• Skip to main content
  • Skip to primary sidebar
  • Skip to secondary sidebar

Sixth Street Sundries

Emily Midgett

  • Home
  • About Me
  • Contact
  • OLO Marker Color Swatch Chart
  • Shop

sparkling snowflake frame and trio

Warmth and Love at Christmastime with New Simon Says Stamp!

November 21, 2025

This post was sponsored by Simon Says Stamp. Thanks, Simon!

Hi friends! I am back today with a sweet holiday card featuring a cheery snowman in an icy winter landscape using some new goodies from the And Everything Nice release from Simon Says Stamp! (click HERE to see the entire release!) I am so in love with the storybook character illustrations that have been peppering the Simon Says Stamp releases; they just make my heart happy with their sweet faces and lovely sentiments! I couldn’t resist pulling out my pencils and doing some no-line coloring with a sweet snowman from the new Cozy in the Cold stamp set, pairing the snowman with the gorgeous new Seafoam colored cardstock. Let’s get started on the details for my project!

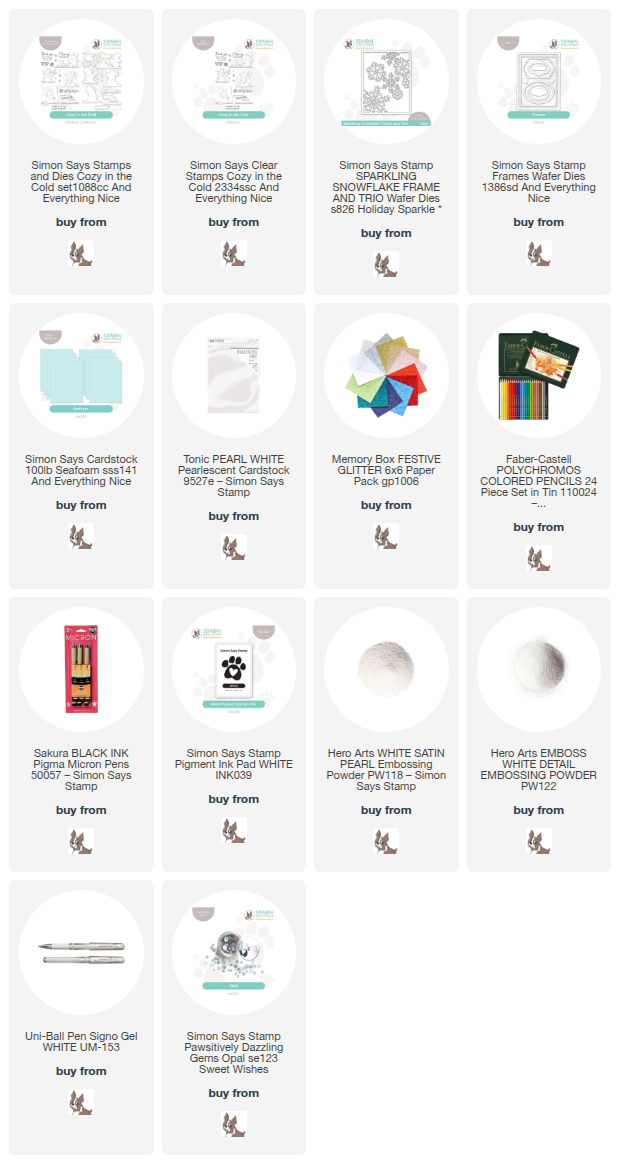
*I have gathered links to all of the products used at the bottom of the post for your convenience, using affiliate links at no extra cost to you. Thank you for shopping with my links! I truly appreciate your support for my work!*

To begin, I stamped the darling snowman wrapped in his cozy scarf from Cozy in the Cold on Seafoam cardstock using Simon Says Stamp White Pigment Ink. I then used colored pencils to add color (or white!) to his vibrant red to his scarf, crisp black top hat, and bright orange carrot nose. I used a fine black pen to add the details to his face and buttons, then die cut him with the coordinating die.

To create a wintry scene in which my snowman could rest, I used some standalone snowflake images from the Cozy in the Cold stamp set, stamping them on the top of a horizontal A2 Seafoam card front. I embellished a bit with some extra white gel pen dots of snow and hand drawn snowflakes (or asterisks, depending on how you look at it!), filling in some of the gaps. I also die cut two pearlescent white frames using the new Frames die set, bringing the eye towards the center of my card front and helping to slightly shrink the canvas upon which my snowman scene would rest.

To add further embellishment to my background, I die cut some individual snowflakes using the older-but-still-fabulous Sparkling Snowflake Frame & Trio die set, as well as some heat embossed pearlescent white stamped snowflakes from the stamp set. I popped up my snowman along the bottom of the smaller frame with foam adhesive squares, then added a white embossed sentiment. I then arranged the die cut snowflakes around the sentiment and snowman, adhering them with both liquid and foam adhesive for extra dimension and texture on my card front. Finally, I added a few Opal Pawsitively Dazzling Gems for added snowy sparkle!

Well, that’s all for my project today! I love a good excuse to put my colored pencils to work, and keeping the icy aqua color palette throughout each of my elements was a great way to evoke those crisp winter days on my card! Thanks so much for stopping by today, and have a marvelous day!
Filed Under: simon says stamp Tagged With: christmas card, cozy in the cold, frames dies, holiday card, snow, sparkling snowflake frame and trio

More Simon Says Stamp Holiday Sparkle!

November 17, 2022

Hi there! Today, I have a couple more projects using the new Holiday Sparkle release from Simon Says Stamp, both featuring tons of texture and layers. I may have started as a stamper, but die cutting is one of my most favorite ways to create these days. Standalone dies just have so many ways to that you can customize them to make them truly unique from project to project! One of my favorite ways to make dies extra exciting is to add lots of texture using different types of fancy papers. The new Pawsitively Velvet cardstock from Simon Says Stamp is the perfect way to add some luxurious texture to your card front without adding a ton of extra bulk! I have two projects to share with you today using these new papers, so let’s get started with the details!

Both of my projects feature an icy color palette using some beautiful Bazzill Icy Mint cardstock as the starting point. I love super pale colored cardstock; it’s just a hair off of white cardstock, but adds that hint of color to a crisp card or tag project!

For my first project, I used the green Pawsitively Velvet cardstock to die cut the Etched Berry Branch die. Because this die cut is very delicate, I also die cut the same branch from some black cardstock and adhered it to the velvet die cut to add some stability while I determined the rest of my card front. I used the white Pawsitively Velvet cardstock to die cut the base layer for the Layered Warbler bird die, adding some details with Icy Mint and Granite cardstock.

For the background, I trimmed a panel of white cardstock down to A2 size, then ran it through my die cut machine using the Exotic Vines embossing folder. I love how classy and elegant this folder is. The vines and berries help to give it a bit of a botanical feel to work well with my bird and berries!

To ground my bird and branch, I die cut the A2 Thin Frames dies from some white glitter cardstock. (Tip: keep your rectangle dies together in order to have double the amount of frames from one pass through your die cut machine!) I selected a very thin frame and smaller, but thicker, frame, then saved the rest for another project. I backed the smaller frame with some vellum to soften the area behind it a bit. This provides a clean canvas for my bird, branch, and sentiment.

I die cut the detail layer of the Snowy Greetings die set from some more Granite cardstock. I also heat embossed a greeting from a set that seems to be retired (whoops!), just to flesh out the greeting a bit. I adhered the thin frame around the edge of the embossed panel, then arranged the remaining die cuts on the vellum rectangle. The final touch was to add a few coordinating blue pearls as “berries” for the foliage die cut.

My second project is a simple tag to adorn a holiday gift! I die cut one of the Large Tag Dies from some more Icy Mint cardstock , then lightly blended some Winter Sky ink around the edge using a blending brush. I splattered the blended tag using some pearlescent watercolors to create some wintry shimmer.

I die cut a few individual snowflakes from the new Sparkling Snowflake Frame and Trio die set using the white velvet from the Pawsitively Velvet cardstock pack. I arranged them on the blended tag, snipping off the overhanging edges. I love the texture that this creates on this simple tag! I added a “for you” greeting, customized by snipping off the “here” from the CZ Design Here For You die. I popped up the glittery greeting using some very thin strips of foam adheisve and added a simple white raffia loop to make for easy attachment to a gift!

Well, that’s all for my projects today! The Pawsitively Velvet cardstock adds such a luxurious textural element to your holiday projects, and so inexpensively. Love that! Thanks so much for stopping by today, and have a marvelous day!

Filed Under: simon says stamp Tagged With: christmas, christmas tag, etched berry branch, holiday, holiday tag, layered warbler, snowy greetings, sparkling snowflake frame and trio, warbler

Simon Says Stamp Holiday Sparkle Release Blog Hop + Giveaway- Day 2!

November 12, 2022

Hi there! Today, I am thrilled to be taking part in the second day of the Simon Says Stamp Holiday Sparkle Blog Hop. We are celebrating the stunning new release and hopping along with tons of inspiration to share with you using the new products. You should have arrived here from Heather Hoffman, and your next stop is Jennifer Kotas. You can also start back at the beginning at the Simon Says Stamp Blog.

I am a huge fan of monochromatic projects, and I am an even bigger fan of non-traditional holiday color palettes. I was searching through my Simon Says Stamp product when I was brainstorming my projects for today, and I came across the stunning Rose Gold Metallic Foil cardstock from Simon Says Stamp and thought how fun and unique it would be to create some shining rose gold snowflakes using the new Sparkling Snowflake Frame and Trio dies. I have a pair of cards to share with you today using these new dies and beautiful foil paper, so let’s get started with the details!

My first card focuses on the frame part of the Sparkling Snowflake Frame and Trio. I began by die cutting it from the Rose Gold Metallic Foil cardstock, as well as cutting a few extra individual snowflakes to create a lovely organic background pattern.

For the card base, I pulled some super pale blush cardstock from my stash and cut it down to an A2 card base size. I then blended some Rosie Cheeks ink around the edges using a Simon Says Stamp Cheeky blending brush. I also splattered some shimmery pearlescent watercolors. I love the effect of the splatters behind the die cut snowflakes; it creates the illusion of different levels of perspective, with large snowflakes close to you and tiny snowflake pinpricks farther away. Before adhering the foil frame over the blended and splattered card base, I placed the frame on the card front and used some of the tiny snowflake stamps in the Holiday Sparkle Greetings stamp set to stamp a mid-size group of snowflakes to my card front using Rosie Cheeks ink.

I adhered my foil snowflakes on my blended, splattered, and stamped card front using liquid adhesive. I heat embossed a greeting from Holiday Sparkle Greetings onto some more of the same blush cardstock using coordinating rose gold embossing powder and die cut it using the coordinating dies. I popped the greeting up on the card front using foam adhesive. Adding that little extra pop of height helps to keep the sentiment die cut from fading into the background!

My second card uses the same color scheme, but features a completely different layout! I began by die cutting several of the standalone snowflakes from the Sparkling Snowflake Frame and Trio from both white cardstock and the Rose Gold Metallic Foil cardstock.

I knew that I wanted to create a focal point in the center of the blush card front, so I used the Simon Says Stamp Cheeky blending brush to lightly blend some Rosie Cheeks ink in the center of the card front. I also added some more pearlescent watercolor splatters using shimmery pearlescent watercolors. (Tip: drop some clean water onto your pearlescent watercolors and allow to sit for a few minutes. This allows the watercolor to activate so that you are able to more easily pick up the shimmery goodness with your paintbrush!) I arranged the snowflakes in a cluster in the center of the blended card front, adhering them with liquid adhesive.

For the greeting, I die cut the detail layer of the Snowy Greetings die several times: once from some sparkling white glitter cardstock, then twice more from plain white cardstock, adhering them together with liquid adhesive. I added the dimensional die cut to a vellum background layer, then added it to the center of the snowflake cluster using some clear dimensional adhesive. The final step was to add some Trinity Stamps Milk Glass gems to add one more element of sparkle and texture to my snowflake cluster. These gems have the added bonus of helping to further create the visual cascade from the top left to the bottom right of the card.

Well, that’s all for my projects today! You can check out another project that I shared using the new Holiday Sparkle release HERE.

Now for some fun giveaways and freebies!

Simon Says Stamp is giving away a $25 gift card to one winner selected from the comments on each stop on the hop! Simply leave a comment on each stop of the hop for maximum chances to win, then check out the Simon Says Stamp blog on November 16, 2022 to see if your name was selected. You can also enter on all of the stops from Day 1 of the hop, as well, for tons of chances to win!

Simon Says Stamp is also offering a super fun free gift with purchase! Simply enter code CUTEBAG at checkout for your purchase of $50 or more to receive the super cute Holiday Zipper Pouch for free with your order!

Your next stop is Jennifer Kotas. Thanks so much for stopping by today, and happy hopping!

Filed Under: simon says stamp Tagged With: christmas card, holiday card, holiday sparkle greetings, ink blending, rose gold metallic cardstock, snowflake, snowy greetings, sparkling snowflake frame and trio

Primary Sidebar

  • Facebook
  • Instagram
  • Pinterest
  • YouTube

Favorite Shops

Secondary Sidebar

Subscribe

Enter your email address to subscribe to this blog and receive notifications of new posts by email.

Instagram
Something is wrong.
Instagram token error.
Follow
Load More

Archives

Tags

3D embossing folder alcohol markers better press birthday birthday card blog hop card kit christmas christmas card christmas tag colored pencil copic copic coloring Daniel Smith die cutting embossing folder embroidery felt giveaway holiday holiday card hot foil ink blending karin brushmarker pro layered stencil masculine my monthly hero new release no line coloring no line watercolor OLO marker olo markers original illustration pawsitively saturated rainbow shaker card slimline stamping stamptember stencil thank you thinking of you valentine's day video watercolor

Popular Posts

Simon Says Stamp Sending Cheer Release: Now Available!
Joyful Snowman with New Simon Says Stamp Sending Cheer Release!
Autumn Legs with Colorado Craft Company and Catherine Pooler!
February 2018 My Monthly Hero Blog Hop!
Altenew Paint A Flower: Carnation Blog Hop+Giveaway!
Altenew March 2020 Release Blog Hop+Giveaway!
Special Release: Simon Says Stamp Limited Edition STAMPtember Christmas Card Kit!
Pinkfresh Studios June Washi and Stamp Release Blog Hop!
Pinkfresh Studio 5th Birthday!
2018 Autism Awareness Hop!

Disclosure

Some affiliate links are used in my posts. This means that, should you click on one of my links and purchase something from that company, I will receive a small portion of the sale at no extra cost to you. I use the money earned from these sales to help maintain my blog. I so appreciate you visiting and, if you do choose to use one of my affiliate links, thank you so much for your support!
Copyright © 2026 ·Brunch Pro Theme · Genesis Framework by StudioPress · WordPress · Log in
Loading Comments...