• Skip to main content
  • Skip to primary sidebar
  • Skip to secondary sidebar

Sixth Street Sundries

Emily Midgett

  • Home
  • About Me
  • Contact
  • OLO Marker Color Swatch Chart
  • Shop

thin frames dies

Coral Sunflowers with New Simon Says Stamp!

October 8, 2023

This post was sponsored by Simon Says Stamp. Thanks, Simon!

If you are an email subscriber, you might have seen this post go up without any text this morning. Whoops! I was out with my family doing all of the fall festival things yesterday and forgot that I hadn’t finished this post. Please forgive my forgetfulness!

Hi friends! As you know, I love all things floral, no matter the season. The flowers change shape with each passing season, it seems. Have you noticed that? Spring flowers have large cupped petals (think tulips, crocus, etc), summer flowers are curled tightly around their stamens and blossom gradually over time (think roses and peonies), and autumnal flowers seem to possess petals with sharper points, radiating out from a large central bulb possessing their pollen (think mums, sunflowers, daisies). I need to research this to find out if there is a biological reason for the difference shapes for each season! (I am obviously not a botanist and possess a very black thumb, so maybe I am just fitting these observations in where I want them haha.)

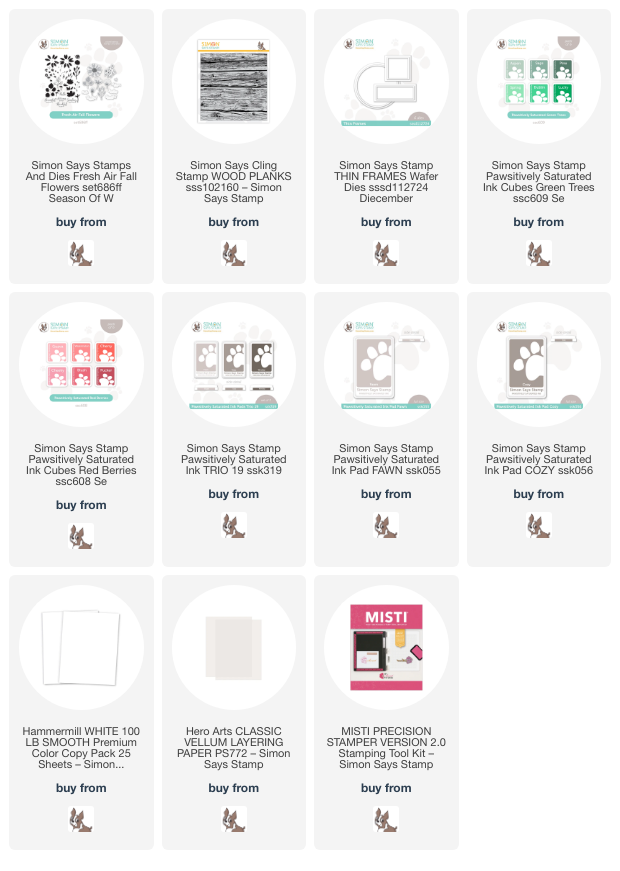
Anyway, I loved the simplicity of the layering stamps for the Fresh Air Fall Flowers Set from the new Simon Says Stamp Season of Wonder release, and just had to pair the beautiful flowers with the new Green Trees and Red Berries Pawsitively Saturated Ink Cubes. Let’s get started with the details on my project!

To start, I die cut nearly all of the images from the Fresh Air Fall Flowers Set from Hammermill white cardstock. I then used the Green Trees, Red Berries, and the Cozy, Fawn, and Woodsy inks (you can check out the bundle HERE) to stamp the painterly floral images. These new stamps were super, super easy to line up and would be great for both beginners and experienced stampers alike! The stamping is made even easier if you have a MISTI, to ensure perfect placement on each layer, but is not necessary.

For the background, I wanted something rustic to complement the simplicity of the floral images, so I stamped the Wood Planks Background stamp using Fawn Pawsitively Saturated ink. I love the subtle texture and pattern that this creates behind the flowers! I trimmed the panel down and adhered it to a coordinating gray cardstock mat, framing the woodgrain and providing a bit of visual respite from the white and gray woodgrain to the white A2 card base on which I mounted the panel.

For the greeting, I stamped a sentiment from Fresh Air Fall Flowers using Woodsy ink onto some more white cardstock, then used the coordinating die to cut it out. I also die cut a thin coordinating gray frame and vellum background piece using the Thin Frames Dies. I arranged my floral die cuts in a cluster, then tucked the frame amongst the flowers, adding the sentiment die cut to the center of the frame and hiding some of the adhesive behind the solid die cuts to avoid marring my transparent vellum piece. I popped up the die cuts with more foam adhesive, then added a few shimmering gems for sparkle!

Well, that’s all for today’s project! I hope you’ll check out the new Season of Wonder release. It absolutely has something for everyone, covering autumn and fall, filled with beautiful images and textures to fulfill all of your stamping dreams! Thanks so much for stopping by today, and have a marvelous day!
Filed Under: simon says stamp Tagged With: autumn, fresh air fall flowers, pawsitively saturated, pawsitively saturated cubes, thank you, thin frames dies

Simon Says Stamp Season of Wonder Release-Now Available!

October 4, 2023

This post is sponsored by Simon Says Stamp. Thanks, Simon!

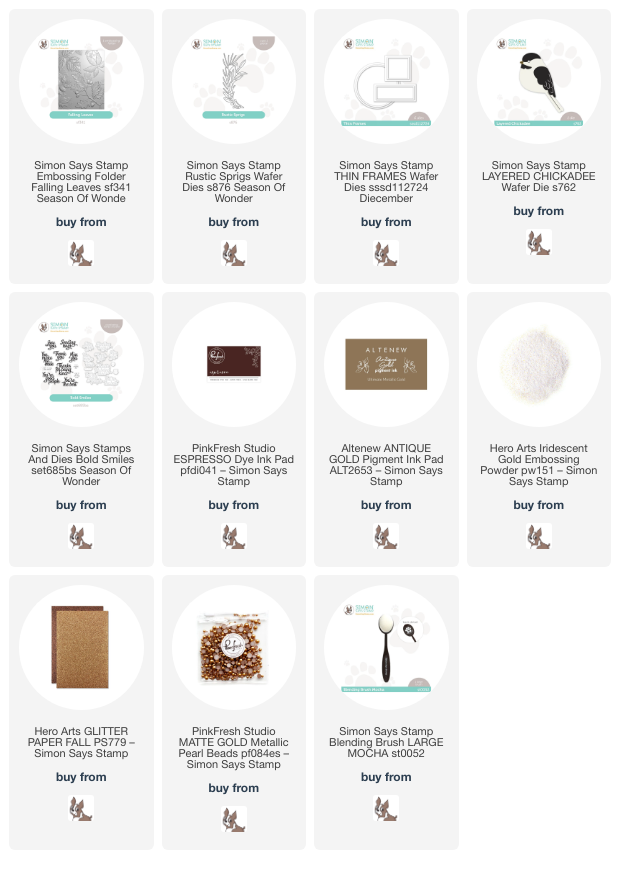
Hi friends! The new Season of Wonder release from Simon Says Stamp is now live, and it is absolutely spectacular! Tons of beautiful and traditional autumnal and holiday imagery, gorgeous sentiments, even a bit of sass thrown in for good measure… you can check out the entire release HERE. I have been super busy creating lots of projects with this beautiful new release, but I’m only going to share one with you tonight! The autumnal sets included in this release are magnificent, featuring beautiful greenery and lots of different textures. I chose to pair the new Falling Leaves Embossing Folder with the Rustic Sprigs die and some other older products to create this intense not-quite-maroon-but-not-quite-chocolate-brown card with lots of gilding. Let’s get started with the details!

To start, I embossed a panel of deep mahogany cardstock using the new Falling Leaves Embossing Folder. After I’d embossed the entire panel using this detailed folder, I blended around the edges using Espresso ink and a blending brush. These blended edges help to enhance the textured background and intensify the colors. To gild the edges of the leaves and add an element of opulence to the card background, I gently swiped the Antique Gold pigment ink pad from Altenew over the raised areas on the embossed panel.

For my focal point, I die cut the new Rustic Sprigs die from some shimmery metallic gold cardstock and some deep chocolate glitter paper from the Hero Arts Fall Glitter Paper pack. I also cut a thin circle frame using the Thin Frames dies and some more metallic gold cardstock. An autumn wreath needs a little birdie nestled in amongst the twigs, so I created this sweet little Layered Chickadee using chocolate brown cardstock and more of the chocolate brown Fall Glitter Paper, adding a black enamel dot for his eye. I adhered the gold circular frame to the embossed card front with liquid adhesive, then arranged the sprigs in a swag on the circle, nestling the bird amongst them.

For the greeting, I used the new Bold Smiles stamps + dies with Hero Arts Iridescent Gold embossing powder. (If you haven’t tried the new iridescent embossing powders from Hero Arts, you’re missing out!! They have Iridescent Gold, Iridescent Copper, Iridescent Purple, and Iridescent Blue.) I embossed the greeting using the shimmering gold embossing powder onto some more of the deep mahogany cardstock, then die cut it with the coordinating die and popped it up on the card front using foam squares. Finally, I added some Pinkfresh Studio Matte Metallic Gold Pearls for one last touch of shine!!

I think that the richness of the mahogany paired with the luxurious gold accents makes this card so opulent, don’t you? The new products in the Season of Wonder release are absolutely marvelous… you won’t want to miss them! Thanks so much for stopping by today, and be sure to check back here on Friday for the first day of the two-day blog hop!

Filed Under: simon says stamp Tagged With: bold smiles, falling leaves embossing folder, layered chickadee, rustic sprigs die, thin frames dies

White Wedding with a Pop of Pink!

August 16, 2023

This post was sponsored by Simon Says Stamp. Thanks, Simon!

Wedding cards are some of my favorite cards to make, though at my stage in life, most of our friends are married and have been for quite awhile! Wedding cards, to me, mean that I can be unapologetically free with flowers, sparkles, and basically all things girly, because as I was repeatedly told during my own wedding planning: the wedding is mostly about the bride. (Ha!) My cards today feature some of my favorite things: white on white, sparkles, texture, flowers, and pops of vivid pink. Let’s get started with the details!

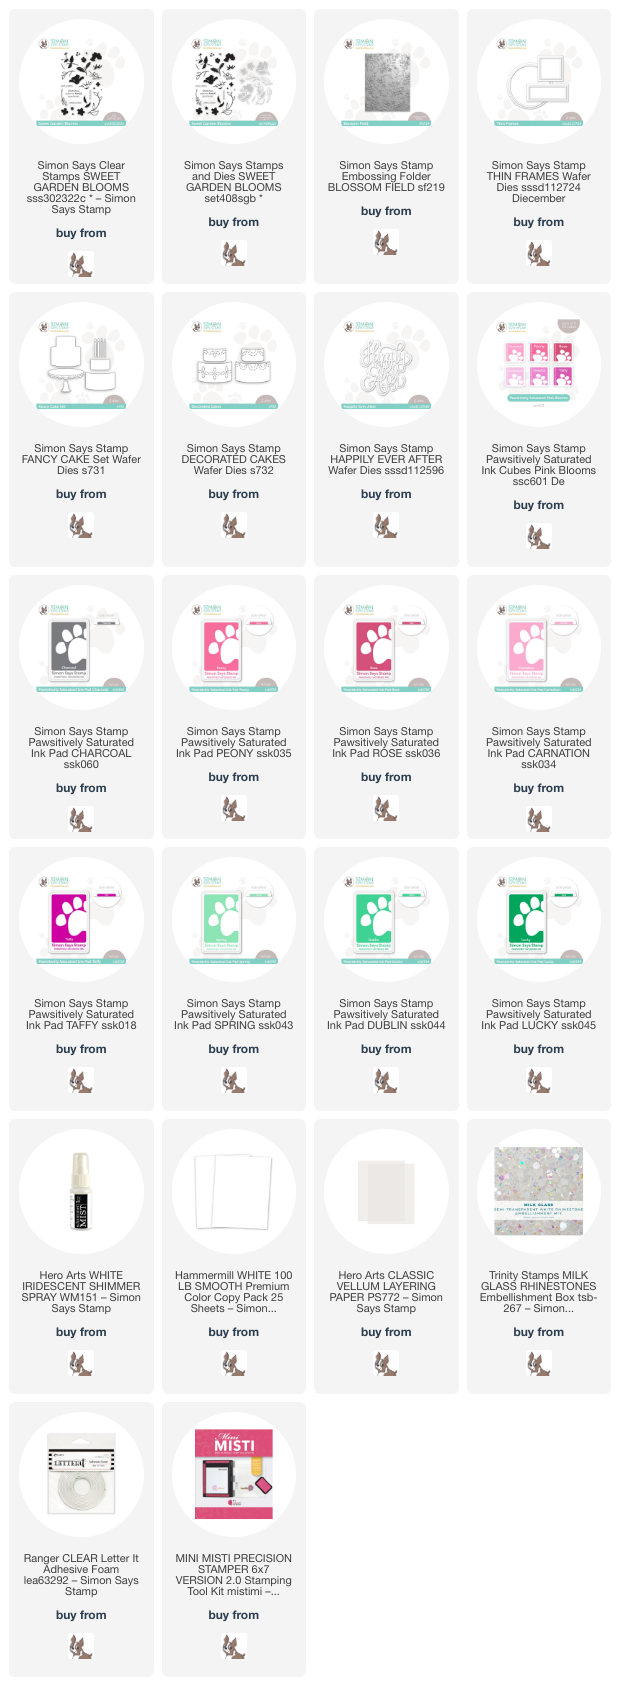
When I am working with small images like the ones from Sweet Garden Blooms, I like to stamp and die cut lots of the images before actually starting work on my card. This ensures that I have plenty of little bits and bobs with which to assemble my finished card, and bonus: it usually means that I have leftovers with which to make another project! I knew that I wanted a floral wedding cake, with lots of white on white and pops of vibrant pink, so I stamped the Sweet Garden Blooms using Carnation, Peony, Rose, Taffy, Charcoal, Spring, Dublin, and Lucky Pawsitively Saturated inks onto Hammermill cardstock.

For my first card, I die cut the elements from the Fancy Cake set and the Decorated Cakes die set, both from more Hammermill cardstock, and layered the pieces together with liquid adhesive. I also die cut a circular frame using the Thin Frames dies as a way to ground my cake to my card front.

For my background, I kept things simple, running a slightly-smaller-than-A2 sized panel of white cardstock through my die cutting machine using the Blossom Field Embossing Folder. I also sprayed the embossed panel with some Hero Arts Iridescent White Shimmer Mist to make the background even more festive and special.

I arranged all of my die cuts on my embossed shimmery panel using both liquid and foam adhesive, then trimmed down a sentiment from the Union of Love sentiment card set. I am really loving these sentiment card sets lately; they are perfect for adding a super quick and simple sentiment, especially on a busy and detailed project like this one. I added a few Milk Glass gems to fill in some of the empty areas on the card front.

My second project features the leftover Sweet Garden Blooms flowers. Stamping and die cutting so many small blooms at the very beginning added a bit of extra time onto my project, but it was worth it to be able to quickly create a second card to add to my stash!

Because I didn’t have a ton of the stamped flower die cuts left over, I decided to use the very generously-sized Happily Ever After die as the focal point for my card. I die cut the detail layer from some white glitter cardstock and the outline background layer from some heavyweight vellum. This vellum layer helps to make that super detailed layer pop without adding lots of extra bulk to this delicate card front.

I trimmed down another panel of white cardstock, trimming some cardstock off of the one side, then ran it through my die cutting machine using the Blossom Field Embossing Folder. I oriented this embossed background on the left side of the A2 card front, leaving a strip of flat cardstock on the right for a bit of added interest to the background. I adhered the large Happily Ever After sentiment die cut using clear foam adhesive, then tucked the leftover florals around the sentiment die cut using liquid and foam adhesive. I added an extra sentiment from the Union of Love sentiment card set, popped up with foam adhesive, and a few Milk Glass gemsfor some more sparkle!

Well, that’s all for my projects today! I love pushing myself to use leftover die cuts to create an entirely new project, and I hope you’ll try it too! Thanks so much for stopping by, and have a marvelous day.

Filed Under: simon says stamp Tagged With: blossom field, decorated cakes, embossing folder, fancy cake, sweet garden blooms, thin frames dies, wedding cake, wedding card

Primary Sidebar

  • Facebook
  • Instagram
  • Pinterest
  • YouTube

Favorite Shops

Secondary Sidebar

Subscribe

Enter your email address to subscribe to this blog and receive notifications of new posts by email.

Instagram
Something is wrong.
Instagram token error.
Follow
Load More

Archives

Tags

3D embossing folder alcohol markers better press birthday birthday card blog hop card kit christmas christmas card christmas tag colored pencil copic copic coloring Daniel Smith die cutting embossing folder embroidery felt giveaway holiday holiday card hot foil ink blending karin brushmarker pro layered stencil masculine my monthly hero new release no line coloring no line watercolor OLO marker olo markers original illustration pawsitively saturated rainbow shaker card slimline stamping stamptember stencil thank you thinking of you valentine's day video watercolor

Popular Posts

Simon Says Stamp Sending Cheer Blog Hop- Day 2 + Freebie + Giveaway!
Altenew October 2026 Release Blog Hop + Giveaway!
Rustic Monochromatic Stars for Christmas with Rainbow Splash!
December 2018 My Monthly Hero Blog Hop + Giveaway!
March 2020 Essentials By Ellen Blog Hop+Giveaway!
The Ton Stamps Summer Release: Day 1
Hero Arts Partners Blog Hop: Lawn Fawn!
Waffleflower July Release Blog Hop!
Simon Says Stamp STAMPtember Tim Holtz Collaboration: Festive Holidays!
The Ton Anniversary Release: Day 1!

Disclosure

Some affiliate links are used in my posts. This means that, should you click on one of my links and purchase something from that company, I will receive a small portion of the sale at no extra cost to you. I use the money earned from these sales to help maintain my blog. I so appreciate you visiting and, if you do choose to use one of my affiliate links, thank you so much for your support!
Copyright © 2026 ·Brunch Pro Theme · Genesis Framework by StudioPress · WordPress · Log in
Loading Comments...