• Skip to main content
  • Skip to primary sidebar
  • Skip to secondary sidebar

Sixth Street Sundries

Emily Midgett

  • Home
  • About Me
  • Contact
  • OLO Marker Color Swatch Chart
  • Shop

today and every day

Simon Says Stamp STAMPtember Special Release: Embossing Folders + Stencils!

September 18, 2026

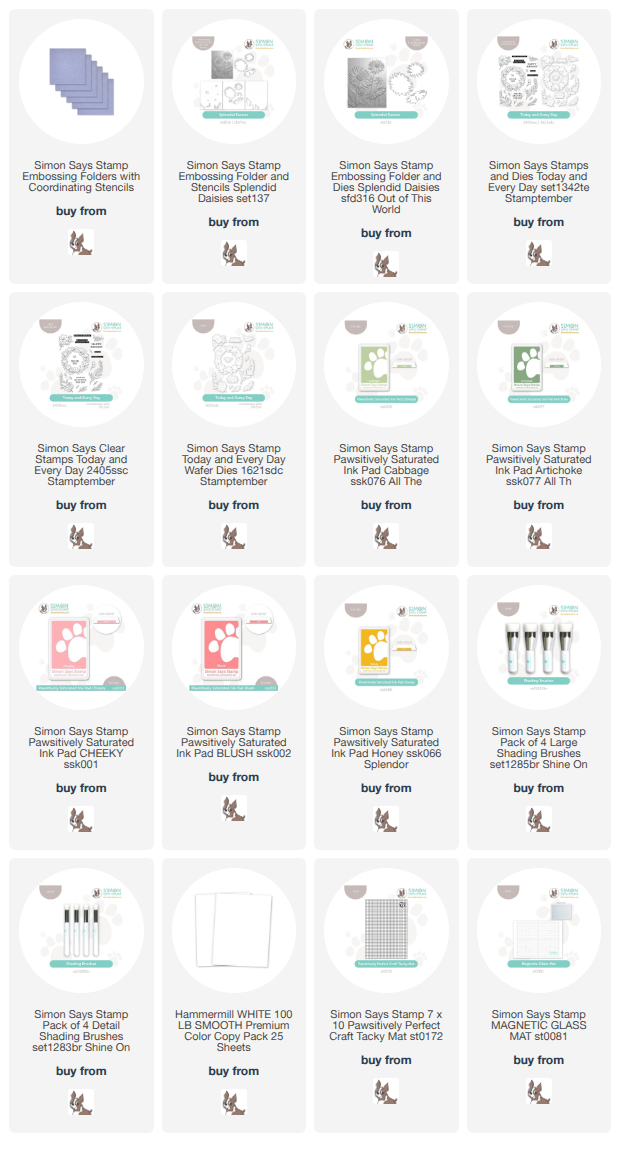
This post was sponsored by Simon Says Stamp. Thanks, Simon! *I have gathered links to all of the products used at the bottom of the post for your convenience, using affiliate links at no extra cost to you. Thank you for shopping with my links! I truly appreciate your support for my work!*

Hi friends! As a special release during Simon Says Stamp’s month-long STAMPtember celebration, Simon has released a collection of fabulous embossing folders with stencils! (Click HERE to see the full collection!) I never tire of the exquisite texture provided to my cards with these 3D Embossing Folders. It’s absolute magic watching plain cardstock transform into something so unique and dimensional! I (of course) chose the new Splendid Daisies embossing folder + die + stencil suite to play with today, and I selected my favorite shades of pink and green for my project. Let’s get started with the details!

To begin, I selected two panels of plain white cardstock, first die cutting the individual daisy images from the Splendid Daisies suite, then running the die cuts and then the full A2 panel of white cardstock through my die cutting machine with the folder.

When working with die cut embossed images, it is important to remember to do your die cutting first. Think of it like like making cut out cookies; if you roll the dough after you’ve cut out the cookie with the cookie cutter, the shape will become distorted. Always die cut your image first, then place it in the embossing folder in the appropriate spot. I like to place my die cut images on the side of the folder that has the images recessed down into the plastic so that it fits snugly into the right place, then close the folder so that it stays securely in the correct space while running the folder through my die cutting machine. This technique almost always gives perfect results!

After I had finished adding that fabulous texture to my die cuts and my panel, I selected my favorite shades of pink and green to add color to my daisies and my background. I used Pawsitively Saturated Inks in shades of Cabbage, Artichoke, Cheeky, Blush, and Honey with the stencils to create the gorgeous range of colors, adding some shadow to the daisies by blending the Blush ink towards the bottom of each daisy and keeping the paler Cheeky ink towards the top. To get great results with stencils, I always reach for my “Stencil Station,” which is a Simon Says Stamp Craft Tacky Mat and a glass mat. I keep this set up at all times so that I can stencil simply and securely! The sticky mat keeps my cardstock secure with the stencil over the top, while the glass mat has plenty of weight to hold everything in place while I’m (sometimes aggressively, depending on the project haha!) blending color!

After I had finished adding color to the images, I used a blending brush to lightly blend Cabbage ink towards the bottom of the panel, creating an ethereal verdant glow around my foliage, then ligtly blended Cheeky at the top of the panel. To add a bit of sparkle and magic, I splattered some iridescent watercolor on the panel, adding some “dewdrops” to my project! I popped up the two largest individual daisies with thin foam squares, then added a rose gold embossed sentiment from Today + Every Day. I finally added some Bubblegum Pawsitively Dazzling Gems and a coordinating blush twine bow.

Now, as a special surprise, Simon is offering a special flash sale!

You can take 25% off of all Simon Says Stamp-branded Embossing Folders with Coordinating Stencils using code HURRY!! Click HERE to see the full collection of folders and coordinating stencils. (Many of these product suites include coordinating dies, as well! Score, right?) Don’t wait, because while the embossing folders that sell out WILL BE restocked, the manufacturing time is a bit lengthy. If you love any of these products, don’t hesitate to take advantage of the sale!

Thanks so much for stopping by, and Happy STAMPtember!
Filed Under: simon says stamp Tagged With: 3D embossing folder, embossing folder, ink blending, splendid daisies, today and every day

So Grateful For You in Acrylic Paint with Simon Says Stamp!

September 11, 2026

This post was sponsored by Simon Says Stamp. Thanks, Simon! *I have gathered links to all of the products used at the bottom of the post for your convenience, using affiliate links at no extra cost to you. Thank you for shopping with my links! I truly appreciate your support for my work!*

Hi friends! I know that we are in the midst of the STAMPtember collaboration fun and all of the surprises, but I have another piece of inspiration to share with you using some new goodies from the Simon Says Stamp STAMPtember collection! **Reminder: the limited edition exclusive collaboration sets (check them out HERE) will not be restocked once they sell out, but the STAMPtember collection (check it out HERE) will be restocked if/when they sell out!** I have been so enjoying playing with different mediums on different materials than simply plain white cardstock lately, pairing colored pencils with colored cardstock, acrylic markers with ceramic and canvas, and for today’s project, I decided to pair my acrylic paint markers with a panel of kraft cardstock for a striking and bold project, softened with a lovely and feminine color palette. Let’s get started with the details on my project!

I began my project by stamping several images from Today & Every Day onto two different panels of kraft cardstock using Simon Says Stamp White Pigment Ink. Similar to when I work with pencils on colored cardstock, I like to use the white pigment ink with the acrylic markers simply because it blends into the opaque paint smoothly and seamlessly. I then used acrylic paint markers to add simple coloring to the stamped images, keeping the coloring very basic to create almost a block print effect.

After I had finished coloring both images with the colorful paint markers, I added some simple white lines to the foliage to add a bit more shape and detail to the simple flowers. Images like those in the Today & Every Day stamp set are great for use with this very simple coloring technique, because their illustration is very open and simplistic, which fits the aesthetic of this basic coloring technique nicely. I die cut one of the images using the coordinating dies, as well as a greeting that I had created with white pigment ink and white embossing powder on the second panel of kraft cardstock.

Before adhering the die cuts to the panel, I used my T-square and a white paint pen to create a very simple frame around the flat painted panel. I love the effect that this easy and quick step has on the finished project; it draws your eye to the focal point without adding any additional bulk or color. I popped up the sentiment with a double layer of thin foam adhesive, then tucked the floral stem behind the greeting with a single layer of foam adhesive. Finally, I added a blush colored bow created with thin ribbon as well as some Peachy Pawsitively Dazzling Gems for added sparkle. Super simple card, but the effect is so unusual and, I think, so pretty!

Well, that’s all for my project today! I think that opaque paint on the neutral cardstock is such a fun technique and so striking. I can’t wait to try it again on a new project! Thanks so much for stopping by today, and have a marvelous day!

Filed Under: simon says stamp Tagged With: acrylic markers, acrylic paint, clean and simple, die cutting, kraft cardstock, no line coloring, thank you card, today and every day

Primary Sidebar

  • Facebook
  • Instagram
  • Pinterest
  • YouTube

Favorite Shops

Secondary Sidebar

Subscribe

Enter your email address to subscribe to this blog and receive notifications of new posts by email.

Instagram
Something is wrong.
Instagram token error.
Follow
Load More

Archives

Tags

3D embossing folder alcohol markers better press birthday birthday card blog hop card kit christmas christmas card christmas tag colored pencil copic copic coloring Daniel Smith die cutting embossing folder embroidery felt giveaway holiday holiday card hot foil ink blending karin brushmarker pro layered stencil masculine my monthly hero new release no line coloring no line watercolor OLO marker olo markers original illustration pawsitively saturated rainbow shaker card slimline stamping stamptember stencil thank you thinking of you valentine's day video watercolor

Popular Posts

Simon Says Stamp Sending Cheer Release: Now Available!
Joyful Snowman with New Simon Says Stamp Sending Cheer Release!
Autumn Legs with Colorado Craft Company and Catherine Pooler!
February 2018 My Monthly Hero Blog Hop!
Altenew Paint A Flower: Carnation Blog Hop+Giveaway!
Altenew March 2020 Release Blog Hop+Giveaway!
Special Release: Simon Says Stamp Limited Edition STAMPtember Christmas Card Kit!
Pinkfresh Studio 5th Birthday!
Pinkfresh Studios June Washi and Stamp Release Blog Hop!
Honey Bee Stamps Bee Bold Release Blog Hop!

Disclosure

Some affiliate links are used in my posts. This means that, should you click on one of my links and purchase something from that company, I will receive a small portion of the sale at no extra cost to you. I use the money earned from these sales to help maintain my blog. I so appreciate you visiting and, if you do choose to use one of my affiliate links, thank you so much for your support!
Copyright © 2026 ·Brunch Pro Theme · Genesis Framework by StudioPress · WordPress · Log in
Loading Comments...