• Skip to main content
  • Skip to primary sidebar
  • Skip to secondary sidebar

Sixth Street Sundries

Emily Midgett

  • Home
  • About Me
  • Contact
  • OLO Marker Color Swatch Chart
  • Shop

winter wishes

Let the Holidays Begin (Officially!) + SALE!

November 23, 2023

This post was sponsored by Simon Says Stamp. Thanks, Simon!

Hi friends! Has everybody recovered from their turkey coma? We had the most delicious weather for our Thanksgiving day, and the kids spent almost the entire day playing outside! Such a glorious day for which to count our blessings! But tomorrow promises to bring with it the cold and damp more typical for the end of November, and so it’s totally appropriate to officially ring in the holiday season. (Not that I haven’t been doing that for months, ha!) My husband is a bit of a grump when it comes to Christmas, having his birthday right around Thanksgiving, so he gives me grief if I start celebrating too early. Luckily for me, he doesn’t get a say in when I start decking the halls of my studio! Today, I wanted to share a super festive shaker project that I created using some new goodies from Simon Says Stamp. Let’s get started with the details!

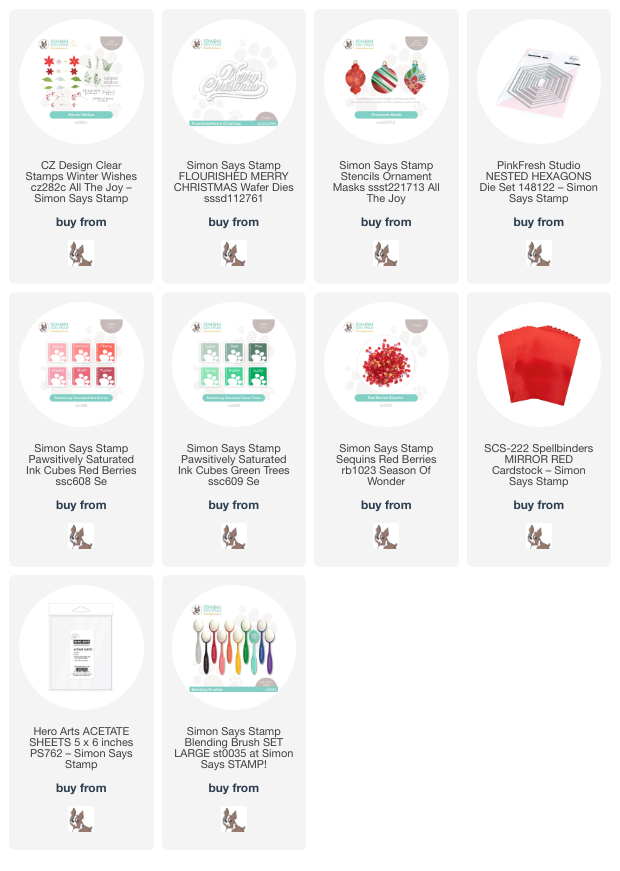
The focal point of this card is the shaker window with the pretty floral ornaments in the background. To create this custom patterned background, I used the same technique that I used to create the ornament card for THIS POST a couple of weeks ago. To start, I arranged my Ornament Masks on my white card front and lightly blended around the edges using blending brushes and the pink and red inks from the Red Berries ink cubes. While the masks were still in place, I used the Red Berries and Green Trees ink cubes to stamp floral images from the Winter Wishes stamp set, creating a pretty floral pattern on each ornament. Removing those masks was absolutely magical; the combination of the blended shapes with the floral pattern creates such a festive and feminine patterned paper!

After I had removed the stencils, I used small pieces of washi tape to add the masks for each ornament from the Ornament Masks set. While these were in place on the card front, I used a blending brush to lightly blend more red ink around the edges. I also splattered some shimmering handmade watercolors over the background while the masks were in place to add some magical sparkle to the background.

Once I had finished creating my background, it was time to create the shaker portion of my card. I die cut a Pinkfresh Studio Nested Hexagons die from the center of a panel of coordinating red cardstock, then backed it with some clear acetate. I used some residual red ink to blend at the top and bottom to add a little extra interest to the shaker card topper. Next, I filled my shaker with Red Berries sequins and adhered the top using foam adhesive. For the greeting, I die cut the detail layer of the Flourished Merry Christmas die set from gorgeous and shiny red mirror foil cardstock, backing it with the vellum outline layer to help it pop from the colorful background. Finally, I added one last bit of sparkle with a glittery gold twine bow!

Now, to celebrate the official start of the Christmas season, Simon Says Stamp is having a fabulous Black Friday Sale!

Until 11:59 eastern time on 11/24/23, you can take 20% off your entire purchase with code BFS23. Such an incredible sale, and a great time to buy crafty gifts for friends or for yourself!

Well, that’s all for my post today. I will have more sales information tomorrow for some other stores, so be sure to stop back by or subscribe to receive blog posts via email! Thanks so much for stopping by, and happy shopping!
Filed Under: simon says stamp Tagged With: flourished merry christmas, ink blending, nested hexagons, ornament masks stencils, pawsitively saturated, shaker card, winter wishes

Floral Winter Wishes with Simon Says Stamp!

November 7, 2023

This post was sponsored by Simon Says Stamp. Thanks, Simon!

Hi friends! I am having such fun playing with all of the new goodies from the new All the Joy release from Simon Says Stamp. Christmas cards are my favorite kind of cards to create, and the new All the Joy release is filled with some exceptionally beautiful new products. I particularly loved the Winter Wishes set; it reminded me very much of Rifle Paper Company designs with the simplistic, but elegant, nature of the flowers and lots of options for foliage. I have created two cards to share with you today, so let’s get started with the details!

For both of my projects, I kept the color scheme simple and Christmas-y, with pinky reds and soft greens. When I’m working with layered stamps like this or when I know I will be using a lot of ink colors on one project, I like to pull out my ink cubes to keep things simple and to help me keep track of what colors I used on my projects! For both of today’s projects, I used the Red Berries and Green Trees ink cubes.

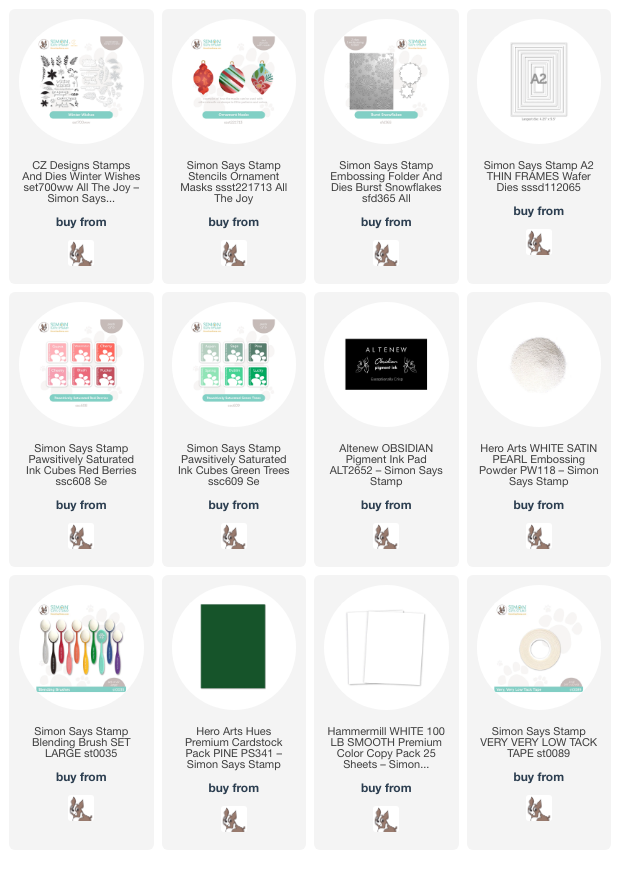
To start, I created a background using the stencils from the Ornament Masks set, blending each ornament a different shade of red using blending brushes onto some white Hammermill cardstock. While the stencils were still in place, I stamped the floral patterns using individual stamps from the Winter Wishes set with the Red Berries and Green Trees ink cubes. This was truly magical to see the patterns come alive on the ornaments; removing the stencils was such fun!!

Once I had finished stamping the patterns, I removed the stencils and placed the masks over the top of the blended and stamped ornaments, adhering them with some low-tack tape.I then placed the stencils around the edges of the red ornaments and blended some Sage ink from the Green Trees ink cube set. Keeping the masks in place, I also blended around the edges of the card front using Aspen ink. The tone-on-tone blending for the background reminds me of bokeh; it allows those red ornaments to be the star of the show! I also splattered the background with some shimmering handmade watercolors while the masks were still adhered, then dotted the flower centers with some dark gray shimmer paints, just to add a little extra sparkle to the card front.

Once I had created my background panel, I die cut the A2 Thin Frames from some deep green cardstock and adhered one to my patterned A2 panel using liquid adhesive. I heat embossed a greeting from Winter Wishes using Obsidian pigment ink and adding some White Satin Pearl embossing powder over the top to keep the greeting a little more muted than a stark black sentiment and add a touch of pearlescent shimmer. After die cutting the greeting using the coordinating die, I used the residual ink left on my blending brush to blend around the edges, making the sentiment die cut a coordinating soft green. I popped the greeting up with some foam adhesive, then added a few shimmering gems for one last touch of sparkle!

For my second card, I used the flowers from the Winter Wishes set to accent one of the large greetings included in the set. I stamped lots of flowers, foliage, and berries using the Red Berries and Green Trees ink cubes onto more Hammermill, then die cut them with the coordinating dies. I also stamped a couple of the large greetings from the Winter Wishes set using Obsidian pigment ink and adding some White Satin Pearl embossing powder over the top. I think this pearlescent charcoal is such a lovely and elegant alternative to the usual black sentiment!

After I had stamped and die cut all of the elements from the Winter Wishes set, I trimmed down a panel of white cardstock to 3.75 x 5″ and ran it through my die cut machine using the Burst Snowflakes EF. I thought this snowflake pattern looked beautifully lacy and feminine, the perfect backdrop for the bright flowers and foliage! I popped the embossed panel up with some foam adhesive, then arranged the greeting and floral die cuts, adhering them with both liquid and foam adhesive, finally finishing the project off with some shimmering gems. So simple, but so elegant, I think!

Well, that’s all for my projects today! I can’t wait to share more of my projects from the new All the Joy release with you. Thanks so much for stopping by today, and have a marvelous day!

Filed Under: simon says stamp Tagged With: A2 thin frames, burst snowflakes, christmas card, holiday card, onament masks, pawsitively saturated ink cubes, winter wishes

Altenew October 2019 Stamp+Die Release Blog Hop+Giveaway!

October 11, 2019

Hi there! I’m super excited to be taking part in Altenew’s October 2019 Stamp and Die Release Blog Hop! Altenew always has incredible stamp and die releases, and this month features some absolutely stunning new florals, as well as some beautiful holiday stamps. You should have arrived here from Jen Schow‘s blog, and your next stop is Svitlana Shayevich‘s blog. You can also start back at the beginning in case you get lost! I have three projects for you today featuring the new goodies, so let’s get started with the details!

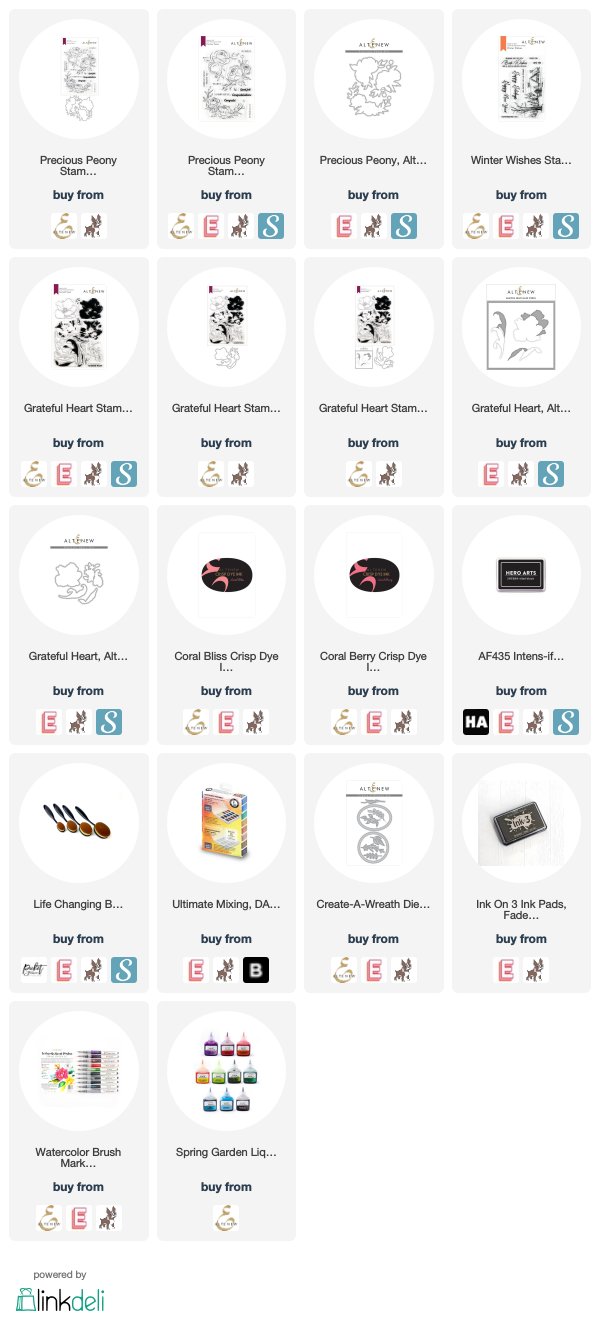
For my first project, I used the gorgeous new Precious Peony stamps and dies. I began by stamping the main floral image onto some Copic-friendly white cardstock using black ink, then used my Copic markers in pretty shades of peach to color the image. I die cut the image with the coordinating dies.

On the white A2 card base, I stamped the main floral image a few times in the upper left hand corner using Coral Bliss ink, then using a blending brush, blended some Coral Bliss and Coral Berry inks over the top of the stamped images, creating a subtle tone-on-tone pattern. I adhered the Copic-colored die cut to the card front using foam adhesive, adding a sentiment (also from Precious Peony) and some jewels for sparkle!

For my second card, I used the beautiful new Winter Wishes stamp set to create this serene holiday card. I began by stamping the main image from Winter Wishes onto some watercolor cardstock using Obsidian Black ink, then adding clear embossing powder over the top and heating it. I used my Daniel Smith watercolors to add some loose watercoloring to the image in serene tones of blue and green.

After I’d finished watercoloring the panel, I used the oval die in the Create A Wreath die set to cut a window from a panel of creamy white A2 cardstock. I stamped a greeting from Winter Wishes on the bottom, again with Obsidian ink and clear embossing powder, then adhered the window panel over the top of the watercolored scene using foam adhesive.

For my final project, I wanted to do some no-line watercolor using the absolutely gorgeous new Grateful Heart set! This set features both the outline and layering stamps, so that you have endless crafty possibilities! The lines on these new florals are utterly graceful; they were an absolute pleasure to color. I began by stamping a little bouquet on a long rectangular panel of watercolor cardstock with Ink On 3 Fadeout Ink, using the mask stencils from the Grateful Heart bundle to create a seamless bouquet of flowers and foliage.

Next, I used the stunningly vibrant and beautiful colors in the Spring Garden Watercolor Brush pens to do some no-line watercoloring, adding lots of layers for extra dimension. After I’d completed the watercoloring, I trimmed the watercolor panel down slightly and mounted it on a mat of deep fuchsia cardstock. I also heat embossed a greeting from Grateful Heart using white embossing powder on some strips of the same deep fuchsia cardstock, which I mounted on the card front using foam adhesive. The final touch was to add some bright turquoise jewels to add a touch of sparkle and texture!

Well, that’s all for my projects today. Now, there are several ways to win today, so pay close attention:

To celebrate this release, Altenew is giving away a $50 gift certificate to 6 lucky winners! Please leave a comment on the Altenew Card Blog and/or Altenew Scrapbook Blog by 10/16/2019 for a chance to win.

We’ll also draw a winner to receive a $20 gift certificate from the comments left on each designer’s blog on the blog hop list below. All winners will be announced on the Altenew blogs on 10/20/2019. The more comments you leave, the more chances you have to win!

Here’s the full hop list in case you get lost:

Altenew Card Blog
Jennifer McGuire
Nathalie DeSousa
Kelly Griglione
Nicole Picadura
Mindy Eggen
Jaycee Gaspar
Lilith Eeckels
Ashlea Cornell
Jen Schow
Emily Midgett
Svitlana Shayevich
Kathleen Graumüller
Therese Calvird
Altenew Scrapbook Blog
Vicky Papaioannou
Norine Borys
Terri Koszler
Maryam Perez
LauraJane
Virginia Lu
Kymona Tracey
Jessica Frost-Ballas
Sveta Fotinia
Amber Rain Davis
Laurie Willison
Caly Person
Reiko Tsuchida
Keeway Tsao
Zinia Redo
Kelly Janes
Erum Tasneem

Filed Under: altenew, christmas card, watercolor Tagged With: altenew watercolor markers, blog hop, create a wreath, grateful heart, no line watercolor, precious peony, watercolor, winter wishes

Primary Sidebar

  • Facebook
  • Instagram
  • Pinterest
  • YouTube

Favorite Shops

Secondary Sidebar

Subscribe

Enter your email address to subscribe to this blog and receive notifications of new posts by email.

Instagram
Something is wrong.
Instagram token error.
Follow
Load More

Archives

Tags

3D embossing folder alcohol markers better press birthday birthday card blog hop card kit christmas christmas card christmas tag colored pencil copic copic coloring Daniel Smith die cutting embossing folder embroidery felt giveaway holiday holiday card hot foil ink blending karin brushmarker pro layered stencil masculine my monthly hero new release no line coloring no line watercolor OLO marker olo markers original illustration pawsitively saturated rainbow shaker card slimline stamping stamptember stencil thank you thinking of you valentine's day video watercolor

Popular Posts

Simon Says Stamp Sending Cheer Release: Now Available!
Joyful Snowman with New Simon Says Stamp Sending Cheer Release!
Autumn Legs with Colorado Craft Company and Catherine Pooler!
February 2018 My Monthly Hero Blog Hop!
Altenew Paint A Flower: Carnation Blog Hop+Giveaway!
Special Release: Simon Says Stamp Limited Edition STAMPtember Christmas Card Kit!
Altenew March 2020 Release Blog Hop+Giveaway!
Pinkfresh Studio 5th Birthday!
Pinkfresh Studios June Washi and Stamp Release Blog Hop!
Studio Katia September Release Blog Hop!

Disclosure

Some affiliate links are used in my posts. This means that, should you click on one of my links and purchase something from that company, I will receive a small portion of the sale at no extra cost to you. I use the money earned from these sales to help maintain my blog. I so appreciate you visiting and, if you do choose to use one of my affiliate links, thank you so much for your support!
Copyright © 2026 ·Brunch Pro Theme · Genesis Framework by StudioPress · WordPress · Log in
Loading Comments...