• Skip to main content
  • Skip to primary sidebar
  • Skip to secondary sidebar

Sixth Street Sundries

Emily Midgett

  • Home
  • About Me
  • Contact
  • OLO Marker Color Swatch Chart
  • Shop

Archives for July 2022

Colorado Craft Company Christmas In July Release + Free Shipping Days!

July 19, 2022

Hi there! My friends over at Colorado Craft Company have a beautiful new Christmas In July release filled with gorgeous holiday stamp sets, and I have a project to share with you using a couple of the new goodies, just in time for the Free Shipping Days promotion! This holiday card features a “holiday ombré” with lots of ink blending and gold embossed images, so let’s get started on all of the details!

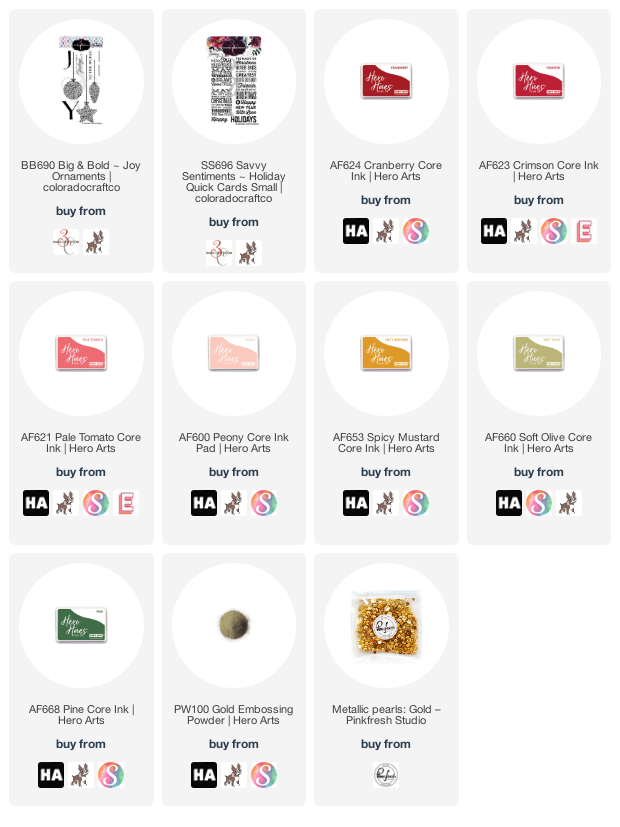
The elegant filigree details on the Big and Bold~ Joy Ornaments set totally sold me on this set. It’s super simple to create an impactful card using just these gorgeous images! I heat embossed them on a white slimline card base using gold detail embossing powder, making sure to stagger the heights to make them look a little more “natural” and not as staged.

Next, I paid homage to the new Hero Arts Core Inks, blending not my usual three, but seven inks down the front of my embossed card base to create a “holiday ombré” background. I started with Crimson, Pale Tomato, Peony, Spicy Mustard, and Soft Olive, then lightly blending a touch of Cranberry at the top and a touch of Pine at the bottom. If I had my druthers, I would have left out the Spicy Mustard, but I could not bring myself to go from Peony to Soft Olive without some sort of yellow bridge between them. C’est la vie, right? I splattered some sparkly gold watercolor on the card base, then set it aside to dry while I worked on the sentiment.

I didn’t want to add a clunky sentiment that covered up the pretty filigree ornaments, so I heat embossed one of the lovely, poignant sentiments from Savvy Sentiments~ Holiday Quick Cards Small on some heavyweight vellum. Using vellum helps to give the sentiment a kind of ethereal effect, much lighter than using regular cardstock. I used some clear dimensional adhesive to pop the sentiment up on the blended card front. The final touch was one last golden element: some gold pearls. I adore metallics all year round, but it seems almost necessary to add lots of shiny metallic accents to holiday cards, don’t you think?

To celebrate the Free Shipping days, Colorado Craft Company is hosting a giveaway on each participating blog! Simply leave a comment on this post, then the folks at Colorado Craft Company will announce the winners on their blog. Be sure to check the blog after July 20 to see if you’re one of the winners!

If you’d like to do some shopping from the new release, you’ll receive free shipping 7/19-7/20! You can check out the new release at the top of the page HERE.

There are lots of other designers sharing inspiration, so be sure to check out their posts! The more comments you leave on the different posts, the more chances you have to win! Thanks so much for stopping by, and have a marvelous day!
Adam Karle 

Amy Tsuruta 

Bibi Cameron 

Kelly Griglione

Daniel West 

Donna Hitz 

Emily Midgett 

Erin Thompson 

Jennifer Gross 

Jennifer Kotas

Jessica Frost-Ballas 

Joe Sysavath 

Kassi Hulet 

Mansi Bhatia

Nancy Sheads 

Amy Young

Sandy Allnock

Traci Jenkins 

Nicol Spohr

Filed Under: colorado craft company Tagged With: christmas in july

Altenew July 2022 Marvelous Monthly Series Release Blog Hop + Giveaway ($300 in total prizes)

July 12, 2022

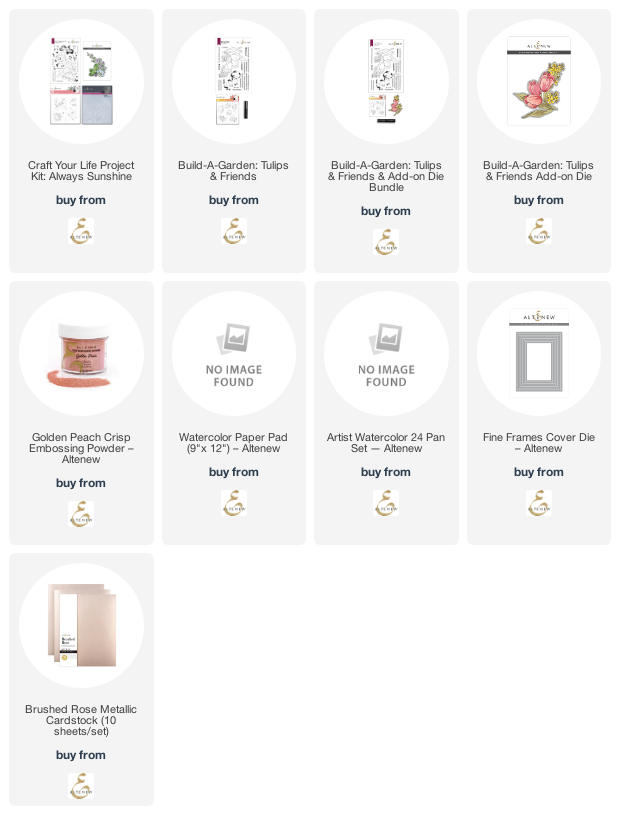
Hi there! Altenew is releasing a slew of stunning new products today for the July Marvelous Monthly release! You should have arrived here from Soraya Maes, and your next stop is Karen Brown. You can always start back at the beginning at the Altenew Blog in case you get lost. I created a pair of cool lilac and lavender cards with beautiful rose gold metallic accents using the new Build A Garden: Tulip and Friends and the new Craft Your Life Project Kit Always Sunshine. Let’s get started with the details!

For both projects, I heat embossed the images onto Altenew Watercolor Paper using Golden Peach embossing powder. The lovely, subtle metallic embossing powder is a beautiful complement to the shades of cool lilac, lavender, and hydrangea blue watercoloring, which I painted using the Artists’ 24 Pan Watercolor Set.

My first project features the jaw-dropping new Craft Your Life Project Kit: Always Sunshine. I have been having a lot of fun trying to mix and match the incredibly vivid, vibrant colors in the Artists’ 24 Pan Watercolor Set to create more muted, but equally intense, color palettes. For this project, I created a cool lilac, raspberry, and hydrangea blue color palette by adding touches of diluted black to my color palettes. This slightly tones down the vibrancy of the colors while still allowing them to be beautifully intense. I taped an A2 panel down to my watercoloring board, then spritzed it with a light mist of clean water and dropped the colors that I’d mixed up on my palette onto the wet watercolor paper to create this beautiful background. I kept dropping and swirling the colors until I was satisfied with the background. I allowed the piece to air dry while still taped to the board to minimize warping. After it was dry, I splattered some rose gold metallic watercolors in the background to further continue the artistic feel of the background and tie into the rose gold heat embossing.

I had already heat embossed the image from Craft Your Life Project Kit: Always Sunshine onto the corner of an A2 watercolor paper card front so that I knew exactly where to place it. The large size of the main image allows you to maneuver it at different angles to create tons of different looks. I also heat embossed another little sprig of greenery in the leftover space of the watercolor panel so that I could have some ivy dripping down behind the main bouquet. I watercolored the heat embossed and die cut images using the same color palette that was used for the background.

I adhered the finished watercolored images to the watercolored card front using foam adhesive, tucking the extra sprig of greenery behind the main floral arrangement using liquid adhesive. I also die cut a frame from some Brushed Rose Metallic Cardstock using the Fine Frames die set. I added a rose gold embossed greeting from the kit, matting the sentiment strip with some more metallic rose gold cardstock. The colors and layout of this card with the vibrant florals just dripping down the front make this card seem so dramatic to me!

My second project features the new Build A Garden: Tulip and Friends stamps. This set comes with coordinating layered stencils, but I was having one of those days where the watercolors were working exactly how I wanted them to work, so I just went with it. I heat embossed the image twice on my A2 panel of watercolor cardstock, again using rose gold embossing powder. I love how subtle this embossing powder is with the bright blues and greens and purples of the finished card. Just enough pink to warm the cool color palette up a little!

Once I had heat embossed the images, I used some 1″ wide washi tape to mask off around the edges of the entire card front, covering some of the embossed images. I used that washi tape to create a frame around the edge of my card and created a Monet-inspired background of blue, purple, and a couple of touches of lime green.

I removed the washi tape around the edges after the center section had dried completely, then watercolored the hydrangeas and greenery, leaving the tulips for last. I wanted the tulips to be very light in color, and it helps me to keep perspective on how many shadows and how much pigment I’m adding to the image if the areas surrounding it are darker and more vibrant. I added very diluted mixture of pink, purple, and black to just the areas of the tulip that were near the base and curled over in the shadows, smoothing the edges and pulling them out with lots of water to keep some of the white card base shining through. I finished the project off with a few sentiment strips, heat embossed in rose gold on some strips of white cardstock, and popped up using foam adhesive.

Well, that’s all for my projects today! I’m marginally obsessed with this color palette and want to watercolor everything in these shades. Now for some fun giveaway information!

$300 in total prizes! To celebrate this release, Altenew is giving away a $50 gift certificate to 2 lucky winners and a $25 gift certificate to 8 winners! Please leave a comment on the Altenew Card Blog and/or each designer’s blog post on the blog hop list below by 07/18/2022 for a chance to win.

Your next stop on the hop is Karen Brown. Thanks so much for stopping by today, and happy hopping!

Filed Under: altenew Tagged With: Altenew Artist Watercolors, build a garden, build a garden tulips and friends, craft your life, craft your life project kit always sunshine, marvelous monthly, watercolor

Purple Birthday Foil with Spellbinders!

July 9, 2022

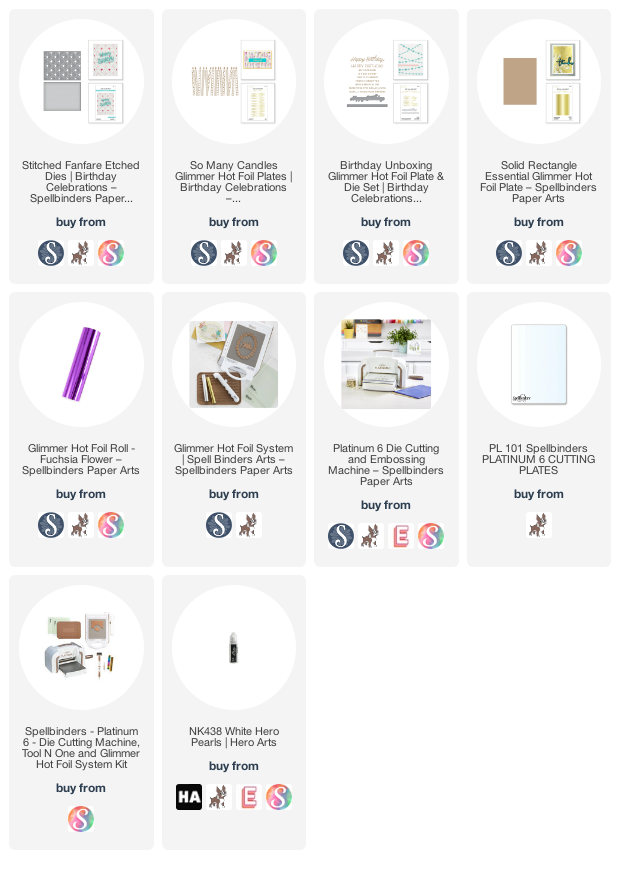
Hi there! I was given the opportunity to play with some of the new birthday goodies from Spellbinders, which was super fun, as I absolutely adore making birthday cards! I recently purchased the beautiful Fuchsia Flower hot foil, and so used that pretty shade of purple as the starting point for both of my projects today. Let’s get started with the details!

To start both of my project, I began by hot foiling the Birthday Unboxing Glimmer Plates onto some smooth white cardstock using the Fuchsia Flower hot foil. I used the plates both as-intended, as well as with the negative space left over on the foil! I simply foiled the sentiments like normal, then used the leftover foil with the Solid Rectangle Glimmer Plate to create the same sentiment by using the negative space! Fun, right? I love that you can use both the positive and negative images from the foil. Makes me feel slightly less guilty about how much trash gets thrown in my trash can!

My first project features the Stitched Fanfare die. I, unfortunately, am not very good at the beautiful stitched looks that some people are able to achieve on their card. The Stitched Fanfare die, however, is so beautifully detailed and intricate that it looks gorgeous just on it’s own! I die cut it from some white cardstock, and I think it looks like a lacy patterned background. So pretty and ornate!

To go along with my shiny purple greeting, I used a blending brush to blend a coordinating shade of purple ink around the edge of my A2 card base. I layered the Stitched Fanfare die cut on the blended background using liquid adhesive, then added my Birthday Unboxing Glimmer Plates greeting with some foam tape for a bit of extra dimension. The final touch was to add a few liquid pearls to the holes on the die cut for even more fun texture and shimmer!

My second project features the So Many Candles Glimmer Hot Foil Plate. When I first saw this beautiful (and massive!) hot foil plate, I thought how much fun it would be to color the candles in a variety of colors or even keep things simple and monochromatic. I think this project could easily be customized for a feminine or masculine recipient, or you could keep things neutral with primary colors! So many possibilities. I love that you can color with alcohol markers over foil so easily! Once I had hot foiled the So Many Candles Glimmer Hot Foil Plate using Fuchsia Flower foil, I used 4 OLO alcohol markers to add some gradations of purple to these pretty candles. I made sure to keep the highlights down the center of the candles and keep it a bit darker on the edges!

After I had finished coloring, I trimmed around the edges of my colored foiled image, then added a greeting created using the Solid Rectangle Glimmer Plate with the Birthday Unboxing Glimmer Plates to create a purple foiled outline on the white cardstock sentiment. I added a thin foiled sentiment strip beneath with another layer of foam tape to create tons of dimension on this monochromatic project! I find that adding lots of different layers and heights on a monchromatic card helps to keep it from being boring.

Well, that’s all for my projects today! Spellbinders released some fabulous new goodies last month (you can check them out HERE; so many great birthday products!), and will have even more beauties later this month. I can’t wait to share some projects with you! Thanks so much for stopping by today, and have a marvelous weekend!

Filed Under: spellbinders Tagged With: birthday, birthday unboxing, so many candles, solid rectangle glimmer plate, stitched fanfare

Hero Arts July My Monthly Hero Blog Hop + Giveaway!

July 5, 2022

Hi there! We’re celebrating the new Hero Arts My Monthly Hero kit a day late because of the holiday, but boy is this one worth the wait! We are hopping along to share all kinds of inspiration with you. You should have arrived here from Debi Adams, and your next stop is Ilina Crouse. This month’s theme is celebrating all things tropical, including the main kit with a stunning flock of layering flamingos. (Side note: did you know that a group of flamingos is called a “flamboyance”? How very appropriate!) Here’s a peek at this month’s My Monthly Hero Kit:

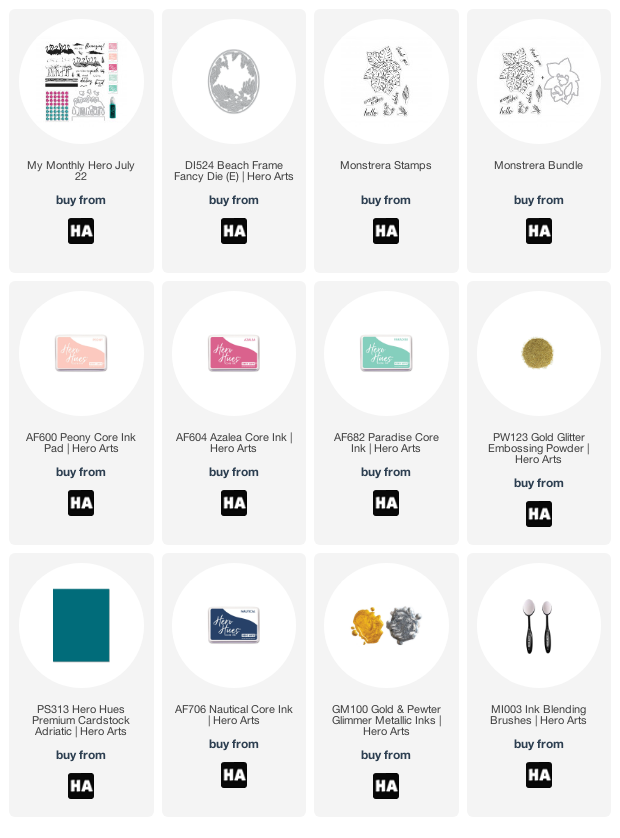
This month’s kit includes: 6″ x 8″ Clear Stamp Set, 7 Coordinating Frame Cuts, 5 Ink Cubes (Cotton Candy, Peony, Azalea, Arctic, Paradise), Self-Adhesive Pink & Teal Gems, Teal Hero Pearls (0.6 oz), all valued individually at $75, but can be yours for $34.99! You can also subscribe to make sure that you receive your kit each month without having to worry about them selling out before you snag one!

My first project uses several of the components of the kit! I began by heat embossing the flamingo base layer on some vellum cardstock using gold glitter embossing powder. The sparkling flamingos are so trendy! I die cut the image with the coordinating die, included in the main kit.

Next, I used blending brushes to blend three of the inks included in the kit on two A2 panels of cardstock: Peony, Azalea, and Paradise. I emphasized the Peony ink in the center area on both panels to look like the skyline, where the sun meets the water. I used the Beach Frame Fancy Die to cut the frame from the center, trimming a few of the more detailed images from the bottom but leaving the palm fronds hanging down to create lots of tone-on-tone texture. I also stamped just the detail layer of the water included in the main kit using Paradise ink over the top of the blending. I love how the ripples in the stamp look even more realistic picking up the colors of the sunset blended on the card base!

I popped up the beach frame die cut using foam adhesive, then stamped the greeting from the main kit using Intens-ified Black ink in the center of the blended base layer. I popped up the glittery gold flamingos using a double layer of foam adhesive. So much fun color and sparkle on this project! I don’t know if I should pick a favorite, but I think this kit is one of my most favorite My Monthly Hero kits this year!

My second card features the beautiful new Monstrera Bundle. My initial instinct was to watercolor the heck out of this set and give it tons of detail, but I was in a glittery embossing powder mood, and I wanted to show how beautifully detailed this main image is just by itself! I heat embossed the main image from the Monstrera stamp set onto some of my favorite Adriatic cardstock using the gold glitter embossing powder. I die cut the heat embossed images with the coordinating fancy cuts.

Next, I blended some Nautical ink on the corner of my A2 Adriatic card base to help further highlight the beautiful gold-embossed leaves. I also splattered some Gold Glimmer Paint on this beautifully saturated card base. I think that the splatters of gold look like fireflies! Once my paint had dried, I trimmed one of the Monstrera embossed die cuts in half and arranged them on the corner of my card front, adhering them with lots of foam tape for extra dimension.

For the greeting, I used some more gold embossing powder on the Adriatic cardstock, then matted it with a little Nautical cardstock to add a touch of contrast, but not enough to really distract from the detailed monstrera leaves. So much sparkle, so much saturated color, but still tasteful. Love it when things don’t have to be complicated to make a dramatic statement!

Well, that’s all for my projects today! Now, for some fun giveaway information!

Hero Arts will give away a $50 gift card, drawn from the comments left across the hop. Enter by Sunday, July 10th at 11:59pm Pacific, and the winner will be announced on the Hero Arts blog the following week.

Your next stop on the hop is Ilina Crouse. Thanks so much for stopping by today, and happy hopping!

Filed Under: Hero Arts Tagged With: flamingos, monstera, monstrera, my monthly hero

Altenew July 2022 Summer Sunshine Collection Release Blog Hop + Giveaway ($300 in total prizes)

July 1, 2022

Hi there! Welcome to the July 2022 Summer Sunshine Blog Hop, helping to introduce the Summer Sunshine Collection for Altenew. You should have arrived from Angela Brennan, and your next stop is Linda Westfall. You can also check out the full hop list on the Altenew Blog. This month’s release features everything from flowers to the beach, with something for everyone! I have a beachy project to share with you today, so let’s get started with the details.

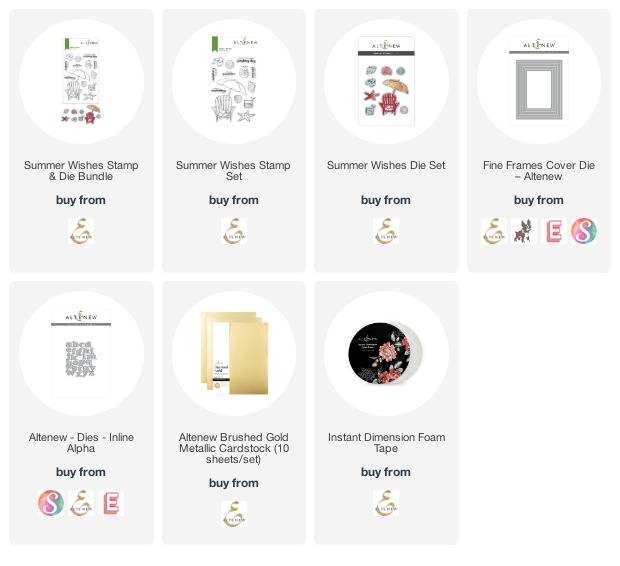
Normally, when I think of the beach, I think of cool blues and greens like the water and sky. But the beach itself is full of warmer tones, from the golden sand to the peach and pink and brown seashells that you find tucked amongst the dunes. So I thought that I would keep things nice and warm for today’s card with a coral, gold, and creamy white color scheme to share inspiration using the new Summer Wishes stamps and dies.

I began by heat embossing several elements from the Summer Wishes onto some creamy white cardstock using gold embossing powder. I used alcohol markers to add some pretty coral colors to the umbrella, shells, and hat, while adding some very pale, warm gray shadows to the white chair. I die cut all of the colored images with the coordinating dies.

Next, I die cut a matte gold frame from Brushed Metallic Gold cardstock using the Fine Frames cover plate die. I also used the same shades of coral markers to color an ombre on a long rectangle of white cardstock, then die cut “hello” using the Inline Alpha dies.

I glue the matte gold frame to the white A2 card front, then I arranged the die cut beach pieces in a little cluster and used Instant Dimension Foam Adhesive and liquid adhesive to adhere them. I also heat embossed a greeting from Summer Wishes using gold embossing powder on a white strip of cardstock, tucked beneath the die cut ombré sentiment. Scene cards are not the easiest for me to create, but by limiting the color palette and making the canvas a little smaller and less daunting with the gold frame, it’s a little easier to “see” the beachy scene!

Well, that’s all for my project today! Now, for some fun giveaway information!

$300 in total prizes! To celebrate this release, Altenew is giving away a $50 gift certificate to 2 lucky winners and a $25 gift certificate to 8 winners! Please leave a comment on the Altenew Card Blog and/or each designer’s blog post on the blog hop list below by 07/17/2022 for a chance to win. Altenew will draw 10 random winners from the comments left on each stop of this blog hop and announce the winners on the Altenew Winners Page on 07/19/2022.

Your next stop is Linda Westfall. Thanks so much for stopping by today, and happy hopping!

Filed Under: altenew Tagged With: beach, fine frames, summer wishes

  • « Go to Previous Page
  • Page 1
  • Page 2

Primary Sidebar

  • Facebook
  • Instagram
  • Pinterest
  • YouTube

Favorite Shops

Secondary Sidebar

Subscribe

Enter your email address to subscribe to this blog and receive notifications of new posts by email.

Instagram
Something is wrong.
Instagram token error.
Follow
Load More

Archives

Tags

3D embossing folder alcohol markers better press birthday birthday card blog hop card kit christmas christmas card christmas tag colored pencil copic copic coloring Daniel Smith die cutting embossing folder embroidery felt giveaway holiday holiday card hot foil ink blending karin brushmarker pro layered stencil masculine my monthly hero new release no line coloring no line watercolor OLO marker olo markers original illustration pawsitively saturated rainbow shaker card slimline stamping stamptember stencil thank you thinking of you valentine's day video watercolor

Popular Posts

Simon Says Stamp Joy For You Blog Hop- Day 1!
Simon Says Stamp Joy For You Release-Now Available!
Frozen Fractals All Around with New Simon Says Stamp Joy For You Release!
Shaped Holiday Shaker Card with New Simon Says Stamp Jolly Season Card Kit of the Month!
Holiday Postage with New Simon Says Stamp!
Simon Says Stamp Glory to the Newborn King Holiday Kit-Part II!
Holiday Joy in Pink and Green with New Simon Says Stamp DieCember!
Pinkfresh Studio 5th Birthday!
Altenew Build A Flower: Fuchsia Blog Hop+Giveway!
July My Monthly Hero Blog Hop+Giveaway!

Disclosure

Some affiliate links are used in my posts. This means that, should you click on one of my links and purchase something from that company, I will receive a small portion of the sale at no extra cost to you. I use the money earned from these sales to help maintain my blog. I so appreciate you visiting and, if you do choose to use one of my affiliate links, thank you so much for your support!
Copyright © 2026 ·Brunch Pro Theme · Genesis Framework by StudioPress · WordPress · Log in
Loading Comments...