• Skip to main content
  • Skip to primary sidebar
  • Skip to secondary sidebar

Sixth Street Sundries

Emily Midgett

  • Home
  • About Me
  • Contact
  • OLO Marker Color Swatch Chart
  • Shop

spellbinders

Fun With Felt: Easter Bunny Garland!

April 19, 2025

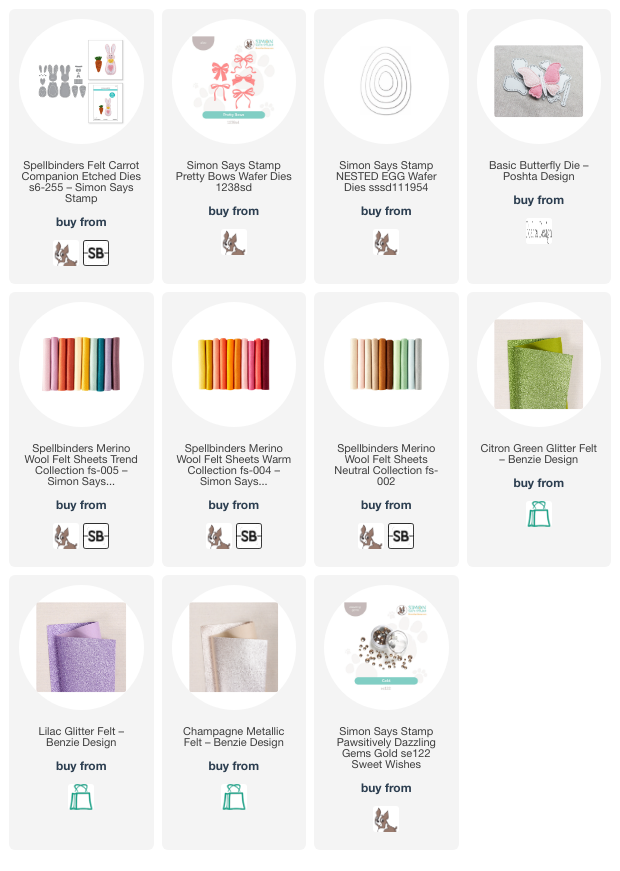
Hi friends! I have a quick home decor post to share with you using some marvelous dies from a few of my favorite companies! My friends at Spellbinders were so good as to send me some of their new stitching dies, including the adorable Felt Carrot Companion Stitching Die Set, which I paired with some other dies from my stash to create this festive Easter garland for my mantelpiece. This was a labor of love, but the felt makes it feel more “permanent,” and it’s something that can be used year after year. Let’s get started with the details!

*I have gathered links to all of the products used at the bottom of the post for your convenience, using affiliate links. Thank you for shopping with my links! I truly appreciate your support for my work!*

I decided on a lovely lavender, peach, pink, and green color palette, pulling the different shades of felt from my stash. I die cut each piece for each individual image before beginning my stitching, placing each set into its own pile before beginning my stitching.

The bunny from the adorable Felt Carrot Companion Stitching Die Set has several ways to customize his overall layout, and I chose to create a girl and a boy bunny. How sweet would these be on the front of a wedding card, or maybe even Christmas ornaments for a newly married couple? I used some champagne metallic thread to stitch the bunnies together, then accented the bunnies’ tummies with some coordinating Champagne metallic felt and added some Gold Pawsitively Dazzling Gems for the eyes. After I had finished the garland, I had an epiphany that I should have done one girl and three boy bunnies to represent my kiddos! C’est la vie, I suppose.

To help accent my bunnies and carrots, I die cut some Easter eggs using coordinating shades of felt and the Egg Nesting Dies from Simon Says Stamp, embellishing them with hearts from the Felt Carrot Companion Stitching Die Set and the Pretty Bows die set from Simon Says Stamp. I used some gorgeous metallic felt that I found in my stash, but Benzie Design has some similar green glitter felt that would work just as beautifully!

Finally, I put to use a die that I purchased months ago but for which I hadn’t found just the right project: the Basic Butterfly from Poshta Designs. Confession: I have been a fan of Lizzie’s (Poshta’s owner) for about 10 years, and as she has moved from content creator to product designer and business owner, I am so excited to have gotten to know her in person over the last few years! We have kiddos almost exactly the same age, and I am so proud of all of that she’s accomplished while also being an awesome, caring mom. I will have more projects to share using her supplies, but for now, if you like to stitch and haven’t checked out Poshta Designs, I highly encourage you to do so. She has some of the most creative stitching dies out there, and there are so many wonderful things to come, as well!

I used the Basic Butterfly, pulling all of the different colors from each of the individual elements of my card into this one image, helping to make everything cohesive. I added die cut felt flowers, some bugle beads, and sequins to embellish my butterfly’s wings. I want to make tons of these in different colors. It’s so much fun to be able to play with color palettes and create these intricate, delicate butterflies!

I stitched all of the felt elements onto a piece of coordinating peach seam binding from my stash, adding loops at the end to allow me to hang the finished garland on my mantle.

It’s taken me awhile, but I think I’ve finally jumped on the stitching bandwagon! I have been slowly collecting felt, dies, and thread over the last several months and am really loving having a new medium to which I can apply my artistic interests. It’s so refreshing! Thanks so much for stopping by today, and have a marvelous day!

PS: Simon Says Stamp is offering some fabulous discounts through 4/21/25 by entering code EGGZ5 at checkout!. The more you spend, the higher the discount! Shop your heart out HERE.
Filed Under: Poshta Design, simon says stamp, spellbinders, Stitching Tagged With: basic butterfly, carrot companion, decor, die cutting, easter, felt, garland, nested egg, pretty bows, sewing, stitching

Foil and Better Press with New Flower Stems from Pressed Posies by Spellbinders!

January 18, 2024

Hi friends! I have a serene project to share with you today using some of the new goodies from the new Spellbinders Pressed Posies Collection. You probably know of my flower obsession by this point, and adding Better Press plates and the marvelous techniques they bring into the my repertoire has been such a joy! Spellbinders generously sent the Flower Stems Better Press Plates + Coordinating Dies (SB | SSS) for me to play with, and I am absolutely in love with these delicate, feminine floral images. Let’s get started with the details on my project!

One of my favorite properties of the Better Press plates is their versatility; you can use them for both letter press and foiling techniques. I’ve combined both of these techniques to create this delicate, super textured card today!

To start, I used the delicate, detailed images from the Flower Stems Better Press Plates + Coordinating Dies (SB | SSS) without ink to emboss a floral pattern around the edge of my Porcelain Better Press A2 Panels (SB | SSS). Using these plates on their own creates the loveliest, subtle texture, and the exceptional detail and fine lines on the Flower Stems Better Press Plates (SB | SSS) picks up beautifully on the super thick letterpress paper.

After I had pressed the floral pattern into the paper, I used Blending Brushes to blend Mist, Dew, Raindrop Pawsitively Saturated Ink from Simon Says Stamp around the edges of the cardstock starting with the lightest shade, gradually decreasing how close I went to the center of the card front with each subsequent color. The debossed pattern on the letterpress panel picks up the ink, making it more concentrated in those debossed lines and allowing the pattern to be more visible. For an extra touch of shimmer, I splattered the blended background with some handmade, sparkling glitter watercolors.

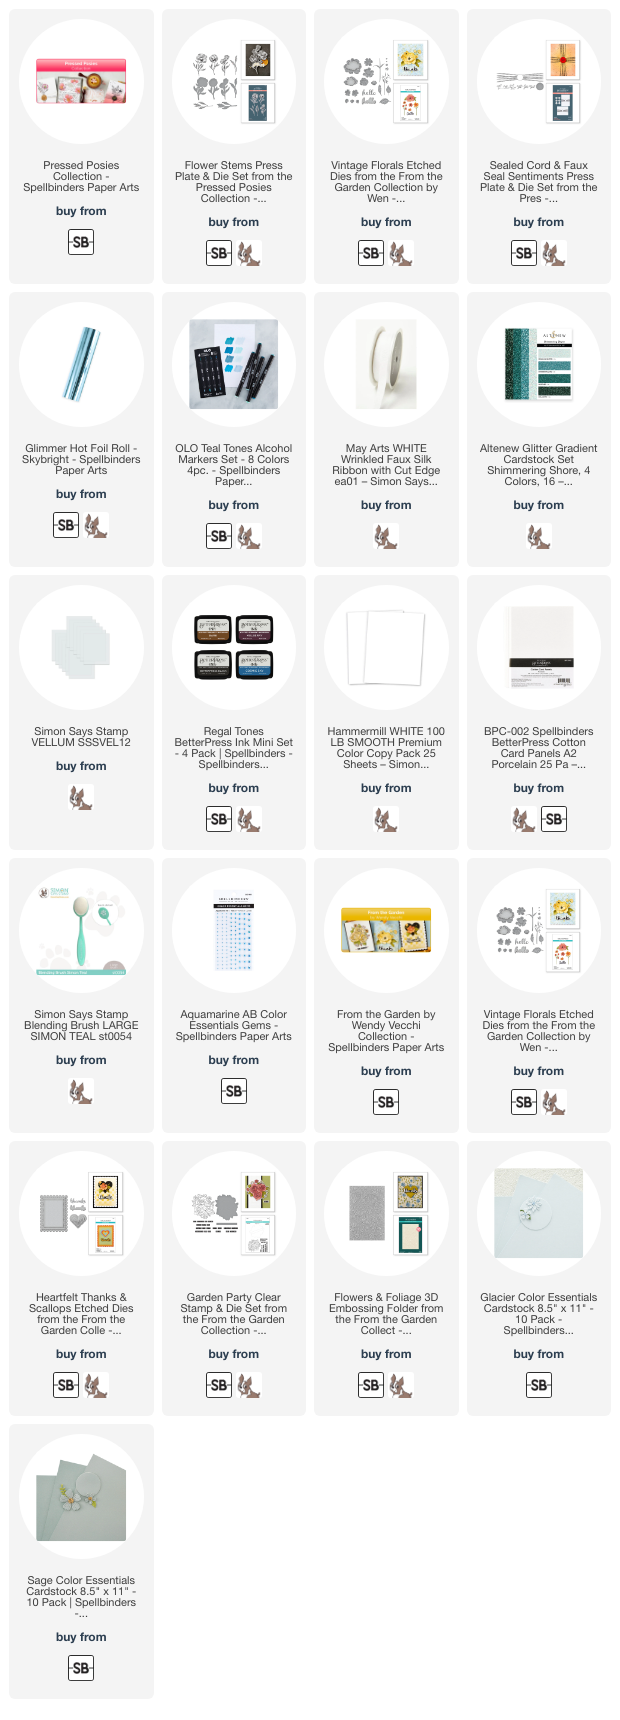
After I had created my background, I used Skybright Glimmer Hot Foil (SB | SSS) to hot foil a few of the images from Flower Stems Better Press Plates (SB | SSS) onto Hammermill white cardstock. I used the coordinating dies to cut them out, then used my OLO Markers (SB | SSS) in lovely coordinating shades of aqua to add some subtle color to the foiled images. Alcohol marker coloring on hot foiled images is such a fun way to get more mileage out of your hot foil and Better Press plates! I also used one of the OLO markers to add some deep teal to a length of faux silk ribbon, which I used to “tie” my bouquet of flowers and foliage.

After I popped up my colored bouquet with foam adhesive, I die cut the “hello” using one of the Vintage Florals dies (SB | SSS), cutting the detail layer from turquoise glitter paper and the shadow layer from vellum. I also used one of the Better Press sentiments from the Sealed Cord and Faux Seal Sentiments Press Plate + Coordinating Die (SB | SSS) set, pressing the greeting with Cosmic Sky Better Press ink (SB | SSS) onto Porcelain Better Press paper (SB | SSS). I tucked the greeting pieces amongst the hot foiled floral arrangement and adhered them with foam adhesive. The final touch was to add a few Aquamarine Gems for sparkle!

Well, that’s all for my project today! Have you jumped on the Better Press bandwagon? The plates are so versatile, and even if you don’t have a Better Press System (what are you waiting for?), you can still use the plates with your hot foil machine!

Just FYI: I was honored to be invited to be a guest designer over on the Spellbinders blog last week using the new From the Garden Collection designed by Wendy Vecchi. Here’s a sneak peek of one of my projects:

This project is just one of three projects in a coordinating card set. I hope you’ll stop by and take a look!! Click HERE to see the post.

Thanks so much for stopping by today, and have a marvelous day!

Filed Under: spellbinders Tagged With: better press, flower stems, flowers & foliage 3D embossing folder, garden party, glimmer hot foil, heartfelt thanks & scallops, olo markers, pressed posies, sealed cord & faux seal sentiments, vintage florals

Guest Designing for The Flower Challenge’s 7th Birthday!

October 7, 2023

Hi friends! I was honored to be asked by my friend Aileen (@huhwhatpardon over on Instagram) to again be the guest designer for the The Flower Challenge Blog‘s 7th Anniversary! This month, the challenge is “Anything Goes”! I love flowers so much and have such a wide variety of products from which to choose that I was slightly overwhelmed when trying to come up with a project for today’s post, but I pulled out my favorite blush cardstock and some products from a few of my favorite companies, including one of my own illustrations for Pinkfresh Studio, to create this monochromatic blush card. Let’s get started with the details!

To start, I heat embossed my Wonderful In Every Way illustration for Pinkfresh Studio onto Hammermill cardstock using Rose Gold embossing powder. I then combined some of the new inks from Pinkfresh Studio with the coordinating Wonderful In Every Way stencils to add simple color to the image. These stencils are a great way to add color to these lined floral images if you don’t feel super confident in your coloring skills! I will link all of the individual ink colors that I used below. After I’d finished stenciling, I used the coordinating Wondeful In Every Way die to cut the image out.

For the background, I started by lightly blending some pale pink ink around the edges of a blush A2 card front, adding some interest to the card front and creating a vignette to enhance my floral arrangement. I also die cut the beautiful Laurel Leaves cover plate die from Simon Says Stamp from some blush cardstock, layering it directly over the top of the blended background panel. I love the tone-on-tone texture that this detailed die cut provides behind the floral arrangement.

For the greeting, I used Blush foil to hot foil some greetings on more of the blush cardstock from the Hello Friend Sentiments set, die cutting the “wonderful” using the coordinating outline die from the Wonderful Script Sentiments die set (love that those two sets coordinate so perfectly!). I adhered the floral bouquet to the textured and blended card front using foam adhesive, then added the foiled greetings over the top of the floral arrangement. The final touch was a few shimmering blush gems for sparkle.

Well, that’s all for my project today! I hope you will check out the challenge over at The Flower Challenge. Using flowers is second nature to me, and what more perfect excuse to use your floral stamps and dies than to enter your card in The Flower Challenge Blog‘s 7th Anniversary! Thanks so much to Aileen and Viv for inviting me to be their guest, and Happy Anniversary to The Flower Challenge!

Filed Under: pinkfresh studio, simon says stamp, spellbinders Tagged With: hello friend sentiments, hot foil, laurel leaves background, layered stencil, original illustration, wonderful in every way, wonderful script sentiments

A Plethora of Projects Using Spellbinders Make It Merry Card Kit!

September 13, 2023

Hi friends! Some days, I am reminded of how much fun it is to just sit and play with paper, without even stamping or anything remotely “technique-y.” When my friends at Spellbinders asked me if I would be interested in working with the Make It Merry Card Kit, I knew that I would love playing with these darling images! The Spellbinders Card Kits make for such wonderfully quick cardmaking sessions, perfect for someone who has limited snippets of crafting time (ahem) or someone who needs/wants to make a ton of cards and tags in a short amount of time! I sort of feel like I cheated a little, because there was very little stamping or “technique” involved in making these projects, but I feel like at Christmas time, volume is more important than spending tons of time on each card.

All of the elements work beautifully together, with the most gorgeous color vintage palette and plenty of themes to make your holiday cardmaking super, super simple. The kit even includes foam adhesive, double sided tape, coordinating 8.5″ x 11″ panels of colored cardstock, and two different sizes of card bases and envelopes to give you basically everything that you need to start crafting! All you truly need is a trimmer and your creativity to create a huge variety of cards!

The folks at Spellbinders have also created some additional coordinating products to make your holiday crafting even easier and add more of these beautiful elements to your cardmaking! The Make It Merry Add-On Bundle features the In the Pines Embossing Folder and the Make It Merry Floral Die Cuts (both of which I used in the projects above), as well as the Make It Merry Sentiments Dies. You can also purchase the Make It Merry 6×6 Patterned Paper Pad which features a most beautiful array of 6″x 6″ patterned papers to complement the papers included in your kit!

The kit includes a multitude of printed die cuts in a variety of themes, in regular cardstock-both with foil and plain, chipboard, and puffy word die cuts. The sheer volume of available images means that you will have an abundance of images from which to make at least 25 cards. I made these six cards and two tags and barely made a dent in my kit! One tip that I wanted to share: take a few minute and go through your die cuts to get a feel for what themes and images there are, the sizes and color palettes, etc. I also separated mine into images with the white outline and images printed right up to the edge of the die cut, as I don’t like to mix the two on the same card.

I combined strips of some of the beautiful patterned paper Make It Merry 6×6 Patterned Paper Pad with the gold foil cardstock included in the kit to create this festive background, then added one of the large senitment die cuts and accented it with coordinating floral images from the Make It Merry Floral Die Cuts add-on. The pre-cut printed die cuts make crafting your holiday cards an absolute breeze!

For this project, I paired the precious little fawn included in the printed die cuts with the In the Pines Embossing Folder. I embossed a strip of the deep green cardstock included in the kit and mounted it on an A2 panel of green gingham printed paper, adding some strips of the gold foil on either side to break up the patterns. I added the darling little deer and coordinating sentiment strip, flanked by some colorful Christmas trees! I have a thing for deer on holiday cards, and this precious fawn was irresistible!

My next card is quite simple, but I think it looks like something you’d find at a boutique! I pulled out a few of the winter house die cuts to pair with one of the sentiment strips. The little houses remind me so much of the little ceramic Christmas villages! Before I adhered the houses to my pink card panel, I blended some Coral Berry ink from Altenew in the center of the panel and splattered some metallic gold ink to coordinate with the gold foil accents. I adhered the die cuts with both foam adhesive and double sided tape to add some extra interest and dimension.

This card pairs the beautiful floral die cuts from the Make It Merry Floral Die Cuts add-on with the In the Pines Embossing Folder. I simply embossed a white panel (so that the white outline on my die cuts would not bother me so much-does that bug anybody else as much as it bugs me?) using the In the Pines Embossing Folder, then arranged the floral pieces in a pretty bouquet, popping them up with foam tape. I added a foiled greeting banner from the main kit, popping it up with a double layer of foam tape to give it a little extra height from the bouquet. Finally, I added a touch of sparkle with some of the deep red gems included in the kit.

These pre-printed images included in the kit make for some beautiful, super quick and easy tags, too! I cut an A2 panel of the blush cardstock in half and used my corner rounder punch to round the edges of the rectangle. I adhered one of the star and peppermint die cuts to the top of each to help reinforce the hole through which the twine would be strung, then used my hole punch to punch a hole at the top of the tag. I added a few die cuts with some foam tape (how sweet is the little car and the snowglobe?) and a red twine loop and bow to make for quick addition to holiday gifts! This kit is totally worth it just for the super quick tags on their own!

My last project is an A7 card. I wanted to take full advantage of the size of the In the Pines Embossing Folder, which is generously sized at 8.5″ x 5.5.” I ran a panel of the minty green cardstock included in the Make It Merry Card Kit through my Platinum 6 using the embossing folder, then used a blending brush to blend Juniper ink from Concord & 9th around the edge of the embossed panel. I also splattered it with some more shimmering gold watercolors. I matted the panel on a wine-colored full size A7 card front, creating a festive frame around the edge.

For the greeting, I used one of the puffy gold foil sentiment stickers included in the kit along with a chipboard greeting strip, also included in the kit. I adhered them in the center of the blended, embossed panel, then used several colors of cardstock from the kit with the Make It Merry Florals dies, arranging them around the greeting with both liquid and foam adhesive. Finally, I added some sparkling red jewels from the kit to make this a super festive card!

Well, that’s all for my projects today! This Make It Merry Card Kit from Spellbinders is totally worth the money, especially if you have lots of Christmas cards and tags to make. Having everything so perfectly coordinated makes it so easy to whip up lots of beautiful and elegant projects in a short amount of time! And the Make It Merry Add-On Bundle and Make It Merry 6×6 Patterned Paper Pad just further enhances the potential for even more projects!

Thanks so much for stopping by today, and have a marvelous day!

Filed Under: spellbinders, Uncategorized Tagged With: card kit, christmas card, christmas tag, holiday card, make it merry, patterned paper

Serene Blue with Spellbinders!

July 31, 2023

Hi friends! It’s the last day of July… where has the summer gone? My kiddos will be starting school in a few weeks, (even my little guys will be going to preschool for a couple of hours a day) and I am simultaneously longing for it and dreading it. School brings with it a special brand of chaos to temper the peace of when the house is quiet. I am trying to mentally plan the days so that I can still get my work done without my big kids offering their wonderful assistance with their little brothers in the mornings (they get rewarded with an increased allowance and lots of trips to the pool)…. but I won’t lie; I’m a bit worried. It will all fall into place somehow, but those first few weeks will surely be a challenge! In an effort to calm my anxious mental state, I have been using lots of serene blues and greens in my color palette, and I have a card to share today that embodies the calm that I’m trying to keep in my head. Let’s get started with the details!

Spellbinders generously sent me the gorgeous Hello Blooms layering stencil and die set (SB | SSS), which creates a large cluster of blooms that remind me so much of Rifle Paper Co designs! I love the wide variety of unique color palettes used within the Rifle Paper Co aesthetic, so I pulled out the Silver Sage ink from Altenew and Aspen, Sage, Morning, Twilight, and Galaxy Pawsitively Saturated Inks from Simon Says Stamp. I used blending brushes to blend these soft and serene ink colors over the Hello Blooms layering stencil. The stencils are super easy to use and line up like a dream! I used the coordinating die from the Hello Blooms layering stencil and die set (SB | SSS) to die cut the large bouquet and set it aside.

Because the general aesthetic of the floral bouquet is fairly simple and graphic, I wanted to continue that feel onto the background of the card. I stamped the Talavera Vine background stamp from Simon Says Stamp using Silver Sage ink to create a lovely, subtly patterned background. The shape of the leaves match the shape of the stenciled leaves almost exactly! I trimmed down the panel on one side, then mounted it to a sheet of coordinating pale blue Sea Glass cardstock. I also added a strip of white glitter paper between the patterned background paper and the blue cardstock to add another level of texture and shimmer.

I popped up the floral bouquet in the center of the card front using foam adhesive, then turned my attention to the greeting. I used the “hello” die included in the Hello Blooms layering stencil and die set (SB | SSS). I die cut the detail layer from white iridescent cardstock and the background layer from heavyweight vellum cardstock and layered them together. The vellum helps to soften the area around the white sentiment die cut to help it stand out a bit from the patterned background. I also stamped a sentiment strip from the Well Wishes stamp set from Simon Says Stamp. I popped both of the sentiment pieces up on the card front directly on top of the stenciled floral die cut to help them both stand out from the background. Finally, I tucked a few Milk Glass gems amongst the floral die cut for a bit of added sparkle and texture!

Well, that’s all for my project today. See you back here tomorrow for my first post for August! Thanks so much for stopping by today, and have a marvelous day!

Filed Under: simon says stamp, spellbinders Tagged With: hello blooms, talavera vine, thinking of you, well wishes, with sympathy

  • Page 1
  • Page 2
  • Page 3
  • Interim pages omitted …
  • Page 13
  • Go to Next Page »

Primary Sidebar

  • Facebook
  • Instagram
  • Pinterest
  • YouTube

Favorite Shops

Secondary Sidebar

Subscribe

Enter your email address to subscribe to this blog and receive notifications of new posts by email.

Instagram
Something is wrong.
Instagram token error.
Follow
Load More

Archives

Tags

3D embossing folder alcohol markers better press birthday birthday card blog hop card kit christmas christmas card christmas tag colored pencil copic copic coloring Daniel Smith die cutting embossing folder embroidery felt giveaway holiday holiday card hot foil ink blending karin brushmarker pro layered stencil masculine my monthly hero new release no line coloring no line watercolor OLO marker olo markers original illustration pawsitively saturated rainbow shaker card slimline stamping stamptember stencil thank you thinking of you valentine's day video watercolor

Popular Posts

Simon Says Stamp Sending Cheer Blog Hop- Day 2 + Freebie + Giveaway!
Altenew October 2026 Release Blog Hop + Giveaway!
Rustic Monochromatic Stars for Christmas with Rainbow Splash!
Hero Arts Partners Blog Hop: Lawn Fawn!
Waffleflower July Release Blog Hop!
December 2018 My Monthly Hero Blog Hop + Giveaway!
March 2020 Essentials By Ellen Blog Hop+Giveaway!
The Ton Anniversary Release: Day 1!
The Ton Stamps Summer Release: Day 1
Autumn Legs with Colorado Craft Company and Catherine Pooler!

Disclosure

Some affiliate links are used in my posts. This means that, should you click on one of my links and purchase something from that company, I will receive a small portion of the sale at no extra cost to you. I use the money earned from these sales to help maintain my blog. I so appreciate you visiting and, if you do choose to use one of my affiliate links, thank you so much for your support!
Copyright © 2026 ·Brunch Pro Theme · Genesis Framework by StudioPress · WordPress · Log in
Loading Comments...