• Skip to main content
  • Skip to primary sidebar
  • Skip to secondary sidebar

Sixth Street Sundries

Emily Midgett

  • Home
  • About Me
  • Contact
  • OLO Marker Color Swatch Chart
  • Shop

Poshta Design

Poshta Designs Release Day!

July 5, 2025

Well, friends, Poshta Release Day is finally here! All of these new Christmas In July products are NOW AVAILABLE! Click HERE to check them all out! If you’re treating yourself for Christmas in July, here’s a direct link to the July 2025 All-In-One Bundle. Below, I will include links to all of the products that I used on each project for easy shopping!

Products to the Baker’s Dozen Sugar Cookie Banner:
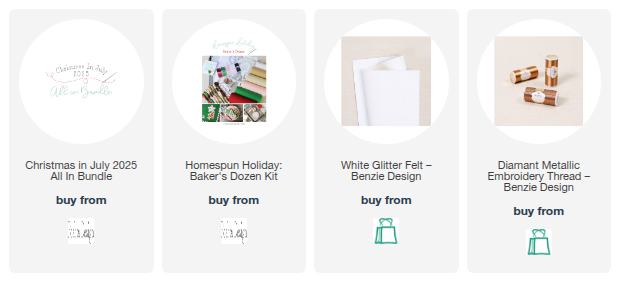
View the coordinating blog post HERE.

Products for the Kringle Krew decorative banner:
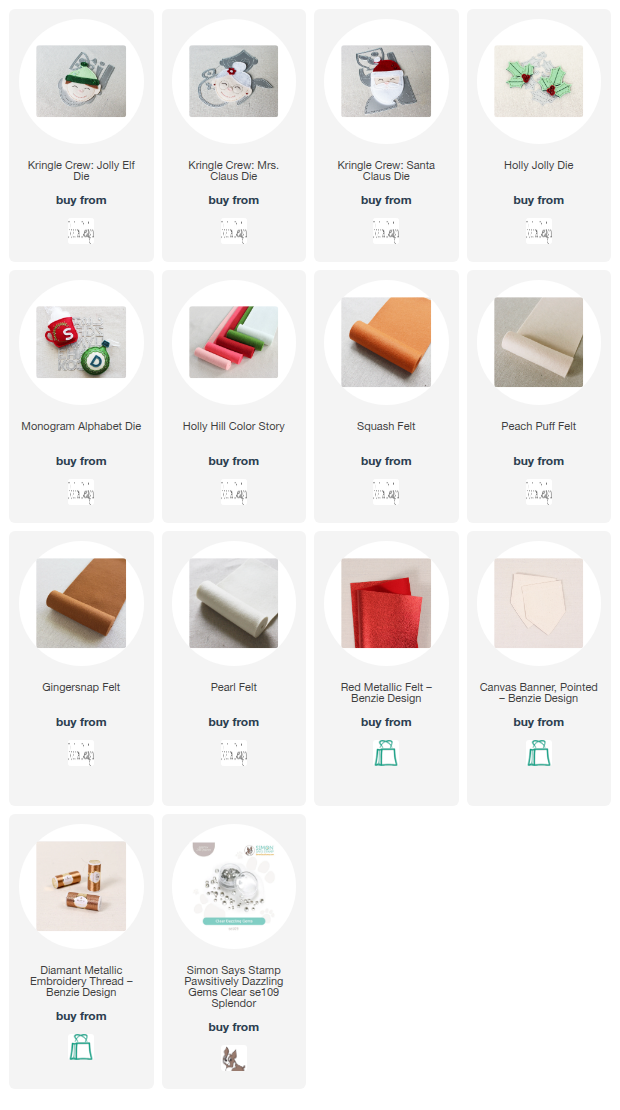
View the coordinating blog post with all of the details HERE.

Products for the Sassy Sleigh Hoop:
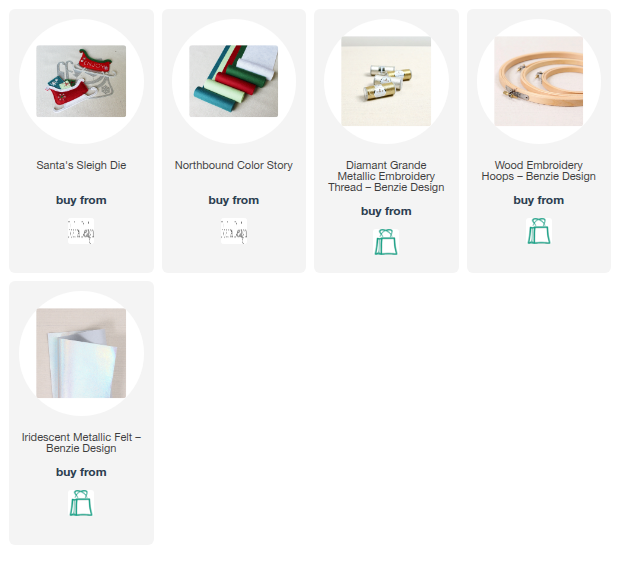
View the coordinating blog post HERE.

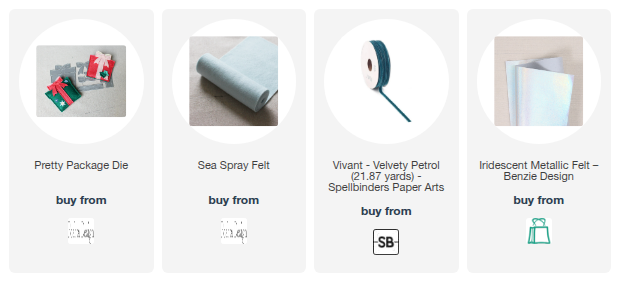
Products for the Gift Box Ornament:
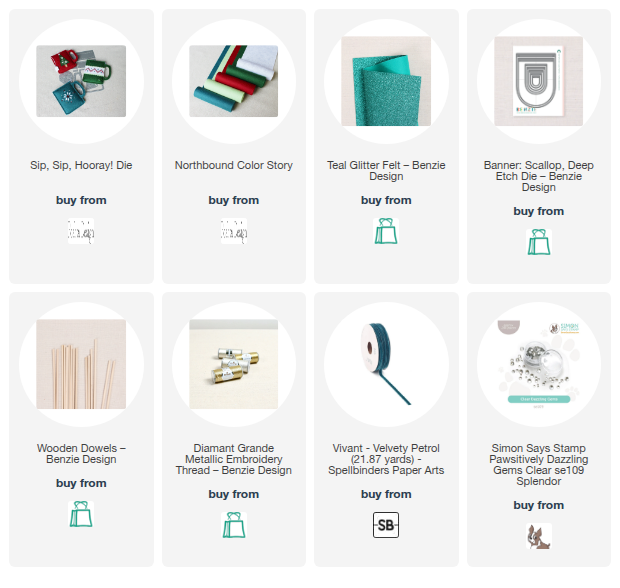
And I have one bonus project using the new Sip, Sip, Hooray die: a mini banner perfect for hanging in a kitchen! I embellished the mug and banner with some fun snowflake embroidery. I used the gorgeous Northbound Color Story for the majority of the pieces, adding in some glittering teal felt from my stash for the top layer of the mug.

Sead beeds, a few sparkling gems, and some velvet ribbon finished this project off!

Here are the products used for my mug mini banner:
Well, that’s all for me today! This entire new release is fabulous; I can’t decided which of my projects is my favorite. Just a reminder: the Baker’s Dozen Homespun Holiday Kit is limited edition, so if you’re loving it as much as I do, you won’t want to wait to purchase!

Be sure to check out the Poshta Blog for all of the details on these new products, as well as more inspiration from Lizzie and the other, super talented guest creators! (Psst-there’s a gift card giveaway up for grabs, as well!) Thanks so much for stopping by today, and have a marvelous day!

Filed Under: Poshta Design Tagged With: baker's dozen homespun holiday, banner, decor, embroidery, holiday, holly hill, holly jolly, kringle krew, monogram alphabet, northbound color story, pretty package, santa's sleigh, sip sip hooray, stitching

Poshta Designs Sneak Peeks: Day 3!

July 4, 2025

Hi friends! I have another project to share with you using the fabulous new Homespun Holiday: Baker’s Dozen kit from Poshta Designs Christmas In July release. Each year, Lizzie designs a fantastic, limited edition holiday kit that contains all of the supplies that you need to create incredible projects, including everything from the dies (of course) to a unique felt Color Story and coordinating beaded embellishments, coordinating floss, even needles! This year’s theme is all about cookies, featuring those classic holiday cookie cutout shapes: star, circle, tree, and candy cane! Here’s a sneak peek of the kit:

Isn’t that just marvelous? The kit contains multiple shades of creamy tan felt so that you can make your cookies as “cooked” as you so choose, as well as some beautiful holiday white, red, pink, and green. I absolutely love the color palette, but I decided to go with a bit non-traditional color palette, sticking with the pale pink, white, and green from the Baker’s Dozen kit to create my Christmas cookie banner!

Each cookie shape comes with a scalloped cookie base in addition to multiple options for “icing” your cookies. You can decorate them with the different die cut felt options, or you can use the coordinating bead embellishments to add delightful sprinkles to your cookies.

I decided to turn my stitched cookies into a banner to decorate my kitchen window! In order to bulk the cookies up a bit, I decided to fill them with polyfill, creating a little cookie pillow. When working with layered stitching dies like this, I like to die cut all of the pieces first before assembling. I die cut two of each scalloped cookie base, as well as the icing in the selected colors. I wanted to add some beaded sprinkles in my color palette, because who can say no to sprinkles, right? I also couldn’t resist adding some glitter to my project, so I die cut the stripes on the candy cane from white glitter felt from my stash.

I found it helpful to do a quick sketch of my banner so that I knew just how many pieces of each die set that I needed to cut before beginning my stitching.

As the super helpful instruction guides will tell you, it is easiest to decorate your icing pieces with your beads or other adornments before stitching them to the base. For the tree, star, and circle cookies, I added sparkling sequins, bugle beads, and seed beads to the icing, then to make the stitching process a bit simpler, I used small dots of fabric glue to adhere the beaded pieces to each cookie before stitching them together.

Once I had stitched the two base scalloped cookies together 2/3 of the way around, I stuffed each cookie with some polyfill, using my die poker tool to push the stuffing throughout the cookie!

After I had finished stuffing and stitching each cookie, it was time to assemble the banner. I used the grid on my glass mat on my desk to make sure I had about 3″ between each cookie, threading a needle with white embroidery floss through the top of each cookie and knotting the thread to keep the cookies from sliding.

Well, that’s all for my project today! I am in love with this adorable kit and have so many ideas rolling around in my head. How cute would it be to make a play set of Christmas cookies for a child’s play kitchen? Felt play food is super expensive, and now you can create your own in your child’s favorite colors!

Just a reminder: all of the new products for the Poshta Christmas In July release will be available tomorrow, July 5, 2025 at noon Eastern time. I will update all of my posts to include the appropriate links as soon as they’re live!

 Be sure to check out the Poshta Blog for all of the details on these new products, as well as more inspiration from Lizzie and the other, super talented guest creators! (Psst-there’s a gift card giveaway up for grabs, as well!) Thanks so much for stopping by today, and have a marvelous day!

Filed Under: Poshta Design, Uncategorized Tagged With: baker's dozen, banner, embroidery, felt, poshta, stitching

Poshta Designs Sneak Peeks-Day 2!

July 3, 2025

Hi friends! I am back with another project from the new Poshta Designs Christmas In July release. Today, we are introducing the Kringle Krew: a sweet grouping of your favorite holiday characters!! Meet Santa, Mrs. Claus, one of the elves, and a reindeer, easily customized to work with your favorite color palette. Lizzie herself inspired me so much with THIS sweet birthday banner that I decided to create my own and super size it to fit the Kringle Krew. Let’s get started with the details on my project!


*I have gathered links to all of the products used at the bottom of the post for your convenience, using affiliate links. Thank you for shopping with my links! I truly appreciate your support for my work!*

Reminder: All of the links for the products will be available after the official Christmas in July release on Saturday, July 5th, 2025 at noon Eastern time.

To start, I die cut all of the faces from Peach Puff felt from Poshta, then used Pearl felt for Santa’s beard and the greens and red from the Holly Hill Color Story for the hats.

I stitched everything together using the coordinating DMC floss, adding some coppery metallic thread from my stash for Mrs. Claus’s glasses!

To make Mrs. Claus a little festive and fancy, I cut the Holly Jolly die from the two different shades of green felt and two shades of pinky red included with the Holly Hill Color Story and tucked them on her bun. I also gave her some twinkling earrings using some gems from my stash!

I stitched all of my holiday characters onto a black canvas banner, placing them neatly in a row with Santa in the middle, of course!

I couldn’t help but add Santa’s jolly “ho ho ho” to the banner, so I die cut the letters from the Monogram Alphabet die set using metallic red foil felt. I stitched them to the banner with coordinating red thread, adding a period after each word with another sparkling gem.

I also added a pretty sprig of holly at the center of the point of the canvas banner, helping to fill in some of the empty space beneath my letters!

Finally, taking my inspiration from Lizzie’s banner that I linked above, I added some coordinating red pom pom trim around the edges of the banner, adhering the trim with Fabri-Tac glue. To make the back as neat as the front, I also adhered some holiday fabric that I have in my stash to cover up the stitches and the messy back of the trim. I added a black and white gingham ribbon with a bow to hold my banner on the wall, as well. I think this turned out just darling. I can’t wait to hang it up this Christmas!

Well, that’s all for my project today! Be sure to check out the Poshta Blog for all of the details on these new products, as well as more inspiration from Lizzie and the other, super talented guest creators! (Psst-there’s a gift card giveaway up for grabs, as well!) Thanks so much for stopping by today, and have a marvelous day!

PS: These new products will be available for purchase on Saturday, 7/5/25 at noon Eastern time!

Filed Under: Poshta Design Tagged With: banner, christmas, decor, embroidery, holiday, kringle krew, stitching

Poshta Designs Christmas In July Sneak Peeks- Day !

July 2, 2025

Hi friends! My sweet friend Lizzie Jones from Poshta Designs asked me to be a guest creator for her Christmas In July release, and I was so over the moon to help her introduce these Christmas products! I have such a soft spot (obsession?) with holiday crafting, and with my newfound love (more obsession?) with felt and all things stitching, I was totally thrilled and honored to be a part of the release. For Day 1 of the sneak peeks, we are showcasing the new Santa’s Sleigh, Pretty Packages, and some new festive felt colors to adorn your holiday projects. I have two different projects to share with you today, so let’s get started on the details!

Reminder: All of the links for the products will be available after the official Christmas in July release on Saturday, July 5th, 2025 at noon Eastern time.

I paired the gorgeous new Northbound Color Story to bring this beautiful sleigh to life. I am a huge fan of non-traditional color palettes at Christmas, and the cool teal, minty green, and icy blue in this color story won my heart over immediately. I paired it with some beautiful iridescent silver felt that I already had in my stash for the runners and accents, because who doesn’t love all things shiny and metallic at Christmas?? After die cutting, I stitched all of the components onto some printed snowflake cloth that I’d mounted in an embroidery hoop, using the coordinating floss colors for the Northbound Color Story. Now, if you’re new to stitching like I am (well, relatively new!) you will be so pleased to know that Lizzie includes the most helpful and detailed stitching guides with each die purchase so that you can easily assemble the pieces in the correct order. She also has tons of marvelous videos available to show you how to create your own felt masterpieces!

Once I had stitched my sleigh filled with gifts to my embroidery hoop, I used my iPad to create a beautiful calligraphic “sleigh” sentiment, a play on the current slang “slay” that my 11 1/2 year old daughter says constantly with an adorable giggle! I simply typed “sleigh” out on my iPad using Procreate in my chosen font, then placed my fabric directly on top of the screen and traced the outline of the letters. My daughter gave me the idea; she likes to trace pictures on her school laptop to use as coloring pages! I used a satin stitch with the coordinating deep teal embroidery floss to stitch the sentiment, and I am so pleased with how smoothly the embroidery came out and how vivid the contrast is between the deep teal lettering and the delicate snowflake fabric background.

Once I had finished embroidering the cheeky word, I added lots of sparkling and metallic details with the coordinating embellishments that are included with each Color Story collection. While the Santa’s Sleigh die set comes with a beautiful snowflake embellishment for the sleigh itself, I chose to create my own decoration for the sleigh with some sparkling holographic thread, seed beads, and sequins to embroider this elegant sleigh just waiting for Santa!

My second project is in the same color family, this time pairing the beautiful icy blue felt included with the Northbound Color Story with the new Pretty Packages die! This project was a fairly quick one once I had decided on the color palette. I kept the cool blues from the previous project, adding some more of that iridescent silver foil felt for the bow and ribbon. If you can’t be extra sparkly and shiny at Christmas, then when can you?

After I had stitched all of the layers together following Lizzie’s fabulous guide, I decided to add a loop of deep teal velvet ribbon to the top to create a pretty ornament! Wouldn’t this be perfect to add to the packaging on a special Christmas gift, so that the recipient could also add it to their Christmas tree later?

Well, that’s all for my projects today! You can see more inspiration over on the Poshta Designs Blog, and don’t forget to come back tomorrow for more sneak peeks and inspiration! Thanks so much for stopping by today, and have a marvelous day!

Filed Under: Poshta Design Tagged With: christmas in july, embroidery, felt, holiday, poshta designs, pretty packages, santa's sleigh, stitching

Fun With Felt: Easter Bunny Garland!

April 19, 2025

Hi friends! I have a quick home decor post to share with you using some marvelous dies from a few of my favorite companies! My friends at Spellbinders were so good as to send me some of their new stitching dies, including the adorable Felt Carrot Companion Stitching Die Set, which I paired with some other dies from my stash to create this festive Easter garland for my mantelpiece. This was a labor of love, but the felt makes it feel more “permanent,” and it’s something that can be used year after year. Let’s get started with the details!

*I have gathered links to all of the products used at the bottom of the post for your convenience, using affiliate links. Thank you for shopping with my links! I truly appreciate your support for my work!*

I decided on a lovely lavender, peach, pink, and green color palette, pulling the different shades of felt from my stash. I die cut each piece for each individual image before beginning my stitching, placing each set into its own pile before beginning my stitching.

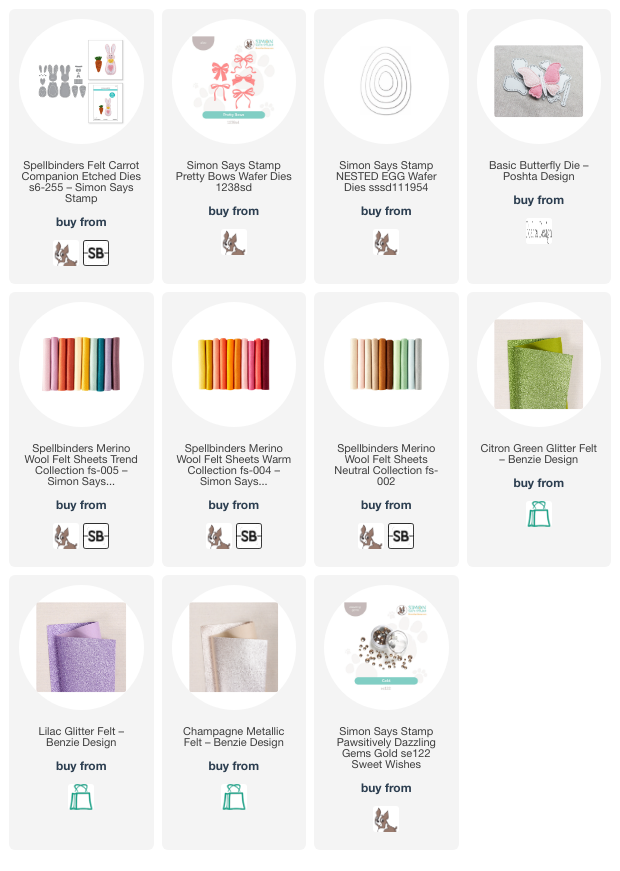
The bunny from the adorable Felt Carrot Companion Stitching Die Set has several ways to customize his overall layout, and I chose to create a girl and a boy bunny. How sweet would these be on the front of a wedding card, or maybe even Christmas ornaments for a newly married couple? I used some champagne metallic thread to stitch the bunnies together, then accented the bunnies’ tummies with some coordinating Champagne metallic felt and added some Gold Pawsitively Dazzling Gems for the eyes. After I had finished the garland, I had an epiphany that I should have done one girl and three boy bunnies to represent my kiddos! C’est la vie, I suppose.

To help accent my bunnies and carrots, I die cut some Easter eggs using coordinating shades of felt and the Egg Nesting Dies from Simon Says Stamp, embellishing them with hearts from the Felt Carrot Companion Stitching Die Set and the Pretty Bows die set from Simon Says Stamp. I used some gorgeous metallic felt that I found in my stash, but Benzie Design has some similar green glitter felt that would work just as beautifully!

Finally, I put to use a die that I purchased months ago but for which I hadn’t found just the right project: the Basic Butterfly from Poshta Designs. Confession: I have been a fan of Lizzie’s (Poshta’s owner) for about 10 years, and as she has moved from content creator to product designer and business owner, I am so excited to have gotten to know her in person over the last few years! We have kiddos almost exactly the same age, and I am so proud of all of that she’s accomplished while also being an awesome, caring mom. I will have more projects to share using her supplies, but for now, if you like to stitch and haven’t checked out Poshta Designs, I highly encourage you to do so. She has some of the most creative stitching dies out there, and there are so many wonderful things to come, as well!

I used the Basic Butterfly, pulling all of the different colors from each of the individual elements of my card into this one image, helping to make everything cohesive. I added die cut felt flowers, some bugle beads, and sequins to embellish my butterfly’s wings. I want to make tons of these in different colors. It’s so much fun to be able to play with color palettes and create these intricate, delicate butterflies!

I stitched all of the felt elements onto a piece of coordinating peach seam binding from my stash, adding loops at the end to allow me to hang the finished garland on my mantle.

It’s taken me awhile, but I think I’ve finally jumped on the stitching bandwagon! I have been slowly collecting felt, dies, and thread over the last several months and am really loving having a new medium to which I can apply my artistic interests. It’s so refreshing! Thanks so much for stopping by today, and have a marvelous day!

PS: Simon Says Stamp is offering some fabulous discounts through 4/21/25 by entering code EGGZ5 at checkout!. The more you spend, the higher the discount! Shop your heart out HERE.

Filed Under: Poshta Design, simon says stamp, spellbinders, Stitching Tagged With: basic butterfly, carrot companion, decor, die cutting, easter, felt, garland, nested egg, pretty bows, sewing, stitching

Primary Sidebar

  • Facebook
  • Instagram
  • Pinterest
  • YouTube

Favorite Shops

Secondary Sidebar

Subscribe

Enter your email address to subscribe to this blog and receive notifications of new posts by email.

Instagram
Something is wrong.
Instagram token error.
Follow
Load More

Archives

Tags

3D embossing folder alcohol markers better press birthday birthday card blog hop card kit christmas christmas card christmas tag colored pencil copic copic coloring Daniel Smith die cutting embossing folder embroidery felt giveaway holiday holiday card hot foil ink blending karin brushmarker pro layered stencil masculine my monthly hero new release no line coloring no line watercolor OLO marker olo markers original illustration pawsitively saturated rainbow shaker card slimline stamping stamptember stencil thank you thinking of you valentine's day video watercolor

Popular Posts

Simon Says Stamp Sending Cheer Release: Now Available!
Joyful Snowman with New Simon Says Stamp Sending Cheer Release!
Autumn Legs with Colorado Craft Company and Catherine Pooler!
February 2018 My Monthly Hero Blog Hop!
Altenew Paint A Flower: Carnation Blog Hop+Giveaway!
Altenew March 2020 Release Blog Hop+Giveaway!
Special Release: Simon Says Stamp Limited Edition STAMPtember Christmas Card Kit!
Pinkfresh Studio 5th Birthday!
Pinkfresh Studios June Washi and Stamp Release Blog Hop!
Honey Bee Stamps Bee Bold Release Blog Hop!

Disclosure

Some affiliate links are used in my posts. This means that, should you click on one of my links and purchase something from that company, I will receive a small portion of the sale at no extra cost to you. I use the money earned from these sales to help maintain my blog. I so appreciate you visiting and, if you do choose to use one of my affiliate links, thank you so much for your support!
Copyright © 2026 ·Brunch Pro Theme · Genesis Framework by StudioPress · WordPress · Log in
Loading Comments...