• Skip to main content
  • Skip to primary sidebar
  • Skip to secondary sidebar

Sixth Street Sundries

Emily Midgett

  • Home
  • About Me
  • Contact
  • OLO Marker Color Swatch Chart
  • Shop

acetate card

Holographic Happy Birthday with Simon Says Stamp!

August 8, 2024

This post was sponsored by Simon Says Stamp. Thanks, Simon!

Hi friends! I am back today using some of the fun foil transfer cards from the Simon Says Stamp  Cheering For You release! I love that Simon is coming out with these cards that you can use with your laminator or Minc machine. These toner foil cards have such a low storage footprint and can be customized to work with your color palette so easily! I used two different sets of these foil transfer cards for my project today, creating a fun clear birthday card with lots of sparkle and shine. Let’s get started with the details!

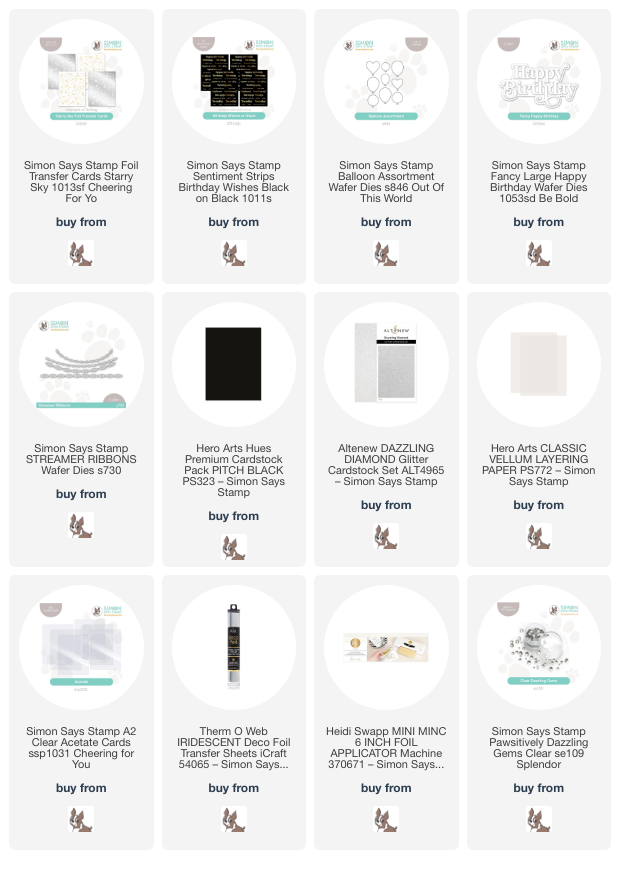
To start my card, I heated up my Minc machine to do some foiling with the new Starry Sky Foil Transfer Cards and Birthday Wishes Sentiment Strips. To use these toner foil cards, I find that I get the best results when I allow my Minc to heat up for quite a long time; the light turns green very quickly, but if you allow the machine to continue to heat for at least 15-20 minutes after that, the foil adheres to the toner cards very smoothly. It is also important to note that the type of foil that you are using is extremely important. Hot foil rolls like those from Spellbinders or Crafter’s Companion are specifically made for hot foiling plates, NOT for toner. I know it can be a little confusing to figure out which kind to use for which purpose! I like to use Thermoweb DecoFoil, Cheerfoil from Pink & Main, and Picket Fence Studio Toner Foil Rolls with my Minc machine. (Be sure to check each of these brands out if you’re interested in toner foiling; the array of available colors is absolutely amazing!!!)

After hot foiling the background and sentiment pieces using iridescent toner foil, I began die cutting the focal point on my shiny, celestial birthday card. I die cut the Balloon Assortment dies from some of Altenew’s Dazzling Diamonds glitter cardstock. This die set is great because it gives you multiple balloon shapes and sizes to mix and match as you like! I also die cut the large-scale and fabulous Fancy Happy Birthday die, cutting the detail layer from Pitch Black cardstock and the shadow from vellum. I also die cut a few Streamer Ribbons from some iridescent white foil cardstock that I found in my stash… so much sparkle and shine on this card!

After creating all of the components for the card, it was time to assemble it. I trimmed the starry foiled background panel down and adhered it in the center of one of the new clear acetate card base from Simon Says Stamp, as well as a plain white panel of the same size for the interior, leaving a space to write a message! I adhered the sentiment die cuts and balloons using adhesive foam squares, tucking the streamers in the corner with some liquid adhesive. I also added some balloon “strings” with a Sharpie. Finally, I added one last touch of sparkle (because you can never have enough sparkle!) with a smattering of Clear Pawsitively Dazzling Gems.

I absolutely love how impactful this card is with the shining foil elements and the clear card base… I think it is so unique and incredibly festive, perfect for a special birthday card! If you’ve never used acetate card bases before, I encourage you to try it out… they’re great fun. Thanks so much for stopping by today, and have a marvelous day!
Filed Under: simon says stamp Tagged With: acetate card, balloon assortment, birthday card, die cutting, fancy large happy birthday, sentiment strips birthday wishes, starry sky toner foil, streamer ribbons, toner foil cards

Adding Acetate to Kick Your Flowers Up A Notch!

June 16, 2023

This post was sponsored by Simon Says Stamp. Thanks, Simon!

Hi there! Jennifer McGuire is just full of excellent ideas, isn’t she? I feel lucky to have such a talented friend! (She gives amazing hugs!) We all get inspiration from her so frequently, and I find her use of acetate to create unique card fronts to be so intriguing and unique! This project is kind of a piggyback on my card from earlier this week, in which I used black A7 Thin Frames die to accent my floral background. Today, I’m using an acetate background to create a super special wedding card, adding some more A7 Thin Frames to help ground the flower on the acetate so that it’s not floating in midair. Let’s get started with the details!

It is such a thrill to me to see how many stamp sets I’ve illustrated over the last few years; I never dreamed that I would be able to use my own drawings to create cards when I started this journey 14 years ago, but I don’t think that I have words to describe what it means to me when I see artists whom I admire so much using my illustrations. Debby Hughes is one such artist; I’ve admired her work for nearly as long as I’ve been stamping, and she painted my Thankful Magnolia image so splendidly… I audibly gasped when I saw it. She was so good as to send that treasure to me, and I have had her card sitting on my desk as an inspiration. I finally made/found the time to do my own watercolored version of the Thankful Magnolia for today’s card! It’s a double whammy of inspiration from those cardmakers whom I admire the most!

To start, I stamped the Thankful Magnolia on some Arches Cold Press Watercolor Paper using Hero Arts’s Contour Ink. I then did some watercolor mixing and matching to create this peach melba magnolia. (I don’t believe that’s really a thing, but how perfect is that description for this peach and raspberry magnolia?) After I’d finished watercoloring the image, I die cut it with the coordinating die. I knew that I wanted to have a peach background to highlight the peachy undertones on the flower, so I selected my peach cardstock from my stash and outline the edge of the die cut with the coordinating Copic marker to keep the color palette seamless.

Once I had finished coloring my main floral image, I cut down a panel of peach cardstock to 7×5.5 inches. I used my Altenew Scoring Board to score 1/2″ in from the edge, creating a 5×7 card with a tiny flap along the long side. I used some super strong double sided tape to adhere a 5″x7″ panel of acetate to the thin flap, creating an A7 card with a transparent front! To accent the peachy magnolia, I die cut the A7 Thin Frames using some Metallic Rose Gold foil cardstock from Simon Says Stamp. I keep my Thin Frames dies together as they arrived in the package; this allows me to have a huge variety of sizes in two different widths with one pass through my die cut machine! I added one thicker frame closer to the edge and a thinner one more towards the center. This addition of the frames adds a little interest to the clear background as well as a bit of sturdiness to the acetate.

For the greeting, I die cut the So Happy For You Both die from another piece of Metallic Rose Gold foil cardstock (isn’t that shade of metallic blush divine?) and backed it with the outline layer cut from vellum. I popped the magnolia up with some foam tape, then popped up the greeting with some clear dimensional adhesive. The vellum behind the foil sentiment allows the greeting to pop a bit from the background while still keeping the overall feeling of lightness on the finished card! Finally, I added a few peachy iridescent gems for one last bit of sparkle.

Well, that’s all for my project today! I am so excited about how this first acetate card came out… I can’t wait to try it on another project! Thanks so much for stopping by, and have a marvelous day!

Filed Under: original illustrations, simon says stamp, watercolor Tagged With: acetate, acetate card, no line watercolor, thankful magnolia, watercolor

Primary Sidebar

  • Facebook
  • Instagram
  • Pinterest
  • YouTube

Favorite Shops

Secondary Sidebar

Subscribe

Enter your email address to subscribe to this blog and receive notifications of new posts by email.

Instagram
Something is wrong.
Instagram token error.
Follow
Load More

Archives

Tags

3D embossing folder alcohol markers better press birthday birthday card blog hop card kit christmas christmas card christmas tag colored pencil copic copic coloring Daniel Smith die cutting embossing folder embroidery felt giveaway holiday holiday card hot foil ink blending karin brushmarker pro layered stencil masculine my monthly hero new release no line coloring no line watercolor OLO marker olo markers original illustration pawsitively saturated rainbow shaker card slimline stamping stamptember stencil thank you thinking of you valentine's day video watercolor

Popular Posts

Simon Says Stamp Joy For You Blog Hop- Day 1!
Simon Says Stamp Joy For You Release-Now Available!
Frozen Fractals All Around with New Simon Says Stamp Joy For You Release!
Holiday Postage with New Simon Says Stamp!
Shaped Holiday Shaker Card with New Simon Says Stamp Jolly Season Card Kit of the Month!
Hero Arts Partners Blog Hop: Lawn Fawn!
Holiday Joy in Pink and Green with New Simon Says Stamp DieCember!
Simon Says Stamp STAMPtember Tim Holtz Collaboration: Festive Holidays!
Greenery for Christmas with New Simon Says Stamp!
The Ton Anniversary Release: Day 1!

Disclosure

Some affiliate links are used in my posts. This means that, should you click on one of my links and purchase something from that company, I will receive a small portion of the sale at no extra cost to you. I use the money earned from these sales to help maintain my blog. I so appreciate you visiting and, if you do choose to use one of my affiliate links, thank you so much for your support!
Copyright © 2026 ·Brunch Pro Theme · Genesis Framework by StudioPress · WordPress · Log in
Loading Comments...