• Skip to main content
  • Skip to primary sidebar
  • Skip to secondary sidebar

Sixth Street Sundries

Emily Midgett

  • Home
  • About Me
  • Contact
  • OLO Marker Color Swatch Chart
  • Shop

arching spruce sprig

Cobalt and Lime Holiday Ornaments with New Simon Says Stamp!

November 8, 2025

This post was sponsored by Simon Says Stamp. Thanks, Simon!

Hi friends! I am back with another project featuring the fabulous new goodies from the Simon Says Stamp And Everything Nice release (click HERE to see the entire release!), this time with a much more elegant aesthetic and a super unique color palette, but no less festive for all of that! I have lots of images saved on my Pinterest boards featuring beautiful color palettes for both holiday and non-holiday projects alike; when I was searching for a color palette to begin my project today, this lime green and cobalt blue really stood out to me as something super unique and eye catching! I knew that this modern holiday color scheme would look marvelous when juxtaposed with the new Nostalgic Christmas imagery. Let’s get started with the details!

*I have gathered links to all of the products used at the bottom of the post for your convenience, using affiliate links. Thank you for shopping with my links! I truly appreciate your support for my work!*

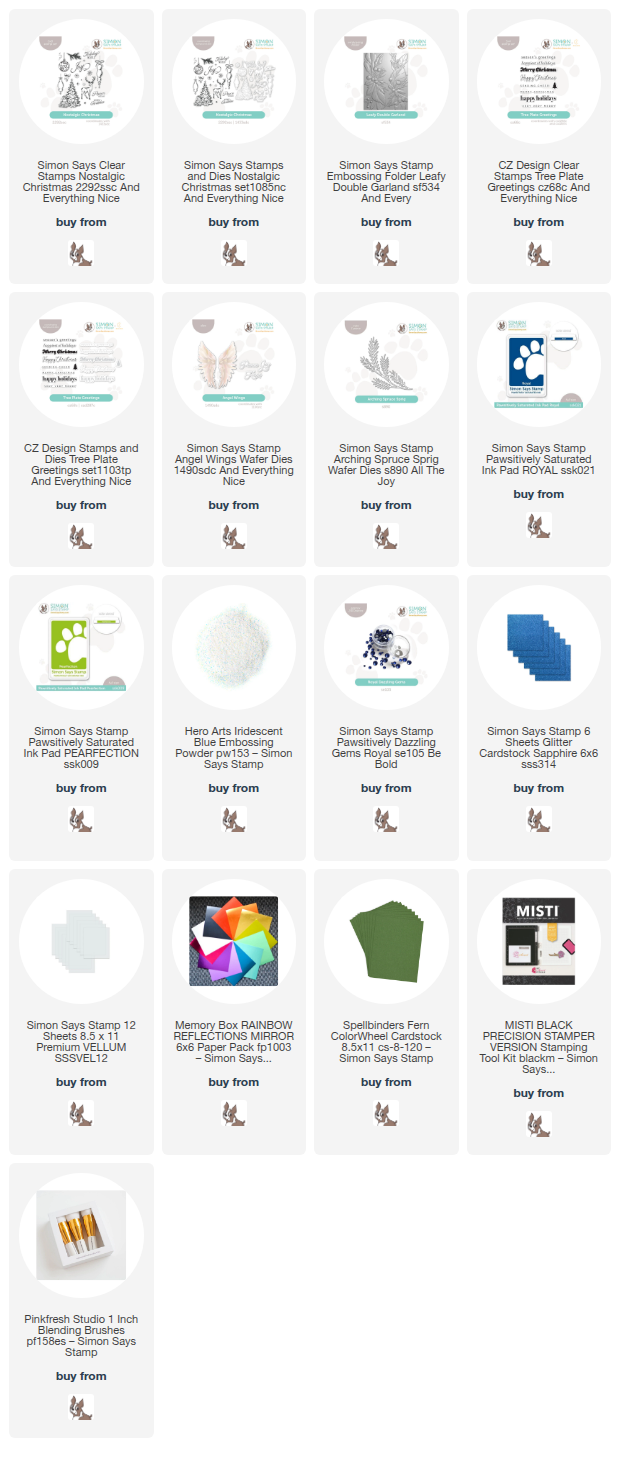
To begin, I stamped the ornament images from the new Nostalgic Christmas stamp set onto some white cardstock using Royal Pawsitively Saturated Ink, then again directly over the top with embossing ink, adding Hero Arts Iridescent Blue embossing powder over the top to create a magical, luminous glow on these super detailed holiday ornaments! I die cut the images with their coordinating dies, then used blending brushes to blend Royal and Pearfection Pawsitively Saturated Ink on the ornaments, hopefully conveying shining ornaments that catch the reflection of the green Christmas lights on the tree! The embossed ornaments resist the ink, while still being that lovely shade of blue, creating an almost monochromatic effect and keeping the color palette as accurate as possible.

After I had created the ornaments, I used the new Leafy Double Garland Embossing Folder (definitely a favorite from this release-can’t wait to do some coloring with this one!) to emboss a panel of lime green pearlescent cardstock that I found in my stash. These coated cardstocks work spectacularly with super detailed embossing folders, creating exquisite texture and allowing the intricate details to really shine. I trimmed a bit off of each side, making it slightly narrower than a typical A2 panel, and tucked two strips of Simon Says Stamp’s Sapphire Blue glitter cardstock on each of the long sides of the A2 card front, allowing that coordinating sparkling blue to peek out from behind the embossed panel. I then die cut the older Arching Spruce Sprigs die from some deeper green cardstock and arranged them in a bough on my card front, placing the ornaments in a cluster to be hanging from the branches. I love the unique shapes on these ornaments! So elegant and interesting!

For the greeting, I stamped one of the sentiments from the new Tree Plate Greetings set using Royal Pawsitively Saturated Ink, again following up with embossing ink and Hero Arts Iridescent Blue embossing powder. I die cut the finished greeting, then used the residual ink left on my blending brushes to add Royal and Pearfection ink to the sentiment die cut. To enhance the sentiment, I decided to also add one of the beautiful greeting dies from the new Angel Wings die set, which coordinates with the Angel Wings stencils but also includes three beautifully scripted sentiment dies, complete with shadow images for each! I die cut the detail layer of the Joy sentiment from the same Sapphire glitter cardstock, backing it with a vellum shadow layer. I tucked the sentiment pieces amongst the ornaments and foliage, then added a few Royal Pawsitively Dazzling Gems for one last touch of festive sparkle!

Well, that’s all for my projects today! Don’t forget to check out the Simon Says Stamp Blog to see tons of inspiration and prizes for Day 2 of the And Everything Nice Blog Hop! You can check out my post for Day 1 by clicking HERE. Thanks so much for stopping by today, and have a marvelous day!
Filed Under: simon says stamp, Uncategorized Tagged With: angel wings, arching spruce sprig, christmas card, die cutting, holiday card, ink blending, leafy double garland, nostalgic christmas, tree plate greetings

Simon Says Stamp STAMPtember Christmas Card Kit Surprise!

September 25, 2024

This post was sponsored by Simon Says Stamp. Thanks, Simon!

Hi friends! Boy do I have a fun surprise for you today…. Although Simon Says Stamp’s STAMPtember is winding down, we still have a few super fun surprises in store for you, including this jam-packed, Limited Edition Holiday Card Kit! The Simon kits are always a phenomenal value, with individual elements retailing for well over the purchase price, but this one… it blew me away. SO many fun and unique elements that you can use together, individually, or pair with products from your stash! Here’s a peek at the kit:

So many fabulous elements that you almost don’t know where to start first, right? This Holiday Card Kit includes the most darling large stamp set, interactive mitten die that you can use to create a focal point or a gift card holder, layering stencils, 3D embossing folder, gorgeous patterned papers, white pigment ink and blending brushes, and tons of individual consumable elements that coordinate so beautifully to create marvelous holiday goodies to make your gift giving extra special! The individual elements of the Holiday Card Kit are valued at well over $100, but you can purchase them in a bundle for only $69.99. I love that there are so many reusable elements included in the kit, not just consumables, making the value on this one truly incredible!

**note: this Holiday Card Kit is being sold as a preorder. It is anticipated to ship in mid-October.

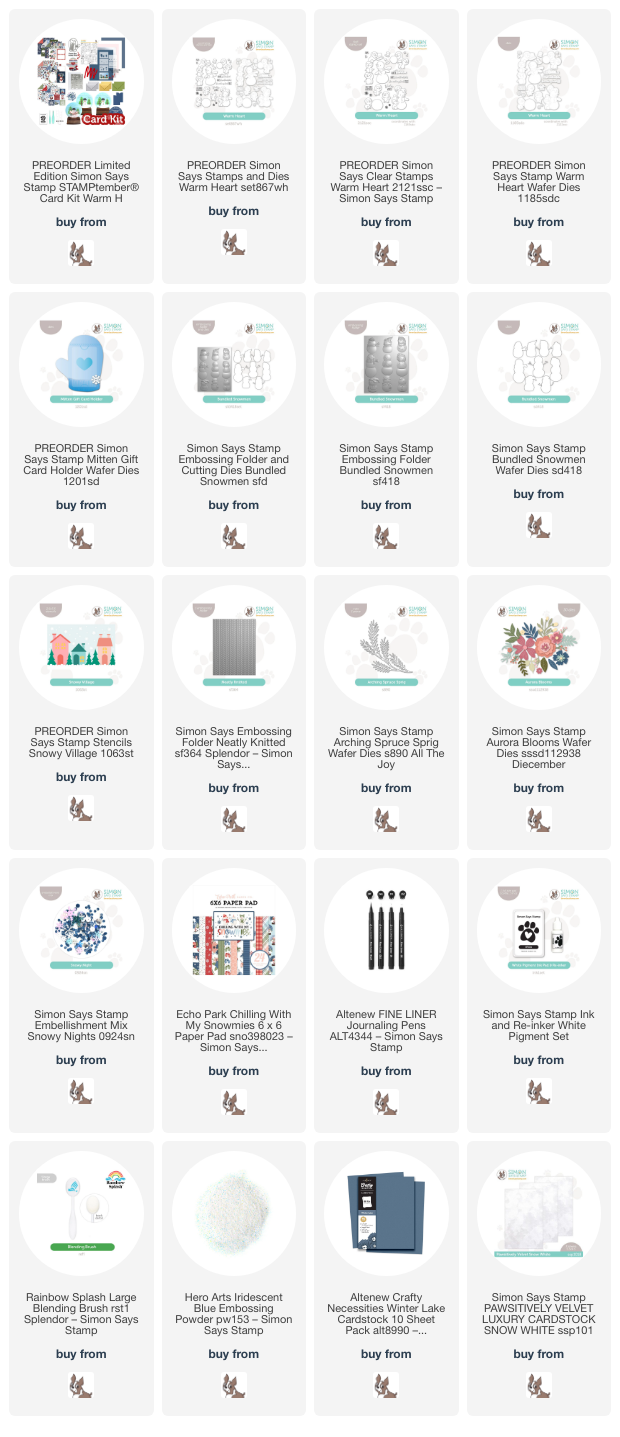
Whenever I am working with a Holiday Card Kit like this, I like to take my color palette from the patterned papers, which usually have an underlying color scheme throughout, so that I can create a cohesive set of projects. The beautiful 6×6 patterned papers included in the kit feature lush blues and greens, with touches of red, coral, and pink. I used those colors and the deep navy cardstock (also included in the kit!) as my starting point for today’s projects. Let’s get started with the details!

*I have linked all of the products used at the bottom of the post for your convenience using affiliate links. Thank you for shopping with my links! I truly appreciate your support for my work!*

I absolutely love the look of snowmen in colored pencil on dark cardstock, and as soon as I saw that navy cardstock in the kit and the adorable snowman stamps in the Warm Heart set, I knew that would be my starting point. I stamped the smiling snowman and pile of penguins onto some of the deep navy cardstock using the White Pigment ink, handily included with the kit. When using colored pencils on stamped images with colored cardstock, I like to stamp with white pigment ink. The white pigment ink sits atop the cardstock without sinking in, making it easy to blend the lines into the colored pencil work!

After I had stamped the images, I used my favorite colored pencils to color the images. The trick with snowmen is to keep the white pencil work as clean as possible, adding only the gentlest of shadows to indicate shape. I always keep extra white pencils around to make sure that I can easily blend and add highlights. For the scarf, I used only a red and white pencil, as I didn’t have a pink that matched perfectly, instead creating my own pink by using a light hand with the red pencil and blending it out with the white! The penguins had the tiniest bit of shadow to make sure that their little tummies looked nice and round, and I used a fine tipped black pen to add details to the eyes and mouth on the snowman, as well. The little details make a big difference with colored pencil work, I think.

After I had finished the colored pencil work, I used a blending brush dedicated to white pigment ink with the white inkpad included in the kit to blend around the edges of the card front, creating a lovely frosted effect. I stamped snowflakes from the Warm Heart set directly over the top of both the blended area and the colored images, also adding snowflakes in various sizes with my white gel pen and some sparkle with Clear Pawsitively Dazzling Gems. Finally, I stamped a greeting from Warm Heart on some leftover navy cardstock using the white pigment ink, adding Iridescent Blue embossing powder over the top to create a gorgeous, shimmery sentiment that stands out on the dark cardstock beautifully. I used the coordinating die to cut the sentiment and popped it up with some thin foam squares, making this card almost completely flat and easy to mail!

For my second project, I used the fantastic Mitten Gift Card Holder die included with the Holiday Card Kit, along with some fo the beautiful patterned paper that reminds me so much of Rifle Paper Company patterns. I first die cut the blue cardstock mitten, cutting the entirety of the mitten from some Altenew Winter Lake cardstock, then running the panel through my die cutting machine with the Neatly Knitted embossing folder and lightly blending Dusk ink around the edges. I die cut the cuff of the mitten from some of Simon Says Stamp’s Pawsitively Velvet Snow cardstock to add luxurious texture to the mitten. Taking my color cues from the pretty patterned paper, I die cut some florals using the Aurora Blooms die set, adhering all of the individual die cut components to the blue textured die cut.

To create the card, I created a card to hold a gift card by doing some fancy die cutting. I die cut a folded A2 card using the mitten die, making sure that the die overlapped the crease, creating a shaped card base. I also die cut an interior mitten using some of the beautiful floral patterned paper, adding in the gift card holder die cut from the Mitten Gift Card Holder set and adhering this to the inside of the card. It’s super easy to slip a gift card in the slots, and this entire card fits perfectly inside a typical A2 envelope!

Well, that’s all for my projects today. I wouldn’t wait long on this jam-packed kit, because it’s sure to sell out quickly! But, the good news is that if you miss out on the kit, you can still purchase the individual elements, which I’ve linked below. And don’t forget your free shipping code!

Thanks so much for stopping by today, and have a marvelous day!

Filed Under: simon says stamp Tagged With: arching spruce sprig, aurora blooms, Bundled Snowmen embossing folder, card kit, christmas card, colored pencil, embossing folder, gift card, gift card holder, holiday card, limited edition, Mitten Gift Card Holder, neatly knitted, Warm Heart

Primary Sidebar

  • Facebook
  • Instagram
  • Pinterest
  • YouTube

Favorite Shops

Secondary Sidebar

Subscribe

Enter your email address to subscribe to this blog and receive notifications of new posts by email.

Instagram
Something is wrong.
Instagram token error.
Follow
Load More

Archives

Tags

3D embossing folder alcohol markers better press birthday birthday card blog hop card kit christmas christmas card christmas tag colored pencil copic copic coloring Daniel Smith die cutting embossing folder embroidery felt giveaway holiday holiday card hot foil ink blending karin brushmarker pro layered stencil masculine my monthly hero new release no line coloring no line watercolor OLO marker olo markers original illustration pawsitively saturated rainbow shaker card slimline stamping stamptember stencil thank you thinking of you valentine's day video watercolor

Popular Posts

Simon Says Stamp Joy For You Blog Hop- Day 1!
Simon Says Stamp Joy For You Release-Now Available!
Frozen Fractals All Around with New Simon Says Stamp Joy For You Release!
Shaped Holiday Shaker Card with New Simon Says Stamp Jolly Season Card Kit of the Month!
Holiday Postage with New Simon Says Stamp!
Simon Says Stamp Glory to the Newborn King Holiday Kit-Part II!
Holiday Joy in Pink and Green with New Simon Says Stamp DieCember!
Pinkfresh Studio 5th Birthday!
Altenew Build A Flower: Fuchsia Blog Hop+Giveway!
July My Monthly Hero Blog Hop+Giveaway!

Disclosure

Some affiliate links are used in my posts. This means that, should you click on one of my links and purchase something from that company, I will receive a small portion of the sale at no extra cost to you. I use the money earned from these sales to help maintain my blog. I so appreciate you visiting and, if you do choose to use one of my affiliate links, thank you so much for your support!
Copyright © 2026 ·Brunch Pro Theme · Genesis Framework by StudioPress · WordPress · Log in
Loading Comments...