This post was sponsored by Simon Says Stamp. Thanks, Simon!
Hi friends! The new Simon Says Stamp Celebrate Release is full of some absolutely stunning new embossing folders, and I fell in love with the grace and elegance of the new Beaufort Floral Frame. It features a beautiful wreath of flowers and lots of lovely foliage, and the images are large enough that you can do tons and tons of techniques to add color and details. I have been super inspired by Suzy Plantamura’s work with colored pencils, (check out her gorgeous work HERE) and thought that I would try out using colored pencils to add details to this delicate embossed image. Let’s get started with the details!
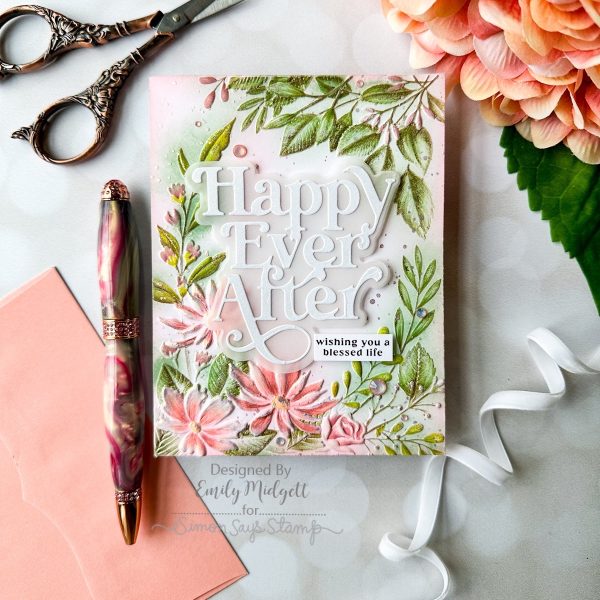
When I first embossed this image from the Beaufort Floral Frame embossing set onto some Hammermill white cardstock, I thought that it reminded me of a magical, ethereal garden, misty and somewhat blurred by the warm, romantic early evening air. I thought the best way to achieve this look was by combining some loose ink blending with colored pencil details. I used small blending brushes to blend Pawsitively Saturated inks Artichoke, Blush, and Cheeky on the floral images, concentrating the deepest colors on the raised areas but also spreading some out over the areas surrounding it, as well. Because coral and green would make a muddy mess if mixed together too intensely, I tried to keep the colors as light as possible where they touched. The result was a lovely garden background, which would have been pretty on it’s own, but I decided to step it up a notch!
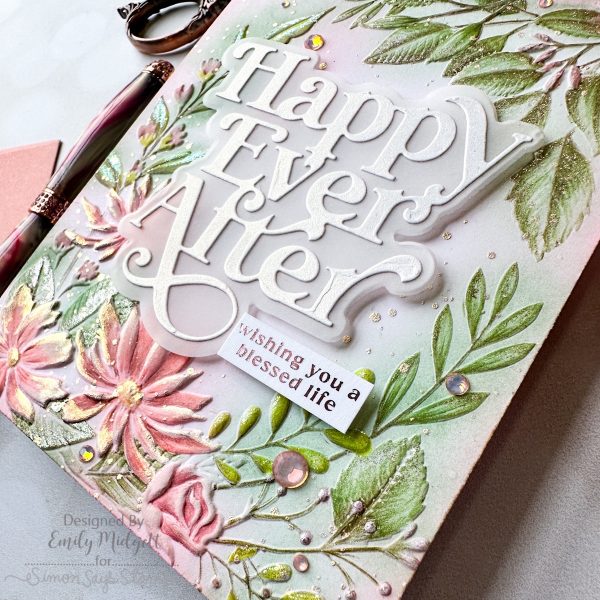
To add some extra details and make the flowers more lifelike, I used colored pencils to add details on each individual petal and leaf, working with very sharp points and keeping a light hand so that the blended color did some of the work for me. (My wrists are not huge fans of pencils, but my artistic soul loves the results!) After I had finished adding the pencil details, I used some super sparkly handmade watercolors from my stash to do some “gilding” on the edges of the petals and foliage, also splattering the entire panel with more of the sparkling watercolors. It reminds me of delicate dewdrops or something equally magical! You can get a bit of an idea of just how sparkly this card is in the photo above; that “gilding” technique adds so much to an embossed card!
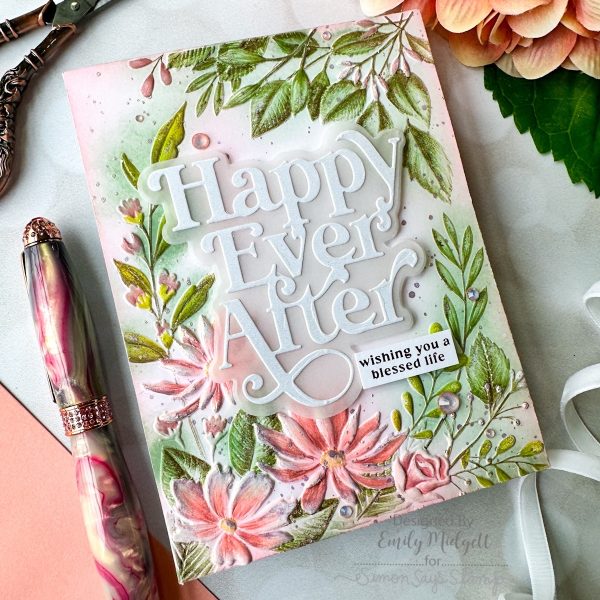
After spending so much time adding the detailed coloring and gilding to the embossed image, I decided to keep the rest of the card simple. I die cut the new Fancy Happy Ever After die from some pearlescent white cardstock and backed it with a vellum shadow to help it stand out a bit from the light background. I also used my Minc machine to add some Simon Says Stamp Rose Gold Deco Foil to the new Congratulations toner foil cards. You can easily leave these sentiment cards black and white, but I think the addition of the foil takes them just one step further towards luxurious elegance. A few gems finished it off with some extra sparkle!
Well, that’s all for my project today. I hope you’ll check out Day 2 of the Celebrate Blog Hop over on the Simon Says Stamp blog. So many prizes and such a wealth of inspiration to be had! You can check out my post from Day 1 of the Celebrate Blog Hop HERE. Thanks so much for stopping by today, and have a marvelous day!