• Skip to main content
  • Skip to primary sidebar
  • Skip to secondary sidebar

Sixth Street Sundries

Emily Midgett

  • Home
  • About Me
  • Contact
  • OLO Marker Color Swatch Chart
  • Shop

congratulations

More Rainbow Splash Inspiration from Simon Says Stamp STAMPtember!

September 27, 2024

This post was sponsored by Simon Says Stamp. Thanks, Simon!

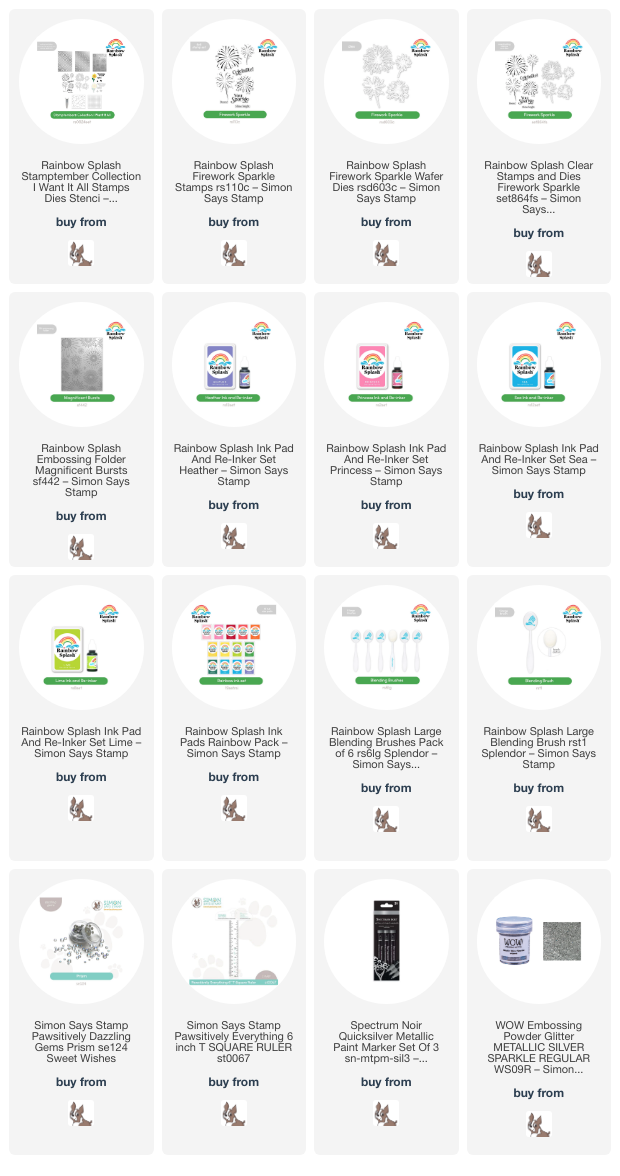
Hi friends! I have some more colorful inspiration for you today using the new additions to the Simon Says Stamp Rainbow Splash line! This line, specially curated for both seasoned and new stampers alike, features very accessible items, with simple stamp images, embossing folders, gorgeous inks in the most perfect rainbow, and some shimmering adhesive gems to accent your projects. For my projects today, I have used a few elements from the new STAMPtember collection and some of the older products to create this pair of festive cards. Let’s get started with the details!

*I have linked all of the products used at the bottom of the post for your convenience using affiliate links. Thank you for shopping with my links! I truly appreciate your support for my work!*

Both of my cards feature the fabulous pyrotechnic images in the new Firework Sparkle stamp and die set. These images are great for so many celebratory occasions or even just to create an encouragement card for a friend! I created two cards, one super simple and one a bit more complicated to show that even if you are an experienced stamper, these images are great additions to your stash.

For my relatively simple card, I began by stamping the large sparkler from the Firework Sparkle stamp set once using Rainbow Splash Princess ink, then the two smaller sparklers using Lime and Sea inks. I die cut the images using their coordinating dies, which are super easy to line up, then turned my attention to the card base.

To create that “glow” behind the sparklers, I used Rainbow Splash Blending Brushes to very lightly blend Princess, Lime, and Sea inks approximately where I would be placing the die cuts on the card front. I also used a T-square to add a silver acrylic paint pen frame around the edges of my card, but you could easily omit this step if you wanted to keep things super simple! I popped up the sparklers on the blended background with some foam adhesive squares, then added my sentiment pieces, heat embossed with silver sparkle embossing powder and fussy cut with sharp scissors. Finally, I added a few Prism Pawsitively Dazzling Gems on each of the silver frame’s corners.

For my second card, I chose to create something that looks a bit more involved but actually is quite simple, because the Magnificent Burst folder does a lot of the “work” for you! I started by embossing a panel of white cardstock with the Magnificent Burst embossing folder, then used blending brushes to blend Rainbow Splash Ink in shades of Princess, Heather, and Sea over the exploding fireworks, making sure I chose colors that would blend nicely together if they overlapped.

To enhance the fireworks background, I stamped some fireworks from the Firework Sparkle stamp set and die cut them with their coordinating dies. I heat embossed a greeting using more silver sparkle embossing powder, trimming the pieces out with my sharp scissors and trimmer. I popped up all of the different elements with foam adhesive, then added a few Prism Pawsitively Dazzling Gems for added sparkle!

Well, that’s all for my projects today! I hope you’re enjoying the last days of STAMPtember… it’s been such an incredible month filled with so much stampy goodness. Thanks so much for stopping by today, and have a marvelous day!
Filed Under: simon says stamp Tagged With: celebrate, congratulations, embossing folder, encouragement, firework sparkle, fireworks, magnificent bursts, rainbow splash

A Special Shaker for a Special Occasion with New Simon Says Stamp!

April 28, 2024

This post was sponsored by Simon Says Stamp. Thanks, Simon!

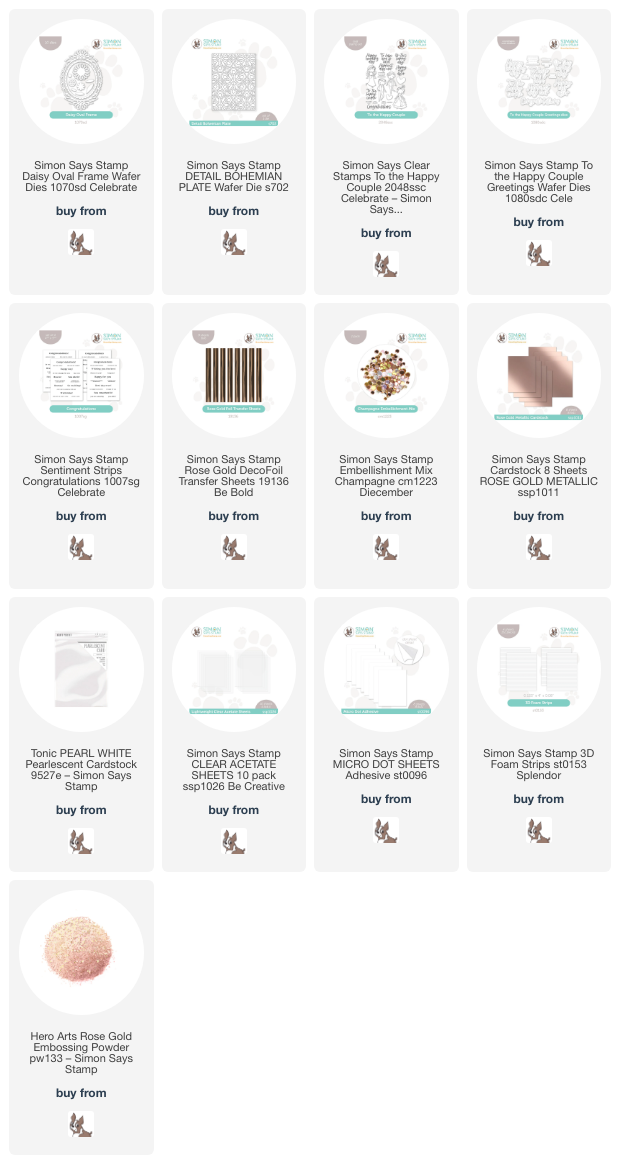
Hi friends! I am back with another special occasion card featuring new products from the Simon Says Stamp Celebrate release! I absolutely adored the new Daisy Oval Frame die; something about the tremendous impact of these intricate dies always makes them irresistible to me. I love that you not only get the intricate daisy frame itself, but also an additional delicate scalloped frame and extra individual detail dies to customize this fun frame in tons of different ways! I created a celebratory shaker card today using some of my favorite specialty papers, so let’s get started with the details!

I started my card by die cutting the Daisy Oval Frame die a few times, first from Rose Gold Metallic foil cardstock, then from the center of an A2 panel of pearlescent white cardstock. I reserved that pearlescent white die cut for another project and used the negative frame for this project. I backed that open window on the pearlescent white cardstock piece with some acetate, which will become my shaker window. Because the Daisy Oval Frame die cut is so very delicate, and because I was working with super shiny metallic mirror cardstock and shiny clear acetate, I wanted to keep everything as clean as possible, so I pulled out the Micro Dot Adhesive Sheets from Simon Says Stamp. To use these tiny dots of adhesive, simply remove the release paper from part of your adhesive sheet, place the die cut with the back side touching the adhesive dots, then replace your release paper over the top. I like to flip the entire thing over and then use my bone folder to burnish the back of the die cut to make sure that the adhesive is really stuck on my intricate die cut. Then I flip it back over, remove the release paper, and pull off my new “sticker” die cut. It is so much easier and cleaner to add adhesive to delicate, detailed die cuts than trying to manage globs of glue, especially when dealing with super shiny cardstock!

After I had added adhesive to the back of my daisy frame die cut, I nestled it into the open window of my shaker card front. I flipped the window over and added a long line of continuous foam adhesive around my window using Foam Strips from Simon Says Stamp. To add a bit of texture behind my open shaker window, I ran a panel of white cardstock through my die cut machine using the Detail Bohemian Plate die, which adds a lovely pierced pattern onto your cardstock without actually cutting any shapes. These pierced plates are some of my favorite ways to add texture to my cards! I filled my shaker with some Champagne Sequins, which have lovely shades of metallic sequins that coordinate beautifully with the Rose Gold Metallic foil cardstock.

For the greeting, I heat embossed the Congratulations sentiment from the To the Happy Couple stamps with rose gold embossing powder onto some more white cardstock, then used the coordinating sentiment dies to cut it out. (I love having the option to use dies to cut out sentiments; it makes the stamp set so much more versatile to have dies to cut each piece!) I used some Simon Says Stamp Rose Gold DecoFoil with my Minc machine to add some coordinating shiny rose gold foil to one of the greetings included in the Congratulations toner foil cards. These cards are great on their own, but pairing them with foil just kicks them up a notch and raises the elegance level of the card! I popped up the greeting pieces in the center of the shaker window, leaving plenty of space around the sentiment to see the festive sequins floating about.

Well, that’s all for my project today! This card would work beautifully for a wedding shower or wedding, or even just a congratulatory card for a special occasion! I love multi-purpose sentiments. Thanks so much for stopping by today, and have a marvelous day!

Filed Under: simon says stamp Tagged With: congratulations, congratulations sentiment strips, daisy oval frame, decofoil, detail bohemian plate, sentiment strips, shaker card, to the happy couple, wedding card

Happy Ever After with New Simon Says Stamp Celebrate!

April 20, 2024

This post was sponsored by Simon Says Stamp. Thanks, Simon!

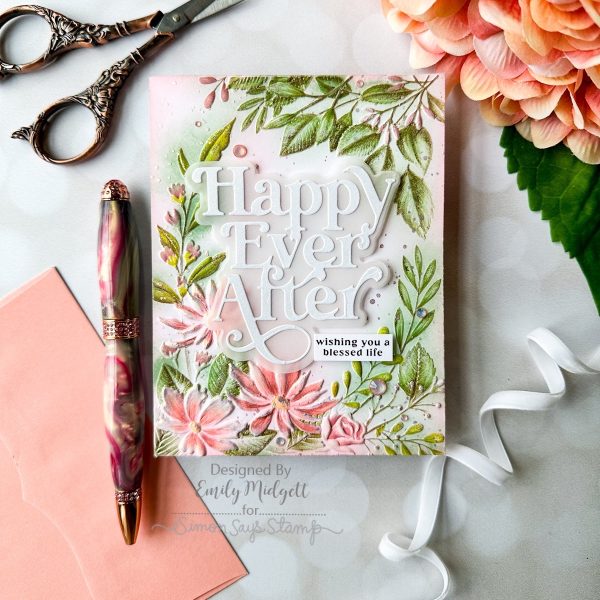
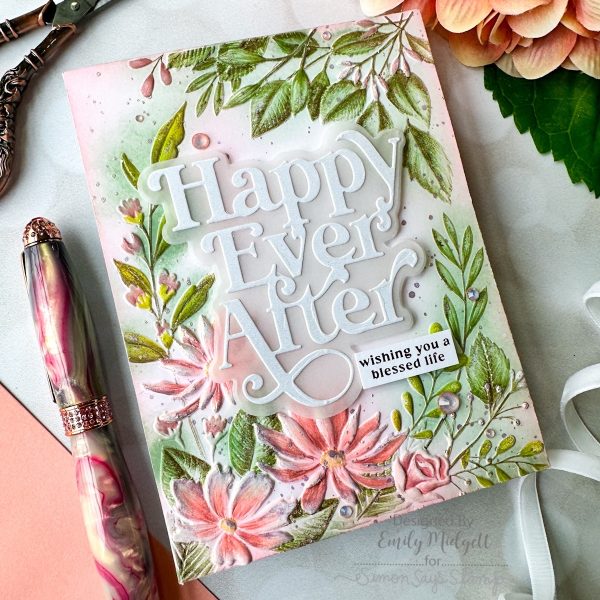
Hi friends! The new Simon Says Stamp Celebrate Release is full of some absolutely stunning new embossing folders, and I fell in love with the grace and elegance of the new Beaufort Floral Frame. It features a beautiful wreath of flowers and lots of lovely foliage, and the images are large enough that you can do tons and tons of techniques to add color and details. I have been super inspired by Suzy Plantamura’s work with colored pencils, (check out her gorgeous work HERE) and thought that I would try out using colored pencils to add details to this delicate embossed image. Let’s get started with the details!

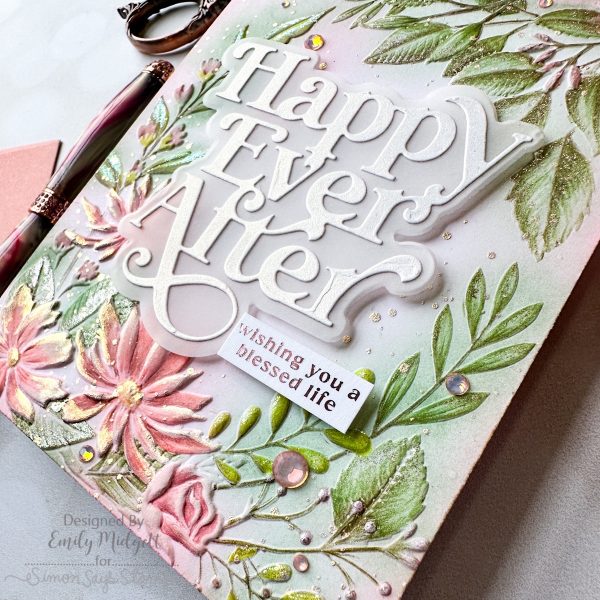
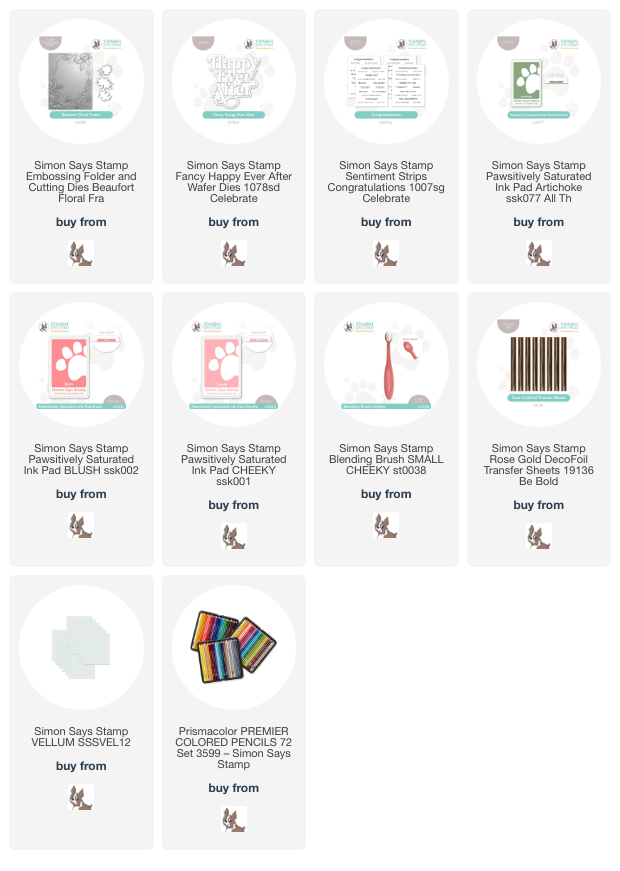
When I first embossed this image from the Beaufort Floral Frame embossing set onto some Hammermill white cardstock, I thought that it reminded me of a magical, ethereal garden, misty and somewhat blurred by the warm, romantic early evening air. I thought the best way to achieve this look was by combining some loose ink blending with colored pencil details. I used small blending brushes to blend Pawsitively Saturated inks Artichoke, Blush, and Cheeky on the floral images, concentrating the deepest colors on the raised areas but also spreading some out over the areas surrounding it, as well. Because coral and green would make a muddy mess if mixed together too intensely, I tried to keep the colors as light as possible where they touched. The result was a lovely garden background, which would have been pretty on it’s own, but I decided to step it up a notch!

To add some extra details and make the flowers more lifelike, I used colored pencils to add details on each individual petal and leaf, working with very sharp points and keeping a light hand so that the blended color did some of the work for me. (My wrists are not huge fans of pencils, but my artistic soul loves the results!) After I had finished adding the pencil details, I used some super sparkly handmade watercolors from my stash to do some “gilding” on the edges of the petals and foliage, also splattering the entire panel with more of the sparkling watercolors. It reminds me of delicate dewdrops or something equally magical! You can get a bit of an idea of just how sparkly this card is in the photo above; that “gilding” technique adds so much to an embossed card!

After spending so much time adding the detailed coloring and gilding to the embossed image, I decided to keep the rest of the card simple. I die cut the new Fancy Happy Ever After die from some pearlescent white cardstock and backed it with a vellum shadow to help it stand out a bit from the light background. I also used my Minc machine to add some Simon Says Stamp Rose Gold Deco Foil to the new Congratulations toner foil cards. You can easily leave these sentiment cards black and white, but I think the addition of the foil takes them just one step further towards luxurious elegance. A few gems finished it off with some extra sparkle!

Well, that’s all for my project today. I hope you’ll check out Day 2 of the Celebrate Blog Hop over on the Simon Says Stamp blog. So many prizes and such a wealth of inspiration to be had! You can check out my post from Day 1 of the Celebrate Blog Hop HERE. Thanks so much for stopping by today, and have a marvelous day!

Filed Under: simon says stamp Tagged With: 3D embossing folder, beaufort floral frames, congratulations, happy ever after, pawsitively saturated, toner foil card, wedding card

Congrats-You’re A Star!

July 7, 2023

This post was sponsored by Simon Says Stamp. Thanks, Simon!

Hi there! We are winding down on graduation season, but it never hurts to have a congratulatory card in your stash, right? I have paired a bunch of products from Simon Says Stamp to create this celebratory card that would be perfect for graduation or any achievement worth noting, really! And the cool colors work perfectly for any gender, too.

I began by blending Pawsitively Saturated Royal and Cadette inks on a white A2 card front. I then ran the blended panel through my die cut machine using the Dimensional Stars embossing folder from Simon Says Stamp. To emphasize the stars and make the background super festive and celebratory, I painted the dimensional stars using handmade metallic silver glitter watercolors, also splattering the background to create tons of interest to the card front!

I wanted to add some more sparkle and shine to the card front, so I die cut the Basic Box Card Stars from some silver Simon Says Stamp Luxe Glitter paper, reserving the box card front itself for later and keeping the intact star cutouts! (Love when I can get double duty out of one die cut, especially with one of those papers that I normally would be hoarding forever!) I also die cut a vellum star using a Nested Star die.

For the greeting, I heat embossed a sentiment from Yay You onto some dark blue cardstock using silver embossing powder. How perfectly does that little star on the “congrats” sentiment coordinate with the stars in the background!? I die cut the sentiment with the coordinating die and trimmed the smaller sentiment to a thin strip. I adhered the sentiment pieces to the vellum star, then flipped the entire thing over and added foam adhesive behind the solid die cuts to hide the adhesive and keep the vellum nice and clean. I added the glittery silver star die cuts on the card front with some more foam tape, creating a variety of silver textures and dimension on the card!

Well, that’s all for my project today! Thanks so much for stopping by, and have a marvelous day!


Filed Under: simon says stamp Tagged With: basic box card stars, congrats, congratulations, dimensional stars, embossing folder, graduation, ink blending, man card monday, masculine, nested stars, stars

Spellbinders Card Kit of the Month-January 2023!

January 11, 2023

Hi there! Beginning in 2023, I have the pleasure of helping Spellbinders share their new Easy Card Kit of the Month each month. This new card kit features all of the different elements you need to create literally dozens of cards. I was shocked at how much was included in this kit. If you love ephemera, patterned paper, and embellishments, you’re going to want to subscribe to this kit. It’s absolutely cram-jam with enough supplies to create so many cards so easily. (The title of the card kit is not a misnomer!) It even comes with adhesive! All you need to create darling cards super fast is a trimmer and maybe a few odds and ends. These first two cards were created almost entirely with contents from the Easy Card Kit of the Month. Let’s get started with the details!

The main theme for the January 2023 Easy Card Kit of the Month is plants and home. But, there are lots of other little bits and bobs included in the chipboard and ephemera packs. As I have, ahem, a black thumb and cannot keep a cactus alive (not joking), I wanted to focus on some of the other elements included in the kit. The patterned paper included in the kit features a lovely color scheme, with lots of muted green, blush pink, and black, with flashes of gold foil.

This first project features a chipboard frame, which I used as a backdrop to my coffee cup focal point. I used one of the blush cardstock card fronts included in the kit, then added some patterned paper hearts, a chipboard frame, and a few embellishments. The kit comes with two sheets of puffy stickers, a bag of chipboard embellishments, a bag that is absolutely chock full of printed ephemera (with two of each design, so there are *so* many ways to use them!), and a sheet of beautiful gold foil-embellished gems in coordinating colors.

I used the included tape roll and foam adhesive to adhere everything to my card front, allowing my heart embellishments to float up from the coffee cups like little bubbles. For the greeting, I used one of the puffy sticker embellishments. I thought this card would be perfect for your valentine! How perfect would a sentiment that said “I love you more than coffee” be on this card? You could easily combine stamps that you already have in your stash to create even more possibilities!

My second card puts me in mind of an engagement or even a new home or job. I love the colors in the patterned papers that were included in the Easy Card Kit of the Month, and I used that as my jumping off point for this card. I trimmed one of the sheets of paper down to create an accent strip for my blush cardstock card front. To accent the little gold foil dots on the patterned paper strip, I added a strip of matte gold foil on each edge of the patterned paper panel to help bring out the shine of that gold foil! I popped it up on the blush card front with some foam tape.

As I was investigating the printed ephemera pack, I fell in love with this sweet bicycle die cut… I had to use it as the focal point for my card! I popped it up on the card front with some more foam tape (I love that they even include foam adhesive in the Easy Card Kit of the Month), then accented it with some floral ephemera from the kit, topping it off with a little butterfly. I added a couple of puffy stickers for the greeting, adding that “congratulations” to make this card work for tons of different celebratory occasions! I added a few gems included in the kit to add a bit of sparkle.

Spellbinders also has a coordinating die set called Happy Plant that coordinates nicely with the contents of the Easy Card Kit of the Month. I began by cutting the different components of the Happy Plant die set, using the blush pink included in the kit for the base, as well as some green cardstock from my stash and the green cardstock included in the kit for the plants. The green was just a little too bright and intense to suit the color scheme that I had in my mind’s eye, so I used an alcohol marker to tone the color down and to make two different shades of green. It’s easy to customize the kit with just a few supplies from your standard stash! I also die cut the plant stand from some more matte gold cardstock that I used on the previous card.

The patterned papers in the Kit of the Month feature a beautiful black grid paper accented with gold foil. I trimmed down the grid to fit a creamy A2 card front (also included in the kit), matting it with a slightly larger panel of black cardstock from my stash.

I arranged all of the plant die cut pieces and adhered them to the gold and black grid paper with some more foam adhesive. For the greeting, I used one of the puffy stickers included in the Kit of the Month. I matted it on a slightly larger strip of blush cardstock to coordinate with the plant pot, then popped it up with some foam adhesive. Perfect for a new homeowner or to accompany a housewarming gift!

Well, that’s all for my projects today. If you’ve not looked at Spellbinders’s kits before, I highly encourage you to check them out. They have a plethora of beautiful, super high-value kits available, including 3D Embossing Folders, Stitching, Dies, and Stamp+Die combos, all of which you can check out HERE. The designs at Spellbinders have been out-of-this-world awesome lately, and these kits continue that trend! Thanks so much for stopping by today, and have a marvelous day!
Filed Under: spellbinders Tagged With: birthday, congratulations, die cutting, easy card kit of the month, ephemera, housewarming, patterned paper

Primary Sidebar

  • Facebook
  • Instagram
  • Pinterest
  • YouTube

Favorite Shops

Secondary Sidebar

Subscribe

Enter your email address to subscribe to this blog and receive notifications of new posts by email.

Instagram
Something is wrong.
Instagram token error.
Follow
Load More

Archives

Tags

3D embossing folder alcohol markers better press birthday birthday card blog hop card kit christmas christmas card christmas tag colored pencil copic copic coloring Daniel Smith die cutting embossing folder embroidery felt giveaway holiday holiday card hot foil ink blending karin brushmarker pro layered stencil masculine my monthly hero new release no line coloring no line watercolor OLO marker olo markers original illustration pawsitively saturated rainbow shaker card slimline stamping stamptember stencil thank you thinking of you valentine's day video watercolor

Popular Posts

Simon Says Stamp Joy For You Blog Hop- Day 1!
Simon Says Stamp Joy For You Release-Now Available!
Frozen Fractals All Around with New Simon Says Stamp Joy For You Release!
Holiday Postage with New Simon Says Stamp!
Shaped Holiday Shaker Card with New Simon Says Stamp Jolly Season Card Kit of the Month!
Hero Arts Partners Blog Hop: Lawn Fawn!
Holiday Joy in Pink and Green with New Simon Says Stamp DieCember!
July My Monthly Hero Blog Hop+Giveaway!
Simon Says Stamp Glory to the Newborn King Holiday Kit-Part II!
Simon Says Stamp STAMPtember Tim Holtz Collaboration: Festive Holidays!

Disclosure

Some affiliate links are used in my posts. This means that, should you click on one of my links and purchase something from that company, I will receive a small portion of the sale at no extra cost to you. I use the money earned from these sales to help maintain my blog. I so appreciate you visiting and, if you do choose to use one of my affiliate links, thank you so much for your support!
Copyright © 2026 ·Brunch Pro Theme · Genesis Framework by StudioPress · WordPress · Log in
Loading Comments...