This post was sponsored by Simon Says Stamp. Thanks, Simon! *I have gathered links to all of the products used at the bottom of the post for your convenience, using affiliate links at no extra cost to you. Thank you for shopping with my links! I truly appreciate your support for my work!*
Hi friends! I have a card with a little shimmer, a lot of color, and even more texture to share with you today featuring some fun new products from the Simon Says Stamp Sending Cheer Release! (Click HERE to see everything!) I love adding shimmering details to the gorgeous texture of Simon Says Stamp’s 3D Embossing Folders, and today’s technique is super easy and makes such a big impact. Let’s get started with the details on my project!
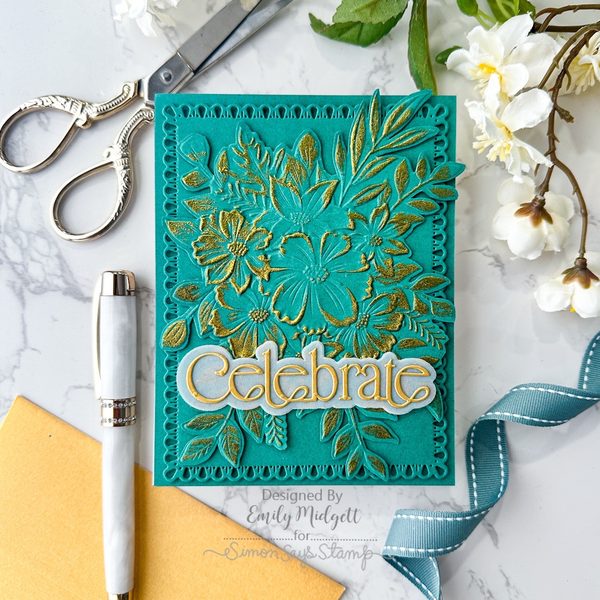
To begin, I used the new Deluxe Bouquet embossing folder with Simon Says Stamp’s new Blue Spruce cardstock. These new colored cardstocks released in the Sending Cheer Release are so beautiful and fill in some holes in my cardstock rainbow. After embossing this gorgeous blue-green cardstock, I swiped my embossing ink pad directly on the raised areas, then sprinkled shimmering gold embossing powder and heated it up. The effect is so lovely; it enhances the raised, textured details and adds shimmer!
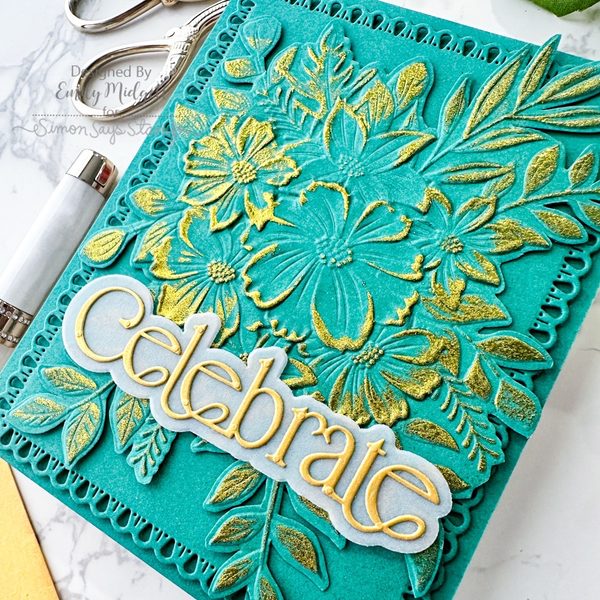
Once the gilding was finished, I used sharp scissors to cut out the entire floral bouquet. I also used some more Blue Spruce cardstock to die cut one of the Petal Point Frames, a favorite in my craft room. I layered the frame over another A2 panel of Blue Spruce cardstock, adhering it with some thin foam adhesive for a touch of dimension. I also popped up the trimmed and gilded bouquet with another layer of thin foam adhesive. When working with monochromatic color palettes like this, I like to be generous with layers of foam adhesive to keep each layer distinct and visually interesting.
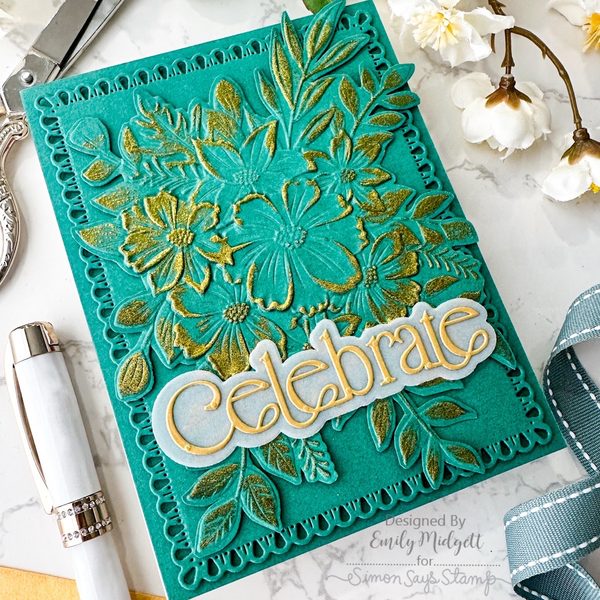
For the greeting, I die cut the detail layer of the Timeless Celebrate from gold pearl cardstock, then used vellum to die cut the shadow layer. I adhered the two layers together with liquid adhesive, then added very thin strips of thin foam adhesive behind the solid lines of the die cut to pop it up on the card front. I thought about adding some gold gems, but thought it was blingy enough with the shimmering embossing powder and pearlescent sentiment!
Well, that’s all for my project today! This project is somewhat simple, but I think the layered monochromatic cardstock and shimmering embossing powder is so elegant. It allows the exquisitely detailed texture to shine, literally! Thanks so much for stopping by today, and have a marvelous day!