• Skip to main content
  • Skip to primary sidebar
  • Skip to secondary sidebar

Sixth Street Sundries

Emily Midgett

  • Home
  • About Me
  • Contact
  • OLO Marker Color Swatch Chart
  • Shop

party balloons

Happy Birthday Little Fox with New Simon Says Stamp STAMPtember!

September 3, 2026

This post was sponsored by Simon Says Stamp. Thanks, Simon! *I have gathered links to all of the products used at the bottom of the post for your convenience, using affiliate links at no extra cost to you. Thank you for shopping with my links! I truly appreciate your support for my work!*

Hello friends! I have another project to share with you today featuring some adorable and festive new goodies from the Simon Says Stamp STAMPtember release (click HERE to see the whole release). I find that I never can have too many birthday cards, and I especially need child-friendly birthday cards with four kiddos and all of the birthday parties that come with so many kids! I absolutely love the “fable” line of critters that Simon Says Stamp has been releasing the last few months; they are drawn in a sweet storybook style that is not too “cutesy” but still has a sweet and whimsical aesthetic. I combined several different dies to create this cutie pie birthday card. Let’s get started with the details on my project!

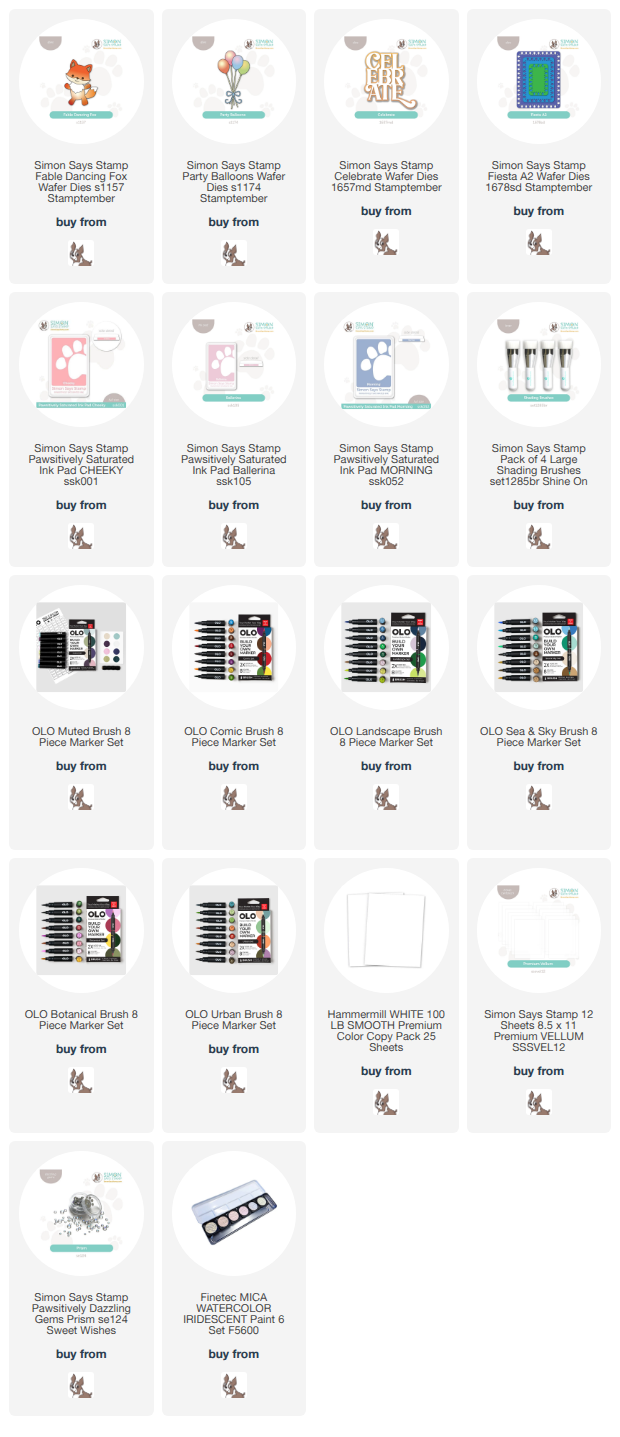
To begin, I die cut the pieces for the Fable Dancing Fox and the Party Balloons dies from plain white cardstock. I used OLO markers to add lots of color to the individual pieces, selecting a somewhat neutral color palette, tempering the pink and peach balloons with green and blue. In hindsight, I wish I would have colored the fox in a bit more of a pastel palette, but c’est la vie. I assembled the die cut pieces with liquid adhesive and set them aside.

For the background of my little birthday scene, I die cut the largest of the Fiesta A2 nesting dies from white cardstock. I selected Pawsitively Saturated Inks in shades of Cheeky, Ballerina, and Morning to coordinate with the balloons, avoiding the green in the balloon bouquet’s color palette to prevent the pink and peach mixing with it and creating a muddy mess. Once I had finished softly blending a colorful halo onto the background of my die cut, I splattered some shimmery iridescent watercolors on the blended area and adhered the die cut to my A2 card base with thin foam adhesive.

I die cut the new Celebrate die to add a chunky, bold sentiment to my cutie fox’s birthday scene. I cut the detail layer from iridescent white mirror cardstock and the shadow from vellum. I adhered the detail layer to the vellum with thin foam adhesive strips, then added more thin foam adhesive strips behind the solid die cuts on the vellum to create a double layer of foam tape that helps that sentiment pop from the background. I placed it over the blended and splattered background, then adhered the fox and balloons with more foam adhesive. Tons of dimension on this project!! Finally, I added some Prism Pawsitively Dazzling Gems for even more gorgeous shimmer on this festive birthday card.

Well, that’s all for my project today! The Simon Says Stamp STAMPtember company collaboration celebrations are starting tomorrow, and you won’t want to miss these limited edition sets. Be sure to bookmark my blog or become a subscriber so that you don’t miss anything fun! Thanks so much for stopping by today, and happy STAMPtember!!
Filed Under: simon says stamp Tagged With: alcohol markers, birthday card, celebrate, die cutting, fable dancing fox, ink blending, no line coloring, olo markers, party balloons, stamptember

STAMPtember Collaboration 9/4/25: Trinity Stamps!

September 4, 2025

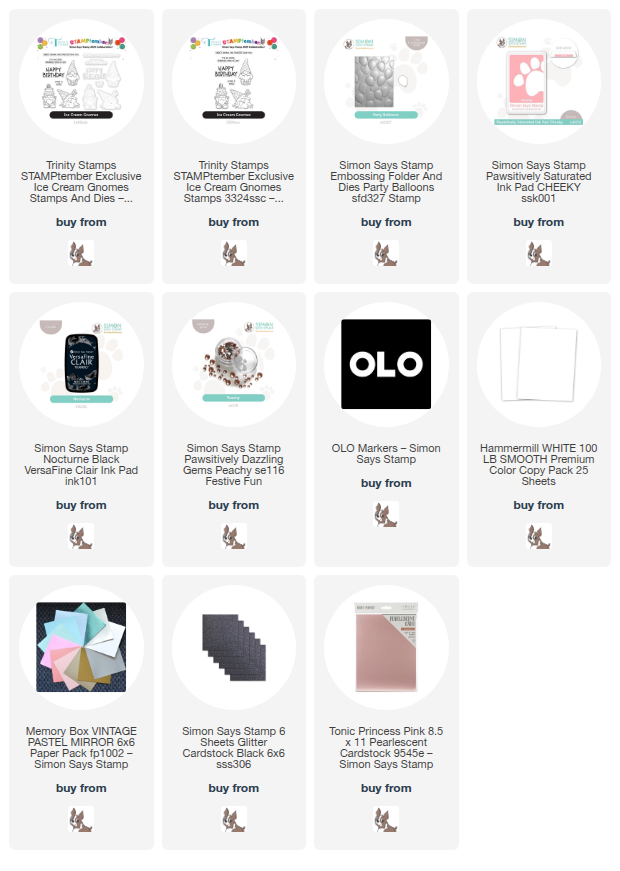
Hi friends! Happy STAMPtember! If you are new to STAMPtember from Simon Says Stamp, throughout the month of September, Simon Says Stamp will have exclusive collaborations with some of our favorite stamping companies, releasing a limited edition stamp set designed in collaboration with a different company nearly every day! (Click HERE to see the Collaboration Sets page, and be sure to bookmark it!) We are kicking the super special, limited edition Collaboration sets off with a favorite company of mine: Trinity Stamps! Taniesa, the owner, is just about one of the sweetest people you could meet, and her stamp sets combine whimsy and classic imagery to create darling products for your craft room. For today’s project, I paired one of the sweet gnomes from the exclusive, limited edition Ice Cream Gnomes STAMPtember set with some goodies from Simon Says Stamp. Let’s get started on the details for my project!

I began by stamping the gnome from Ice Cream Gnomes with his cute little birthday cake hat and two different happy birthday sentiments onto some white cardstock using Simon Says Stamp Nocturne black pigment ink, then added clear embossing powder over the top to make the lines extra crisp and bold. I then used OLO Markers to add some simple coloring to the gnome, keeping the colors to a red, brown, and peach color palette. I die cut the finished image and sentiments with their coordinating dies.

For the background, I began by using a blending brush to lightly blend Pawsitively Saturated Cheeky Ink in the center of a white card base, concentrating the color in the center and slackening the pressure towards the edges to create a smooth fade. I ran this blended panel through my die cutting machine using the Party Balloons Embossing Folder from Simon Says Stamp and trimmed 1″ off of the bottom. I splattered the blended area with some metallic watercolors to add some fun, sparkling texture. Once the watercolor splatters had dried, I added a very thin strip of black glitter cardstock peeking out from the bottom of the embossed panel, then added that to a pearlescent pink A2 card front.

After I had completed the card front, I added the colored and die cut gnome and sentiments, popping a few blush balloons die cut using the coordinating die from the Party Balloons Embossing Folder and embossed using the embossing folder for extra dimension and shape. I added some strings with a black pigment pen, then finished everything off with some Peachy Pawsitively Dazzling Gems for added sparkle!

Well, that’s all for this project. If you love the STAMPtember Collaboration Sets, don’t wait to purchase them, because these limited edition sets will NOT be restocked. Once they’re gone, they’re gone! (Click HERE to see the Collaboration Sets page, and be sure to bookmark it!) Each day holds new surprises, so be sure to check out the Simon Says Stamp social media at noon ET every day throughout STAMPtember so that you don’t miss out. Thanks so much for stopping by today, and happy STAMPtember!!!

Filed Under: simon says stamp, Trinity Stamps Tagged With: 3D embossing folder, birthday card, embossing folder, olo markers, party balloons, stamptember, STAMPtember collaboration

Man Card Monday Returns!

February 3, 2025

This post was sponsored by Simon Says Stamp. Thanks, Simon!

Hi friends! I am back today with a fresh installment for Man Card Monday! In case you are new here, I tend to gravitate towards all things feminine: flowers, pink, lace, sparkle, etc. I struggle to create cards that would work for more masculine recipients, so I decided to challenge myself to create cards that are decidedly masculine or at the very least gender neutral. I took a hiatus during the holidays, because I wanted to soak up as much festive goodness as possible in my craft room, but now I am back to my regularly scheduled series projects, starting with February’s edition of Man Card Monday! To ease back into this series, I decided to pull out some birthday products that had been sitting alone for awhile while I focused my energies on all things Christmas, pairing them with a masculine color palette of blues, gray, and black for a super masculine card. Let’s get started with the details!

*I have gathered links to all of the products used at the bottom of the post for your convenience, using affiliate links. Thank you for shopping with my links! I truly appreciate your support for my work!*

To start, I ran a panel of white cardstock through my die cutting machine using the Party Balloons embossing folder + die set, then flipped the panel over so that the images were debossed down into the cardstock, rather than creating the raised images that have been embossed into the cardstock. I used blending brushes to blend Charcoal, Morning, and Dusk Pawsitively Saturated Ink on the entirety of the card, creating a gray-to-blue ombré. After I had finished blending the entire background, I put the Simon Says Stamp Nocturne Ink directly onto the raised areas of the cardstock, emphasizing the debossed pattern on the cardstock and multiple colors for the balloons on a black background. I splattered the entire background with silver glitter watercolors for additional texture and shimmer.

To further enhance the festive birthday theme, I used the coordinating die included with the Party Balloons embossing folder + die set to die cut three balloons in coordinating cardstock colors of silver glitter, black, and light blue, running them through the die cutting machine in their appropriate spots on the embossing folder to add extra shape and dimension. I added some thin white thread to the back of each and pulling them together to create a bunch of balloons. I also die cut the components from Party Hat Die from the same blue, black, and silver glitter cardstock, adding black dots to the blue stripes with my black pigment pen.

Before I began assembling, I heat embossed a couple of birthday greetings from Big Old Birthday onto some black cardstock using silver embossing powder, then die cut the larger sentiment with the coordinating die. I added some foam adhesive squares to the back of all of the die cuts and arranged them on the festive balloon backdrop, finally adding a few Dusk Pawsitively Dazzling Gems for added sparkle!

Well, that’s all for my project today! After several months of craziness with lots of challenging things happening, I am happy to be getting back into a little bit better routine. I hope your new year is off to a great start! Thanks so much for stopping by today, and have a marvelous day!

Filed Under: simon says stamp Tagged With: 3D embossing, big old birthday, birthday, die cutting, embossing folder, ink blending, ink swiping, man card monday, party balloons, party hat wafer dies

Green and Blue Birthday with New Simon Says Stamp!

April 29, 2024

This post was sponsored by Simon Says Stamp. Thanks, Simon!

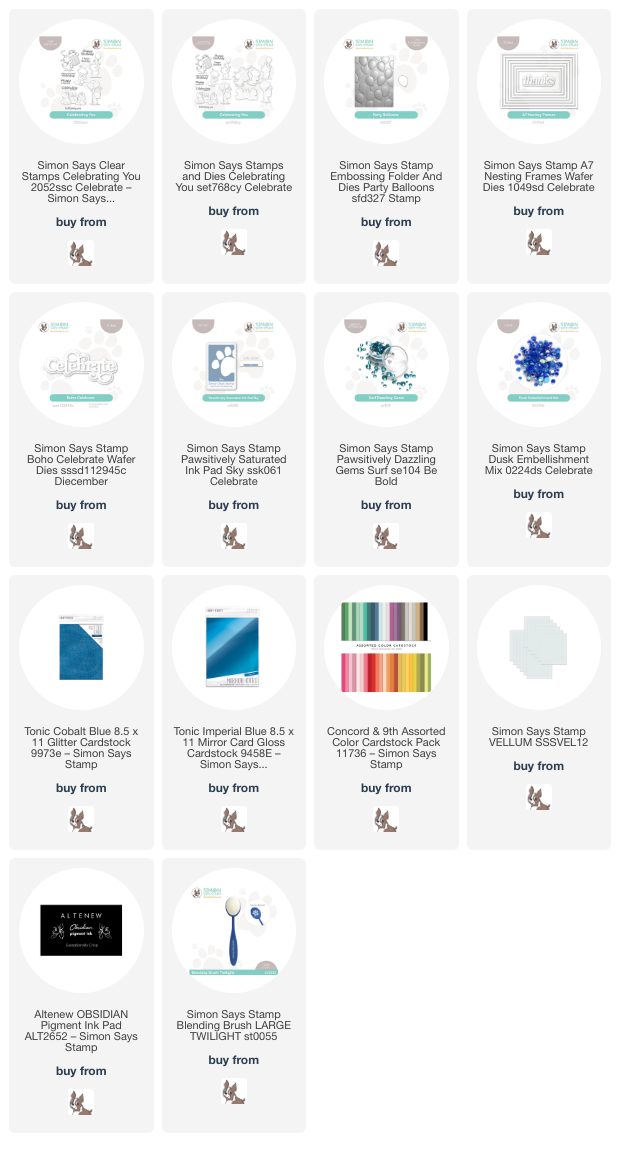
Hi friends! Do you ever feel inspired by a color combination and feel like it’s too good to only use it on one card? I have really been getting into “analogous” color palettes lately, meaning colors that are next to each other on the color wheel. Today’s color palette is one that I’ve used and loved before, featuring a crisp bright blue, pale mint, and soft jungle green to create a gender neutral-ish color palette, which when paired with the adorable new Celebrating You stamps and dies from the Simon Says Stamp Celebrate release, work smashingly to create some sweet birthday cards perfect for any person. Let’s get started with the details on my projects!

Both of my images from the Celebrating You set were stamped with Obsidian black pigment ink and embossed using clear embossing powder, which I think really enhances the crispness of the lines and brings out the sweet little details on the illustrations.

For my first project, I stamped the adorable little bear holding balloons from the Celebrating You set, selecting Copic markers that matched my chosen color palette perfectly, along with some pale gray markers and the colorless blender pen. This colorless blender is great for use to create “white” or super pale images, because you can add shading and shape to objects without much color using your light gray or violet marker, then smooth out the edges of the coloring with the colorless marker. It’s super subtle, but the little polar bear would be very flat indeed without any shadow or shape to him! After I had colored him and the balloon bouquet, I used the coordinating die to cut him out.

For my background, I wanted to create a flat shaker card with some fun embossed balloons. I started by trimming down a panel of Juniper cardstock to 3.75″ x 5″, then running that panel through my die cutting machine with the Party Balloons Embossing Folder. Next, I lightly blended the new Sky Pawsitively Saturated Ink around the edges of the embossed panel to add a little extra interest and to tie in the color scheme a bit more to the background. With some old stamp packaging, I created a cellophane pocket around my embossed balloon background, then filled it with the new Dusk embellishment mix, the iridescence of which beautifully highlights the blues and greens in the rest of the card’s color palette. After filling up my shaker pocket, I adhered the panel to the center of an A2 piece of Cobalt glitter cardstock, creating a sparkling frame around the edge of the shaker. I added the celebratory bear and coordinating sentiment directly on top of the shaker pouch, creating a super fun birthday card!

My second card is a bit more elegant, with lots of crisp white, textures, and pops of color. I am a double twin mom, so I am always on the lookout for ways that I can create “twin-themed” projects with stamps that are not necessarily meant to be used for twins. I thought that the pair of birthday unicorns from the Celebrating You set would make an absolutely perfect birthday card for a set of twins, maybe even for a first birthday! After coloring and die cutting the image in the sky blue, mint, and juniper color palette, I also ran a panel of white cardstock through my die cutting machine using the Party Balloons Embossing Folder. I die cut the A7 Nesting Frames dies from some shiny blue foil cardstock and selected the largest frame that would fit on my piece of embossed A2 cardstock, trimming the embossed panel down to fit inside the shiny frame.

To accent the textured balloon background and make the card a bit more overtly birthday themed, I die cut some floating balloons with the included single balloon die from the Party Balloons Embossing Folder. These balloons nestle in the embossing folder so that you can create more dimension on them, but I left them simply as die cuts. I added some super delicate silver thread to the back of each balloon, as well. I think the addition of this kind of little extra (somewhat fiddly) detail elevates the card a bit more!

For the greeting, I die cut the Boho Celebrate die from some more shiny blue foil cardstock and backed it with the vellum die cut shadow. I adhered the textured frame to my A7 card front, orienting it to the bottom left and building my scene on it. I popped up the unicorn pair, ballons, and the greeting with foam adhesive, tucking the threads from the balloons behind the unicorns. Finally, I added some coordinating Surf Pawsitively Dazzling Gems to the card front to add a bit more sparkle and texture!

Well, that’s all for my projects today. I am so in love with this color palette and just analogous color palettes in general. I think I will have to keep working with them! Thanks so much for stopping by today, and have a marvelous day!

Filed Under: simon says stamp Tagged With: A7 nesting frames, birthday card, boho celebrate, celebrating you, party balloons, shaker card

STAMPtember Blog Party!

September 2, 2023

This post is sponsored by Simon Says Stamp. Thanks, Simon!

Hi friends! STAMPtember is here, and we’re celebrating in a big way with an amazing blog party, filled with inspiration, free gifts with purchase, and a scavenger hunt!! Each stop on the blog party has it’s own unique free gift with purchase, so be sure to check out each of the stops (listed HERE on the Simon Says Stamp blog) to see all of the fabulous gifts with purchase that are up for grabs! My followers and blog readers have the option to receive the fantastic Detail Round Blending Brush Set as their free gift with purchase! Simply follow the instructions in the graphic above to receive your free gift with any purchase of $100 or more.

Today, we’re celebrating the start of STAMPtember with a blog party, and what’s a party without balloons?? I used the marvelous new Party Balloons embossing folder and coordinating die along with a bunch of other goodies from Simon Says Stamp to create this pair of soft, shimmering birthday cards. Let’s get started with the details!

Both of my projects feature some soft ink blending using the gorgeous Thistle, Twirling Tutu, and Maliblue inks. I kept the color palette pale, with lovely pastel colors, changing things up from my normal bold and vibrant color schemes! Both of my cards feature the new Party Balloons embossing folder, which comes with an individual balloon die so that you can create dimensional balloon bouquets!

My first card features just the Party Balloons embossing folder to create a subtle-but-festive background for my large scale sentiment components! I began by blending Thistle, Twirling Tutu, and Maliblue inks on a panel of A2 white cardstock using Large Blending Brushes. I ran the blended panel through my die cutting machine using the Party Balloons embossing folder, then spritzed the entire panel with some Hero Arts Iridescent Shimmer Spray. The shimmer spray helps to soften the blend and even out the colors even more, while also adding a gorgeous pearlescent shine to the panel!

To add to the party atmosphere of the balloon background, I die cut the Streamer Ribbons dies from some Lawn Fawn Pearlescent Vellum and some more plain white cardstock. I again used blending brushes to blend Thistle and Maliblue inks on the plain white streamers so that they perfectly coordinated with the colors of the background. I arranged them so that they were artfully hanging from the “ceiling,” popping the solid streamers up with foam adhesive for extra dimension.

For the sentiment, I die cut the gorgeous detailed layer of the Scripty Happy Birthday die three times; once from shimmering white pearl cardstock and twice from plain cardstock, layering the three pieces together with liquid adhesive to create a dimensional die cut greeting. To this, I added a sentiment strip embossed using a greeting from the Birthday Sentiments stamp set and some silver embossing powder. The last touch was to add a few shimmering gems for some sparkle!

My second project coordinates with the first, using the same color scheme, but with a bit cleaner aesthetic! I began my project by centering one of the A7 Scalloped Rectangles Stencils over an A7 panel of white cardstock. I then used Large Blending Brushes to blend Thistle, Twirling Tutu, and Maliblue inks over the open area of the stencil, creating a colorful area upon which I could build my focal point. I again spritzed the blended area with Hero Arts Iridescent Shimmer Spray to add some extra shimmer and shine to the background. I trimmed the panel down slightly and mounted it in the center of a full size A7 panel of Sea Glass cardstock.

For the focal point, I wanted to create a coordinating bunch of 3D balloons using the die included in the Party Balloons embossing folder set. I die cut several balloons from white cardstock, then placed them inside the embossing folder in the coordinating shaped openings and ran them through my die cut machine. I find it easiest to die cut first and emboss last in order to ensure that the die cut shapes maintain as much dimension and shape as possible. I also prefer to nestle the die cuts inside the negative side of the embossing folder, rather than on the raised side, because they sit perfectly inside the negative spaces without shifting! After I had added shape to my balloon die cuts, I used the same three ink colors with the Small Blending Brushes to blend coordinating ink colors.

Next, I die cut the Large Fancy Happy Birthday die from some white pearlescent mirror cardstock and popped it up towards the bottom of the blended, shimmering scalloped rectangle using foam adhesive. I arranged the balloon die cuts in a little bouquet, using foam and liquid adhesive and adding the balloon strings using a sparkly gray gel pen. After I had adhered all of my die cuts, I added some Trinity Stamps Rock Candy Confetti, which I think makes it look like party time!!

Well, that’s all for today’s projects! Be sure that you check out all of the different blogs participating in today’s blog party over on the Simon Says Stamp blog. Each stop has a fabulous different Gift With Purchase code, so you can find the one that works best for you and your crafting desires! My code (details shared in the graphic at the top of the post!) allows you to receive the Detail Round Blending Brush Set as your free gift with purchase of $100 or more… a $29.99 value, which is absolutely incredible!! Thanks so much for reading today, and Happy STAMPtember!!! Enjoy the party!

Filed Under: simon says stamp Tagged With: 3D embossing folder, A7 card, birthday card, die cutting, ink blending, party balloons, streamers

Primary Sidebar

  • Facebook
  • Instagram
  • Pinterest
  • YouTube

Favorite Shops

Secondary Sidebar

Subscribe

Enter your email address to subscribe to this blog and receive notifications of new posts by email.

Instagram
Something is wrong.
Instagram token error.
Follow
Load More

Archives

Tags

3D embossing folder alcohol markers better press birthday birthday card blog hop card kit christmas christmas card christmas tag colored pencil copic copic coloring Daniel Smith die cutting embossing folder embroidery felt giveaway holiday holiday card hot foil ink blending karin brushmarker pro layered stencil masculine my monthly hero new release no line coloring no line watercolor OLO marker olo markers original illustration pawsitively saturated rainbow shaker card slimline stamping stamptember stencil thank you thinking of you valentine's day video watercolor

Popular Posts

Simon Says Stamp Sending Cheer Blog Hop- Day 2 + Freebie + Giveaway!
Altenew October 2026 Release Blog Hop + Giveaway!
Rustic Monochromatic Stars for Christmas with Rainbow Splash!
Waffleflower July Release Blog Hop!
Hero Arts Partners Blog Hop: Lawn Fawn!
March 2020 Essentials By Ellen Blog Hop+Giveaway!
December 2018 My Monthly Hero Blog Hop + Giveaway!
The Ton Stamps Summer Release: Day 1
The Ton Anniversary Release: Day 1!
Altenew Paint A Flower: Carnation Blog Hop+Giveaway!

Disclosure

Some affiliate links are used in my posts. This means that, should you click on one of my links and purchase something from that company, I will receive a small portion of the sale at no extra cost to you. I use the money earned from these sales to help maintain my blog. I so appreciate you visiting and, if you do choose to use one of my affiliate links, thank you so much for your support!
Copyright © 2026 ·Brunch Pro Theme · Genesis Framework by StudioPress · WordPress · Log in
Loading Comments...