• Skip to main content
  • Skip to primary sidebar
  • Skip to secondary sidebar

Sixth Street Sundries

Emily Midgett

  • Home
  • About Me
  • Contact
  • OLO Marker Color Swatch Chart
  • Shop

big old birthday

Man Card Monday Returns!

February 3, 2025

This post was sponsored by Simon Says Stamp. Thanks, Simon!

Hi friends! I am back today with a fresh installment for Man Card Monday! In case you are new here, I tend to gravitate towards all things feminine: flowers, pink, lace, sparkle, etc. I struggle to create cards that would work for more masculine recipients, so I decided to challenge myself to create cards that are decidedly masculine or at the very least gender neutral. I took a hiatus during the holidays, because I wanted to soak up as much festive goodness as possible in my craft room, but now I am back to my regularly scheduled series projects, starting with February’s edition of Man Card Monday! To ease back into this series, I decided to pull out some birthday products that had been sitting alone for awhile while I focused my energies on all things Christmas, pairing them with a masculine color palette of blues, gray, and black for a super masculine card. Let’s get started with the details!

*I have gathered links to all of the products used at the bottom of the post for your convenience, using affiliate links. Thank you for shopping with my links! I truly appreciate your support for my work!*

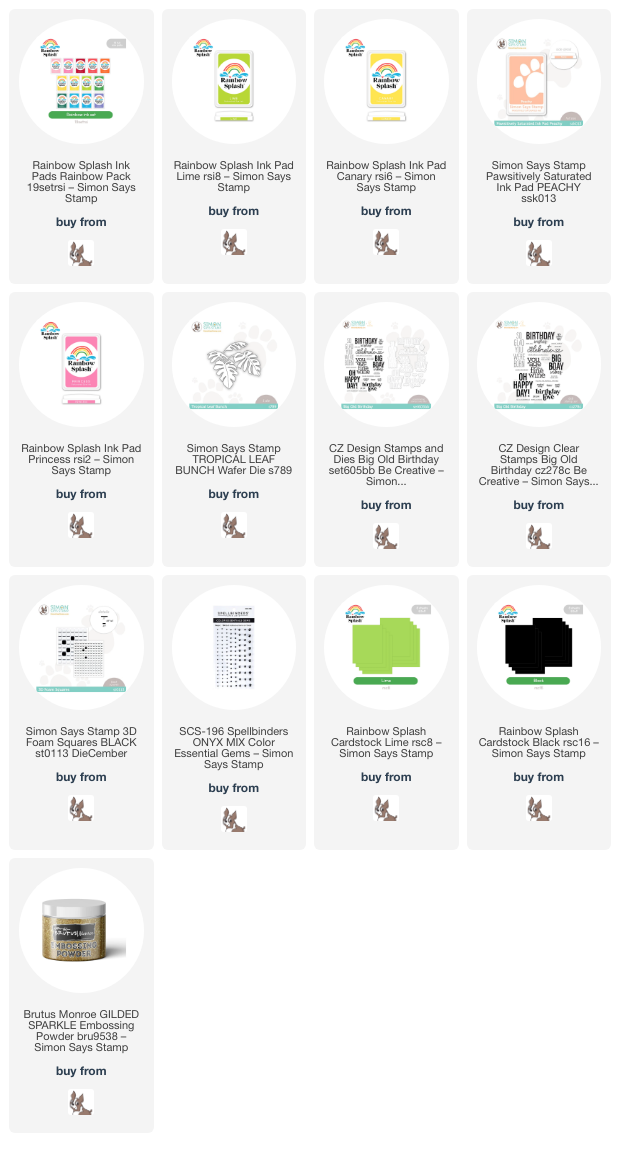
To start, I ran a panel of white cardstock through my die cutting machine using the Party Balloons embossing folder + die set, then flipped the panel over so that the images were debossed down into the cardstock, rather than creating the raised images that have been embossed into the cardstock. I used blending brushes to blend Charcoal, Morning, and Dusk Pawsitively Saturated Ink on the entirety of the card, creating a gray-to-blue ombré. After I had finished blending the entire background, I put the Simon Says Stamp Nocturne Ink directly onto the raised areas of the cardstock, emphasizing the debossed pattern on the cardstock and multiple colors for the balloons on a black background. I splattered the entire background with silver glitter watercolors for additional texture and shimmer.

To further enhance the festive birthday theme, I used the coordinating die included with the Party Balloons embossing folder + die set to die cut three balloons in coordinating cardstock colors of silver glitter, black, and light blue, running them through the die cutting machine in their appropriate spots on the embossing folder to add extra shape and dimension. I added some thin white thread to the back of each and pulling them together to create a bunch of balloons. I also die cut the components from Party Hat Die from the same blue, black, and silver glitter cardstock, adding black dots to the blue stripes with my black pigment pen.

Before I began assembling, I heat embossed a couple of birthday greetings from Big Old Birthday onto some black cardstock using silver embossing powder, then die cut the larger sentiment with the coordinating die. I added some foam adhesive squares to the back of all of the die cuts and arranged them on the festive balloon backdrop, finally adding a few Dusk Pawsitively Dazzling Gems for added sparkle!

Well, that’s all for my project today! After several months of craziness with lots of challenging things happening, I am happy to be getting back into a little bit better routine. I hope your new year is off to a great start! Thanks so much for stopping by today, and have a marvelous day!
Filed Under: simon says stamp Tagged With: 3D embossing, big old birthday, birthday, die cutting, embossing folder, ink blending, ink swiping, man card monday, party balloons, party hat wafer dies

Neon Rainbows for a Tropical Theme!

September 12, 2023

This post was sponsored by Simon Says Stamp. Thanks, Simon!

Hi friends! I am back with another card inspired by the new Rainbow Splash line from Simon Says Stamp. As I was swatching the colors in the Rainbow Splash Ink Collection, I noticed that the super bright Lime ink was nearly neon, and that inspired me to create a tropical project using a few inks from the Rainbow Splash line, softening the vivid neon aesthetic with the lovely Peachy ink from the Pawsitively Saturated ink line. Let’s get started on the details for this project!

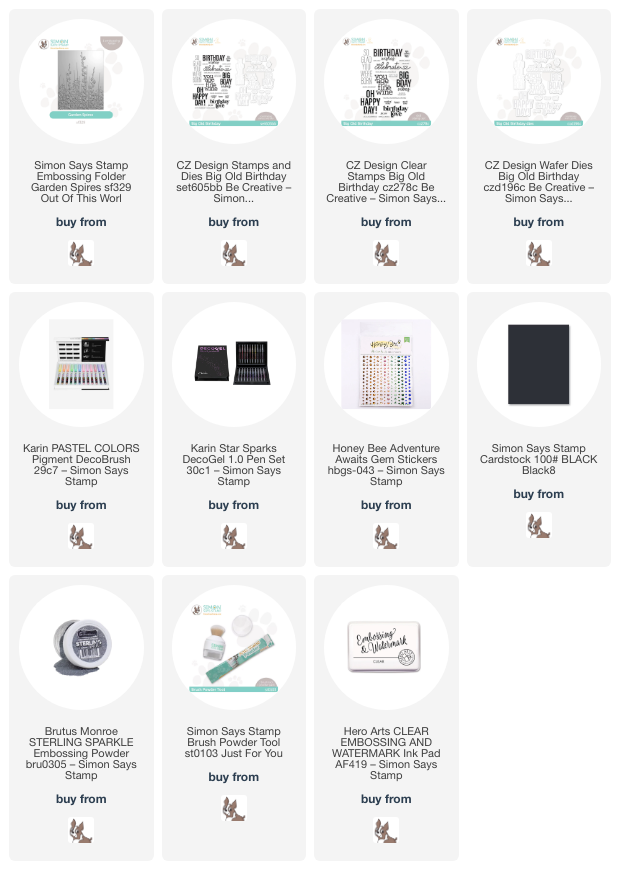
I began by trimming down a panel of white cardstock to about 5.25″ x 4,” blending around the edges with Lime, Canary, Peachy, and Princess Inks. The Lime, Canary,and Princess Inks are from the Rainbow Splash family, but they work beautifully when paired with the Pawsitively Saturated inks. After I had created the beautiful neon glow on the edges of my white card front, I matted the panel with an ever-so-slightly larger piece of black cardstock to make it pop from the Lime Rainbow Splash cardstock base.

To keep the bright neon colors as vivid as possible, I die cut the Tropical Leaf Bunch die from some black cardstock. The crisp black cardstock contrasts beautifully with the neon background! I nestled one die cut into the corner and trimmed off the excess, then added the second over the top with some black foam adhesive squares for extra dimension and interest.

For the greeting, I heat embossed a couple of the greetings from the Big Old Birthday stamp set onto some more black cardstock using gold glitter embossing powder. I die cut the larger sentiment using the coordinating die and trimmed the smaller sentiment strip with my trimmer. I popped those up on the card front using some more black foam adhesive squares, finally adding a few Onyx adhesive gems for some more sparkle!

Well, that’s all for me today! It was such fun to step outside of my jewel- and pastel-toned aesthetic for this super vivid neon project. Sometimes, all you need is one color to jumpstart an idea for an entire card! Thanks so much for stopping by today, and have a marvelous day!

Filed Under: simon says stamp Tagged With: big old birthday, birthday, birthday card, neon, rainbow splash, tropical, tropical leaf bunch

Adding Opaque Details to Embossing Folders with Karin!

September 6, 2023

This post was sponsored by Simon Says Stamp. Thanks, Simon!

Hi friends! In the midst of the STAMPtember fun, I will still be sharing some inspiration using the other gorgeous products from Simon Says Stamp, and today’s project features the utterly lovely Garden Spires Embossing Folder. I love taking these beautifully detailed embossed images and turning them into something uniquely my own with various coloring mediums. A couple of weeks ago, I shared THIS project using the opaque Karin Decobrush Pigment markers on black watercolor cardstock, and I loved the results so much that I couldn’t wait to try the technique on another project! I recently purchased the Garden Spires Embossing Folder and thought that the delicate flowers and foliage would be a great image to try putting the combination to use again. This time, though, the tiny flowers lent themselves better to putting a slightly different technique. Let’s get started with the details!

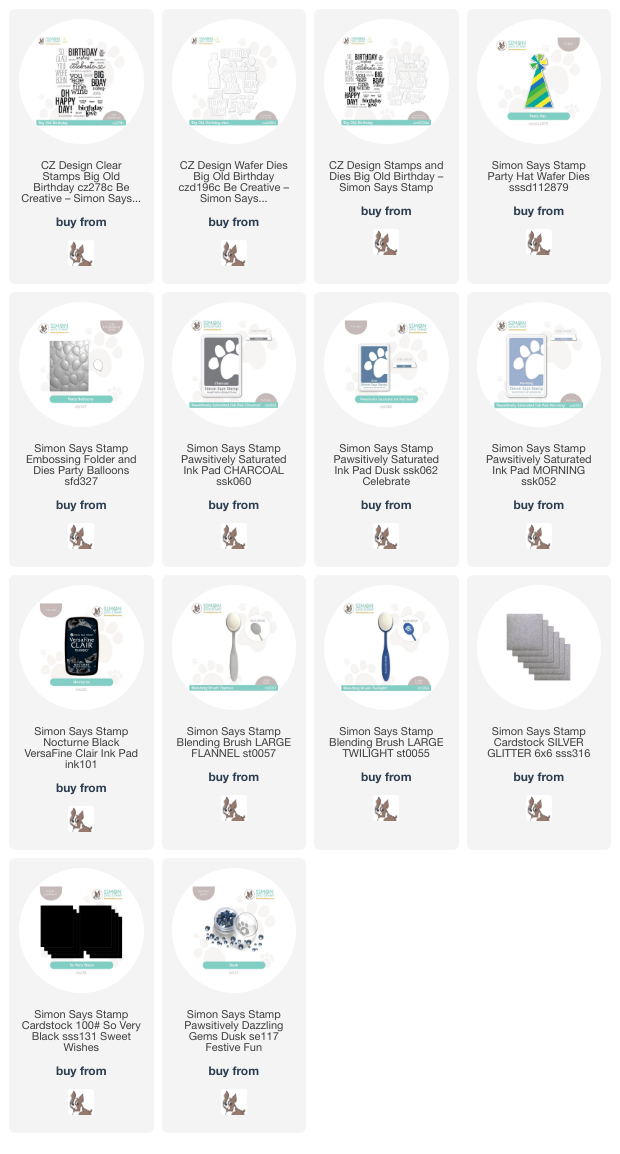
I began by running the Garden Spires Embossing Folder through my die cutting machine using a panel of thick black cardstock. My previous project used black watercolor paper, but I have used the Karin Decobrush Pigment markers successfully with plain black cardstock and thought that these images were small enough that I could do so again! Instead of using a damp paintbrush to move the color on my images as I did in the previous project, I simply put the marker tip directly to the black cardstock and added color that way. I used a pale purple for the tiny flowers and two different shades of pink for the taller, large flowers to achieve a little variation. I also used some metallic watercolors to add some extra sparkle to the larger flowers!

Because the greenery on the embossed image was so delicate, I chose to use the Karin DecoGel Sparkle pens to add some super sparkly accents to the foliage and to the flowers. I also splattered some extra little “dewdrops” on my entire card panel with some more metallic watercolors. It’s so difficult to capture in a photograph, but this card is insanely sparkly!!

After I had finished adding color to the background, it reminded me of an outdoor wedding, perhaps at a vineyard, with a large, scenic meadow of wildflowers beneath a starry sky. I decided to use a beautiful stamp from the Big Old Birthday stamp + die set, one that could easily be used for a wedding card or a birthday card! I heat embossed the greeting on some more black cardstock using silver sparkle embossing powder, then die cut it with the coordinating die. I popped it up amidst the colorful wildflowers, then added a few shimmering gems for some sparkle!

Well, that’s all for today’s project. I wish you could see how sparkly it is in person… the different elements of shimmer are utterly gorgeous! I hope you enjoyed seeing the Karin Decobrush Pigment in action again. They’re such a fun and unique medium to employ to create really special projects! Thanks so much for stopping by today, and have a marvelous day!

Filed Under: simon says stamp Tagged With: big old birthday, CZ design, embossing folder, garden spires, karin, karin decobrush pigment, wedding card

Primary Sidebar

  • Facebook
  • Instagram
  • Pinterest
  • YouTube

Favorite Shops

Secondary Sidebar

Subscribe

Enter your email address to subscribe to this blog and receive notifications of new posts by email.

Instagram
Something is wrong.
Instagram token error.
Follow
Load More

Archives

Tags

3D embossing folder alcohol markers better press birthday birthday card blog hop card kit christmas christmas card christmas tag colored pencil copic copic coloring Daniel Smith die cutting embossing folder embroidery felt giveaway holiday holiday card hot foil ink blending karin brushmarker pro layered stencil masculine my monthly hero new release no line coloring no line watercolor OLO marker olo markers original illustration pawsitively saturated rainbow shaker card slimline stamping stamptember stencil thank you thinking of you valentine's day video watercolor

Popular Posts

Simon Says Stamp Joy For You Blog Hop- Day 1!
Simon Says Stamp Joy For You Release-Now Available!
Frozen Fractals All Around with New Simon Says Stamp Joy For You Release!
Shaped Holiday Shaker Card with New Simon Says Stamp Jolly Season Card Kit of the Month!
Holiday Postage with New Simon Says Stamp!
Simon Says Stamp Glory to the Newborn King Holiday Kit-Part II!
Pinkfresh Studio 5th Birthday!
Altenew Build A Flower: Fuchsia Blog Hop+Giveway!
Holiday Joy in Pink and Green with New Simon Says Stamp DieCember!
Honey Bee Stamps September Release Blog Hop!

Disclosure

Some affiliate links are used in my posts. This means that, should you click on one of my links and purchase something from that company, I will receive a small portion of the sale at no extra cost to you. I use the money earned from these sales to help maintain my blog. I so appreciate you visiting and, if you do choose to use one of my affiliate links, thank you so much for your support!
Copyright © 2026 ·Brunch Pro Theme · Genesis Framework by StudioPress · WordPress · Log in
Loading Comments...