• Skip to main content
  • Skip to primary sidebar
  • Skip to secondary sidebar

Sixth Street Sundries

Emily Midgett

  • Home
  • About Me
  • Contact
  • OLO Marker Color Swatch Chart
  • Shop

Bountiful Berries

Winter Whites with Simon Says Stamp!

November 29, 2023

This post was sponsored by Simon Says Stamp. Thanks, Simon!

Hi friends! Today, I have a pair of projects using lots of gorgeous holiday dies and the Holly & Pine Embossing Folder from the Simon Says Stamp All the Joy release, showcasing the beauty of the ultimate monochrome: white-on-white! I love a good monochromatic card, and white on white is one of my favorite ways to challenge myself to incorporate as many textures as possible to keep things from being blah. Let’s get started with the details!

“Winter Whites” are definitely having their moment in fashion right now, along with all monochromatic styles, and I tried to channel that into these two projects. I did end up adding some minty green to the tag, but otherwise both projects are white-on-white-on-white!

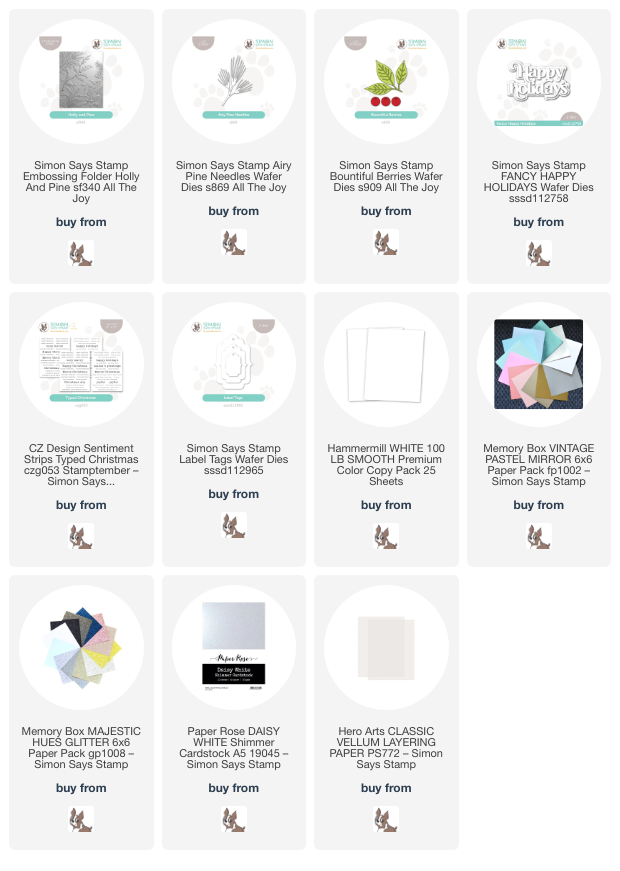
I began my card by running an A2 panel of Hammermill white cardstock through my die cut machine using the Holly & Pine Embossing Folder. I splattered the background with some super sparkly iridescent white watercolor and set it aside to dry. Next, I pulled out the Airy Pine Needles and Bountiful Berries along with a large assortment of iridescent, glitter, shimmer, and vellum cardstocks and set about die cutting. When working with these limited-color palette projects, I try to add as many textures and finishes as possible, which keeps the white elements from all blending into each other.

After I had die cut and assembled all of my foliage and berries, I worked on the sentiment. Keeping the two dies together, I die cut the beautiful Fancy Happy Holidays die from some white shimmer cardstock, making sure to reserve all of the pieces, including the interiors of the letters. I then die cut the full background piece from some heavweight vellum and adhered the outline to the complete background piece, creating almost a reverse die cut. I popped the greeting up on the embossed card front using foam adhesive, then added a sentiment strip from Typed Christmas Sentiment Cards beneath it. I arranged the winter foliage around the greeting and added a few shimmering gems for more sparkle!

For a quick and cute tag, I die cut the Label Tags dies twice from white cardstock, embossing one using the Holly & Pine Embossing Folder. I sandwiched the tags together so that the scratched sides would be facing each other. This double layer also helps to add some extra stability to the hole at the top!

I die cut the Bountiful Berries dies from white cardstock and added some minty green alcohol marker coloring to the leaves, then arranged the berry cluster and foliage on the embossed side of the tag. For a quick greeting (perfect for a tag!) I added a Typed Christmas Sentiment strip “from me to you.” I popped all of the pieces up with some foam tape and added a few iridescent white gems to add some sparkle. I think this would look so pretty adorning a package or gift bag!

Well, that’s all for my projects today. I encourage you to shop in your paper stash to see what kinds of coated and textured papers you have that will work together to create monochromatic cards. I am always on the lookout for papers with gorgeous finishes! Thanks so much for stopping by today, and have a marvelous day!
Filed Under: simon says stamp Tagged With: 3D embossing folder, airy pine needles, Bountiful Berries, christmas card, christmas tag, holiday card, holiday tag, holly and pine, tag, typed christmas

Joyful in Red and White!

November 9, 2023

This post was sponsored by Simon Says Stamp. Thanks, Simon!

If you’re an email subscriber, a draft of this post might have been sent out inadvertently. My apologies for clogging your email!

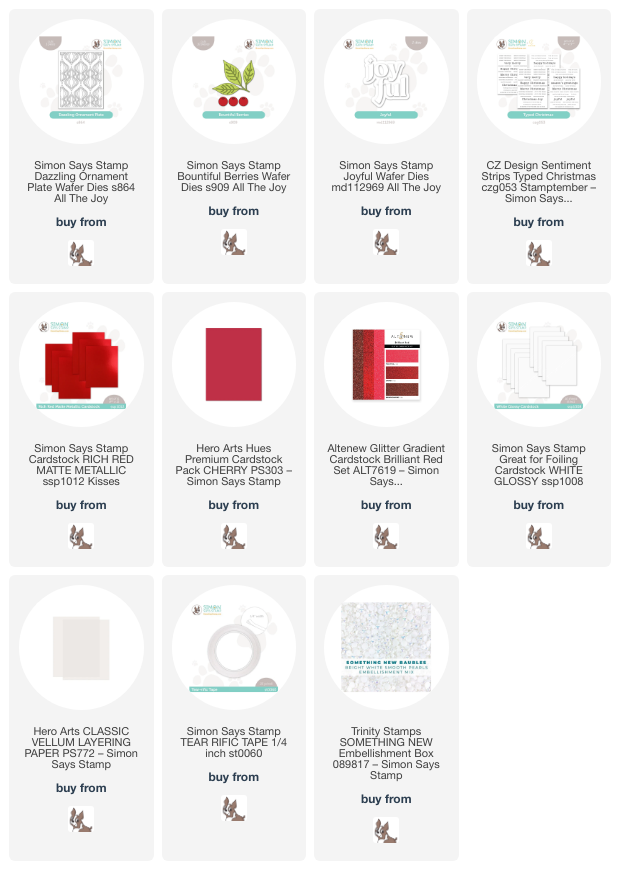
Hi friends! I have a festive holiday project to share with you today using some of the new products from the Simon Says Stamp All the Joy release. I rarely seem to use red outside of holiday crafting, but when I get started, I just can’t seem to stop! I love pairing interesting papers to create tone-on-tone backgrounds, and the new Dazzling Ornament Plate provided the perfect opportunity to pair cherry red cardstock with some gorgeous Rich Red Matte Metallic cardstock from Simon Says Stamp. Let’s get started with the details!

To begin, I die cut the Dazzling Ornament Plate twice: once from Cherry cardstock and once from Rich Red Matte Metallic cardstock. I covered the front of a card base with Tear-rific Tape and removed the release paper. Once I had created my sticky “canvas,” I adhered the negative space around the ornament die cuts from the plain cardstock piece to the card front, then added the Rich Red Matte Metallic cardstock die cuts to create a luxurious monochromatic background with tons of beautiful texture and interest!

For the greeting, I die cut the detail layer of the new Joyful die from some White Glossy cardstock, then adhered it to the solid background layer, cut from some heavyweight vellum. To make a more complete sentiment, I trimmed down a greeting from the Typed Christmas sentiment cards set.

After I had adhered the greeting pieces to the brilliant red card front using foam adhesive, I wanted to add some botanical accents with the new Bountiful Berries die. I die cut the berries from some red glitter cardstock and the foliage from two different shades of green from my stash, then tucked them behind the die cut greeting with some more foam adhesive. Finally, I added a few crisp white Something New pearls from Trinity Stamps. So many different textures and types of shine and sparkle!

Well, that’s all for my project today! I am definitely getting my fill of vibrant cherry red this season. I hope you don’t mind! Thanks so much for stopping by today, and have a marvelous day!

Filed Under: simon says stamp Tagged With: all the joy, Bountiful Berries, christmas card, Dazzling Ornament cover plate, die cutting

Primary Sidebar

  • Facebook
  • Instagram
  • Pinterest
  • YouTube

Favorite Shops

Secondary Sidebar

Subscribe

Enter your email address to subscribe to this blog and receive notifications of new posts by email.

Instagram
Something is wrong.
Instagram token error.
Follow
Load More

Archives

Tags

3D embossing folder alcohol markers better press birthday birthday card blog hop card kit christmas christmas card christmas tag colored pencil copic copic coloring Daniel Smith die cutting embossing folder embroidery felt giveaway holiday holiday card hot foil ink blending karin brushmarker pro layered stencil masculine my monthly hero new release no line coloring no line watercolor OLO marker olo markers original illustration pawsitively saturated rainbow shaker card slimline stamping stamptember stencil thank you thinking of you valentine's day video watercolor

Popular Posts

Simon Says Stamp Joy For You Blog Hop- Day 1!
Simon Says Stamp Joy For You Release-Now Available!
Frozen Fractals All Around with New Simon Says Stamp Joy For You Release!
Shaped Holiday Shaker Card with New Simon Says Stamp Jolly Season Card Kit of the Month!
Holiday Postage with New Simon Says Stamp!
Simon Says Stamp Glory to the Newborn King Holiday Kit-Part II!
Pinkfresh Studio 5th Birthday!
Altenew Build A Flower: Fuchsia Blog Hop+Giveway!
Holiday Joy in Pink and Green with New Simon Says Stamp DieCember!
Honey Bee Stamps September Release Blog Hop!

Disclosure

Some affiliate links are used in my posts. This means that, should you click on one of my links and purchase something from that company, I will receive a small portion of the sale at no extra cost to you. I use the money earned from these sales to help maintain my blog. I so appreciate you visiting and, if you do choose to use one of my affiliate links, thank you so much for your support!
Copyright © 2026 ·Brunch Pro Theme · Genesis Framework by StudioPress · WordPress · Log in
Loading Comments...