• Skip to main content
  • Skip to primary sidebar
  • Skip to secondary sidebar

Sixth Street Sundries

Emily Midgett

  • Home
  • About Me
  • Contact
  • OLO Marker Color Swatch Chart
  • Shop

airy pine needles

Rich Red Ink Blending with New Simon Says Stamp Pawsitively Saturated Inks!

October 25, 2024

This post was sponsored by Simon Says Stamp. Thanks, Simon!

Hi friends! The new Sweet Wishes release from Simon Says Stamp contains a gorgeous new ink trio of luscious, vibrant reds that I used as the inspiration point for my projects today. I always love new ink colors, as color is frequently the first element that I decide when mentally designing my project, and these vibrant, cool reds are absolutely perfect for the holiday season. I used two different techniques with the same embossing folder for today’s projects, so let’s get started with the details!

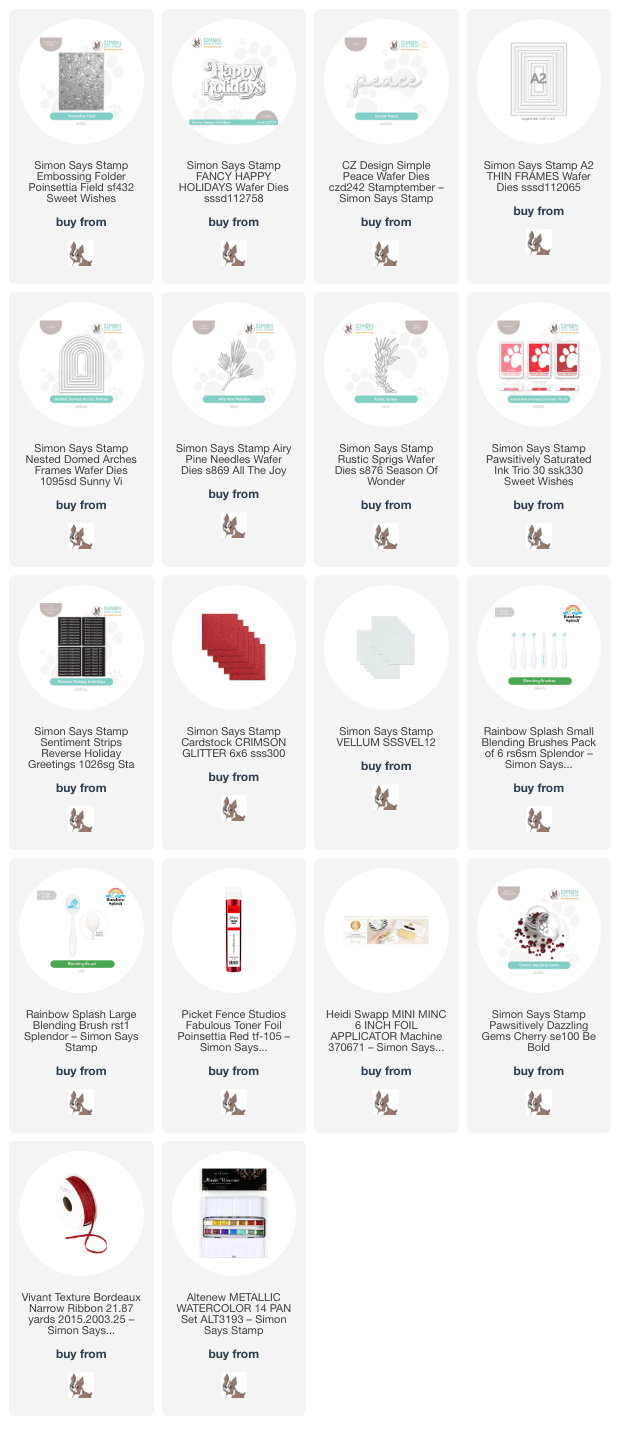
*I have linked all of the products used at the bottom of the post for your convenience using affiliate links. Thank you for shopping with my links! I truly appreciate your support for my work!*

For both of my projects today, I put the new Ink Trio 30 to use with the beautifully intricate new Poinsettia Field Embossing Folder. The 3D embossing folders from Simon Says Stamp are amongst my most favorite products from every release, because there are so many ways to use them, and so many mediums with which to pair them. I’ve used two different techniques for my projects today, creating two completely different looks with almost identical supplies.

For my first project, I ran a panel of white cardstock through my die cutting machine using the new Poinsettia Field Embossing Folder. To add color to the panel, I flipped the embossed image over to reveal the debossed background, with the images impressed into the cardstock rather than popped up. I then used small blending brushes to blend the two lighter inks in the new Ink Trio 30 in the center of each flower, blending the lightest over most of each flower and enhancing the center of each flower with a small amount of the middle shade from the trio. After I had finished blending on each flower (which sounds time consuming, but actually went quite quickly!), I swiped the darkest shade from the Ink Trio 30 over the raised areas, putting the ink pad directly onto the cardstock, which enhances the pattern and creates such unique texture! I blended that same deeper red around the edges, creating a halo, and splattered the entire panel with metallic red watercolor.

After I had finished creating the background, I die cut a frame from some glittery red cardstock using the Nested Domed Arches Frames and adhered it to the card front using liquid adhesive. I used the same glittery red cardstock to die cut the detail layer of the Fancy Happy Holidays die set and added a vellum shadow behind it. To enhance the sentiment, I die cut some foliage using the Airy Pine Needles die and Rustic Sprigs die, tucking the monochromatic die cuts behind the sparkling dimensional sentiment. Finally, I added a few Cherry Pawsitively Dazzling Gems for added sparkle!

For my second card, I did some simple ink blending using the new Ink Trio 30, using blending brushes to blend a smooth ombré horizontally across a white A2 card front. After ink blending, I made sure that the cardstock was completely dry with my heat tool and ran the panel through my die cutting machine with the Poinsettia Field Embossing Folder. The color saturated panel enhances the incredibly detailed background so beautifully, adding texture and pattern to the panel.

After I had finished the background, I die cut another glittering frame, this time using the A2 Thin Frames and the same Crimson glitter cardstock from Simon Says Stamp. I adhered the frame around the edges of the blended, embossed background. The frames help to draw the eye towards the focal point in the center of the card, as well as add texture to the monochromatic card. I die cut the detail layer of the Simple Peace die from some coordinating red cardstock and the shadow layer from more red glitter cardstock, adhering the two layers together with liquid adhesive. I popped the sentiment die cut up with some foam adhesive squares, then tucked a sentiment strip from the Reverse Holiday Greetings sentiment card set, to which I had added some red toner foil using my Minc machine. To accent the sentiment pieces and add a bit more botanical softness to the card, I die cut a deep red Airy Pine Needles sprig and tucked it beneath the sentiment pieces. Finally, I added a Bordeaux ribbon bow and some shimmering gems.

Well, that’s all for my projects today! Each of these cards is so different while still being exactly the same color palette. It’s amazing what a difference technique makes for the color saturation with these embossing folders! Thanks so much for stopping by today, and have a marvelous day!
Filed Under: simon says stamp Tagged With: A2 thin frames, airy pine needles, christmas card, die cutting, fancy happy holidays, holiday card, ink blending, ink swiping, minc, nested domed arches frames, pawsitively saturated, poinsettia field, reverse holiday greetings, rustic sprigs, simple peace, toner foil

Dramatic Black, Red, and Gold for Christmas!

November 30, 2023

This post was sponsored by Simon Says Stamp. Thanks, Simon!

Hi friends! I am back with another project using one of my new holiday illustrations for Simon Says Stamp: Festive Bouquets. I was on a roll with the vibrant red lilies when I was coloring a couple of weeks ago; I used OLO markers to create this vivid bouquet for THIS post, but for today’s project, I used Distress Inks to watercolor these bold blooms. Let’s get started with the details!

To start, I heat embossed the lily bouquet from the Festive Bouquets set onto some Fabriano Artistico Cold Press watercolor paper using gold embossing powder. Next, I tapped Barn Door, Aged Mahogany, and Forest Moss Distress Inks onto my palette and picked up the color with my damp paintbrush to add some vibrant watercolor! Once I’d finished watercoloring the images, I tapped Black Soot ink on my palette and did a wash around the edge of the embossed image. I knew that I wanted a black background behind the die cut watercolored image, and adding the black around the edges helps keep the color palette cohesive throughout the project even after die cutting.

After I had finished my watercoloring, I turned to the card base. The lily bouquet in the Festive Bouquets set is quite generously-sized, making it perfect for use with larger card sizes. I trimmed down a panel of Rainbow Splash black to A7 size, then masked around the edges using Satin Masking Tape. I placed the Snow Pattern stencil over the masked area, keeping it in place with a few pieces of washi tape, then spritzed Tim Holtz Mica Spray in Tart Cranberry and Tarnished Brass over the top of the stencil. These beautiful Mica Sprays are opaque enough that they add a subtle shimmer and color to even black cardstock. (Bonus: you can get the super cute Walter the penguin die as a free gift with purchase if you purchase $25 of Tim Holtz product, which includes these fabulous Mica Sprays!)

Once my stenciled pattern had dried and I’d removed the masking tape around the edges, I die cut the A7 Thin Frames dies from Matte Gold Metallic foil cardstock. I always keep my Thin Frames dies wired together, rather than snipping them apart, so that I can create a variety of widths of frames with just one pass through my die cutting machine! I found a frame to cover the edges of the stenciled area and adhered it, then added a slightly larger thinner frame to nest around the outer edge of my stenciled frame. I die cut some Airy Pine Needles using gold glitter cardstock, then added the flowers and pine needles on the top corner of my card using foam adhesive. I added some gold embossed and die cut sentiments from Festive Bouquets using some more foam adhesive, finishing everything off with some matte gold pearl embellishments.

Well, that’s all for my project today! Can you believe that DieCember starts tonight at midnight? I’m so excited to share all of the projects I’ve been creating lately! Thanks so much for stopping by, and have a marvelous day!

Filed Under: original illustrations, simon says stamp Tagged With: A7 thin frames, airy pine needles, distress watercolor, festive bouquets, mica spray, snow pattern, stencil

Winter Whites with Simon Says Stamp!

November 29, 2023

This post was sponsored by Simon Says Stamp. Thanks, Simon!

Hi friends! Today, I have a pair of projects using lots of gorgeous holiday dies and the Holly & Pine Embossing Folder from the Simon Says Stamp All the Joy release, showcasing the beauty of the ultimate monochrome: white-on-white! I love a good monochromatic card, and white on white is one of my favorite ways to challenge myself to incorporate as many textures as possible to keep things from being blah. Let’s get started with the details!

“Winter Whites” are definitely having their moment in fashion right now, along with all monochromatic styles, and I tried to channel that into these two projects. I did end up adding some minty green to the tag, but otherwise both projects are white-on-white-on-white!

I began my card by running an A2 panel of Hammermill white cardstock through my die cut machine using the Holly & Pine Embossing Folder. I splattered the background with some super sparkly iridescent white watercolor and set it aside to dry. Next, I pulled out the Airy Pine Needles and Bountiful Berries along with a large assortment of iridescent, glitter, shimmer, and vellum cardstocks and set about die cutting. When working with these limited-color palette projects, I try to add as many textures and finishes as possible, which keeps the white elements from all blending into each other.

After I had die cut and assembled all of my foliage and berries, I worked on the sentiment. Keeping the two dies together, I die cut the beautiful Fancy Happy Holidays die from some white shimmer cardstock, making sure to reserve all of the pieces, including the interiors of the letters. I then die cut the full background piece from some heavweight vellum and adhered the outline to the complete background piece, creating almost a reverse die cut. I popped the greeting up on the embossed card front using foam adhesive, then added a sentiment strip from Typed Christmas Sentiment Cards beneath it. I arranged the winter foliage around the greeting and added a few shimmering gems for more sparkle!

For a quick and cute tag, I die cut the Label Tags dies twice from white cardstock, embossing one using the Holly & Pine Embossing Folder. I sandwiched the tags together so that the scratched sides would be facing each other. This double layer also helps to add some extra stability to the hole at the top!

I die cut the Bountiful Berries dies from white cardstock and added some minty green alcohol marker coloring to the leaves, then arranged the berry cluster and foliage on the embossed side of the tag. For a quick greeting (perfect for a tag!) I added a Typed Christmas Sentiment strip “from me to you.” I popped all of the pieces up with some foam tape and added a few iridescent white gems to add some sparkle. I think this would look so pretty adorning a package or gift bag!

Well, that’s all for my projects today. I encourage you to shop in your paper stash to see what kinds of coated and textured papers you have that will work together to create monochromatic cards. I am always on the lookout for papers with gorgeous finishes! Thanks so much for stopping by today, and have a marvelous day!

Filed Under: simon says stamp Tagged With: 3D embossing folder, airy pine needles, Bountiful Berries, christmas card, christmas tag, holiday card, holiday tag, holly and pine, tag, typed christmas

Primary Sidebar

  • Facebook
  • Instagram
  • Pinterest
  • YouTube

Favorite Shops

Secondary Sidebar

Subscribe

Enter your email address to subscribe to this blog and receive notifications of new posts by email.

Instagram
Something is wrong.
Instagram token error.
Follow
Load More

Archives

Tags

3D embossing folder alcohol markers better press birthday birthday card blog hop card kit christmas christmas card christmas tag colored pencil copic copic coloring Daniel Smith die cutting embossing folder embroidery felt giveaway holiday holiday card hot foil ink blending karin brushmarker pro layered stencil masculine my monthly hero new release no line coloring no line watercolor OLO marker olo markers original illustration pawsitively saturated rainbow shaker card slimline stamping stamptember stencil thank you thinking of you valentine's day video watercolor

Popular Posts

Simon Says Stamp Sending Cheer Release: Now Available!
Joyful Snowman with New Simon Says Stamp Sending Cheer Release!
Autumn Legs with Colorado Craft Company and Catherine Pooler!
February 2018 My Monthly Hero Blog Hop!
Altenew Paint A Flower: Carnation Blog Hop+Giveaway!
Special Release: Simon Says Stamp Limited Edition STAMPtember Christmas Card Kit!
Altenew March 2020 Release Blog Hop+Giveaway!
Pinkfresh Studio 5th Birthday!
Pinkfresh Studios June Washi and Stamp Release Blog Hop!
Advent Calendar Extravaganza with Taheerah Atchia

Disclosure

Some affiliate links are used in my posts. This means that, should you click on one of my links and purchase something from that company, I will receive a small portion of the sale at no extra cost to you. I use the money earned from these sales to help maintain my blog. I so appreciate you visiting and, if you do choose to use one of my affiliate links, thank you so much for your support!
Copyright © 2026 ·Brunch Pro Theme · Genesis Framework by StudioPress · WordPress · Log in
Loading Comments...