• Skip to main content
  • Skip to primary sidebar
  • Skip to secondary sidebar

Sixth Street Sundries

Emily Midgett

  • Home
  • About Me
  • Contact
  • OLO Marker Color Swatch Chart
  • Shop

ornate trims

Special Release: Simon Says Stamp Exclusive Tim Holtz Coordinating Dies!

October 22, 2026

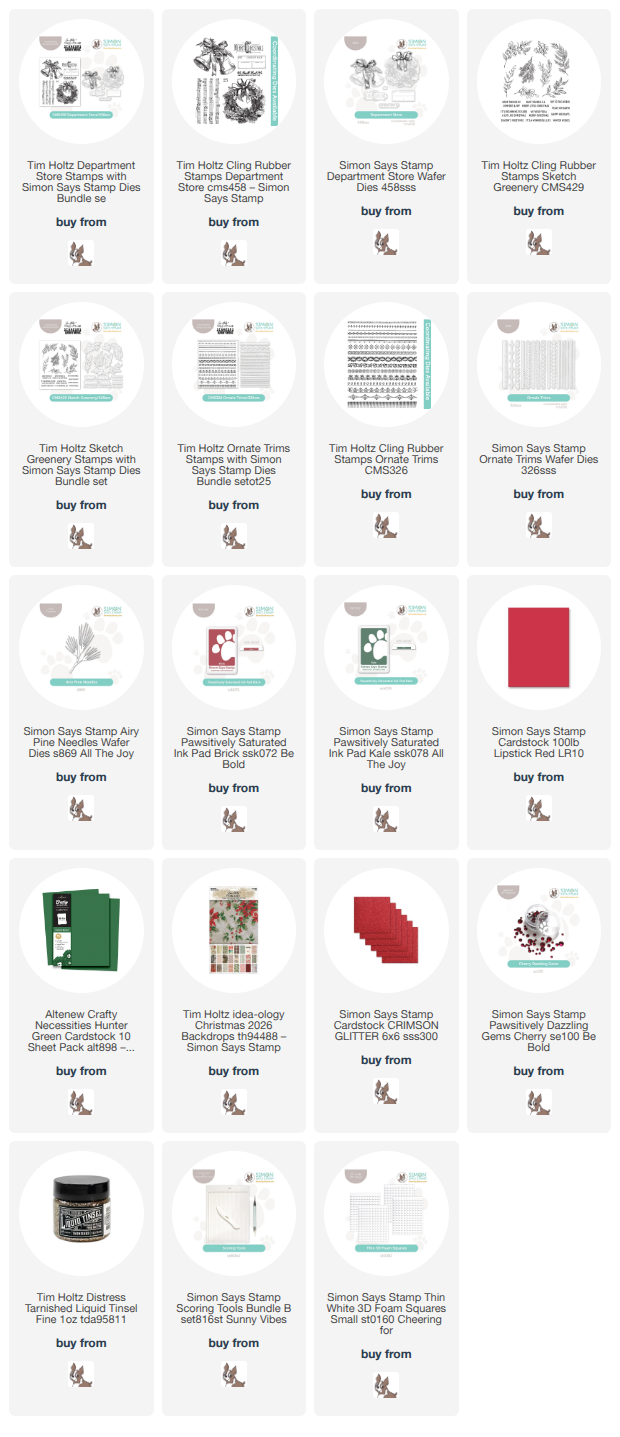
Hi friends! I have a few special projects to share with you today using a super fun, exclusive-to-Simon Says Stamp new release. Crafty Genius Tim Holtz creates the most incredible, vintage inspired holiday stamp sets each year, and Simon Says Stamp now offers super detailed coordinating wafer thin dies to quickly and easily cut out those beautiful images! You can check out all of the Tim Holtz stamp sets and coordinating dies HERE.
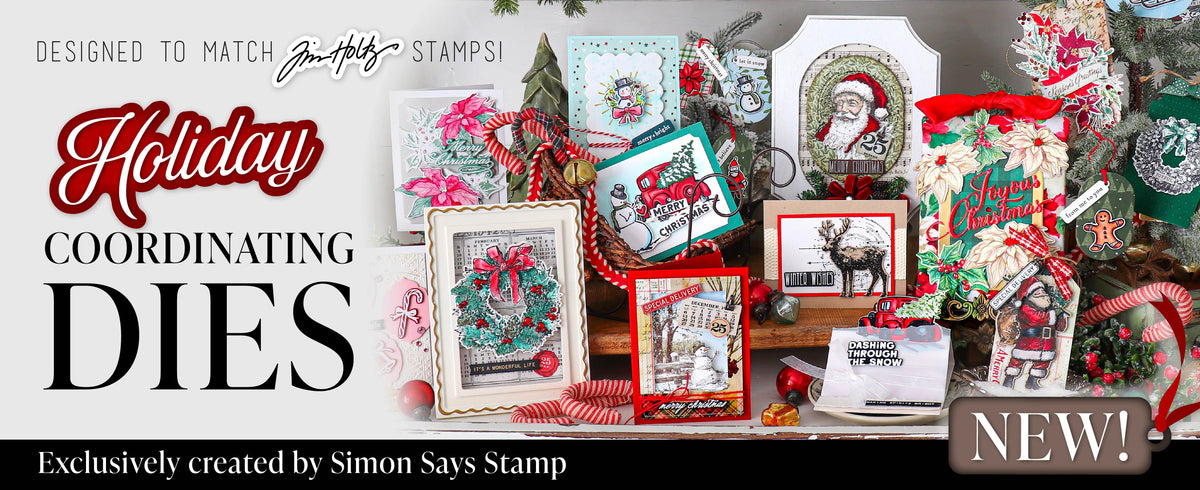
I went on a creative spree earlier this week using these fabulous new dies, and for my first project, I created a card and gift bag set using some patterned papers and gorgeous stamped images from the Department Store stamp and die set. Let’s get started with the details on my projects!
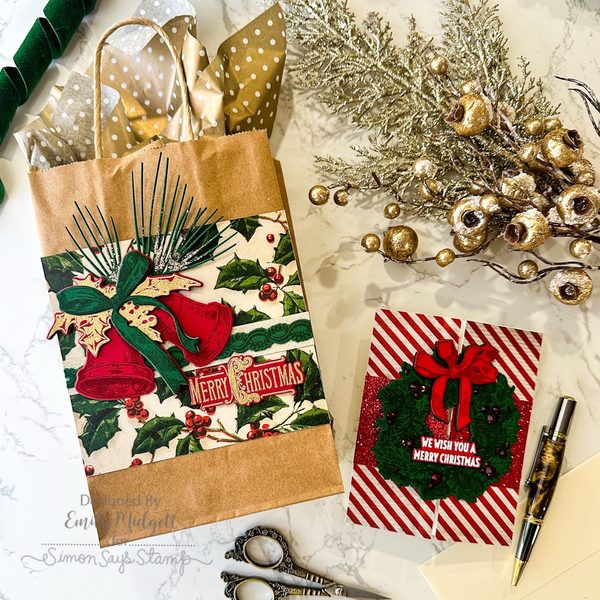
I kept the color palette super traditional and very vintage, a style that almost automatically signals Tim Holtz to me. The new Department Store dies have the super fun feature of being able to layer the details on the wreath and bell images! You can stamp the large image multiple times, perhaps on different colored cardstock or with a different color of ink, then use the individual bow dies to cut out the details so that you can layer them with foam adhesive.
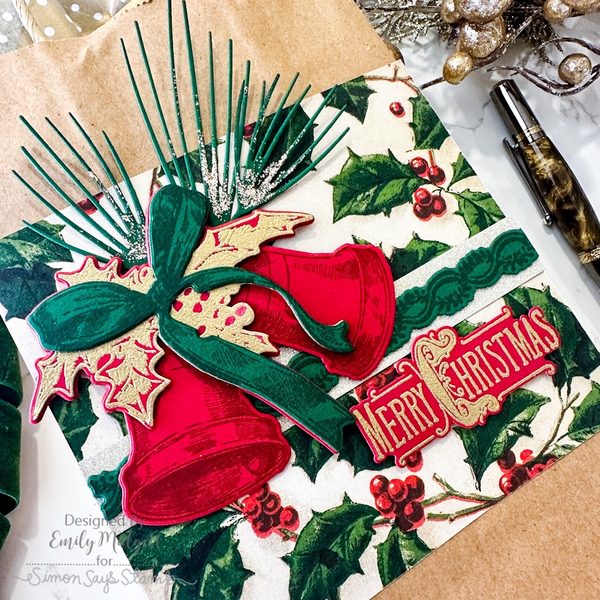
The gorgeous holly patterned paper from the Idea-ology Christmas Backgrounds 2026 Papers inspired this gift bag embellishment, because the holly swag on the bells matched the patterned paper so perfectly! I started by stamping the bells from Department Store three times: once on red cardstock with deeper red ink, once on green cardstock with deeper green ink, and once more on red cardstock with embossing ink and gold embossing powder. Once stamped, I used the individual detailed coordinating dies to cut the holly arrangement from the gold embossed image and the green bow, then used foam adhesive to add them to the complete bell image. I trimmed down the panel of the holly patterned paper and adhered it to a kraft gift bag, then added the bells, some Ornate Trims and glitter cardstock, and finished everything off with some Airy Pine Needles that I embellished with Tarnished Tim Holtz Fine Liquid Tinsel! I just love how this came out with simple stamping, some pretty patterned paper, and a bit of sparkle!
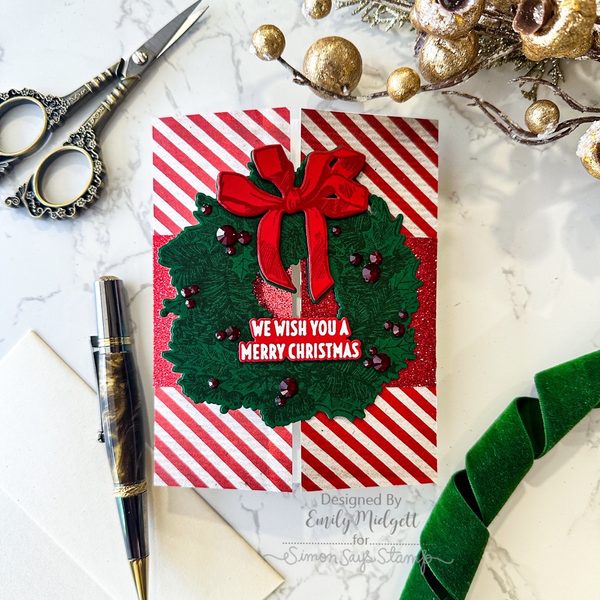
For my second project, I took advantage of the large size of the wreath image from Department Store to create a substantial focal point. I stamped the wreath image twice: once on green cardstock with Kale ink and once on red cardstock with Brick ink, then die cut the green wreath with the large wreath die and the red bow with the individual bow die. I layered the two die cuts together with foam squares and embellished the wreath with some sparkling “berries” created using Cherry Pawsitively Dazzling Gems.
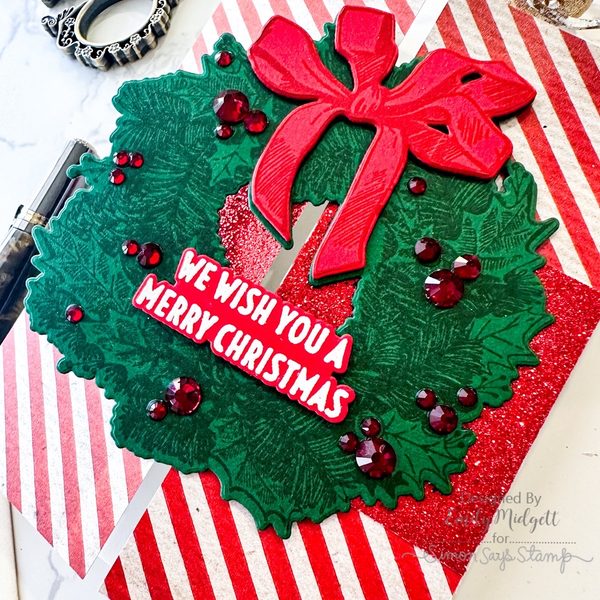
After I had created my focal point, I wanted to create a unique card base to keep things interesting! I created a gate-fold card by scoring a 4.25″ x 11″ piece of cardstock at 2 1/8″ on each end. I then trimmed down some festive red and white striped patterned paper from the Idea-ology Christmas Backgrounds 2026 Papers to 2 1/8″ x 5.5″ and adhered them to both panels of the gate-fold card. I added a thick strip of some super sparkly red glitter cardstock, then mounted the wreath on the card front, adding adhesive to only one side so that the card would open easily and cleanly. For the greeting, I white embossed a sentiment from Sketch Greenery and die cut it with it’s new coordinating die, which I placed in the center of the wreath. I just love how bold and vibrant this project is!

Well, that’s all for my projects today! I have so many more fun projects to share with you using the new Simon Says Stamp Exclusive Tim Holtz Coordinating Holiday Dies. We are heading into the most festive season and I can’t get enough. Thanks so much for stopping by today, and have a marvelous day!
Filed Under: simon says stamp, tim holtz, Uncategorized Tagged With: airy pine needles, christmas, christmas card, department store, gift bag, holiday, holiday card, ornate trims, packaging, patterned paper, sketch greenery

Special Release: Simon Says Stamp Exclusive Dies for Tim Holtz and Ranger!

June 24, 2025

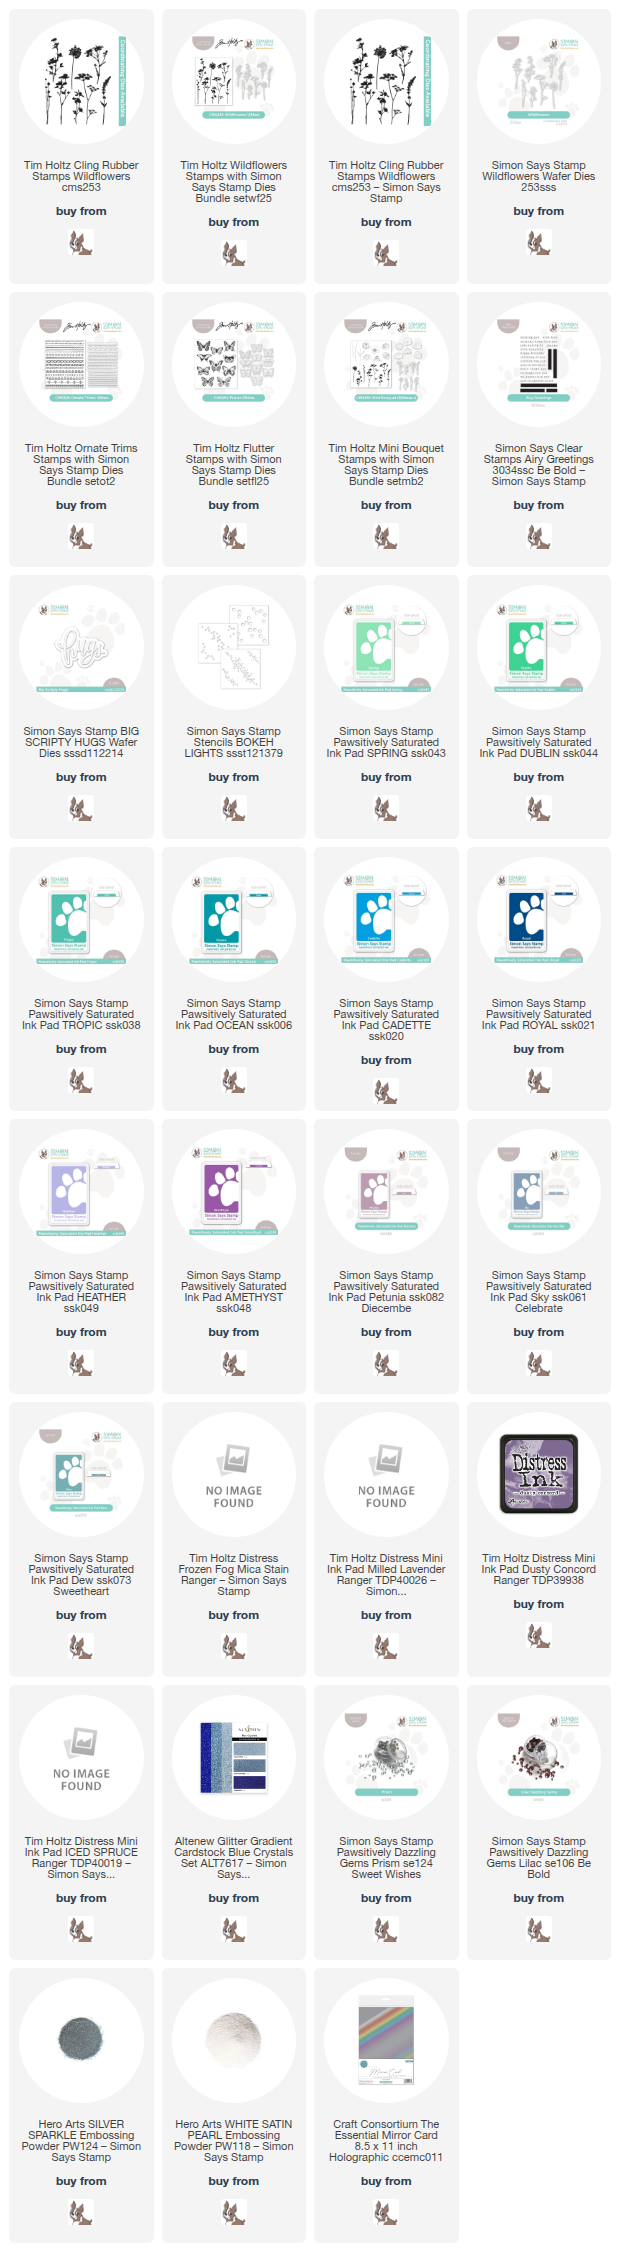
Hi friends! Simon Says Stamp has had a special surprise release today: Exclusive Dies to match previously-released Tim Holtz cling stamp sets! These new coordinating die sets are exclusive to Simon Says Stamp and make crafting with these cling stamp sets such a joy. Click HERE to see all of these Specialty Bundles! I created three different projects highlighting these fabulous new dies, so let’s do a brief rundown of each project.

For this first project, I decided to do a fun vertical ombré with several different shades of blue to green Pawsitively Saturated Inks. I began by blending Spring, Dublin, Tropic, Ocean, Cadette, and Royal inks from left to right on a horizontal A2 card front. I went over the first layer with a second layer of ink blending to ensure a smooth gradient from color to color. To add some whimsy to the background, I splattered some diluted white gouache over the entirety of the panel.

I also used the same shades of ink to stamp the images from the Tim Holtz Wildflowers stamp set on white cardstock, then die cut them with the new coordinating dies. The white splatters on the background complement the white edges of the floral silhouette die cuts! I also white embossed a sentiment from Airy Greetings onto a strip of coordinating teal cardstock, then backed it with a slightly larger strip of coordinating blue glitter cardstock. I popped up the floral die cuts on their coordinating color stripe with foam adhesive, then added the sentiment strip over the top with a double layer of thin foam adhesive squares. For a final sparkling touch, I added a couple of Prism Pawsitively Dazzling Gems to each side of the greeting.

For my second project, I thought I would pair the delicate florals in the Mini Bouquet bundle with the feminine, lacy borders in the Ornate Trims bundle! When I was first learning to watercolor, I used Distress Inks, so this project took me back to my roots, for sure! I stamped the floral images from Mini Bouquet using Milled Lavender Distress Ink, then tapped Milled Lavender, Dusty Concord, and Iced Spruce out on my glass craft mat and used a damp paintbrush to pick up the color to do some delicate no-line watercolor with these pretty florals! Though these images are dainty, a paintbrush with a nice, crisp point and some patience to allow each section to dry will ensure that those details are not lost! After painting, I die cut the finished Mini Bouquet images with their new coordinating dies.

To further enhance the slightly “shabby chic” feel for this card, I stamped two of the different borders from the Ornate Trims bundle on a piece of white cardstock using Simon Says Stamp’s Petunia Pawsitively Saturated Ink. I die cut the stamped borders with their new coordinating dies, then adhered them in the center of a white A2 card front with some thin foam adhesive. Layering the trims reminds me so much of crocheted lace, like on the edge of a linen sheet or curtain! I arranged the watercolored florals in a swag, popping them up with a double layer of foam adhesive to achieve extra dimension, then tucked a die cut deep plum “hugs” dimensional die cut next to the bouquet. I added some Lilac Pawsitively Dazzling Gems and tucked a twine bow into the bouquet. I absolutely love how this one turned out! Clean and feminine with a hint of shabby chic.

For my final project, I was inspired by Tim Holtz’s incredible mixed media projects to try my hand at some mixed media of my own! I enjoy pushing myself outside of my typical symmetrical, carefully constructed projects to do something a bit more whimsical occasionally, and this frame that I found at my local dollar store provided me the perfect canvas to create some splattery mixed media goodness! I painted the wooden shadow box frame with a pearlescent royal purple, then selected Pawsitively Saturated Inks that worked nicely with the vibrant purple frame: Amethyst, Sky, Dew, and Heather. I lightly blended these colors on my 6×6 background panel, creating an ethereal blended background, then used the Bokeh Lights Stencils to add some interest to the background. To keep a semi-tone-on-tone background, I carefully blended the same colors on the stencils as the blended background behind it, which I think adds to the ethereal feel of the background. For the stencil with the largest dots, I used Tim Holtz’s Frozen Fog Mica Spray to add some subtle shimmer; I also splattered some handmade iridescent watercolors on the background for lots of different elements of shimmer and shine!

After I had created the background, I worked with the new stamp and die bundles to create a magical meadow. I heat embossed the butterflies from the Flutter bundle onto some vellum using silver sparkle embossing powder, then die cut them with their coordinating dies. I love embossing butterflies onto vellum; I think it makes them even more delicate and weightless! I also heat embossed some florals from the Wildflowers bundle using White Satin Pearl embossing powder. Before die cutting, I used residual ink from my blending brushes to lightly blend Dew ink on the foliage and Amethyst and Heather on the florals, which when die cut creates a lovely and ethereal emboss/resist effect!

I layered all of the die cuts on the blended background panel with so much (and I do mean SO MUCH) foam adhesive, creating multiple layers and heights by doubling it up for die cuts in the foreground. Finally, I added a “magical” die cut, cut from holographic mirror foil cardstock, but unfortunately I see that that die has been discontinued. You could recreate this with some individual alphabet letter dies, however! I think this finished product is just so much fun and such a departure from my regular projects.

Well, that’s all for me today! If you love Tim Holtz stamps but have been yearning for coordinating dies to make your life easier, Simon Says Stamp has made your wishes come true. I hope you’ll check out all of the fabulous bundles available, because Simon has a variety of bundles for many of Tim Holtz’s stamp designs available. You can check them all out HERE! Thanks so much for stopping by today, and have a marvelous day!

Filed Under: simon says stamp, tim holtz Tagged With: airy greetings, big scripty hugs, bokeh lights, distress watercoloring, flutter, ink blending, mini bouquet, mixed media, ornate trims, shadow box, tim holtz, watercolor, wildflowers

Primary Sidebar

  • Facebook
  • Instagram
  • Pinterest
  • YouTube

Favorite Shops

Secondary Sidebar

Subscribe

Enter your email address to subscribe to this blog and receive notifications of new posts by email.

Instagram
Something is wrong.
Instagram token error.
Follow
Load More

Archives

Tags

3D embossing folder alcohol markers better press birthday birthday card blog hop card kit christmas christmas card christmas tag colored pencil copic copic coloring Daniel Smith die cutting embossing folder embroidery felt giveaway holiday holiday card hot foil ink blending karin brushmarker pro layered stencil masculine my monthly hero new release no line coloring no line watercolor OLO marker olo markers original illustration pawsitively saturated rainbow shaker card slimline stamping stamptember stencil thank you thinking of you valentine's day video watercolor

Popular Posts

Simon Says Stamp Joy For You Blog Hop- Day 1!
Simon Says Stamp Joy For You Release-Now Available!
Frozen Fractals All Around with New Simon Says Stamp Joy For You Release!
Shaped Holiday Shaker Card with New Simon Says Stamp Jolly Season Card Kit of the Month!
Holiday Postage with New Simon Says Stamp!
Simon Says Stamp Glory to the Newborn King Holiday Kit-Part II!
Altenew Build A Flower: Fuchsia Blog Hop+Giveway!
Holiday Joy in Pink and Green with New Simon Says Stamp DieCember!
Pinkfresh Studio 5th Birthday!
Honey Bee Stamps September Release Blog Hop!

Disclosure

Some affiliate links are used in my posts. This means that, should you click on one of my links and purchase something from that company, I will receive a small portion of the sale at no extra cost to you. I use the money earned from these sales to help maintain my blog. I so appreciate you visiting and, if you do choose to use one of my affiliate links, thank you so much for your support!
Copyright © 2026 ·Brunch Pro Theme · Genesis Framework by StudioPress · WordPress · Log in
Loading Comments...