• Skip to main content
  • Skip to primary sidebar
  • Skip to secondary sidebar

Sixth Street Sundries

Emily Midgett

  • Home
  • About Me
  • Contact
  • OLO Marker Color Swatch Chart
  • Shop

packaging

Special Release: Simon Says Stamp Exclusive Tim Holtz Coordinating Dies!

October 22, 2026

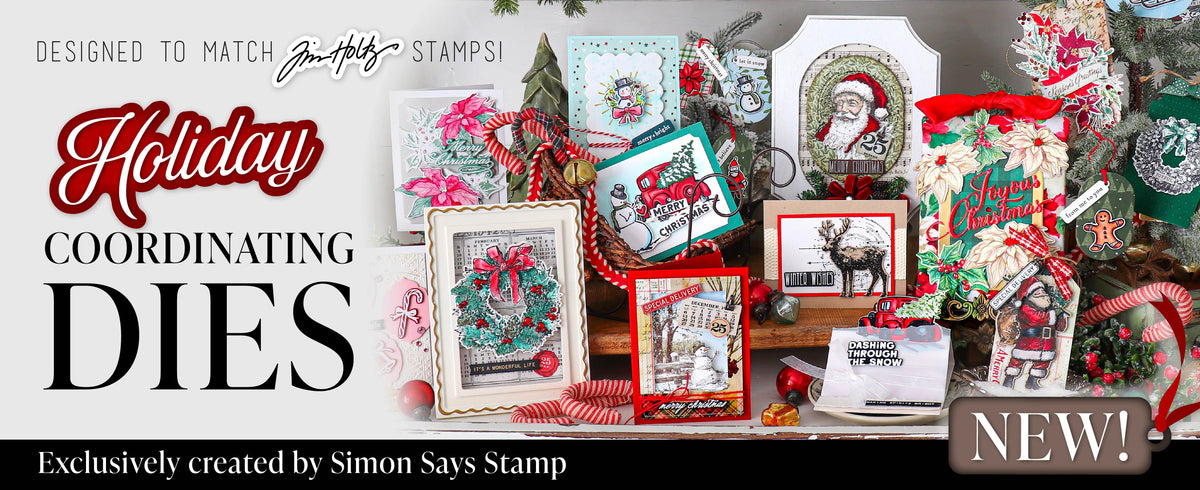
Hi friends! I have a few special projects to share with you today using a super fun, exclusive-to-Simon Says Stamp new release. Crafty Genius Tim Holtz creates the most incredible, vintage inspired holiday stamp sets each year, and Simon Says Stamp now offers super detailed coordinating wafer thin dies to quickly and easily cut out those beautiful images! You can check out all of the Tim Holtz stamp sets and coordinating dies HERE.
I went on a creative spree earlier this week using these fabulous new dies, and for my first project, I created a card and gift bag set using some patterned papers and gorgeous stamped images from the Department Store stamp and die set. Let’s get started with the details on my projects!
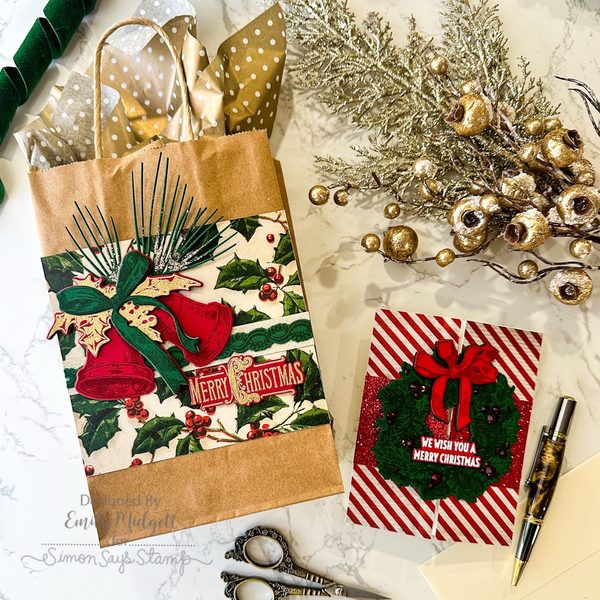
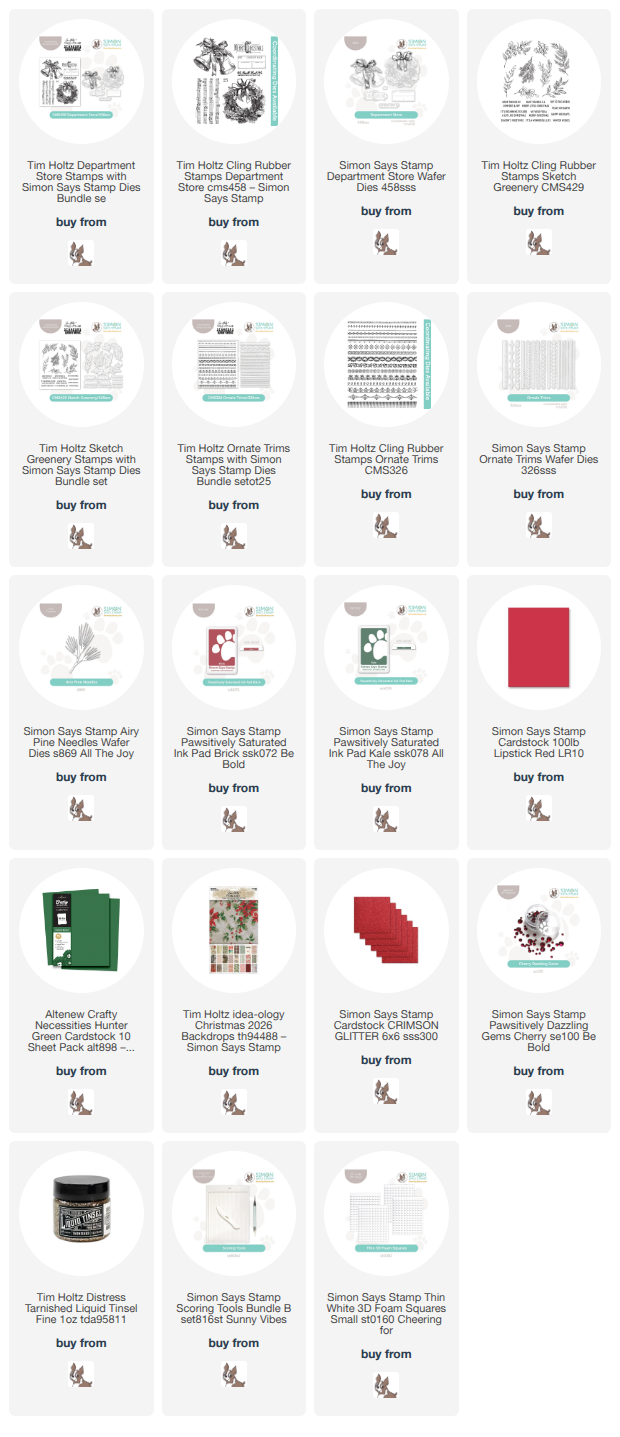
I kept the color palette super traditional and very vintage, a style that almost automatically signals Tim Holtz to me. The new Department Store dies have the super fun feature of being able to layer the details on the wreath and bell images! You can stamp the large image multiple times, perhaps on different colored cardstock or with a different color of ink, then use the individual bow dies to cut out the details so that you can layer them with foam adhesive.
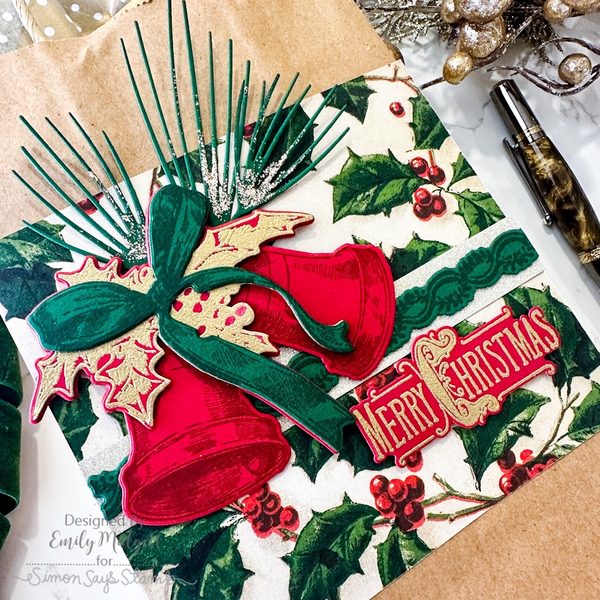
The gorgeous holly patterned paper from the Idea-ology Christmas Backgrounds 2026 Papers inspired this gift bag embellishment, because the holly swag on the bells matched the patterned paper so perfectly! I started by stamping the bells from Department Store three times: once on red cardstock with deeper red ink, once on green cardstock with deeper green ink, and once more on red cardstock with embossing ink and gold embossing powder. Once stamped, I used the individual detailed coordinating dies to cut the holly arrangement from the gold embossed image and the green bow, then used foam adhesive to add them to the complete bell image. I trimmed down the panel of the holly patterned paper and adhered it to a kraft gift bag, then added the bells, some Ornate Trims and glitter cardstock, and finished everything off with some Airy Pine Needles that I embellished with Tarnished Tim Holtz Fine Liquid Tinsel! I just love how this came out with simple stamping, some pretty patterned paper, and a bit of sparkle!
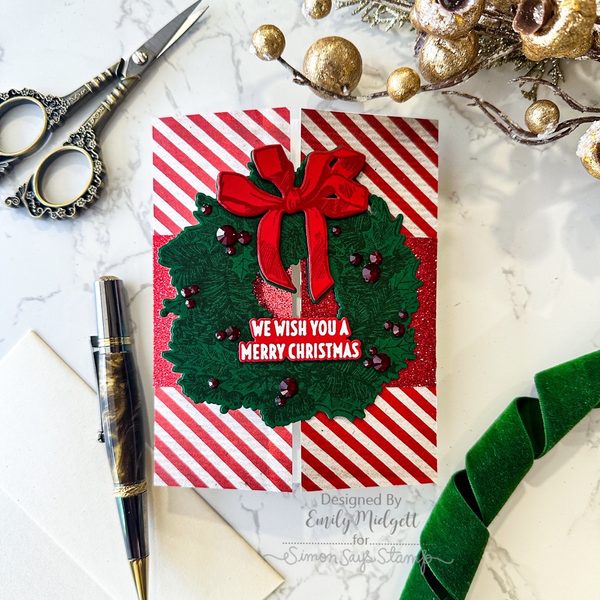
For my second project, I took advantage of the large size of the wreath image from Department Store to create a substantial focal point. I stamped the wreath image twice: once on green cardstock with Kale ink and once on red cardstock with Brick ink, then die cut the green wreath with the large wreath die and the red bow with the individual bow die. I layered the two die cuts together with foam squares and embellished the wreath with some sparkling “berries” created using Cherry Pawsitively Dazzling Gems.
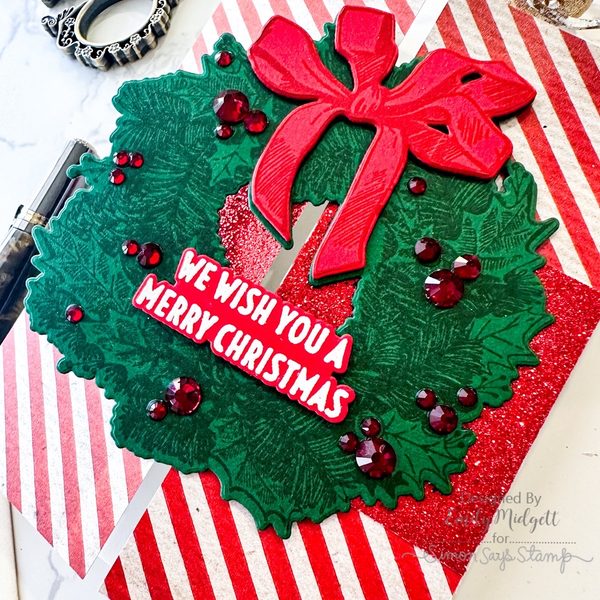
After I had created my focal point, I wanted to create a unique card base to keep things interesting! I created a gate-fold card by scoring a 4.25″ x 11″ piece of cardstock at 2 1/8″ on each end. I then trimmed down some festive red and white striped patterned paper from the Idea-ology Christmas Backgrounds 2026 Papers to 2 1/8″ x 5.5″ and adhered them to both panels of the gate-fold card. I added a thick strip of some super sparkly red glitter cardstock, then mounted the wreath on the card front, adding adhesive to only one side so that the card would open easily and cleanly. For the greeting, I white embossed a sentiment from Sketch Greenery and die cut it with it’s new coordinating die, which I placed in the center of the wreath. I just love how bold and vibrant this project is!

Well, that’s all for my projects today! I have so many more fun projects to share with you using the new Simon Says Stamp Exclusive Tim Holtz Coordinating Holiday Dies. We are heading into the most festive season and I can’t get enough. Thanks so much for stopping by today, and have a marvelous day!
Filed Under: simon says stamp, tim holtz, Uncategorized Tagged With: airy pine needles, christmas, christmas card, department store, gift bag, holiday, holiday card, ornate trims, packaging, patterned paper, sketch greenery

Mother’s Day Gift Bag with New Simon Says Stamp!

February 22, 2024

This post was sponsored by Simon Says Stamp. Thanks, Simon!

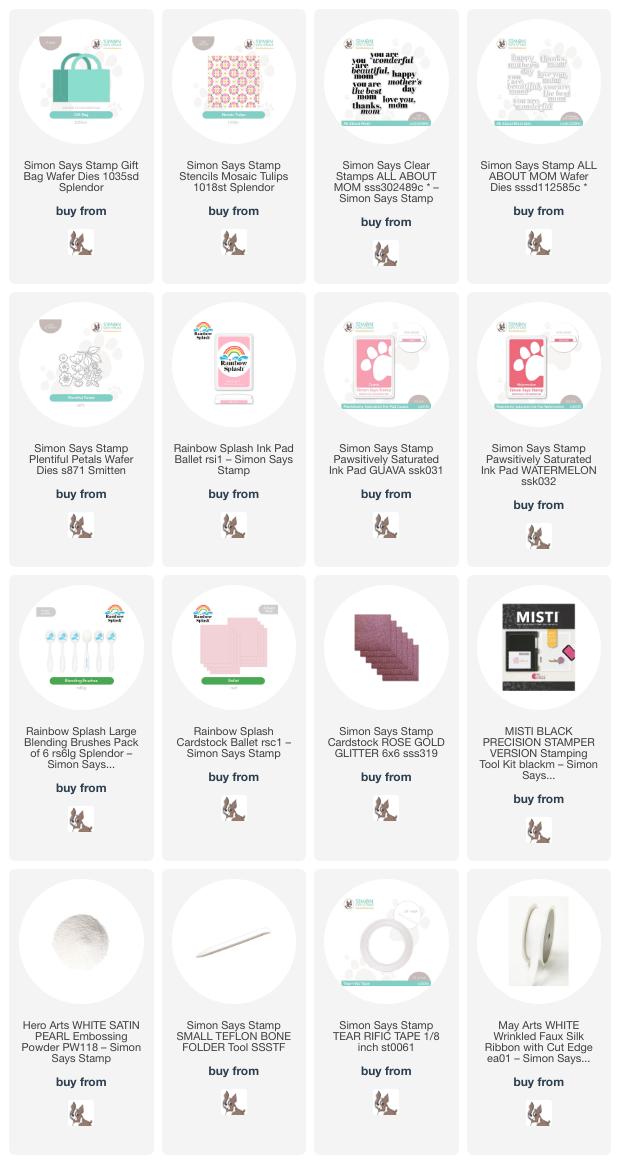
Hi friends! I have some super cute inspiration to share with you today featuring the marvelous new Gift Bag die from the Simon Says Stamp Splendor release! This Gift Bag die creates the most adorable little gift bag, just the perfect size to fit a gift card, some jewelry, some lip gloss… perfect for all of those tiny gifts that don’t need a huge gift bag but still want to look a little special! The Gift Bag die requires just one sheet of 8.5″ x 11″ cardstock, so it’s a super economical and fun way to make your gifts extra exciting. Let’s get started on my Mother’s Day gift bag!!

I started my project by die cutting the Gift Bag die twice from Rainbow Splash Ballet cardstock. To create the pretty pattern on each of the large, flat spaces on the gift bag, I first used Post-It Notes to mask off the sides and bottom while the bag was still a flat die cut. I then blended the pattern from the the layered Mosaic Tulips stencil set using Rainbow Splash blending brushes with Rainbow Splash Ballet ink and Pawsitively Saturated Guava & Watermelon inks to create this feminine tone-on-tone patterned bag. This layered stencil set is fast becoming one of my all-time favorites!!

In keeping with the monochromatic pink color scheme in my head, I used the All About Mom + coordinating die to create a greeting to use on the outside of the gift bag. I wanted to heat emboss my greeting, but since I did not have a shade of embossing powder that was exactly the right shade of pink, I decided to create my own custom “embossing powder” by putting my MISTI to good use! I first stamped the sentiment from All About Mom onto some more Ballet cardstock using Watermelon ink, then without moving the stamp, stamped the sentiment again using embossing ink and sprinkled it with White Satin Pearl embossing powder. The result was a lovely pearlescent pink sentiment, the contrast of which was enhanced by the addition of the pearlescent embossing powder! I used the coordinating die to die cut the finished sentiment, creating a polished, crisp effect.

After I had stenciled my gift bag and created my greeting, it was time to start assembling. I used my bone folder and strong double sided tape to assemble my bag, which went *so* quickly. 3D projects always intimidate me, and this project was incredibly simple to assemble! Score! To adorn my gift bag and Mother’s Day sentiment, I used some floral die cuts from the Plentiful Petals floral dies, cut using both Rose Gold Glitter Cardstock and Ballet cardstock. I also used an alcohol marker to add color to some white faux silk ribbon, tying it in a pretty bow and adhering it to the front of the gift bag. A little pink tissue paper et voilá!

Isn’t this new Gift Bag die just the cutest? I can’t wait to make more bags for different occasions! I’m definitely going to be using this one for teacher gifts at the end of the school year! Thanks so much for stopping by today, and have a marvelous day!

Filed Under: simon says stamp Tagged With: all about mom, gift bag, ink blending, layered stencil, mother's day, packaging, plentiful petals, rainbow splash

Primary Sidebar

  • Facebook
  • Instagram
  • Pinterest
  • YouTube

Favorite Shops

Secondary Sidebar

Subscribe

Enter your email address to subscribe to this blog and receive notifications of new posts by email.

Instagram
Something is wrong.
Instagram token error.
Follow
Load More

Archives

Tags

3D embossing folder alcohol markers better press birthday birthday card blog hop card kit christmas christmas card christmas tag colored pencil copic copic coloring Daniel Smith die cutting embossing folder embroidery felt giveaway holiday holiday card hot foil ink blending karin brushmarker pro layered stencil masculine my monthly hero new release no line coloring no line watercolor OLO marker olo markers original illustration pawsitively saturated rainbow shaker card slimline stamping stamptember stencil thank you thinking of you valentine's day video watercolor

Popular Posts

Simon Says Stamp Joy For You Blog Hop- Day 1!
Simon Says Stamp Joy For You Release-Now Available!
Frozen Fractals All Around with New Simon Says Stamp Joy For You Release!
Shaped Holiday Shaker Card with New Simon Says Stamp Jolly Season Card Kit of the Month!
Holiday Postage with New Simon Says Stamp!
Simon Says Stamp Glory to the Newborn King Holiday Kit-Part II!
Pinkfresh Studio 5th Birthday!
Altenew Build A Flower: Fuchsia Blog Hop+Giveway!
Holiday Joy in Pink and Green with New Simon Says Stamp DieCember!
Honey Bee Stamps September Release Blog Hop!

Disclosure

Some affiliate links are used in my posts. This means that, should you click on one of my links and purchase something from that company, I will receive a small portion of the sale at no extra cost to you. I use the money earned from these sales to help maintain my blog. I so appreciate you visiting and, if you do choose to use one of my affiliate links, thank you so much for your support!
Copyright © 2026 ·Brunch Pro Theme · Genesis Framework by StudioPress · WordPress · Log in
Loading Comments...