• Skip to main content
  • Skip to primary sidebar
  • Skip to secondary sidebar

Sixth Street Sundries

Emily Midgett

  • Home
  • About Me
  • Contact
  • OLO Marker Color Swatch Chart
  • Shop

mica spray

Blue for Halloween with Simon Says Stamp!

August 6, 2024

This post is sponsored by Simon Says Stamp. Thanks, Simon!

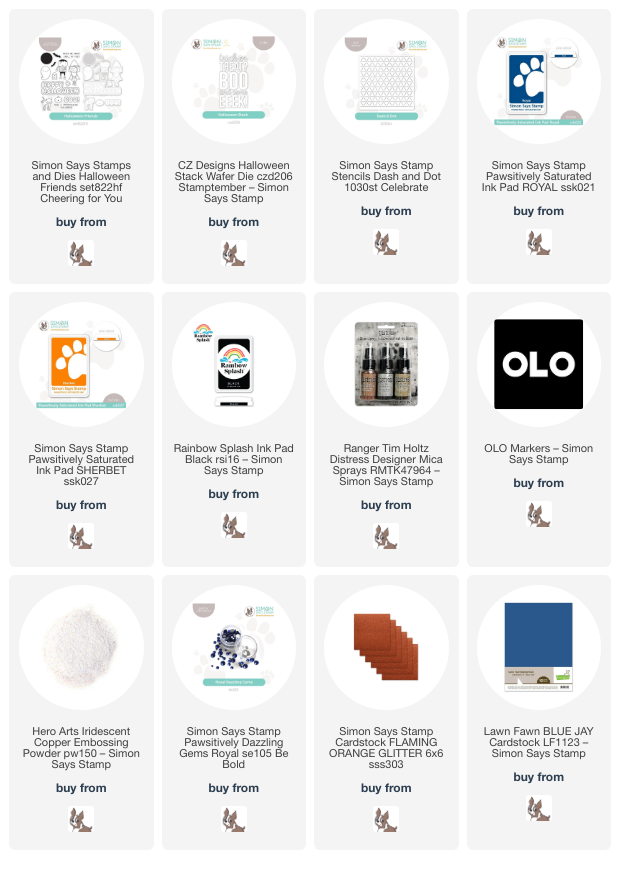
Hi friends! I got into the groove with some of the new Halloween-themed goodies from the Simon Says Stamp Cheering For You release. I don’t typically create much for Halloween, preferring instead to focus on things that are pretty and not gory or spooky, but these new items were so cute and definitely inspiring! I think my lack of interest in Halloween crafts stems from not being a huge fan of orange, but I have discovered that, when paired with certain accent colors, orange can be lovely and not too garish. I paired a few older products with the new Halloween Friends set and a unique royal blue and orange color palette to create this cute, sparkly Halloween card. Let’s get started with the details!

I started my project by stamping several of the images from the new Halloween Friends set onto some white cardstock using Rainbow Splash Black ink, which is alcohol marker-friendly! I colored the images using OLO markers in a palette of orange, blue, and black, then die cut the images with their coordinating dies. I also stamped a greeting from the Halloween Friends stamp set onto some royal blue cardstock and heat embossed it with Iridescent Copper embossing powder.

For the background, I used blending brushes to blend Royal and Sherbet Pawsitively Saturated Ink at the top and bottom of a white A2 card front, making sure to slacken my pressure as I got towards the center of the card front so that the two colors would not mix and create a muddy mess. After I had finished blending, I taped the panel to the Dash + Dots stencil and sprayed it with some Distress Antiqued Bronze Mica Spray, creating a subtle metallic shimmer pattern in the background.

While my background panel was drying, I die cut the Halloween Stack die from some royal blue cardstock and removed the die cut letters, reserving the centers of the letters. I trimmed down a panel of orange glitter paper that was slightly larger than the Halloween Stack die cut and mounted the blue sentiment piece in the center. I also adhered the centers of the letters (like the O and A) to create the negative image. I popped the sentiment die cut up on the blended and spritzed background using thin foam adhesive squares, then used the thicker foam adhesive squares to pop up the colored Halloween die cuts, resting them on the embossed sentiment strip. Finally, I added a few Royal Pawsitively Dazzling Gems for added sparkle.

Well, that’s all for my project today! This orange and royal blue color combination is definitely a new one for me, but I am really enjoying this tweak to the typical autumnal color palette. I hope I’ve inspired you to try tweaking things to fit them into your own personal style, too! Thanks so much for stopping by today, and have a marvelous day!
Filed Under: simon says stamp Tagged With: dash and dot stencil, halloween, halloween friends, halloween stack, ink blending, mica spray, OLO marker, stencil

Dramatic Black, Red, and Gold for Christmas!

November 30, 2023

This post was sponsored by Simon Says Stamp. Thanks, Simon!

Hi friends! I am back with another project using one of my new holiday illustrations for Simon Says Stamp: Festive Bouquets. I was on a roll with the vibrant red lilies when I was coloring a couple of weeks ago; I used OLO markers to create this vivid bouquet for THIS post, but for today’s project, I used Distress Inks to watercolor these bold blooms. Let’s get started with the details!

To start, I heat embossed the lily bouquet from the Festive Bouquets set onto some Fabriano Artistico Cold Press watercolor paper using gold embossing powder. Next, I tapped Barn Door, Aged Mahogany, and Forest Moss Distress Inks onto my palette and picked up the color with my damp paintbrush to add some vibrant watercolor! Once I’d finished watercoloring the images, I tapped Black Soot ink on my palette and did a wash around the edge of the embossed image. I knew that I wanted a black background behind the die cut watercolored image, and adding the black around the edges helps keep the color palette cohesive throughout the project even after die cutting.

After I had finished my watercoloring, I turned to the card base. The lily bouquet in the Festive Bouquets set is quite generously-sized, making it perfect for use with larger card sizes. I trimmed down a panel of Rainbow Splash black to A7 size, then masked around the edges using Satin Masking Tape. I placed the Snow Pattern stencil over the masked area, keeping it in place with a few pieces of washi tape, then spritzed Tim Holtz Mica Spray in Tart Cranberry and Tarnished Brass over the top of the stencil. These beautiful Mica Sprays are opaque enough that they add a subtle shimmer and color to even black cardstock. (Bonus: you can get the super cute Walter the penguin die as a free gift with purchase if you purchase $25 of Tim Holtz product, which includes these fabulous Mica Sprays!)

Once my stenciled pattern had dried and I’d removed the masking tape around the edges, I die cut the A7 Thin Frames dies from Matte Gold Metallic foil cardstock. I always keep my Thin Frames dies wired together, rather than snipping them apart, so that I can create a variety of widths of frames with just one pass through my die cutting machine! I found a frame to cover the edges of the stenciled area and adhered it, then added a slightly larger thinner frame to nest around the outer edge of my stenciled frame. I die cut some Airy Pine Needles using gold glitter cardstock, then added the flowers and pine needles on the top corner of my card using foam adhesive. I added some gold embossed and die cut sentiments from Festive Bouquets using some more foam adhesive, finishing everything off with some matte gold pearl embellishments.

Well, that’s all for my project today! Can you believe that DieCember starts tonight at midnight? I’m so excited to share all of the projects I’ve been creating lately! Thanks so much for stopping by, and have a marvelous day!

Filed Under: original illustrations, simon says stamp Tagged With: A7 thin frames, airy pine needles, distress watercolor, festive bouquets, mica spray, snow pattern, stencil

Primary Sidebar

  • Facebook
  • Instagram
  • Pinterest
  • YouTube

Favorite Shops

Secondary Sidebar

Subscribe

Enter your email address to subscribe to this blog and receive notifications of new posts by email.

Instagram
Something is wrong.
Instagram token error.
Follow
Load More

Archives

Tags

3D embossing folder alcohol markers better press birthday birthday card blog hop card kit christmas christmas card christmas tag colored pencil copic copic coloring Daniel Smith die cutting embossing folder embroidery felt giveaway holiday holiday card hot foil ink blending karin brushmarker pro layered stencil masculine my monthly hero new release no line coloring no line watercolor OLO marker olo markers original illustration pawsitively saturated rainbow shaker card slimline stamping stamptember stencil thank you thinking of you valentine's day video watercolor

Popular Posts

Simon Says Stamp Sending Cheer Release: Now Available!
Joyful Snowman with New Simon Says Stamp Sending Cheer Release!
Autumn Legs with Colorado Craft Company and Catherine Pooler!
February 2018 My Monthly Hero Blog Hop!
Altenew Paint A Flower: Carnation Blog Hop+Giveaway!
Altenew March 2020 Release Blog Hop+Giveaway!
Special Release: Simon Says Stamp Limited Edition STAMPtember Christmas Card Kit!
Pinkfresh Studio 5th Birthday!
Pinkfresh Studios June Washi and Stamp Release Blog Hop!
Studio Katia September Release Blog Hop!

Disclosure

Some affiliate links are used in my posts. This means that, should you click on one of my links and purchase something from that company, I will receive a small portion of the sale at no extra cost to you. I use the money earned from these sales to help maintain my blog. I so appreciate you visiting and, if you do choose to use one of my affiliate links, thank you so much for your support!
Copyright © 2026 ·Brunch Pro Theme · Genesis Framework by StudioPress · WordPress · Log in
Loading Comments...