• Skip to main content
  • Skip to primary sidebar
  • Skip to secondary sidebar

Sixth Street Sundries

Emily Midgett

  • Home
  • About Me
  • Contact
  • OLO Marker Color Swatch Chart
  • Shop

fancy happy holidays

Dramatic Rose Gold and Plum Holiday Card with New Simon Says Stamp!

November 27, 2024

This post was sponsored by Simon Says Stamp. Thanks, Simon!

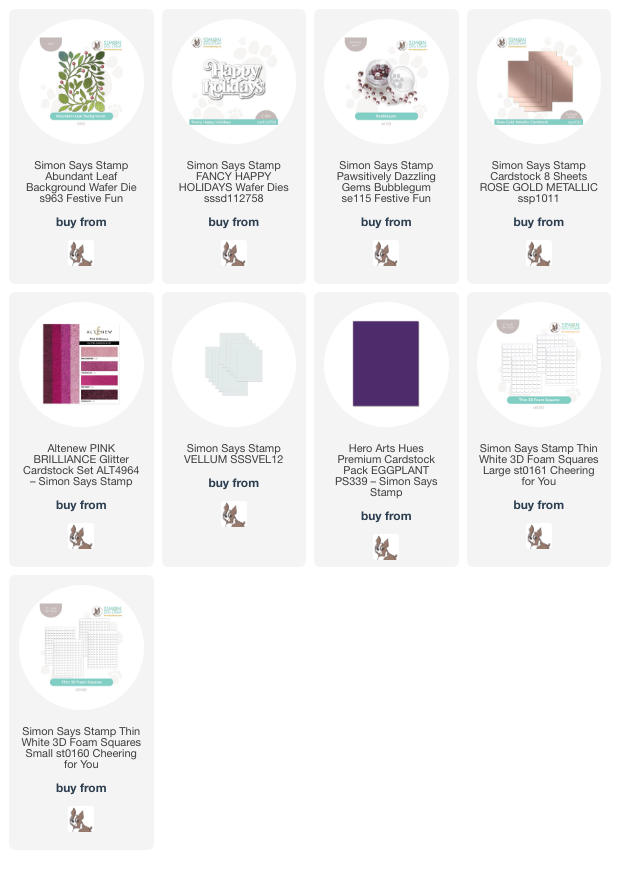
Hi friends! I am back with another project today that uses the new Abundant Leaf Background from the Simon Says Stamp Festive Fun release. I am always up for a unique holiday color combination, and deep, saturated plum paired with shiny rose gold and some sparkles is a winner in my book! The Abundant Leaf Background is a beautifully intricate die that cuts beautifully from many different kinds of cardstock, but I was absolutely enchanted by how perfectly it die cut from Simon Says Stamp’s Metallic Rose Gold cardstock. Metallic cardstock almost always is a winner for intricate die cuts; the coating on the cardstock seems to enhance the details perfectly!! Let’s get started with the details on my project.

*I have gathered links to all of the products used at the bottom of the post for your convenience, using affiliate links. Thank you for shopping with my links! I truly appreciate your support for my work!*

I began by die cutting the foliage from the new Abundant Leaf Background from Metallic Rose Gold cardstock, then die cut the berry detail die using the Rhodonite Garnet glitter cardstock from the Altenew Pink Brilliance Glitter Cardstock. I flipped the metallic foliage cover plate die cut over and added small pieces of foam adhesive to the larger areas and adhered it to a deep plum A2 cardstock card front. Using the foam adhesive is a bit fiddly with such an intricate die cut, but I think that the resulting dimension is so worth it!

After I had adhered the shining foliage die cut to the plum card base, I used liquid adhesive to add the glittering berry die cuts in their appropriate spots. I also die cut a Fancy Happy Holidays for a greeting, cutting the detail layer from more Rhodonite Garnet glitter cardstock and the shadow layer from Simon Says Stamp vellum to help the sentiment stand out from the color saturated background. I added some foam adhesive squares on the back of the solid die cuts to hide the adhesive, then added the sentiment to the center of the card.

Finally, I wanted to add a bit more shine and sparkle to the card, so I added a smattering of Bubblegum Pawsitively Dazzling Gems; these pale pastel pink gems coordinate so nicely with the metallic rose gold foliage and deep magenta/maroon glitter berries!

Well, that’s all for my project today! I think this card is simple enough that it could be easily mass produced with a few minor modifications, and would love lovely in a variety of color combinations. I love with a large cover plate die cut does most of the work for you! Thanks so much for stopping by today, and have a marvelous day!
Filed Under: simon says stamp Tagged With: abundant leaf background, christmas card, die cutting, fancy happy holidays, holiday card, metallic rose gold, pawsitively dazzling gems

Rich Red Ink Blending with New Simon Says Stamp Pawsitively Saturated Inks!

October 25, 2024

This post was sponsored by Simon Says Stamp. Thanks, Simon!

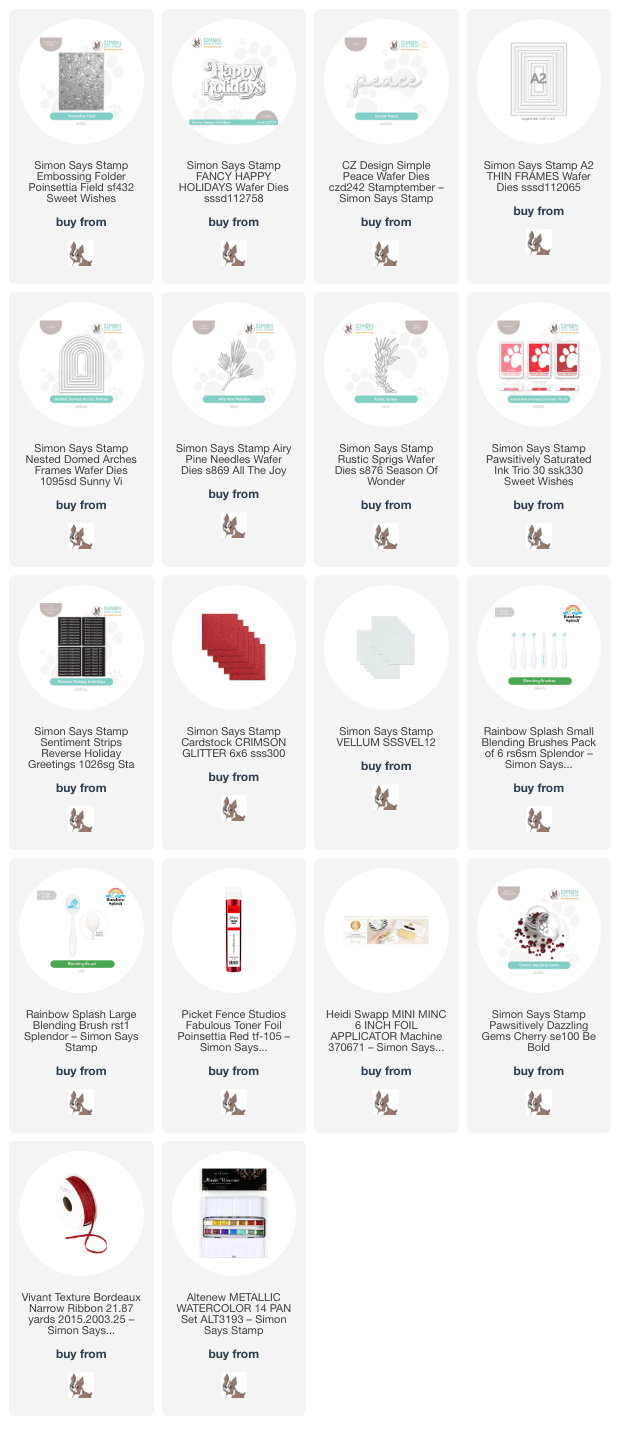
Hi friends! The new Sweet Wishes release from Simon Says Stamp contains a gorgeous new ink trio of luscious, vibrant reds that I used as the inspiration point for my projects today. I always love new ink colors, as color is frequently the first element that I decide when mentally designing my project, and these vibrant, cool reds are absolutely perfect for the holiday season. I used two different techniques with the same embossing folder for today’s projects, so let’s get started with the details!

*I have linked all of the products used at the bottom of the post for your convenience using affiliate links. Thank you for shopping with my links! I truly appreciate your support for my work!*

For both of my projects today, I put the new Ink Trio 30 to use with the beautifully intricate new Poinsettia Field Embossing Folder. The 3D embossing folders from Simon Says Stamp are amongst my most favorite products from every release, because there are so many ways to use them, and so many mediums with which to pair them. I’ve used two different techniques for my projects today, creating two completely different looks with almost identical supplies.

For my first project, I ran a panel of white cardstock through my die cutting machine using the new Poinsettia Field Embossing Folder. To add color to the panel, I flipped the embossed image over to reveal the debossed background, with the images impressed into the cardstock rather than popped up. I then used small blending brushes to blend the two lighter inks in the new Ink Trio 30 in the center of each flower, blending the lightest over most of each flower and enhancing the center of each flower with a small amount of the middle shade from the trio. After I had finished blending on each flower (which sounds time consuming, but actually went quite quickly!), I swiped the darkest shade from the Ink Trio 30 over the raised areas, putting the ink pad directly onto the cardstock, which enhances the pattern and creates such unique texture! I blended that same deeper red around the edges, creating a halo, and splattered the entire panel with metallic red watercolor.

After I had finished creating the background, I die cut a frame from some glittery red cardstock using the Nested Domed Arches Frames and adhered it to the card front using liquid adhesive. I used the same glittery red cardstock to die cut the detail layer of the Fancy Happy Holidays die set and added a vellum shadow behind it. To enhance the sentiment, I die cut some foliage using the Airy Pine Needles die and Rustic Sprigs die, tucking the monochromatic die cuts behind the sparkling dimensional sentiment. Finally, I added a few Cherry Pawsitively Dazzling Gems for added sparkle!

For my second card, I did some simple ink blending using the new Ink Trio 30, using blending brushes to blend a smooth ombré horizontally across a white A2 card front. After ink blending, I made sure that the cardstock was completely dry with my heat tool and ran the panel through my die cutting machine with the Poinsettia Field Embossing Folder. The color saturated panel enhances the incredibly detailed background so beautifully, adding texture and pattern to the panel.

After I had finished the background, I die cut another glittering frame, this time using the A2 Thin Frames and the same Crimson glitter cardstock from Simon Says Stamp. I adhered the frame around the edges of the blended, embossed background. The frames help to draw the eye towards the focal point in the center of the card, as well as add texture to the monochromatic card. I die cut the detail layer of the Simple Peace die from some coordinating red cardstock and the shadow layer from more red glitter cardstock, adhering the two layers together with liquid adhesive. I popped the sentiment die cut up with some foam adhesive squares, then tucked a sentiment strip from the Reverse Holiday Greetings sentiment card set, to which I had added some red toner foil using my Minc machine. To accent the sentiment pieces and add a bit more botanical softness to the card, I die cut a deep red Airy Pine Needles sprig and tucked it beneath the sentiment pieces. Finally, I added a Bordeaux ribbon bow and some shimmering gems.

Well, that’s all for my projects today! Each of these cards is so different while still being exactly the same color palette. It’s amazing what a difference technique makes for the color saturation with these embossing folders! Thanks so much for stopping by today, and have a marvelous day!

Filed Under: simon says stamp Tagged With: A2 thin frames, airy pine needles, christmas card, die cutting, fancy happy holidays, holiday card, ink blending, ink swiping, minc, nested domed arches frames, pawsitively saturated, poinsettia field, reverse holiday greetings, rustic sprigs, simple peace, toner foil

Songs of the Season: I Heard the Bells on Christmas Day…

July 25, 2023

This post is sponsored by Simon Says Stamp. Thanks, Simon!

Merry Christmas in July, friends! I am always so bummed when the holiday season is over and I have to put away my holiday stamps, dies, and hot foil plates in favor of non-holiday images. Companies just keep coming out with wonderful new products each year, and sometimes I don’t even have time to use them all, so they sit in my bins and wait hopefully for the following year’s holiday cardmaking season. To rectify this sad situation, I have decided that I am going to post a distinctly holiday-themed card on the 25th of each month to give me more opportunity to use my supplies and get a head start on my holiday cardmaking.

I wanted to come up with a name for this series, similar to the “Get Cracking on Christmas” series that my friend Jenn Shurkus shares each month, and thought to myself what is my favorite part about the holidays? The food, the gifts, the decor, the generally festive and happy feelings that the holidays evoke… all are individually wonderful pieces that, when put together, make the holiday season as a whole such a special time. But as a child, I was most influenced by the music of the Christmas season. In a past life, I earned a Master’s of Music in vocal performance, due in no small part to the impact that holiday music made on my life. As a young teenager, I wanted to sing the Messiah, the traditional Christmas carols, the popular secular pieces like White Christmas… Singing these familiar pieces on my own and during my voice lessons gave me the opportunity to practice different vocal techniques and styles, from classical oratorio arias to crooning ballads, and listening to those pieces (and singing along whenever possible) made the holiday season truly begin for me. So, my new holiday series is going to be based on the Songs of the Season. Each month, I will select a different holiday musical piece to use as my inspiration for my project.

This month, I have selected a favorite: I Heard the Bells on Christmas Day, specifically the Johnny Cash version. The simple melody (and his equally simple vocal technique) is enhanced to perfection by the simple guitar accompaniment and female backup singers. You can listen to this version HERE on YouTube. His voice is simple, but it resonates with me, reminding me of long car rides in the cold to visit family, tightly wrapped in my coat, perhaps cuddling a new doll or clasping a new purse or book. For my projects today, I started by creating those bells using the Bell dies from Simon Says Stamp. Let’s get started with the details on my projects!

For both of my cards today, I kept the colors intense, but still somewhat muted, with a deep cranberry, pine, and minty green with shimmering rose gold accents. Both projects feature a deep cranberry card front that I first embossed using the Pine Bouquet Embossing Folder. To enhance the beautiful embossed details, I first blended some Redwood ink around the edges with a blending brush, then gently swiped the Rose Gold Pigment Ink pad from Altenew over the raised areas. This beautiful rose gold metallic ink highlights the details so perfectly! The foam pad is not too firm, with just the right amount of springiness to allow this technique to work beautifully. I also splattered the backgrounds with some handmade metallic watercolors to create many levels of sparkle and dimension on the background!

My first project is a fairly literal representation of I Heard the Bells on Christmas Day. I wanted to create a cluster of ringing bells, decorated with some sprigs of holiday foliage and a how. I die cut the Bell dies twice using Brushed Rose Metallic Cardstock, adhering all of the layers with both liquid and foam adhesive to create extra dimension.

To accent the ringing bells, I die cut some holiday greenery using the Etched Berry Branch die and the Fir Branches die. I cut the berry branch from Simon Says Stamp’s Midnight Green cardstock and the fir branches from a lighter shade of green to allow some contrast between the two styles. I accented the berries on the berry branches with some blush pearls to coordinate with the rose gold bells. I also die cut a double bow using the bow die from the Pinkfresh Studio Wrap Around Elements die set, layering the two die cuts together to create a very full bow.

I arranged all of the different die cut elements on my embossed card front using both liquid and foam adhesives for tons of dimension on the textured background. I die cut a Fancy Happy Holidays from the same shimmering white cardstock used for the bow cluster and heat embossed a greeting from Inside Greetings: Christmas using rose gold embossing powder. I popped the greetings up on the card front using foam tape. So much dimension and so many fun individual elements on this card!

My second card uses up some of the leftovers from the first. Before beginning a card heavily laden with botanical die cuts, I always cut a bunch of the elements before building the arrangement. I frequently end up with leftovers, which just gives me an excuse to make another card! I also wanted to use another of the beautiful sentiments from the Inside Greetings: Christmas. Several of them are large enough and have beautiful designs that they can be focal points on a card front. I heat embossed one of the greetings onto a rectangle of the same deep cranberry cardstock that I used for the embossed card base using rose gold embossing powder. The contrast between the light metallic rose gold embossing powder with the deep maroon cardstock is gorgeous!

I assembled the card with both liquid and foam tape to ensure lots of dimension. I love that the sentiment stamp is large enough to stand on its own amongst the busy background. I tucked the leftover bits of foliage around the sentiment and added a few more blush pearls to accent the rose gold color scheme.

Well, that’s all for this month’s edition of Songs of the Season! As we head into the holiday crafting season, there will be plenty more holiday inspiration, but until then, you can check back here on the 25th of each month to get your Christmas card fix. Thanks so much for stopping by, and have a marvelous day!

Filed Under: christmas card, simon says stamp Tagged With: bell die, christmas card, embossing folder, fancy happy holidays, fir branches, holiday card, inside christmas greetings, pine bouquet, songs of the season

Primary Sidebar

  • Facebook
  • Instagram
  • Pinterest
  • YouTube

Favorite Shops

Secondary Sidebar

Subscribe

Enter your email address to subscribe to this blog and receive notifications of new posts by email.

Instagram
Something is wrong.
Instagram token error.
Follow
Load More

Archives

Tags

3D embossing folder alcohol markers better press birthday birthday card blog hop card kit christmas christmas card christmas tag colored pencil copic copic coloring Daniel Smith die cutting embossing folder embroidery felt giveaway holiday holiday card hot foil ink blending karin brushmarker pro layered stencil masculine my monthly hero new release no line coloring no line watercolor OLO marker olo markers original illustration pawsitively saturated rainbow shaker card slimline stamping stamptember stencil thank you thinking of you valentine's day video watercolor

Popular Posts

Simon Says Stamp October 2026 Card Kit of the Month: Homespun Gratitude!
Honey Bee Stamps Cheerful Love Blog Hop!
Altenew Craft A Flower: Poppy Blog Hop+Giveaway!
Autumn Legs with Colorado Craft Company and Catherine Pooler!
Simon Says Stamp Cozy & Bright Inspiration, Part Two!
February 2018 My Monthly Hero Blog Hop!
The Ton Anniversary Release- Day 2
Sunflower Home Decor with Simon Says Stamp!
Simon Says Stamp STAMPtember Surprise: Boo Bundle Halloween Card Kit!
Hero Arts Spring 2020 Catalog Release Blog Hop+Giveaway!

Disclosure

Some affiliate links are used in my posts. This means that, should you click on one of my links and purchase something from that company, I will receive a small portion of the sale at no extra cost to you. I use the money earned from these sales to help maintain my blog. I so appreciate you visiting and, if you do choose to use one of my affiliate links, thank you so much for your support!
Copyright © 2026 ·Brunch Pro Theme · Genesis Framework by StudioPress · WordPress · Log in
Loading Comments...