• Skip to main content
  • Skip to primary sidebar
  • Skip to secondary sidebar

Sixth Street Sundries

Emily Midgett

  • Home
  • About Me
  • Contact
  • OLO Marker Color Swatch Chart
  • Shop

chelsea floral embossing folder

Accentuate Embossing Folder Details with Metallic Cardstock and Alcohol Markers!

April 30, 2024

This post was sponsored by Simon Says Stamp. Thanks, Simon!

Hi friends! I have been crafting for nearly 15 years, and when I first started, I was primarily a Cricut-crafter, making scrapbooks and home decor pieces, with the occasional card thrown in. Cricut’s companion die cutting machine, the Cuttlebug, was also in my arsenal of tools to use with embossing folders, though the embossing folders fell to the wayside when I found stamps and dies. I was delighted when embossing folders began making their resurgence a couple of years ago. We now have so many amazing options to add incredible dimension and texture, including coordinating dies and layering stencils! I don’t mind admitting that as I get older, I can take a longer view on how things evolve, and it’s such fun to see what’s old become new again. Simon Says Stamp has been releasing month after month of exceptional embossing folder designs, with geometric patterns, fun and unique textures, and (my favorites) luscious florals. The new Celebrate release from Simon Says Stamp features an abundance of lovely embossing folders, and my favorite by far was the new Chelsea Floral Embossing Folder. I am always on the lookout for gorgeous florals to color, and the graceful florals with this embossing folder/die combo did not disappoint! I have a pair of cards to share with you today, so let’s get started with the details.

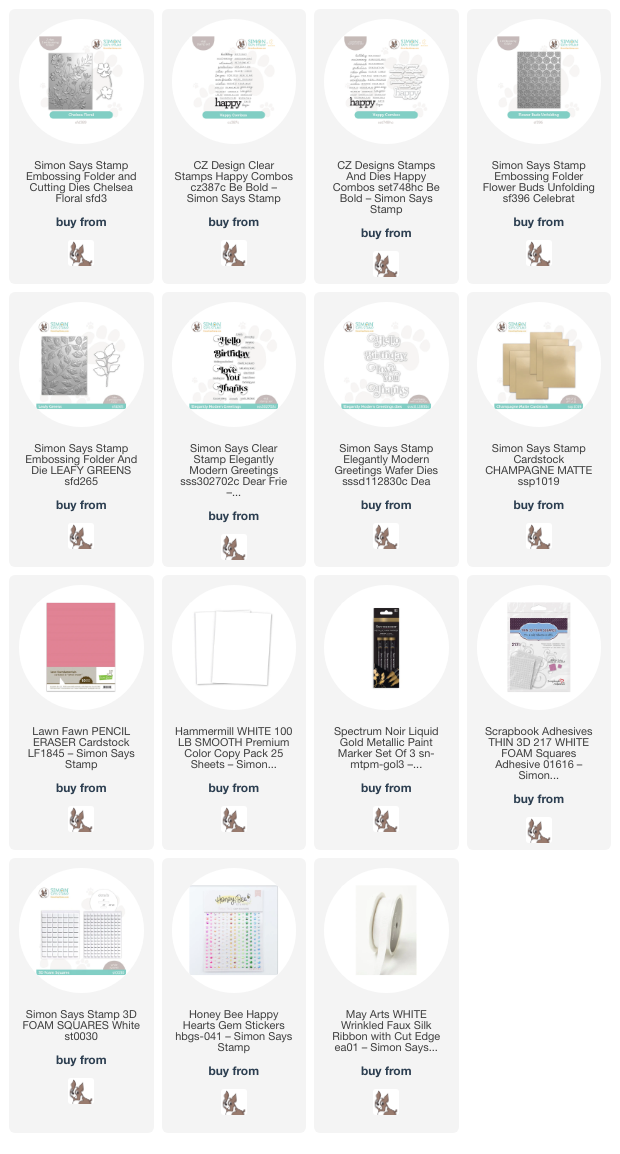
I was recently reminded during the latest Simon Says Stamp Live (you can watch the replay HERE) of how utterly stunning Champagne Matte cardstock is when paired with a super detailed embossing folder. I love to use specialty cardstocks with embossing folders; the coating on these unique cardstocks seem to highlight the intricate details of the raised images even more. I pulled out my pack of the beautiful Champagne Matte cardstock and looked to Pinterest for some color palettes that would complement it. I found a combination with a lovely rosy mauve, peach, and pale sage green that I thought would work beautifully with the softness of the Champagne Matte cardstock.

For my first project, I die cut several of the blooms Chelsea Floral Embossing Folder/die combo, as well as some foliage from the Leafy Greens Embossing Folder/die combo using Hammermill cardstock. After die cutting the images, I lined them up in the coordinating spots on the embossing folders and ran them through my die cutting machine to add the curvature and debossed details. I pulled some Copic markers to create these unique peach melba florals with some delicate, almost silvery sage foliage. I added some gold to the flower centers with a shiny gold paint pen.

Behind the colored floral die cuts, I wanted to add some delicate texture, so I embossed a panel of pearlescent peach cardstock with the new Flower Buds Unfolding Embossing Folder. The floral die cuts lent themselves well to a delicate spray spilling down the long side of a mini-slimline card, so I trimmed the embossed panel down and matted it with an ever-so-slightly larger piece of coordinating sage green cardstock, then placed both pieces in the center of a mini slimline (3.5″ x 6″) panel of Champagne Matte cardstock.

For the greeting, I heat embossed a few of the sentiments from Happy Combos using white embossing powder onto Pencil Eraser cardstock, which coordinated beautifully with the peach melba tones of the flowers. I arranged the floral die cuts on the textured background, popping them up with thin foam adhesive, then used Simon Says Stamp foam squares, which are slightly thicker, to pop up the sentiment pieces. Finally, I added a few sparkly adhesive gems amongst the florals for extra shine!

For my second card, I wanted to take advantage of the beautiful details on the entirety of the Chelsea Floral Embossing Folder. The individual flower die cuts are lovely, but the design for the full embossing folder is just delightful! I embossed an A2 panel of Champagne Matte cardstock using the Chelsea Floral Embossing Folder, then trimmed some off of the top and bottom of the panel with my trimmer so that I could do some color blocking on the bottom of the panel. I added a very thin strip of the same muted sage green that I used on the first project, then a bolder strip of the Pencil Eraser cardstock at the very bottom, covering a full A2 card front completely.

Next, I heat embossed some sentiments from the Elegantly Modern Greetings stamps onto some more Pencil Eraser cardstock using white embossing powder, then used the coordinating die to die cut the intricately detailed “thanks” sentiment. I popped the two sentiment pieces up on the embossed metallic panel using foam adhesive, then used one of the Copic markers from the previous card to dye a piece of faux silk ribbon so that it coordinated beautifully with the color palette! After tucking the pretty pink bow beneath the sentiment, I added a few more sparkly adhesive gems.

Well, that’s all for my projects today! I can’t believe it is nearly May and summertime is just around the corner. It doesn’t seem possible that my big kids will be 5th graders and my little boys will have completed their first year of preschool. Time flies when you’re having fun! Thanks so much for stopping by today, and have a marvelous day!
Filed Under: simon says stamp Tagged With: champagne matte cardstock, chelsea floral embossing folder, copic coloring, copic markers, elegantly modern greetings, embossing folder, flower buds unfolding, happy combos, happy for you, leafy greens, thanks

New Release: Simon Says Stamp Celebrate!

April 17, 2024

This post was sponsored by Simon Says Stamp. Thanks, Simon!

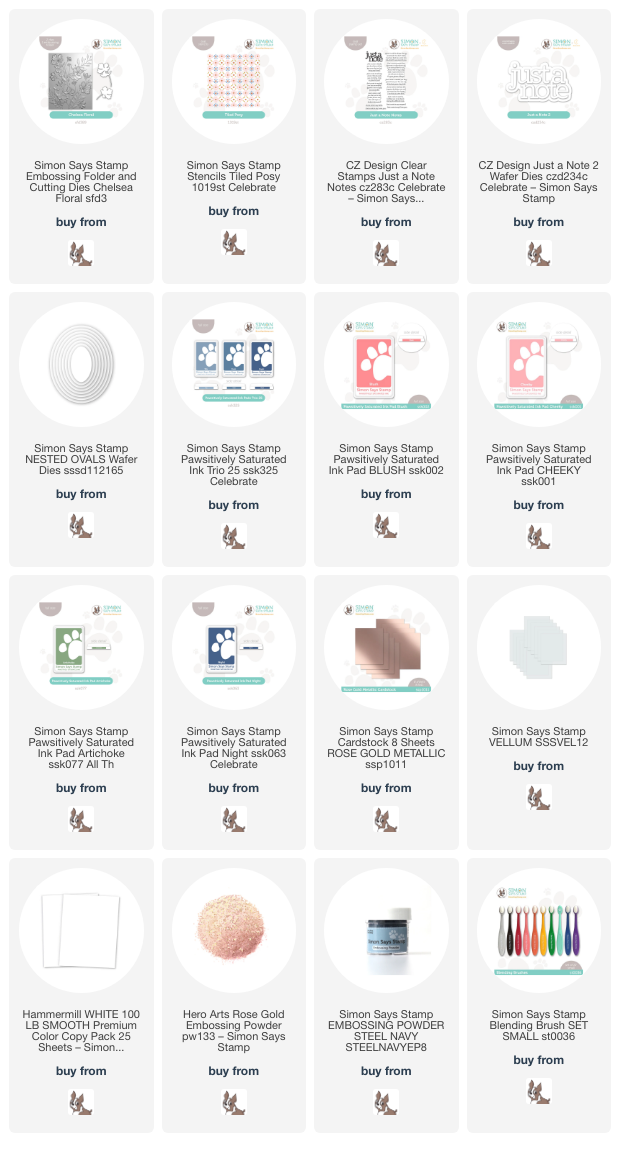
Hi friends! Simon Says Stamp has a new, totally marvelous release to share with you this evening: Celebrate! This new release features a huge variety of styles and products, including a bunch of gorgeous new embossing folders and stencils and the new Pawsitively Saturated Ink Trio 25. I have definitely jumped on the embossing folder+ink swiping bandwagon, and used the beautiful new … ink from the Ink Trio 25 to create a pair of navy and coral projects. Let’s get started with the details!

For my projects today, I started by selecting my ink colors: Blush, Cheeky, Artichoke, and the new Night from Ink Trio 25. I think coral+navy is such an incredibly springy color combination, and the new Night ink worked beautifully with the fresh Blush, Cheeky, and Artichoke inks.

I have fallen in love with the ink swiping technique that is all over social media, and I experimented with the Pawsitively Saturated Inks it on THIS project. Basically, you take your embossed image, flip it over, and use small blending brushes with your colorful inks to add color to the individual images, not being too persnickety with blending outside the lines, because in the next step, you swipe your super dark ink pad over the top of your blended panel, and the ink will only be added to the raised areas, which are the negative spaces on this flipped-over embossed panel!

To start my first project, I embossed the new Chelsea Floral embossing folder on a panel of Hammermill white cardstock, then flipped it over and used small blending brushes to add Pawsitively Saturated Inks in shades of Blush, Cheeky, and Artichoke to the flowers and the foliage. Once I had completed “coloring” my debossed images, I swiped the Night inkpad directly over the top of the panel. The super dark blue covers up the blending that may have gotten outside the lines and beautifully highlights the embossed details of the individual images! To add a bit of extra interest and sparkle to the card front, I used some super sparkly metallic watercolors for the center of the flowers and some added splatters on the entire panel.

For the greeting, I die cut the new Just a Note 2 die from Rose Gold Metallic cardstock from Simon Says Stamp, enhancing the foil detail layer with a vellum shadow die cut. I also heat embossed a greeting from the coordinating Just A Note Notes stamp set onto some deep navy blue cardstock using rose gold embossing powder. I popped both sentiment pieces up with some foam adhesive, then tucked a sparkling rose gold twine bow behind the embossed sentiment. I love the texture that this addition adds to the card! A few coordinating peach gems finished the project off.

For my second project, I paired the same Blush, Cheeky, Artichoke, and Night Pawsitively Saturated Inks with the new Tiled Posy stencil, covering the entirety of an A2 panel of Hammermill cardstock with this dainty floral pattern. I die cut an oval shape from this stenciled panel using the Nested Ovals dies and mounted it on a panel of coordinating navy blue cardstock with foam adhesive.

For the greeting, I heat embossed a poignant sentiment from the Just A Note Notes stamp using Steel Navy embossing powder onto some more vellum. The semi-transparent vellum allows the detailed sentiment to float above the patterned background without adding the bulk of solid cardstock. In order to hide the adhesive on my vellum panel, I die cut a few of the blooms using the Chelsea Floral embossing folder set, then embossed them using the coordinating folder and blended the flowers with Blush, Cheeky, and Artichoke inks, again adding some sparkling rose gold watercolor to the center of the flowers. I adhered those flowers to the vellum sentiment piece, allowed them to dry completely, then flipped the adhered pieces over and added foam adhesive to the back of the solid die cut flowers, effectively hiding the adhesive to keep my vellum clean! The final touch was to add a few more sparkling peach gems.

Well, that’s all for my projects today! I have a huge trove of projects to share with you using the new Celebrate release from Simon Says Stamp, so if you’d like to receive an email notification of a new post, be sure to subscribe to my blog by adding your email address to the box on the top left hand side! And don’t forget to come back on Friday, April 20, 2024 for Day 1 of the two-day Celebrate Blog Hop. A wealth of inspiration to be had that you won’t want to miss! Thanks so much for stopping by today, and have a marvelous day!

Filed Under: simon says stamp Tagged With: 3D embossing folder, chelsea floral embossing folder, ink swiping, just a note 2, just a note notes, nested ovals, tiled posy stencil

Primary Sidebar

  • Facebook
  • Instagram
  • Pinterest
  • YouTube

Favorite Shops

Secondary Sidebar

Subscribe

Enter your email address to subscribe to this blog and receive notifications of new posts by email.

Instagram
Something is wrong.
Instagram token error.
Follow
Load More

Archives

Tags

3D embossing folder alcohol markers better press birthday birthday card blog hop card kit christmas christmas card christmas tag colored pencil copic copic coloring Daniel Smith die cutting embossing folder embroidery felt giveaway holiday holiday card hot foil ink blending karin brushmarker pro layered stencil masculine my monthly hero new release no line coloring no line watercolor OLO marker olo markers original illustration pawsitively saturated rainbow shaker card slimline stamping stamptember stencil thank you thinking of you valentine's day video watercolor

Popular Posts

Simon Says Stamp Sending Cheer Blog Hop- Day 2 + Freebie + Giveaway!
Altenew October 2026 Release Blog Hop + Giveaway!
Rustic Monochromatic Stars for Christmas with Rainbow Splash!
December 2018 My Monthly Hero Blog Hop + Giveaway!
March 2020 Essentials By Ellen Blog Hop+Giveaway!
The Ton Stamps Summer Release: Day 1
Hero Arts Partners Blog Hop: Lawn Fawn!
Waffleflower July Release Blog Hop!
Simon Says Stamp STAMPtember Tim Holtz Collaboration: Festive Holidays!
The Ton Anniversary Release: Day 1!

Disclosure

Some affiliate links are used in my posts. This means that, should you click on one of my links and purchase something from that company, I will receive a small portion of the sale at no extra cost to you. I use the money earned from these sales to help maintain my blog. I so appreciate you visiting and, if you do choose to use one of my affiliate links, thank you so much for your support!
Copyright © 2026 ·Brunch Pro Theme · Genesis Framework by StudioPress · WordPress · Log in
Loading Comments...