• Skip to main content
  • Skip to primary sidebar
  • Skip to secondary sidebar

Sixth Street Sundries

Emily Midgett

  • Home
  • About Me
  • Contact
  • OLO Marker Color Swatch Chart
  • Shop

nested ovals

Eggstra Special with New Simon Says Stamp Favorite Things!

March 4, 2025

This post was sponsored by Simon Says Stamp. Thanks, Simon!

Hi friends! I have some colorful, cheery Easter inspiration using the adorable new Eggstra Special stamp set from Simon Says Stamp’s latest release, called Favorite Things! I leaned into the Pastel Pigment Ink palette from Simon Says Stamp for several of my projects for this release, but I wanted to add a little pop of vibrant pink to this project to help those sweet blooms stand out amongst the colorful Easter eggs. Let’s get started with the details!

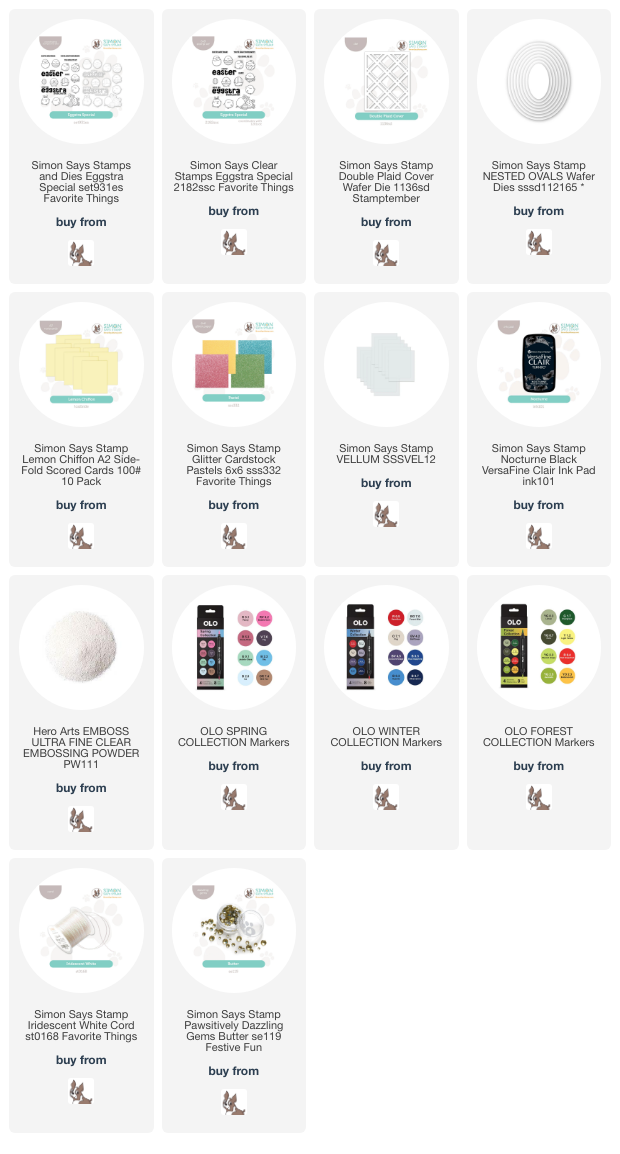
*I have gathered links to all of the products used at the bottom of the post for your convenience, using affiliate links. Thank you for shopping with my links! I truly appreciate your support for my work!*

To start my project, I stamped several images and a sentiment from the new Eggstra Special stamp set onto some white cardstock using Nocturne Pigment Ink, then covered it with Clear Embossing Powder to make those black lines extra crisp and stark against my pastel color palette! I then used OLO Markers in a variety of pastel shades, zhuzhing things up with a pop of vibrant magenta. Because I wanted to have a sunny, buttery yellow background, I used a coordinating butter yellow marker around the white edges of my die cuts to make sure that they transitioned seamlessly from the background to the foreground!

After I had finished my focal point, I die cut the previously-released Double Plaid Cover with the buttery yellow glitter cardstock in the new Pastel 6×6 Glitter Pack. I love this plaid background; it’s the perfect amount of texture and pattern without overwhelming the main focal point! I paired the buttery yellow glitter pattern with a Lemon Chiffon card base, creating a fairly neutral tone-on-tone texture and pattern behind my colorful springtime images.

To help ground my images and sentiment die cuts on my plaid card front so that they weren’t just floating in midair, I die cut one of the Nested Ovals Dies from Simon Says Stamp Vellum. I arranged the colored die cuts in the center of the vellum oval, then adhered all of the die cuts to the front of the card with liquid and foam adhesive, hiding the adhesive for the vellum behind the solid die cuts. To add a few final shimmery accents, I added some Butter Pawsitively Dazzling Gems and a bow tied with the new Simon Says Stamp Iridescent White Cord. I think this card exudes all of the springtime feels!

Well, that’s all for my project today! Have you started crafting for springtime yet? I have definitely noticed a shift in my color palettes, transitioning from lots of deep reds and dramatic jewel tones to white, light, and bright pastel palettes! Thanks so much for stopping by today, and have a marvelous day!
Filed Under: OLO markers, simon says stamp Tagged With: copic coloring, die cutting, double plaid cover, eggstra special, glitter cardstock, lemon chiffon, nested ovals, olo markers, vellum

Monochromatic Winter Scenes with New DieCember from Simon Says Stamp!

December 4, 2024

This post was sponsored by Simon Says Stamp. Thanks, Simon!

Hi friends! I am back with another project using some goodies from the ultra-fabulous DieCember release from Simon Says Stamp. If you’ve visited my blog very much, you’ll know that bold color palettes and vibrant, color-saturated projects are my bread and butter. But, I also hold monochromatic white-on-white projects very closely to my heart. White-on-white is just so ethereal, so utterly elegant, so crisp and clean… it’s such fun to try to achieve as much dimension as possible with different levels of height, different textures, different elements of shimmer and shine. For my projects today, I wanted to use the marvelous new Woodland Treescape die set, which uses three different oval-shaped apertures layered atop one another to create exquisite depth and dimension of this wintry holiday scene. I used the layered oval dies as well as the individual accessory dies to create two different, sparkling projects. Let’s get started with the details!

*I have gathered links to all of the products used at the bottom of the post for your convenience, using affiliate links. Thank you for shopping with my links! I truly appreciate your support for my work!*

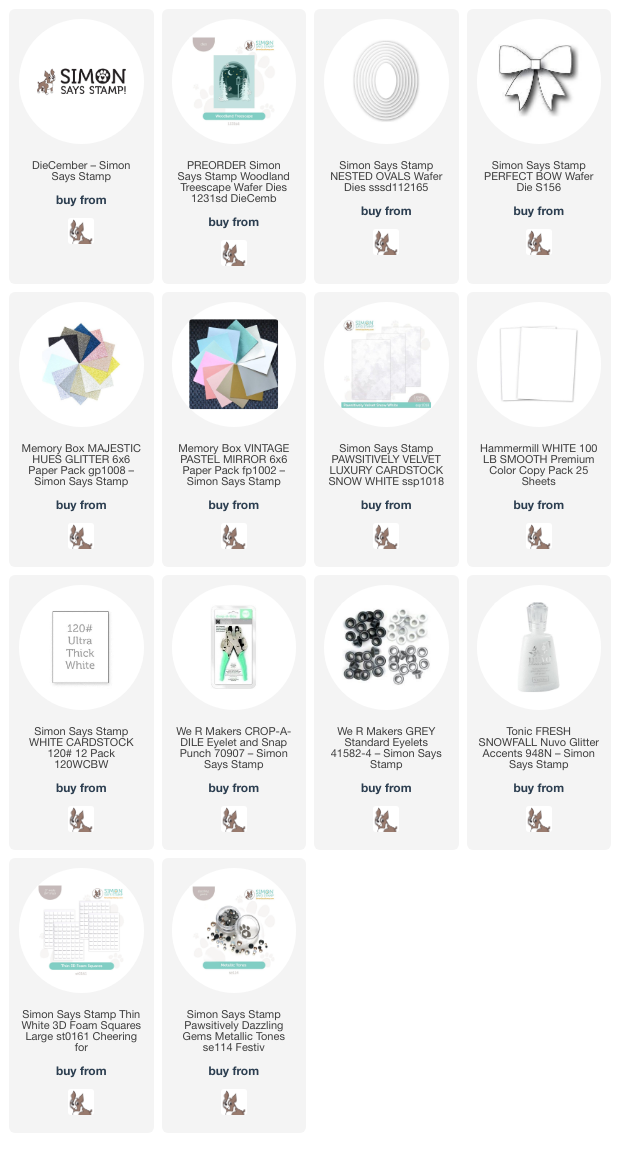
The Woodland Treescape die set features three different oval aperture scenes that are intended to fit perfectly within an A2 card front, as well as individual image dies that work beautifully to enhance the winter scene! I wanted to take full advantage of all of the dies by creating a super detailed framed scene as well as a gift tag that can be turned into an ornament!

To create tons of dimension for both of my projects today, I put into practice my typical monochromatic techniques: texture, texture, and more texture! I love to use multiple types of “coated” cardstock to create dimension and add some distinction between the layers in addition to lots of foam adhesive. For these projects, I combined my typical white cardstock with white glitter cardstock, white pearlescent cardstock, and white velvet cardstock to create lots of different textures and tons of sparkle and shine!

For the tag/ornament, I began by die cutting two medium-sized ovals from the Nested Ovals die set using Simon Says Stamp White 120 lb Heavy Cardstock, layering them together with the scratched sides touching so that not only was the base of the ornament super sturdy, but the back of the ornament was nice and clean. I also die cut a frame using the same die plus the smaller nested die nestled inside it using white glitter cardstock to create a little framed vignette. Using the Woodland Treescape die set, I cut the individual tree dies from white pearl and white glitter cardstock, as well as the lamp post and snowflakes. I popped up the white glitter frame on the edge of the heavy tag stock oval base, then arranged the tree die and lamp die cuts within the frame using liquid and foam adhesive. To make sure that the tag/ornament would withstand being on a present before being added to the tree, I used my eyelet punch and a white eyelet on the punched hole. (I knew I kept that tool around for a reason! Everything comes back in fashion!) I added the snowflakes and Opal Pawsitively Dazzling Gems around the blank areas and some glittering snow using Nuvo Glitter Accents. Finally, I topped the entire thing off with an adorable Perfect Bow die cut from Pawsitively Velvet Snow Velvet cardstock.

How pretty would this be to put on a Christmas tree? I love when handmade tags serve a dual purpose, more than just decorations to be thrown away!

To create my framed scene, I reused the same basic techniques from the tag/ornament: multiple types of white texture, this time within a 5″ x 7″ canvas and lots and lots of foam adhesive! I die cut the elements of the Woodland Treescape die set using the same white glitter, pearlescent, and plain cardstock, cutting each layer from an A7 panel of cardstock. The oval aperture dies can be adapted to fit more than just an A2-sized card! I removed the glass from an inexpensive frame from my local dollar store and backed my A7 panel of white glitter cardstock with it, then arranged the oval die cuts atop it, laying down the first layer with only liquid adhesive, then the second layer with Thin Foam Adhesive Squares, finally adding the last layer with a double layer of Thin Foam Adhesive Squares to ensure many variations in height and distinction between the layers.

After I had layered the large die cuts, I used the same white glitter and pearl cardstock with the individual tree and snowflake dies to add some extra details and fill in some of the blank spots created by using the larger A7 size. I adhered all of the pieces with liquid and foam adhesive, then added some more Opal gems to create a snowy effect. Finally, I added some more white glitter “snow” with the Nuvo Glitter Accents, enhancing the snow drift layers and adding some snow to the tree branches. After the glitter glue was dried, I placed the glass-backed panel inside my frame, allowing the thick layers of foam adhesive to create tons of dimension and depth on my monochromatic winter scene. I am just so in love with this die set… it’s so incredibly elegant and can be used in so many different ways with all of the different components!!

Well, that’s all for my projects today! I know that this Woodland Treescape die set is currently being sold on preorder, so don’t be discouraged that it’s not currently in stock. It seems that I was not the only person who fell in love with this set from DieCember. When you preorder an item, you are guaranteed to be shipped one as soon as the restock arrives at the Simon warehouse. This die set would work beautifully for winter cards beyond Christmas, so don’t miss out on this one! Thanks so much for stopping by today, and happy DieCember!

Filed Under: simon says stamp Tagged With: christmas card, christmas ornament, christmas tag, die cutting, diecember, eyelet, framed scene, holiday card, monochromatic, nested ovals, perfect bow, picture frame, snow, tag, white, woodland treescape

Blue, Pink, and Copper Pumpkins with Simon Says Stamp!

August 27, 2024

This post was sponsored by Simon Says Stamp. Thanks, Simon!

Hi friends! We had a little taste of autumnal temperatures last week, and it made me start yearning for fall! (We’re back to face-melting temps this week, though. Blah!) I pulled out some new-to-me stamps and dies from Simon Says Stamp to indulge my autumnal yearnings, but added some fun blue and pink to the traditional orange pumpkins to create this pair of modern fall cards. Let’s get started with the details!

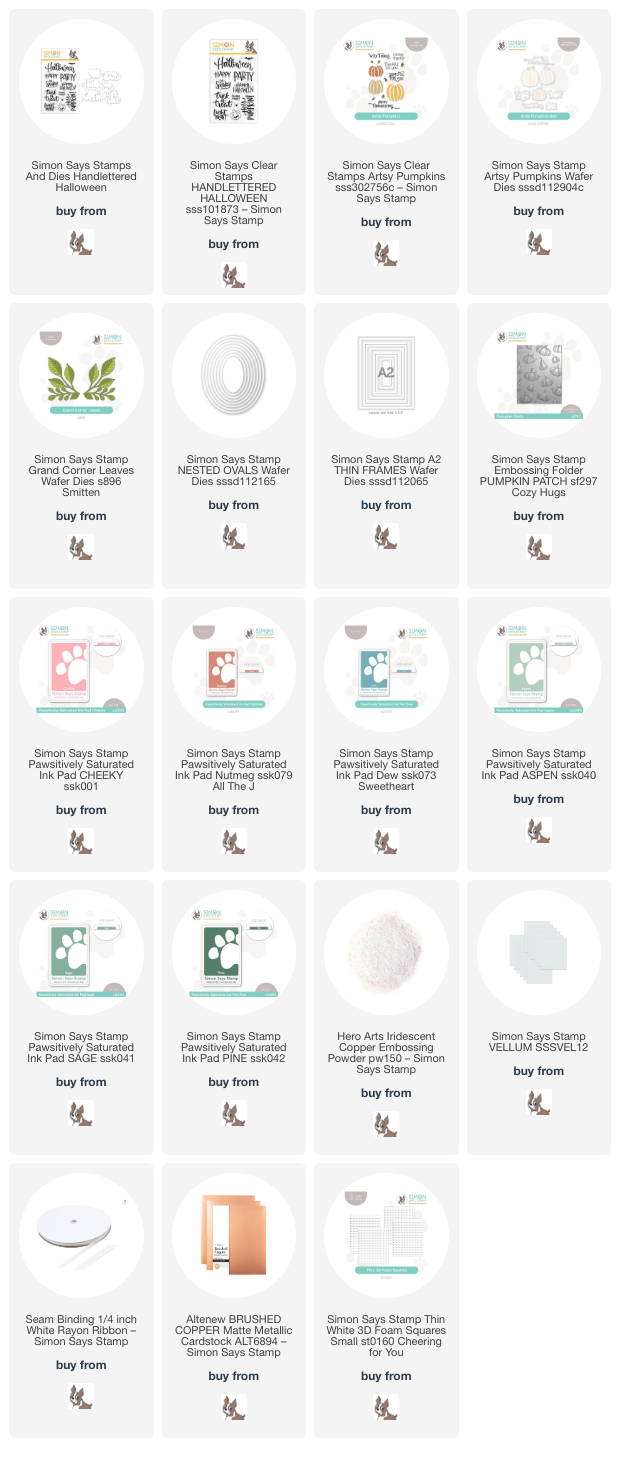
I’ve mentioned before that orange is not my favorite color, but it becomes much more palatable to me when paired with some colors to which I naturally gravitate. I paired the coppery Nutmeg Pawsitively Saturated Ink with Cheeky and Dew ink and crisp white to create a modern autumn color combination!

For my first project, I created a custom patterned paper background by stamping the Artsy Pumpkins stamps onto some bright white cardstock using Cheeky, Nutmeg, and Dew inks, adding foliage and stems with Aspen, Sage, and Pine inks. To create patterned paper, I always start with the largest images first, stamping at least three of them randomly, rotating the stamp and the cardstock to make things look somewhat random and cohesive. I move to the next largest stamp, filling in the large spaces between the stamped images, then fill in any remaining spaces withthe smaller images, always rotating the stamp and the paper to keep things interesting! I also stamped a few extra pumpkins in various sizes and die cut them using their coordinating dies.

After I had created the background, I used a blending brush to blend some more Dew ink around the edge of the card front, creating a soft blue glow.

After I had finished the background, I die cut some foliage using white cardstock and the Grand Corner Leaves dies. I contemplated using some coordinating sage green cardstock, but I thought that the white cardstock kept things light and airy without adding visual weight to the card. I die cut a medium-sized oval using vellum and the Nested Ovals die set, arranging the pumpkin die cuts and foliage on the vellum oval. I hid some foam adhesive on the back of the solid die cuts, adhering the die cuts to the patterned background. I also stamped and heat embossed a greeting from Hand Lettered Halloween using Iridescent Copper embossing powder, die cutting it with the coordinating die. Finally, I tucked a bow made from soem 1/4″ white ribbon amongst the pumpkins and foliage and added a few sparkling gems!

For my second project, I used some of the leftover stamped and die cut pumpkins that I created for the first project using the Artsy Pumpkins stamps and coordinating dies with Cheeky, Nutmeg, Dew, Aspen, Sage, and Pine Pawsitively Saturated Inks. I had one of each size pumpkin left over, so I envisioned a cluster in a pumpkin patch. I created a background using the Pumpkin Patch Embossing Folder and blended some Dew ink in the center to create a blue glow behind my pumpkins! I also splattered the background with some coppery metallic watercolors for added shimmer.

After I had created the embossed background, I trimmed it down slightly and mounted it in the center of a white A2 card front, creating a solid white frame around the embossed background. I added a delicate frame cut using the A2 Thin Frames and brushed copper foil cardstock, then arranged my pumpkin die cuts in a trio over the blended and embossed background, adhering them using single and double layers of thin foam adhesive squares. Finally, I heat embossed a sentiment from Artsy Pumpkins using Iridescent Copper embossing powder, adding it with a triple layer of thin foam adhesive squares. (yes, a triple layer!) For a final touch, I added some tiny sparkling gems in the corners of the metallic foil frame!

Well, that’s all for my projects today! I love taking traditional color palettes and adding a little twist to make them fit my style a bit better. Thanks so much for stopping by today, and have a marvelous day!

Filed Under: simon says stamp Tagged With: A2 thin frames, artsy pumpkins, autumn, fall, grand corner leaves, handlettered halloween, hey pumpkin, nested ovals, pumpkin patch embossing folder

Teal and Lavender with Simon Says Stamp and Interference Ink!

August 19, 2024

This post was sponsored by Simon Says Stamp. Thanks, Simon!

Hi friends! I have another project to share with you using another color of the absolutely spectacular Interference Ink from  Lisa Horton Crafts. I recently purchased many of the colors of these beautiful, shimmery pigment/dye ink combos, and I wasted no time playing with them. They add one of my most favorite embellishments to my cards: shimmer. I love incorporating multiple textures into my monochromatic cards, so having lots of options for colorful shimmer (rather than the typical metallic shimmery inks) helps expand my monochromatic horizons even further. I have paired an unusual color palette for my project today, inspired by the Galaxy Dream Shimmer Interference Ink: teal and lavender. Let’s get started with the details on my project!

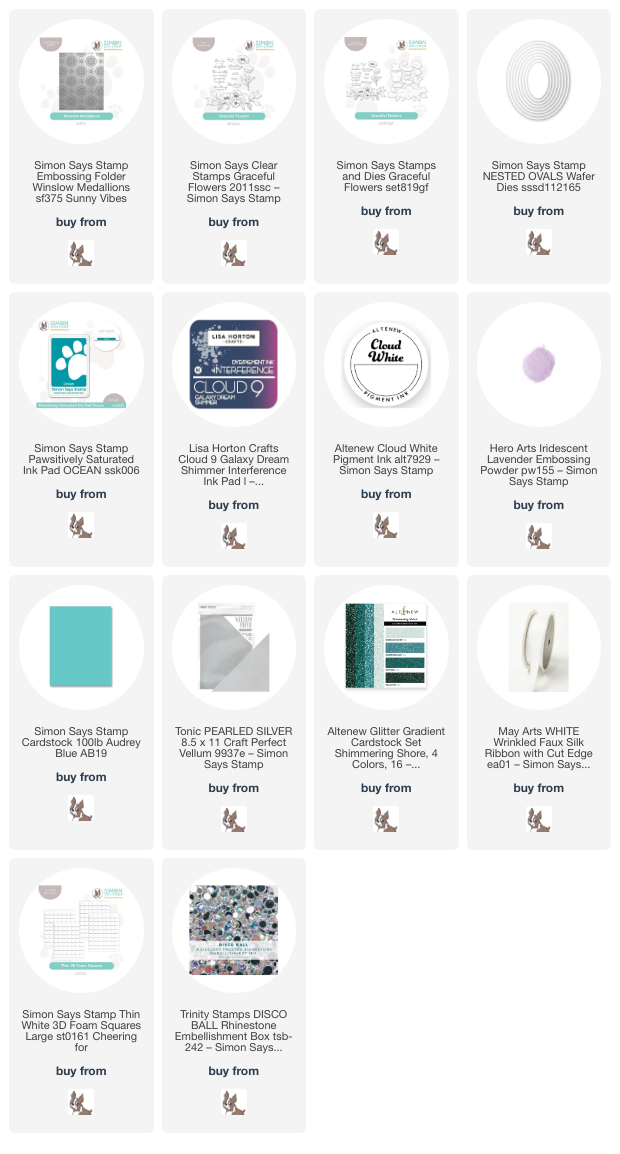
I began by running an A2 panel of Simon Says Stamp Audrey Blue cardstock through my die cutting machine using the Winslow Medallions Embossing Folder. After I had embossed the beautifully detailed texture into the vibrant cardstock, I used a blending brush to blend Ocean Pawsitively Saturated Ink around the edges of the embossed panel, which helps to highlight some of the details in the embossed images and add extra depth to the background. I grabbed my Galaxy Dream Shimmer Interference Ink pad and put it directly to the raised areas of the embossed panel; the shimmer helps to highlight those incredible textural details! I also splattered the background with some metallic watercolors for even more shine.

While my background was drying, I stamped some of the individual floral images from the new Graceful Flowers set onto some more Audrey Blue cardstock, first using white pigment ink and then again with sticky embossing ink. I covered the stamped images with Hero Arts Iridescent Lavender embossing powder and heated it. The initial layer of white pigment ink helps the highlight the embossed image on the vibrant cardstock. After embossing, I die cut the images and sentiment with their coordinating dies and added some more sparkling metallic watercolors to the flower and stem.

Before adhering my embossed images to my sparkling, textured background, I trimmed a strip of teal glitter cardstock and adhered it to the background with some foam adhesive strips to ground my focal point a bit on the card front. Next, I die cut a small oval using the Nested Ovals dies and some pearlescent vellum, onto which I adhered the flower and stem die cuts with some thin foam adhesive squares. I flipped the vellum oval over and hid some more foam adhesive behind the solid die cuts, then added it over the glittery cardstock strip. I tucked the embossed, die cut greeting next to the glittering flower and added a bow created by dying some 1/2″ silk ribbon with an alcohol marker in a coordinating color. Finally, I added a few sparkling Trinity Stamps Disco Ball gems, which have a perfectly coordinating teal and lavender iridescent shine!

Well, that’s all for my project today. If you haven’t checked out the  Lisa Horton Crafts Interference Inks, you’re missing out. I am absolutely loving the additional shimmer that they add to my cards, and I can’t wait to play with them even more. Thanks so much for stopping by today, and have a marvelous day!

Filed Under: simon says stamp Tagged With: 3D embossing folder, graceful flowers, interference ink, monochromatic, nested ovals, shimmer, watercolor, winslow medallions

Happy Sunflowers with new Simon Says Stamp Cheering For You Release!

July 28, 2024

This post was sponsored by Simon Says Stamp. Thanks, Simon!

Hi friends! I have some vibrant sunflower inspiraiton to share with you today using some new goodies from the Simon Says Stamp Cheering For You release. (The contests on Day 1 and 2 of the blog hop are still open, so be sure to check out the Simon Says Stamp blog if you haven’t already!) I love a good standalone die, because you can do so many fun techniques and create so much beautiful texture depending on your cardstock choices! I have two cards to share with you today using several of the new goodies from the release, so let’s get started with the details!

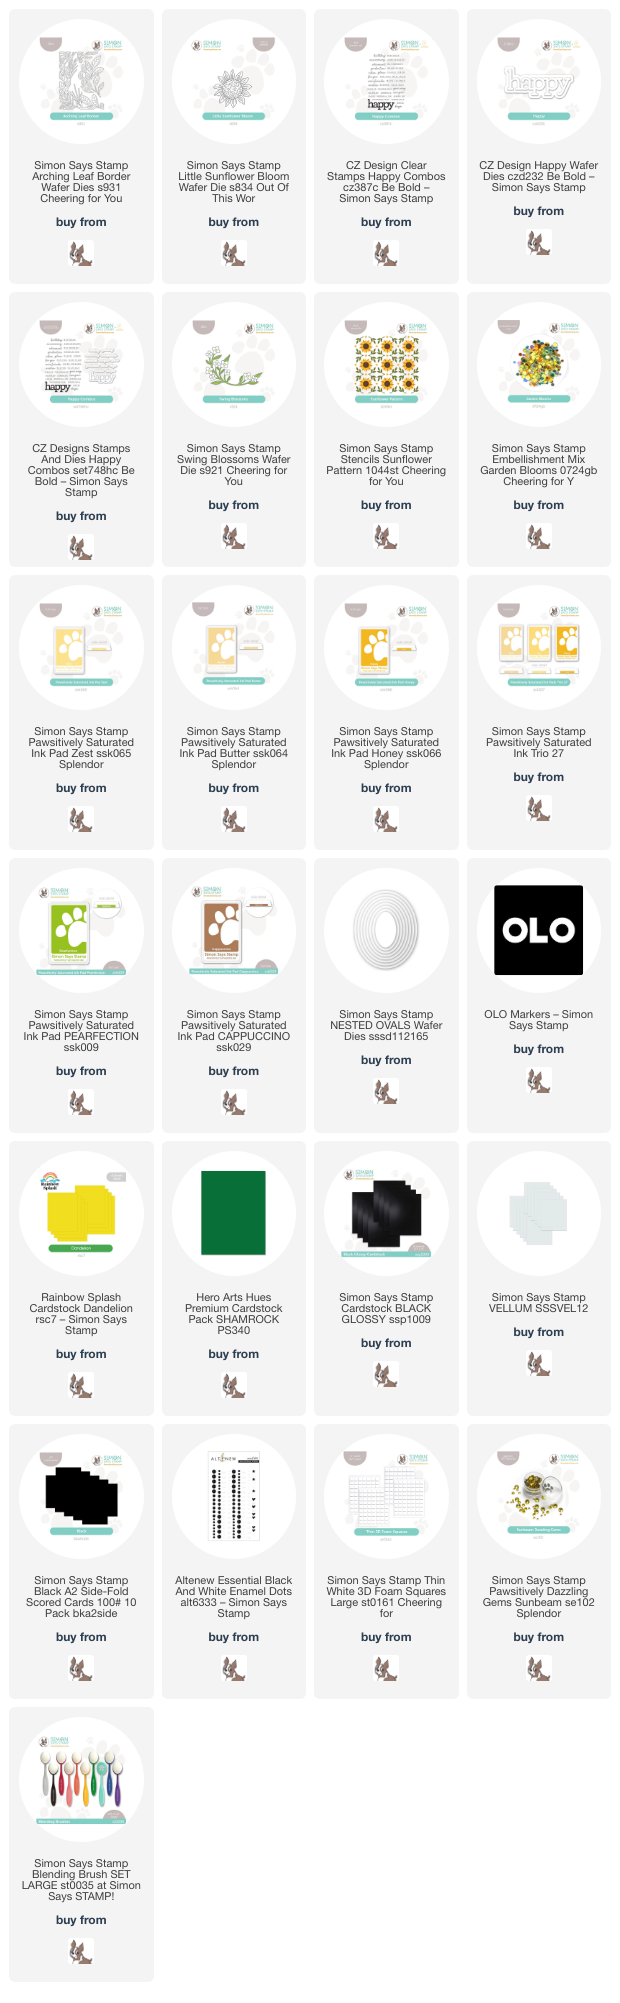
The beautiful new Arching Leaf Border immediately jumped out at me when sorting through the new release. The incredible detail and generous size are gorgeous just on their own, but I couldn’t resist adding some pretty flowers. I was inspired by the new Sunflower Pattern layering stencil set to pair the leaves with some cheerful sunflower die cuts using a crisp, vibrant yellow, green, and black color palette for both of my projects!

To start my shaker card, I die cut the different elements from the Arching Leaf Border from some bright green cardstock. This new die set cuts a beautifully intricate botanical frame that can be cut multiple times to be used to create a full background or once, as I’ve done here, to create a partial background. The die set also comes with individual leaves that you can layer on the intricate frame. I have lots of ideas rolling around in my head for this die set, and I can’t wait to play with it some more! I paired these simply-shaped leaves with some Little Sunflower Bloom die cuts, which I cut from white cardstock and colored using OLO markers, layering two of the sunflower images together to create nice, full floral image.

I wanted to allow those botanical die cut details to shine through, so I decided to back the vivid green leaves with a black card front, adding some extra sparkle with a flat shaker! I created a shaker pocket from some leftover stamp packaging and some black cardstock, then filled it with the new Garden Blooms Embellishment Mix. I adhered the green foliage frame on the edge of the shaker front using liquid adhesive, then nestled the colorful sunflower die cuts amongst the greenery with some foam adhesive. I added a greeting created with the Happy Combos stamps and coordinating dies and the Happy die, which I die cut using Glossy Black cardstock and vellum. I love how beautifully the sequins peek through from behind the delicate leaf die cuts!

For my second card, I used the new Sunflower Pattern layered stencil to create a sunshiny background for the new Swing Blossoms die cuts. I used Pawsitively Saturated Inks in shades of Butter, Zest, Honey, (or purchased as a combo HERE), with Pearfection and Cappuccino inks to create the lovely Sunflower Pattern background on a panel of white A2 cardstock. I die cut an oval focal point using the Nested Ovals dies, then softened the die cut by blending Butter ink around the edges of the oval die cut.

To enhance the pretty yellow floral pattern, I die cut the Swing Blossoms dies twice from some coordinating green and yellow cardstocks, adhering all of the pieces with some liquid adhesive. I added black enamel dots to the center of each flower to create some black eyed Susans! I adhered the oval die cut to one of the new Black A2 Side Fold cards using some of the new Thin Foam Adhesive Squares. I adhered the floral swags on the edge of the stenciled oval, then nestled another greeting from the Happy Combos stamps and coordinating dies and the Happy die, which I die cut using Glossy Black cardstock and vellum. I added a few Sunbeam gems for added sparkle!

Well, that’s all for my projects today. You can check out the full release HERE. Thanks so much for stopping by today, and have a marvelous day!

Filed Under: simon says stamp Tagged With: arching leaf border, happy combos, happy die, ink blending, little sunflower bloom, nested ovals, sunflower, sunflower pattern, swing blossoms

  • Page 1
  • Page 2
  • Go to Next Page »

Primary Sidebar

  • Facebook
  • Instagram
  • Pinterest
  • YouTube

Favorite Shops

Secondary Sidebar

Subscribe

Enter your email address to subscribe to this blog and receive notifications of new posts by email.

Instagram
Something is wrong.
Instagram token error.
Follow
Load More

Archives

Tags

3D embossing folder alcohol markers better press birthday birthday card blog hop card kit christmas christmas card christmas tag colored pencil copic copic coloring Daniel Smith die cutting embossing folder embroidery felt giveaway holiday holiday card hot foil ink blending karin brushmarker pro layered stencil masculine my monthly hero new release no line coloring no line watercolor OLO marker olo markers original illustration pawsitively saturated rainbow shaker card slimline stamping stamptember stencil thank you thinking of you valentine's day video watercolor

Popular Posts

Simon Says Stamp Joy For You Blog Hop- Day 1!
Simon Says Stamp Joy For You Release-Now Available!
Frozen Fractals All Around with New Simon Says Stamp Joy For You Release!
Shaped Holiday Shaker Card with New Simon Says Stamp Jolly Season Card Kit of the Month!
Holiday Postage with New Simon Says Stamp!
Simon Says Stamp Glory to the Newborn King Holiday Kit-Part II!
Pinkfresh Studio 5th Birthday!
Altenew Build A Flower: Fuchsia Blog Hop+Giveway!
Holiday Joy in Pink and Green with New Simon Says Stamp DieCember!
Honey Bee Stamps September Release Blog Hop!

Disclosure

Some affiliate links are used in my posts. This means that, should you click on one of my links and purchase something from that company, I will receive a small portion of the sale at no extra cost to you. I use the money earned from these sales to help maintain my blog. I so appreciate you visiting and, if you do choose to use one of my affiliate links, thank you so much for your support!
Copyright © 2026 ·Brunch Pro Theme · Genesis Framework by StudioPress · WordPress · Log in
Loading Comments...