• Skip to main content
  • Skip to primary sidebar
  • Skip to secondary sidebar

Sixth Street Sundries

Emily Midgett

  • Home
  • About Me
  • Contact
  • OLO Marker Color Swatch Chart
  • Shop

interference ink

Interference Plaid with New Simon Says Stamp!

September 17, 2024

This post was sponsored by Simon Says Stamp. Thanks, Simon!

Hi friends! I have a shimmery holiday card to share with you today using several new goodies from the Simon Says Stamp brand STAMPtember release from earlier this month. This card features some of my favorite things: plaid, greenery, and sparkle! I combined all of these elements with some die cutting and toner foil to create this shimmering card. Let’s get started with the details!

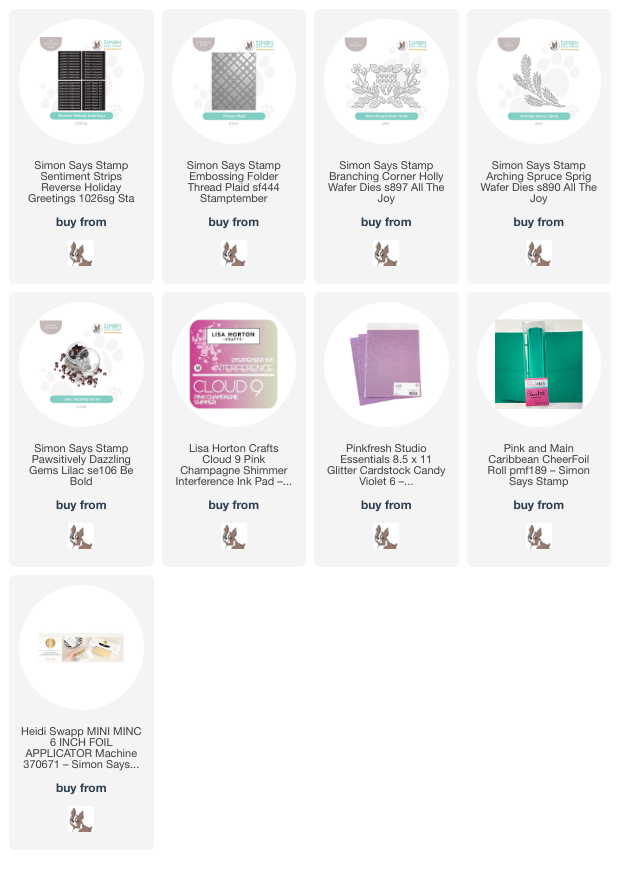
I recently purchased several colors of the Lisa Horton Crafts Interference Inks, and let me just say… I am totally smitten with the beautiful shimmer that they add to your cardstock, even more so when you pair them with colored cardstock as I’ve done here! I ran a panel of emerald green cardstock through my die cutting machine using the new Thread Plaid embossing folder (which is currently out of stock, but you can always sign up to receive an email when it comes back in stock!), then decided to swipe the beautiful Lisa Horton Crafts Champagne Shimmer ink over the raised embossing and around the edges of the textured panel, creating a gorgeous shimmer adds a beautiful lavender shimmer to the card front.

I think that the combination of plaid with holiday greenery is simple and absolutely classic holiday imagery, so I pulled out some green shimmer cardstock, Arching Spruce Sprig die, Branching Corner Holly, and some Candy Violet glitter cardstock to coordinate with the lavender shimmer on the plaid background. I die cut the foliage using the green pearl cardstock, then added the tiny florals cut from the Candy Violet glitter cardstock. I trimmed a panel of vellum cardstock down upon which I could mount the greenery without it getting lost on the plaid background. I arranged the greenery in a swag on the vellum and adhered with both liquid and foam adhesive, then flipped the panel over and added some more foam adhesive behind the solid die cuts, effectively hiding the adhesive behind the semi-transparent vellum.

For the greeting, I ran the fabulous Reverse Holiday Greetings cards through my Minc machine using some coordinating Pink & Main Caribbean Cheerfoil, then popped it up with a double layer of foam adhesive over the holiday greenery swag. Finally, I added a few Lilac Pawsitively Dazzling Gems to add a bit more sparkle and to add one last touch of lavender to the card front!

Well, that’s all for my project today. This card would be so pretty in lots of different color palettes for Christmas, from traditional to the non-traditional teal and lavender palette that I’ve shared here! Plaid and greenery work so perfectly together, don’t you think? Thanks so much for stopping by today, and have a marvelous day!
Filed Under: simon says stamp Tagged With: branching corner holly, christmas card, embossing folder, holiday card, interference ink, lisa horton crafts, minc, reverse holiday greetings, sentiment strips

Teal and Lavender with Simon Says Stamp and Interference Ink!

August 19, 2024

This post was sponsored by Simon Says Stamp. Thanks, Simon!

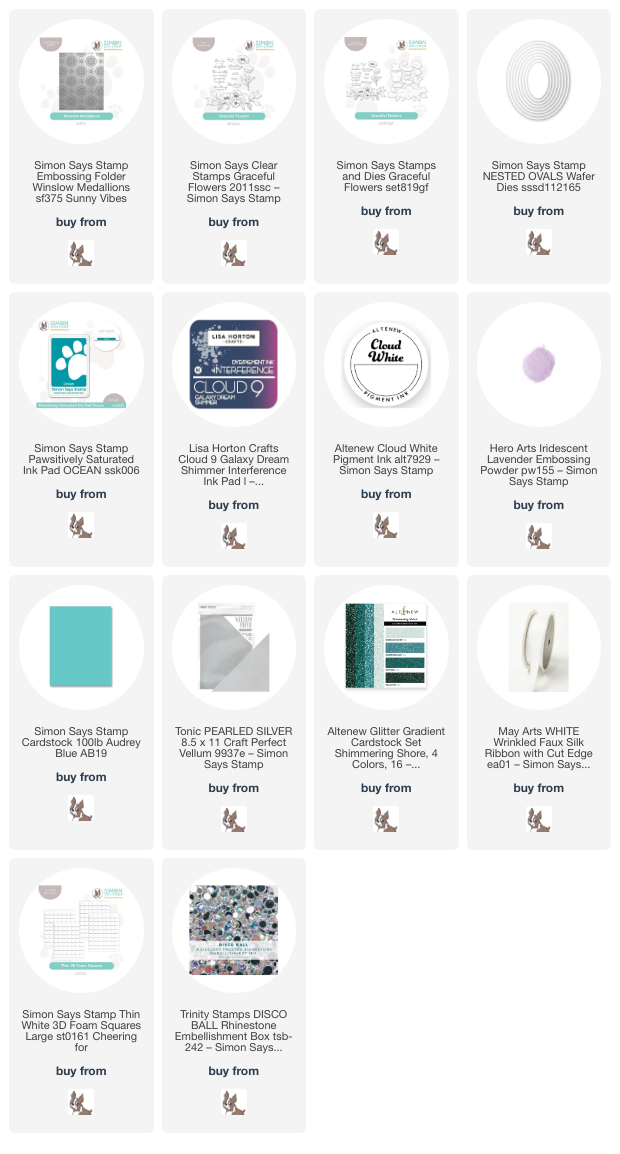
Hi friends! I have another project to share with you using another color of the absolutely spectacular Interference Ink from  Lisa Horton Crafts. I recently purchased many of the colors of these beautiful, shimmery pigment/dye ink combos, and I wasted no time playing with them. They add one of my most favorite embellishments to my cards: shimmer. I love incorporating multiple textures into my monochromatic cards, so having lots of options for colorful shimmer (rather than the typical metallic shimmery inks) helps expand my monochromatic horizons even further. I have paired an unusual color palette for my project today, inspired by the Galaxy Dream Shimmer Interference Ink: teal and lavender. Let’s get started with the details on my project!

I began by running an A2 panel of Simon Says Stamp Audrey Blue cardstock through my die cutting machine using the Winslow Medallions Embossing Folder. After I had embossed the beautifully detailed texture into the vibrant cardstock, I used a blending brush to blend Ocean Pawsitively Saturated Ink around the edges of the embossed panel, which helps to highlight some of the details in the embossed images and add extra depth to the background. I grabbed my Galaxy Dream Shimmer Interference Ink pad and put it directly to the raised areas of the embossed panel; the shimmer helps to highlight those incredible textural details! I also splattered the background with some metallic watercolors for even more shine.

While my background was drying, I stamped some of the individual floral images from the new Graceful Flowers set onto some more Audrey Blue cardstock, first using white pigment ink and then again with sticky embossing ink. I covered the stamped images with Hero Arts Iridescent Lavender embossing powder and heated it. The initial layer of white pigment ink helps the highlight the embossed image on the vibrant cardstock. After embossing, I die cut the images and sentiment with their coordinating dies and added some more sparkling metallic watercolors to the flower and stem.

Before adhering my embossed images to my sparkling, textured background, I trimmed a strip of teal glitter cardstock and adhered it to the background with some foam adhesive strips to ground my focal point a bit on the card front. Next, I die cut a small oval using the Nested Ovals dies and some pearlescent vellum, onto which I adhered the flower and stem die cuts with some thin foam adhesive squares. I flipped the vellum oval over and hid some more foam adhesive behind the solid die cuts, then added it over the glittery cardstock strip. I tucked the embossed, die cut greeting next to the glittering flower and added a bow created by dying some 1/2″ silk ribbon with an alcohol marker in a coordinating color. Finally, I added a few sparkling Trinity Stamps Disco Ball gems, which have a perfectly coordinating teal and lavender iridescent shine!

Well, that’s all for my project today. If you haven’t checked out the  Lisa Horton Crafts Interference Inks, you’re missing out. I am absolutely loving the additional shimmer that they add to my cards, and I can’t wait to play with them even more. Thanks so much for stopping by today, and have a marvelous day!

Filed Under: simon says stamp Tagged With: 3D embossing folder, graceful flowers, interference ink, monochromatic, nested ovals, shimmer, watercolor, winslow medallions

Enhancing Embossing Folder Details with Lisa Horton Crafts Interference Inkpads!

August 15, 2024

This post was sponsored by Simon Says Stamp. Thanks, Simon!

Hi friends! I recently purchased some new-to-me inks that I’ve seen for a long time: Lisa Horton Crafts Interference Inks. These inks are a mixture of dye and pigment ink, creating an ink that has an incredibly unique metallic pearlescent shimmer and shifts colors in different lights and angles! An Instagram friend of mine (@ritzyhag) shared one of her projects with these inks that she’d purchased from the UK last year, and so I was super excited to see them available at Simon Says Stamp. (Click HERE to see them all!) I purchased… several… of these inks, and I am absolutely delighted with the initial experiementation results.

If you’ve been paying any attention to my blog over the last several months, you know that embossing folders are some of my most favorite products, simply because of the versatility of techniques with which you can use on them. When I purchased these inks, my first instinct was to pair them with some gorgeous detailed embossing folders, and boy they did not disappoint. I have created several cards to share with you over the next couple of weeks, but I thought we’d start off with some citrus-y cards to juxtapost the cool color palettes from my cards this week. Let’s get started with the details!

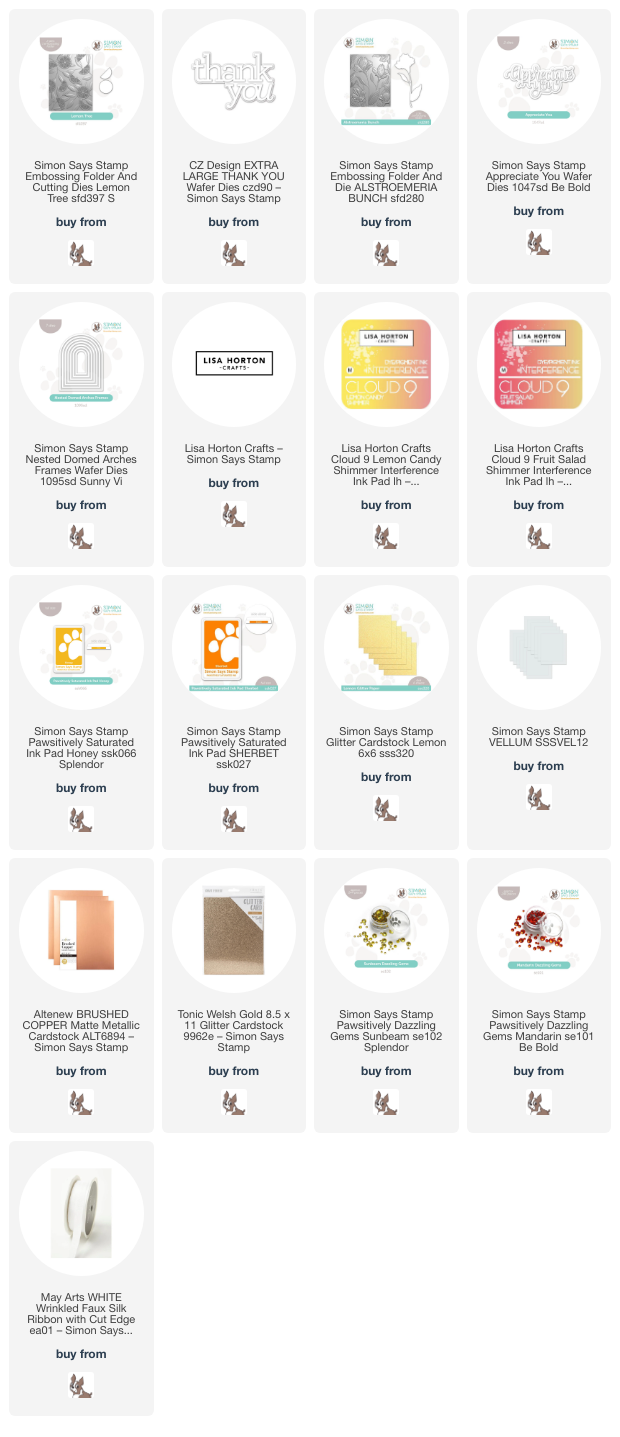
I realized that I hadn’t used the new Lemon Tree Embossing Folder, so I pulled that out and started ruminating on some citrusy colors and themes. The Interference Inks come in such an enormous array of colors; it was easy to find some colors that would beautifully accent this citrus color palette! They are a mixture of pigment and dye inks, so they stamp one color on white and another on black. I am having tons of fun experimenting with them on different colors of cardstock, too!!

I started by embossing a panel of sunny yellow cardstock with the new Lemon Tree Embossing Folder, then blended Honey Pawsitively Saturated Ink around the edges with a blending brush. Blending after embossing enhances the textured pattern on the cardstock and adds extra dimension to the panel. After I had finished blending, I swiped the raised areas of the panel with the gorgeous Lisa Horton Crafts Lemon Candy Shimmer ink, which adds some incredible shimmer to the pattern and adds some luxury to the entire panel. I also splattered the background with some shimmering gold glitter watercolors from my stash.

For the greeting, I kept things simple, cutting the Thank You XL die from some yellow glitter cardstock and vellum, then popped it up on the blended backdrop with some thin strips of foam adhesive. I used an alcohol marker to add some deep yellow to a length of white silk ribbon and tied it in a fluffy bow, tucking it beneath the sentiment die cut. Finally, I added a few sparkling Sunbeam Pawsitively Dazzling Gems. The shimmer and sparkle on this card is incredible in real life!!

For my second card, I continued with the citrusy color palette, this time using an under-utilized color in my craft room: tangerine. I paired it with the Alstroemeria Bunch Embossing Folder, creating a fiery tiger lily-inspired background. I embossed the orange A2 cardstock with the Alstroemeria Bunch Embossing Folder, then blended around the edges with Sherbet Pawsitively Saturated Ink. To enhance the details on the embossed area, I swiped Lisa Horton Craft Fruit Salad Shimmer ink over the raised areas. This reddish orange metallic ink worked beautifully with the blended background to add the prettiest shimmer to my project! I took it one step further and splattered some sparkling rose gold glitter watercolor on the background, as well.

For the greeting, I die cut the detail layer of the Appreciate You die from some copper brushed metallic foil cardstock and the shadow from some vellum, adhering the two layers together with liquid adhesive. I also die cut the Nested Domed Arches Frames from some Welsh gold glitter paper, popping one of the frames up on the embellished card front with some thin strips of foam adhesive. Before adhering the greeting over the arched frame, I die cut one of the standalone alstroemeria flowers, which is included in the Alstroemeria Bunch Embossing Folder, from some more of the same vivid orange cardstock, then placed the die cut in the coordinating spot of the embossing folder and ran it through my die cutting machine to emboss the details into the image. I used some residual ink on the blending brush from blending on the card front to add some dimension to the standalone die cut, then added some more rose gold glitter watercolor details. I popped up the alstroemeria flower die cut and greeting with foam adhesive over the glittery arched frame, finishing the card off with some sparkling Mandarin Pawsitively Dazzling Gems.

Soooo much sparkle and shimmer on these cards… the pictures simply do not do them justice!! These new Lisa Horton Crafts Interference Inks have so much potential for fun techniques. I can’t wait to continue playing with them! Thanks so much for stopping by today, and have a marvelous day!

Filed Under: simon says stamp Tagged With: 3D embossing folder, alstroemeria bunch, appreciate you, extra large thank you, ink blending, interference ink, lemon tree, lisa horton interference inks, nested domed arches frames

Primary Sidebar

  • Facebook
  • Instagram
  • Pinterest
  • YouTube

Favorite Shops

Secondary Sidebar

Subscribe

Enter your email address to subscribe to this blog and receive notifications of new posts by email.

Instagram
Something is wrong.
Instagram token error.
Follow
Load More

Archives

Tags

3D embossing folder alcohol markers better press birthday birthday card blog hop card kit christmas christmas card christmas tag colored pencil copic copic coloring Daniel Smith die cutting embossing folder embroidery felt giveaway holiday holiday card hot foil ink blending karin brushmarker pro layered stencil masculine my monthly hero new release no line coloring no line watercolor OLO marker olo markers original illustration pawsitively saturated rainbow shaker card slimline stamping stamptember stencil thank you thinking of you valentine's day video watercolor

Popular Posts

Simon Says Stamp Joy For You Blog Hop- Day 1!
Simon Says Stamp Joy For You Release-Now Available!
Frozen Fractals All Around with New Simon Says Stamp Joy For You Release!
Shaped Holiday Shaker Card with New Simon Says Stamp Jolly Season Card Kit of the Month!
Holiday Postage with New Simon Says Stamp!
Simon Says Stamp Glory to the Newborn King Holiday Kit-Part II!
Pinkfresh Studio 5th Birthday!
Altenew Build A Flower: Fuchsia Blog Hop+Giveway!
Holiday Joy in Pink and Green with New Simon Says Stamp DieCember!
Honey Bee Stamps September Release Blog Hop!

Disclosure

Some affiliate links are used in my posts. This means that, should you click on one of my links and purchase something from that company, I will receive a small portion of the sale at no extra cost to you. I use the money earned from these sales to help maintain my blog. I so appreciate you visiting and, if you do choose to use one of my affiliate links, thank you so much for your support!
Copyright © 2026 ·Brunch Pro Theme · Genesis Framework by StudioPress · WordPress · Log in
Loading Comments...