• Skip to main content
  • Skip to primary sidebar
  • Skip to secondary sidebar

Sixth Street Sundries

Emily Midgett

  • Home
  • About Me
  • Contact
  • OLO Marker Color Swatch Chart
  • Shop

nested ovals

April Showers Bring May Flowers with Simon Says Stamp: Mother’s Day Gift Suite with Thankful Magnolia!

May 2, 2024

This post was sponsored by Simon Says Stamp. Thanks, Simon!

Hi friends! It’s officially May… I’m a little bit in shock at how quickly the year is flying by! I am not sad to see the end of April 2024; we had quite a lot of stressful events taking place last month, of which the biggest was my son breaking his leg. He’s on the mend, now, and we are coming up on some fun events in May that I am really excited about. The crazy weather has also leveled out a little, with lots of April showers bringing an abundance of May flowers! I thought that I would honor the beautiful blooms in the outside world by creating my own card-gardens for a new series for the month of May, using some of the floral stamps I’ve illustrated for Simon Says Stamp over the last few years. Some of the sets have been (sadly) discontinued, but there are still several of them that are available. Over the course of the month of May, I will be sharing inspiration using these stamp sets for the April Showers Bring May Flowers series. First up: Thankful Magnolia!

I love creating coordinating gift suites, and the large floral illustration from Thankful Magnolia is so substantial and detailed that I decided to use it for some framed watercolor artwork, a coordinating Mother’s Day card (with no coloring on it at all), and to adorn the front of one of Simon Says Stamp’s new Black Bubble Mailer envelopes. Coordinating project suites for the win!

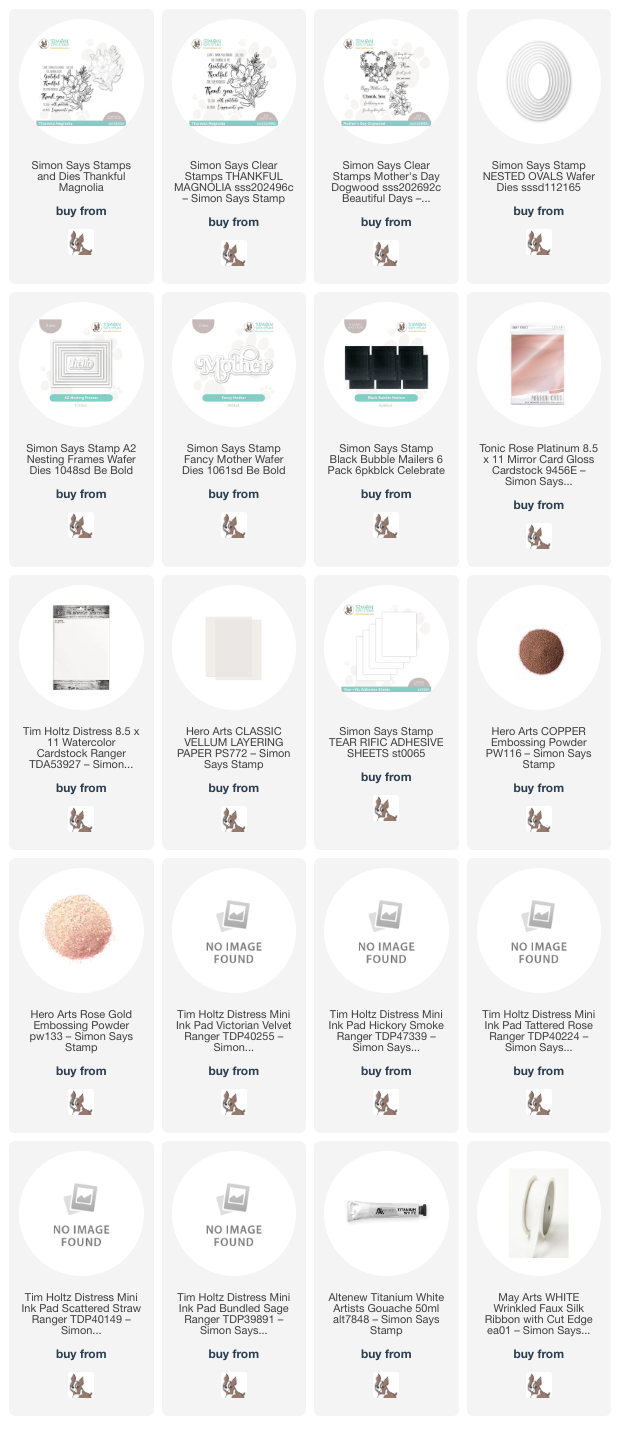
For the framed artwork, I heat embossed the large magnolia image from Thankful Magnolia onto a panel of 4″ x 6″ Distress Watercolor Cardstock using Copper embossing powder. I then used Distress Ink Mini cubes in shades of Scattered Straw, Tattered Rose, Victorian Velvet, Bundled Sage, Hickory Smoke to watercolor the image, tapping the cubes on my watercolor palette and picking the color up with my damp paintbrush to apply it to the heat embossed image. To create a very pale magnolia image, I used some visual reverse psychology, painting the area around the main image the dark Hickory Smoke and Victorian Velvet to increase the contrast between the light magnolia and the dark backdrop. (I demonstrate this technique in THIS video.) After I had completed the watercoloring, I splattered some Altenew Titanium White Artists’ Gouache around the image for a bit of artsy flair!

Once my watercoloring had been completed, I placed the painting in an inexpensive frame from the dollar store and embellished it with a pretty white May Arts faux silk ribbon bow! An inexpensive, but heartfelt, gift that any mom would love to receive. I know my mom always loves receiving my artwork!

For the coordinating card, I heat embossed the large image from Thankful Magnolia onto some Hero Arts Vellum using Copper embossing powder. I wanted to create a card that coordinated with, but was not as involved as, the painting and the super smooth embossing on the vellum highlights the details of the image beautifully, even without any extra coloring! I die cut the image using the coordinating die; I love how detailed this die is, cutting out even the interior spaces on the image. So much easier than fussy cutting it.

For the card base, I blended some Victorian Velvet Distress Ink on the bottom left corner of a pale pink A2 card front, then added a shiny frame cut using the A2 Nesting Frames dies from Tonic Rose Platinum foil cardstock, which coordinates beautifully with the copper embossed floral image. I also heat embossed a sentiment from my Mother’s Day Dogwood stamp set using Rose Gold embossing powder on some deep magenta cardstock from my stash, which enhanced the coordinating Fancy Mother die cut, cut from the same magenta cardstock. I adhered the sentiment pieces to the vellum image with some liquid adhesive, then flipped it over and added my foam adhesive behind those solid die cuts. The last step was a few shimmering gems for extra sparkle!

My mom lives a couple of hours from me, and so I know that I will need to mail her gift to her, so I decided to embellish one of the new Black Bubble Mailer envelopes to coordinate with my gift suite. I created my own sticky label by adding some Simon Says Stamp Tear-rific Adhesive Sheets to the back of some thin pink paper (lightweight paper=flush against the envelope and less chance of damage during mailing). I die cut my sticker label using the Nested Ovals dies, then stamped a tone-on-tone Thankful Magnolia image using Victorian Velvet Distress Ink. I used a black pen to add the address (these are not our actual addresses, just for privacy reasons), but I probably would use a thicker black pen or marker to add the address if I were truly going to mail it. An embellished envelope is the perfect way to let the recipient know that the contents are extra special!

Well, that’s all for my projects today! I’m so excited to have an excuse to play with some of my older floral illustrations. I hope you don’t mind indulging me! Thanks so much for stopping by today, and happy May!
Filed Under: simon says stamp Tagged With: A2 Nesting Frames dies, artwork, bubble mailer, fancy mother, mother's day card, mother's day dogwood, nested ovals, original illustration, thankful magnolia

New Release: Simon Says Stamp Celebrate!

April 17, 2024

This post was sponsored by Simon Says Stamp. Thanks, Simon!

Hi friends! Simon Says Stamp has a new, totally marvelous release to share with you this evening: Celebrate! This new release features a huge variety of styles and products, including a bunch of gorgeous new embossing folders and stencils and the new Pawsitively Saturated Ink Trio 25. I have definitely jumped on the embossing folder+ink swiping bandwagon, and used the beautiful new … ink from the Ink Trio 25 to create a pair of navy and coral projects. Let’s get started with the details!

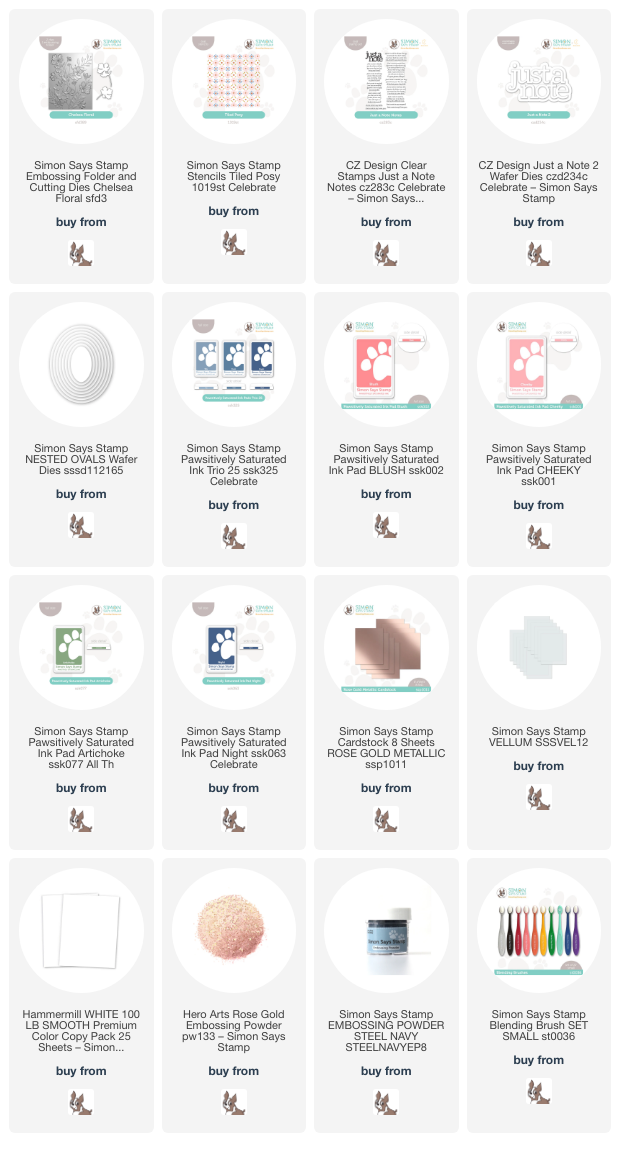
For my projects today, I started by selecting my ink colors: Blush, Cheeky, Artichoke, and the new Night from Ink Trio 25. I think coral+navy is such an incredibly springy color combination, and the new Night ink worked beautifully with the fresh Blush, Cheeky, and Artichoke inks.

I have fallen in love with the ink swiping technique that is all over social media, and I experimented with the Pawsitively Saturated Inks it on THIS project. Basically, you take your embossed image, flip it over, and use small blending brushes with your colorful inks to add color to the individual images, not being too persnickety with blending outside the lines, because in the next step, you swipe your super dark ink pad over the top of your blended panel, and the ink will only be added to the raised areas, which are the negative spaces on this flipped-over embossed panel!

To start my first project, I embossed the new Chelsea Floral embossing folder on a panel of Hammermill white cardstock, then flipped it over and used small blending brushes to add Pawsitively Saturated Inks in shades of Blush, Cheeky, and Artichoke to the flowers and the foliage. Once I had completed “coloring” my debossed images, I swiped the Night inkpad directly over the top of the panel. The super dark blue covers up the blending that may have gotten outside the lines and beautifully highlights the embossed details of the individual images! To add a bit of extra interest and sparkle to the card front, I used some super sparkly metallic watercolors for the center of the flowers and some added splatters on the entire panel.

For the greeting, I die cut the new Just a Note 2 die from Rose Gold Metallic cardstock from Simon Says Stamp, enhancing the foil detail layer with a vellum shadow die cut. I also heat embossed a greeting from the coordinating Just A Note Notes stamp set onto some deep navy blue cardstock using rose gold embossing powder. I popped both sentiment pieces up with some foam adhesive, then tucked a sparkling rose gold twine bow behind the embossed sentiment. I love the texture that this addition adds to the card! A few coordinating peach gems finished the project off.

For my second project, I paired the same Blush, Cheeky, Artichoke, and Night Pawsitively Saturated Inks with the new Tiled Posy stencil, covering the entirety of an A2 panel of Hammermill cardstock with this dainty floral pattern. I die cut an oval shape from this stenciled panel using the Nested Ovals dies and mounted it on a panel of coordinating navy blue cardstock with foam adhesive.

For the greeting, I heat embossed a poignant sentiment from the Just A Note Notes stamp using Steel Navy embossing powder onto some more vellum. The semi-transparent vellum allows the detailed sentiment to float above the patterned background without adding the bulk of solid cardstock. In order to hide the adhesive on my vellum panel, I die cut a few of the blooms using the Chelsea Floral embossing folder set, then embossed them using the coordinating folder and blended the flowers with Blush, Cheeky, and Artichoke inks, again adding some sparkling rose gold watercolor to the center of the flowers. I adhered those flowers to the vellum sentiment piece, allowed them to dry completely, then flipped the adhered pieces over and added foam adhesive to the back of the solid die cut flowers, effectively hiding the adhesive to keep my vellum clean! The final touch was to add a few more sparkling peach gems.

Well, that’s all for my projects today! I have a huge trove of projects to share with you using the new Celebrate release from Simon Says Stamp, so if you’d like to receive an email notification of a new post, be sure to subscribe to my blog by adding your email address to the box on the top left hand side! And don’t forget to come back on Friday, April 20, 2024 for Day 1 of the two-day Celebrate Blog Hop. A wealth of inspiration to be had that you won’t want to miss! Thanks so much for stopping by today, and have a marvelous day!

Filed Under: simon says stamp Tagged With: 3D embossing folder, chelsea floral embossing folder, ink swiping, just a note 2, just a note notes, nested ovals, tiled posy stencil

  • « Go to Previous Page
  • Page 1
  • Page 2

Primary Sidebar

  • Facebook
  • Instagram
  • Pinterest
  • YouTube

Favorite Shops

Secondary Sidebar

Subscribe

Enter your email address to subscribe to this blog and receive notifications of new posts by email.

Instagram
Something is wrong.
Instagram token error.
Follow
Load More

Archives

Tags

3D embossing folder alcohol markers better press birthday birthday card blog hop card kit christmas christmas card christmas tag colored pencil copic copic coloring Daniel Smith die cutting embossing folder embroidery felt giveaway holiday holiday card hot foil ink blending karin brushmarker pro layered stencil masculine my monthly hero new release no line coloring no line watercolor OLO marker olo markers original illustration pawsitively saturated rainbow shaker card slimline stamping stamptember stencil thank you thinking of you valentine's day video watercolor

Popular Posts

Simon Says Stamp Joy For You Blog Hop- Day 1!
Simon Says Stamp Joy For You Release-Now Available!
Frozen Fractals All Around with New Simon Says Stamp Joy For You Release!
Shaped Holiday Shaker Card with New Simon Says Stamp Jolly Season Card Kit of the Month!
Holiday Postage with New Simon Says Stamp!
Simon Says Stamp Glory to the Newborn King Holiday Kit-Part II!
Pinkfresh Studio 5th Birthday!
Altenew Build A Flower: Fuchsia Blog Hop+Giveway!
Holiday Joy in Pink and Green with New Simon Says Stamp DieCember!
Honey Bee Stamps September Release Blog Hop!

Disclosure

Some affiliate links are used in my posts. This means that, should you click on one of my links and purchase something from that company, I will receive a small portion of the sale at no extra cost to you. I use the money earned from these sales to help maintain my blog. I so appreciate you visiting and, if you do choose to use one of my affiliate links, thank you so much for your support!
Copyright © 2026 ·Brunch Pro Theme · Genesis Framework by StudioPress · WordPress · Log in
Loading Comments...