• Skip to main content
  • Skip to primary sidebar
  • Skip to secondary sidebar

Sixth Street Sundries

Emily Midgett

  • Home
  • About Me
  • Contact
  • OLO Marker Color Swatch Chart
  • Shop

mother's day dogwood

Floral Flashback Week: Mother’s Day Dogwood with Simon Says Stamp!

February 18, 2025

This post was sponsored by Simon Says Stamp. Thanks, Simon!

Hi friends! I am back with another installment of this week’s Floral Flashback, this time focusing on another older set: Mother’s Day Dogwood! This set features two different arrangements featuring dogwood flowers, one in a detailed heart arrangement with lots of foliage and accent flowers, and another, simpler dogwood branch. I decided to go to town stamping and coloring that dogwood branch to create another A7-sized card, this time using one of the fabulous Clear Acetate Card Bases from Simon Says Stamp. Let’s get started with the details!

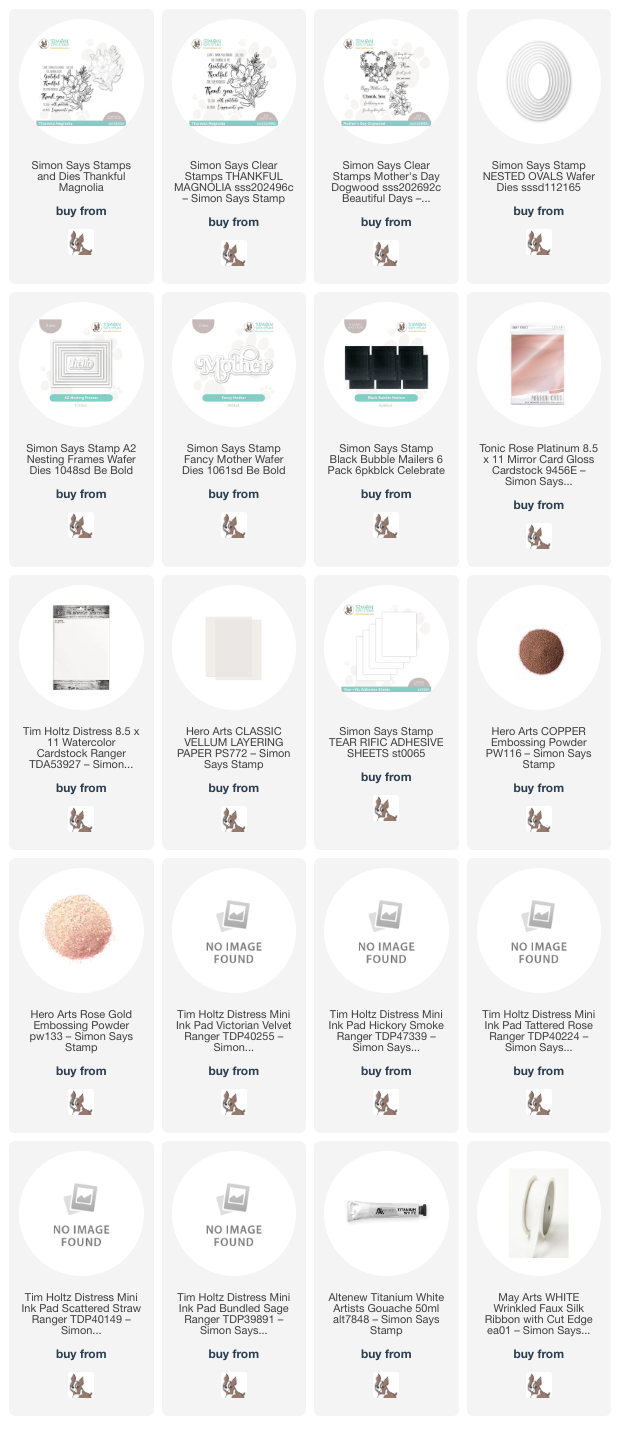
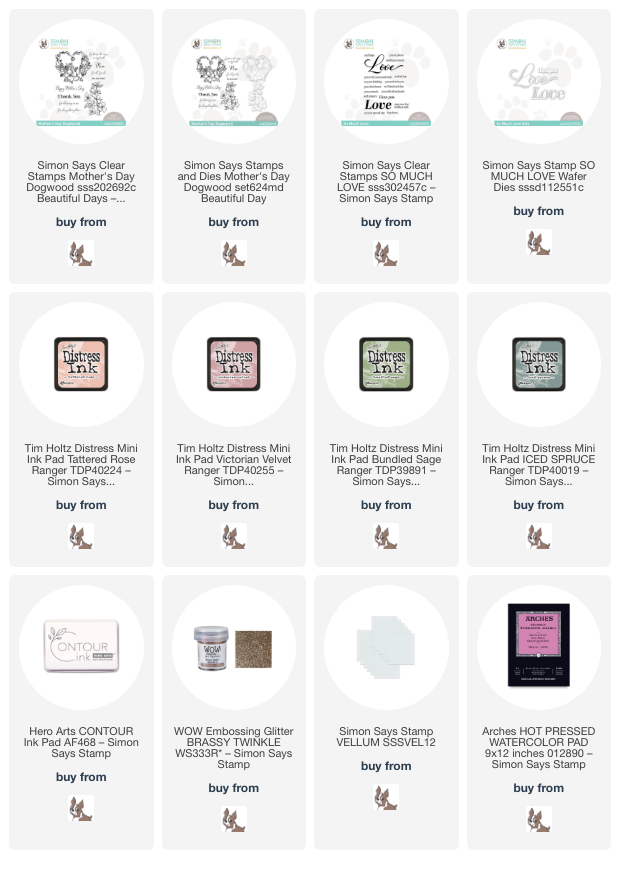
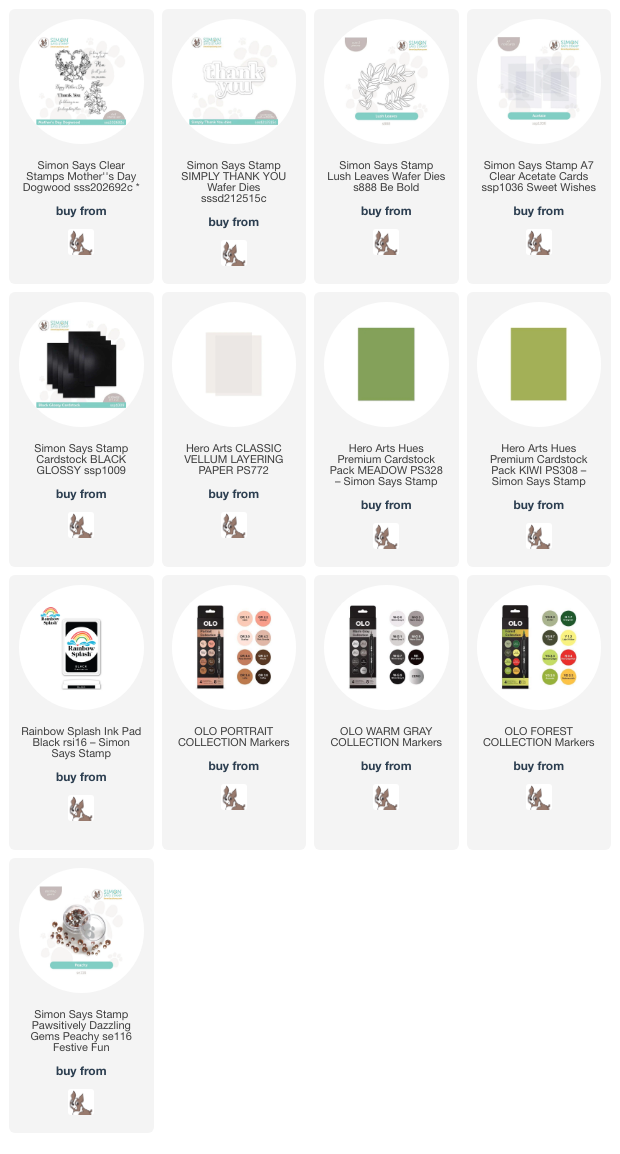
*I have gathered links to all of the products used at the bottom of the post for your convenience, using affiliate links. Thank you for shopping with my links! I truly appreciate your support for my work!*

I am lucky enough to have two dogwood trees in my front yard: one that has bright magenta blooms and another with snowy white blooms kissed by the faintest hint of blush. It was those white blooms that inspired today’s project. I began by stamping the dogwood branch from Mother’s Day Dogwood onto some white cardstock using Simon Says Stamp Rainbow Splash Black Ink. I then used very pale blush OLO markers to color the centers of each bloom, softening the edge of the colored areas with the Zero marker so that the blush faded gently into white. To do a little “reverse psychology” with those almost-colorless blooms, I colored the foliage with vivid spring green, the contrast of which helps to make the super pale blooms stand out that much more! I die cut the blooms with their coordinating die.

After I had die cut all of the blooming branches, I also die cut some Lush Leaves dies from a slightly deeper shade of green. I love filling out stamped and colors bouquets with solid die cut leaves; it creates such a lush and vibrant bouquet and makes it easy to create a large floral focal point! I adhered the bouquet of dogwoods on the exterior corner of a Simon Says Stamp A7 Clear Acetate Card Base using foam adhesive, staggering them a bit to create a full bouquet, then filling in the swag with the Lush Leaves die cuts. After I had adhered all of the floral die cuts, I added a vivid green 4×6 panel of cardstock, keeping the liquid adhesive behind the solid die cuts. This creates a visual frame for my card front while also allowing me to put a sentiment on both the outside and the inside of the card!

For the greeting, I paired one of the poignant sentiment from Mother’s Day Dogwoods with the Simply Thank You die. When I was designing this set, I wanted to make sure that I had plenty of meaningful greeting options, because “Happy Mother’s Day” just doesn’t cut it on it’s own! I die cut the Thank You from Simon Says Stamp Glossy Black cardstock and backed it with a vellum shadow, then stamped the sentiment using Nocturne pigment ink and clear embossed over the top using that same darker green cardstock for contrast. I popped the sentiments up on the card front with foam adhesive, tucking them amongst the flowers and leaves. I added a few Peachy Pawsitively Dazzling Gems for a bit of added sparkle.

For the interior greeting, I used the dogwood branch stamp from Mother’s Day Dogwood to adorn the corners of the 4×6 panel of white cardstock, stamping them in pale gray ink to create a “watermark” effect. I stamped the two individual sentiment stamps using black ink so that they would pop, leaving plenty of room for a handwritten note below!

Well, that’s all for my project today. I hope you’re enjoying this walk down memory lane with me as I reengage with some of my older illustrations! I know that I am loving it! Thanks so much for stopping by today, and have a marvelous day!
Filed Under: simon says stamp Tagged With: A7, clear card base, die cutting, lush leaves, mother's day card, mother's day dogwood, olo markers, simply thank you

April Showers Bring May Flowers with Simon Says Stamp: Mother’s Day Gift Suite with Thankful Magnolia!

May 2, 2024

This post was sponsored by Simon Says Stamp. Thanks, Simon!

Hi friends! It’s officially May… I’m a little bit in shock at how quickly the year is flying by! I am not sad to see the end of April 2024; we had quite a lot of stressful events taking place last month, of which the biggest was my son breaking his leg. He’s on the mend, now, and we are coming up on some fun events in May that I am really excited about. The crazy weather has also leveled out a little, with lots of April showers bringing an abundance of May flowers! I thought that I would honor the beautiful blooms in the outside world by creating my own card-gardens for a new series for the month of May, using some of the floral stamps I’ve illustrated for Simon Says Stamp over the last few years. Some of the sets have been (sadly) discontinued, but there are still several of them that are available. Over the course of the month of May, I will be sharing inspiration using these stamp sets for the April Showers Bring May Flowers series. First up: Thankful Magnolia!

I love creating coordinating gift suites, and the large floral illustration from Thankful Magnolia is so substantial and detailed that I decided to use it for some framed watercolor artwork, a coordinating Mother’s Day card (with no coloring on it at all), and to adorn the front of one of Simon Says Stamp’s new Black Bubble Mailer envelopes. Coordinating project suites for the win!

For the framed artwork, I heat embossed the large magnolia image from Thankful Magnolia onto a panel of 4″ x 6″ Distress Watercolor Cardstock using Copper embossing powder. I then used Distress Ink Mini cubes in shades of Scattered Straw, Tattered Rose, Victorian Velvet, Bundled Sage, Hickory Smoke to watercolor the image, tapping the cubes on my watercolor palette and picking the color up with my damp paintbrush to apply it to the heat embossed image. To create a very pale magnolia image, I used some visual reverse psychology, painting the area around the main image the dark Hickory Smoke and Victorian Velvet to increase the contrast between the light magnolia and the dark backdrop. (I demonstrate this technique in THIS video.) After I had completed the watercoloring, I splattered some Altenew Titanium White Artists’ Gouache around the image for a bit of artsy flair!

Once my watercoloring had been completed, I placed the painting in an inexpensive frame from the dollar store and embellished it with a pretty white May Arts faux silk ribbon bow! An inexpensive, but heartfelt, gift that any mom would love to receive. I know my mom always loves receiving my artwork!

For the coordinating card, I heat embossed the large image from Thankful Magnolia onto some Hero Arts Vellum using Copper embossing powder. I wanted to create a card that coordinated with, but was not as involved as, the painting and the super smooth embossing on the vellum highlights the details of the image beautifully, even without any extra coloring! I die cut the image using the coordinating die; I love how detailed this die is, cutting out even the interior spaces on the image. So much easier than fussy cutting it.

For the card base, I blended some Victorian Velvet Distress Ink on the bottom left corner of a pale pink A2 card front, then added a shiny frame cut using the A2 Nesting Frames dies from Tonic Rose Platinum foil cardstock, which coordinates beautifully with the copper embossed floral image. I also heat embossed a sentiment from my Mother’s Day Dogwood stamp set using Rose Gold embossing powder on some deep magenta cardstock from my stash, which enhanced the coordinating Fancy Mother die cut, cut from the same magenta cardstock. I adhered the sentiment pieces to the vellum image with some liquid adhesive, then flipped it over and added my foam adhesive behind those solid die cuts. The last step was a few shimmering gems for extra sparkle!

My mom lives a couple of hours from me, and so I know that I will need to mail her gift to her, so I decided to embellish one of the new Black Bubble Mailer envelopes to coordinate with my gift suite. I created my own sticky label by adding some Simon Says Stamp Tear-rific Adhesive Sheets to the back of some thin pink paper (lightweight paper=flush against the envelope and less chance of damage during mailing). I die cut my sticker label using the Nested Ovals dies, then stamped a tone-on-tone Thankful Magnolia image using Victorian Velvet Distress Ink. I used a black pen to add the address (these are not our actual addresses, just for privacy reasons), but I probably would use a thicker black pen or marker to add the address if I were truly going to mail it. An embellished envelope is the perfect way to let the recipient know that the contents are extra special!

Well, that’s all for my projects today! I’m so excited to have an excuse to play with some of my older floral illustrations. I hope you don’t mind indulging me! Thanks so much for stopping by today, and happy May!

Filed Under: simon says stamp Tagged With: A2 Nesting Frames dies, artwork, bubble mailer, fancy mother, mother's day card, mother's day dogwood, nested ovals, original illustration, thankful magnolia

With Love on Valentine’s Day!

February 14, 2024

This post was sponsored by Simon Says Stamp. Thanks, Simon!

Hi friends! Happy Valentine’s Day! I hope you feel loved today! I am not really huge on hearts; if I’m going to use a basic shape, I’d rather use something a bit more neutral. But, on a day celebrating love, hearts are pretty much the only shape that counts, right? When I was looking through the stamps which I’ve illustrated for Simon Says Stamp, I saw the floral heart in my Mother’s Day Dogwood set and knew that I needed to make a valentine out of it! Let’s get started with the details.

I began by stamping the dogwood heart arrangement from Mother’s Day Dogwood onto some Arches hot press watercolor paper using Contour ink, which is my favorite ink for use with no-line watercolor and alcohol marker coloring techniques. I have really been enoying using Distress Inks for watercoloring lately, so I pulled out my Distress Minis and selected several colors in muted shades of blush and olive green. For today’s project, I used Tattered Rose, Saltwater Taffy, Victorian Velvet, Bundled Sage, and Iced Spruce. I tapped them out on my palette, then used a damp paintbrush to pick the colors up and maneuver them around on my smooth watercolor cardstock. I find that hot press watercolor paper works beautifully with liquid watercolor mediums like the Distress Inks or Karin markers, while the super smooth surface picks up stamped details really well!

After I had finished watercoloring the image, I wanted to take advantage of the coordinating dies for the Mother’s Day Dogwood set to create a shaped card. I die cut the finished image, then trimmed down a piece of cardstock to create a small 3″ x 3.5″ card. I placed the heart die over the seam of the folded notecard and ran it through my die cutting machine so that it would create a shaped notecard. On the interior, I stamped a greeting from the So Much Love stamp set, which would be hidden behind the solid portion on the heart die cut. Such a fun way to take advantage of these detailed dies!

For the greeting on the front, I stamped the scripty “love” from the So Much Love stamp set onto Simon Says Stamp vellum using glittery embossing powder, then die cut it with the coordinating die. I adhered the greeting die cut to the front of my card using small dots of liquid adhesive, making sure to overlap the top portion of the die cut with the top of the floral heart image, adding some more stability to the delicate shaped card. For a final accent, I added a few dots of super sparkly metallic watercolors to the centers of the flowers and the dainty baby’s breath!

Well, that’s all for my project today. I hope you’ll try making a shaped card base the next time you need a special card… it really makes the project extra special and exciting! Thanks so much for stopping by, and Happy Valentine’s Day!

Filed Under: original illustrations, simon says stamp Tagged With: distres ink, distress ink, distress watercolor, mother's day dogwood, no line watercolor, original illustration, shaped card, valentine, valentine's day

Simon Says Stamp Beautiful Days Blog Hop- Day 2!

April 8, 2023

Good morning! Today is Day 2 of the Simon Says Stamp Beautiful Days release blog hop, and I am so excited to be a stop on the hop! You should have arrived here from Amy Rysavy, and your next stop is Maura Hibbitts. You can also start at the beginning at the Simon Says Stamp Blog. The new Beautiful Days collection is filled with gorgeous, springy products, many of which are utterly perfect for creating handmade Mother’s Day cards. Nobody appreciates a handmade card like a momma appreciates a handmade card, right? I am extra excited to have one of my own illustrations included in this release: Mother’s Day Dogwood. I designed this set to feature a simple dogwood branch (which you can see in action HERE) and a detailed dogwood heart, featuring large dogwood blooms, lush foliage, and sweet filler flowers. I also included a wide variety of sentiment-building stamps, so that you can create unique, heartfelt sentiments for your Mother’s Day cards, but they aren’t limited only to Mother’s Day! I have two projects to share with you today using new goodies from the Beautiful Days collection, so let’s get started with the details.

My first card features the large heart illustration in my Mother’s Day Dogwood stamp set. I began by stamping the image on some Hammermill cardstock using Intens-ified Black ink from Hero Arts. After ample drying time to ensure that the ink was set completely, I used OLO markers to add delicate pink, lilac, and turquoise color to the images, also coloring the edge of the die cut a super pale shade of aqua to coordinate with the colorful background. I wanted to keep the color palette light and feminine, and the lovely pale pink dogwoods shine amongst the bright accent images. I die cut the finished image with the coordinating die, which doesn’t just cut the outline, but also the interior of the heart, which I think adds such a polished look.

To accent the detailed image, I wanted to add some subtle texture to the background, but didn’t want to overwhelm the main focal point. Enter the Detail Bohemian Plate! I ran this beautifully pierced background through my machine using some of the new Color Blend Pastel cardstock, using the lovely aqua ombré piece that coordinated beautifully with my dogwood heart wreath. I also die cut another heart wreath from a scrap of vellum, making sure that just the center was intact. I wanted to draw the eye towards the floral wreath and accent it even further, so adding the vellum center softens the pattern behind that center area.

I designed the sentiments in the Mother’s Day Dogwood set to be individual elements that would work together or to complement other stamps and dies. Versatility is important! I paired the “for believing in me” sentiment with the previously-released Bold Thanks die. I die cut it three times from some Pitch Black cardstock and layered them together, creating a dimensional die cut sentiment. I adhered the colorful wreath to the pierced, textured background using foam tape, then added the two sentiment pieces with a double layer of foam tape to add extra height. A few black jewels finished it off and added one last black accent (completing my “rule of three” for black accents!).

My second card features the new Delicate Florals, using it to create a shaker window! I die cut the Delicate Florals from some Simon Says Stamp Rose Gold Metallic cardstock, as well as from a panel of pale blush cardstock, reserving the negative space to create a shaker window by backing the panel with some clear acetate! I added the detailed rose gold die cut over the top of the acetate window, avoiding clumps of glue splurting out the sides of this super delicate die cut by adding Micro Dot Adhesive to the back. I love the textural contrast between the shiny foil die cut and the matte blush background.

For the greeting, I die cut the detail layer of the Simple Mother’s Day from some Pencil Eraser cardstock three times and layered them together. The darker shade of warm pink pops beautifully from the blush cardstock. I filled the shaker portion with some rose gold confetti from Pretty Pink Posh and backed it with some more of the warm pink cardstock to add a little contrast behind the shiny rose gold die cut.

Once I had the shaker card assembled, I added a bit of textural accent to the bouquet with a warm pink twine bow. (This is why I save everything! I bought that twine probably 10 years ago haha, and the color worked perfectly with the overall color scheme of the card!) As an afterthought, I added a super thin rose gold frame, cut using the A2 Thin Frames, around the edge. It helps to frame the images and adds a bit of interest to that wide expanse of open space around the floral focal point.

Well, that’s all for my projects today! To celebrate the new Beautiful Days collection, Simon Says Stamp is offering a Gift With Purchase! Simply use code: BUD at checkout to receive the Flower Garden emboss and cut folder FREE with a purchase of $30 or more!

Simon Says Stamp is also giving away a $25 coupon to every stop on the hop from your blog comment section. Winners will be selected and posted on the Simon Says Stamp blog on Wednesday the 12th of April. Winners can email Simon Says Stamp to claim your prize, so be sure to check out the Simon Says Stamp blog next week to see if you’re the winner!

Your next stop is Maura Hibbitts. Here’s the full hop list:

Simon Says Stamp Blog  

Nina-Marie Trapani

Caly Person

Debby Hughes

Suzy Plantamura

Bibi Cameron

Yana Smakula

Lisa Addesa

Amy Rysavy

Emily Midgett

Maura Hibbitts

Jean Doeringsfeld

Thanks so much for stopping by today, and happy hopping!

Filed Under: simon says stamp Tagged With: A2 thin frames, bold thanks, delicate florals, detail bohemian plate, mother's day, mother's day dogwood, OLO marker, pastel color blend, rose gold metallic cardstock, shaker card, simple mother's day, thank you

Simon Says Stamp Beautiful Days Release + New Illustration-Mother’s Day Dogwood!

April 5, 2023

Hi there! Simon Says Stamp is releasing a beautiful new collection of products tonight, called the Beautiful Days! This collection features so many beautiful, unique products that are perfect for creating springy cards, and I am thrilled that I have illustrated a stamp set included in this release, called Mother’s Day Dogwood! This stamp set features two large dogwood illustrations: one dogwood heart filled with sweet filler flowers and foliage, and one more simplistic illustration of a dogwood branch, as well as lots of sentiments to be used to build meaningful greetings for your Mother’s Day cards (or even non-Mother’s Day cards!). I have two projects to share with you today using my new Mother’s Day Dogwood stamp set and lots of beautiful colored cardstock, so let’s get started with the details!

Vivid colored cardstock is one of my favorite ways to make a huge impact on a card front. Figuring out how to add all of the different elements on my card while also keeping the intense color of the cardstock true (that is, not using white cardstock!) is like a puzzle for me. I love monochromatic cards, as you’ve seen if you have looked at my blog before, and my cards today feature monochromatic jewel-toned color scheme with bright pops of pink flowers and some pretty metallic accents!

For my first project, I paired the simple Mother’s Day Dogwood branch with my colored pencils and Hero Arts Adriatic cardstock. When coloring with pencils on colored cardstock, I like to use Hero Arts Unicorn White pigment ink. I think that, because this thick ink sits on top of the cardstock rather than sinking down into it, it melds nicely with the colored pencils, which also sit atop the cardstock, preventing unsightly lines from being visible beneath the colored pencils. When using super intense colored cardstock like this deep teal cardstock, I like to lay down a base layer of my lightest colored pencil, which in this case was a cool pale blush color. I covered the entirety of each petal with that pale blush, then went back and added my darker colors, blending them together with the same pale blush color. I die cut the finished colored piece with the coordinating dies.

To accent the pink flowers, I used a blending brush to blend Pinkfresh Studio Tidal Pond ink with the Simon Says Stamp Domed Arches Stencils and Masks. I love the boldness of the dark teal ink on the intense teal cardstock. After I’d blended the arch shape, I kept my stencil in place, then placed the Simon Says Stamp Tin Tile Stencil directly over the top of the cardstock and attached dome stencil, blending with the same Tidal Pond ink. This creates a super subtle monochromatic pattern within the arch shape. I removed the patterned stencil and, while the arch stencil was still in place, splattered some handmade rose gold metallic watercolor in the background. The pale rose gold juxtaposes beautifully with the vivid teal. I finally removed the arch stencil, leaving me with a lovely patterned background that is entirely one layer! So much dimension and interest when you layer multiple stencils together.

I trimmed down the stenciled panel so that it was slightly smaller than a standard A2, then mounted it on a full size A2 panel of the same Adriatic cardstock with some foam tape. I heat embossed one of the greetings from Mother’s Day Dogwood onto some more teal cardstock using rose gold embossing powder, which contrasts beautifully with the jewel-toned cardstock, then trimmed the sentiment out with sharp scissors. I popped up the die cut with more foam tape, then added a double layer of foam tape to the sentiment, which creates a triple layer of foam tape on this card… so much dimension! But I find that with monochromatic cards like this, dimension and varying heights are important elements in keeping things interesting.

My second card features some older products, but uses a couple of the sentiment builder stamps from my new Mother’s Day Dogwood stamps. I designed the sentiments so that they would work together or you could mix and match with sentiment dies, as I’ve done here. In some “free” time that I had a few weeks ago (a unicorn if ever there was one!), I decided to do some therapeutic watercoloring with the previously-released Lisianthus stamp set that I illustrated last year. I heat embossed the main image on some Fabriano Artistico watercolor paper using more rose gold embossing powder. I used Karin Brushmarker Pro markers to watercolor some pretty pinks, hunter green, and plum to this large image. I added a dark green halo around the edge, as well, so that after die cutting, I could have a dark green cardstock background without worrying about that pesky white edge!

For the background, I trimmed down an A2 panel of Hero Arts Shamrock cardstock and stamped the Simon Says Stamp Arches Background using Pine ink. I used a blending brush to blend more Pine ink around the edge. I love the halo effect this creates! I splattered some more sparkling metallic rose gold watercolor on the background to add a bit more textural interest, but I love the subtly-patterned monochromatic look on this beautiful green cardstock!

I had originally painted this image on a 4″x6″ panel of cardstock, so the die cut was just a tiny bit too narrow to fill out the full A2 card front. To compensate for this, I die cut an A2 Thin Frames die from Simon Says Stamp using the gorgeous Rose Gold Metallic cardstock, also from Simon Says Stamp, and added my Lisianthus die cut to the back of it, creating a delicate, coordinating metallic frame around my large floral die cut.

For the greeting, I die cut the “thanks” from the Basic Trio dies, cutting it twice from plain white cardstock and once from white velvet cardstock to add some extra texture to the card front. I layered all of the die cut sentiment pieces together, creating a dimensional die cut greeting. Using some of the sentiment builder stamps included in the Mother’s Day Dogwood stamp set, I heat embossed “Mom” and “for all you do” on some scraps of Shamrock cardstock, again with the rose gold embossing powder. It stands out beautifully from the jewel-bright cardstock. I arranged them all on my card front, creating a custom sentiment for my colorful card. I love mixing and matching different products to create one cohesive project! The trick is to keep the colors cohesive so that each component looks intentional. Finally, I added a smattering of pink Rose Tinted Glasses gems for one last bit of sparkle and shine.

Well, that’s all for my projects for today! The release blog hop will be later this week, so be sure to be on the lookout for that. Thanks so much for stopping by today, and have a marvelous day!

Filed Under: simon says stamp Tagged With: A2 thin frames, arches background, basic trio, colored pencil, domed arches, karin markers, lisianthus, mother's day, mother's day dogwood, stencil, tin tile, watercolor

Primary Sidebar

  • Facebook
  • Instagram
  • Pinterest
  • YouTube

Favorite Shops

Secondary Sidebar

Subscribe

Enter your email address to subscribe to this blog and receive notifications of new posts by email.

Instagram
Something is wrong.
Instagram token error.
Follow
Load More

Archives

Tags

3D embossing folder alcohol markers better press birthday birthday card blog hop card kit christmas christmas card christmas tag colored pencil copic copic coloring Daniel Smith die cutting embossing folder embroidery felt giveaway holiday holiday card hot foil ink blending karin brushmarker pro layered stencil masculine my monthly hero new release no line coloring no line watercolor OLO marker olo markers original illustration pawsitively saturated rainbow shaker card slimline stamping stamptember stencil thank you thinking of you valentine's day video watercolor

Popular Posts

Simon Says Stamp Sending Cheer Blog Hop- Day 2 + Freebie + Giveaway!
Altenew October 2026 Release Blog Hop + Giveaway!
Rustic Monochromatic Stars for Christmas with Rainbow Splash!
December 2018 My Monthly Hero Blog Hop + Giveaway!
March 2020 Essentials By Ellen Blog Hop+Giveaway!
The Ton Stamps Summer Release: Day 1
Hero Arts Partners Blog Hop: Lawn Fawn!
Waffleflower July Release Blog Hop!
Simon Says Stamp STAMPtember Tim Holtz Collaboration: Festive Holidays!
Honey Bee Stamps Autumn Blessings Blog Hop-Day 2!

Disclosure

Some affiliate links are used in my posts. This means that, should you click on one of my links and purchase something from that company, I will receive a small portion of the sale at no extra cost to you. I use the money earned from these sales to help maintain my blog. I so appreciate you visiting and, if you do choose to use one of my affiliate links, thank you so much for your support!
Copyright © 2026 ·Brunch Pro Theme · Genesis Framework by StudioPress · WordPress · Log in
Loading Comments...