• Skip to main content
  • Skip to primary sidebar
  • Skip to secondary sidebar

Sixth Street Sundries

Emily Midgett

  • Home
  • About Me
  • Contact
  • OLO Marker Color Swatch Chart
  • Shop

distress ink

Simon Says Stamp STAMPtember Collaboration: Tim Holtz!

September 4, 2026

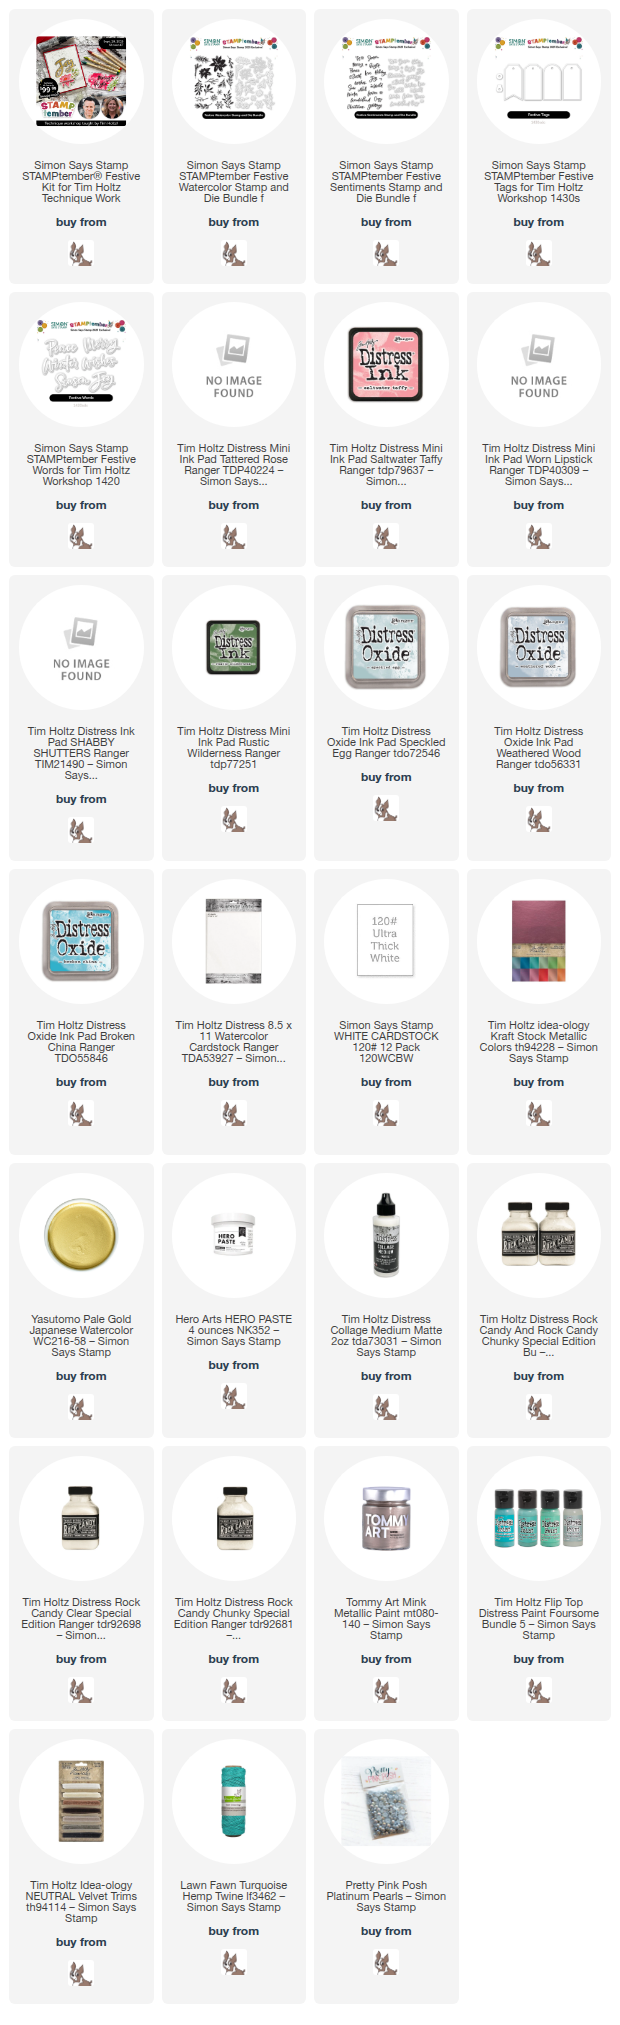
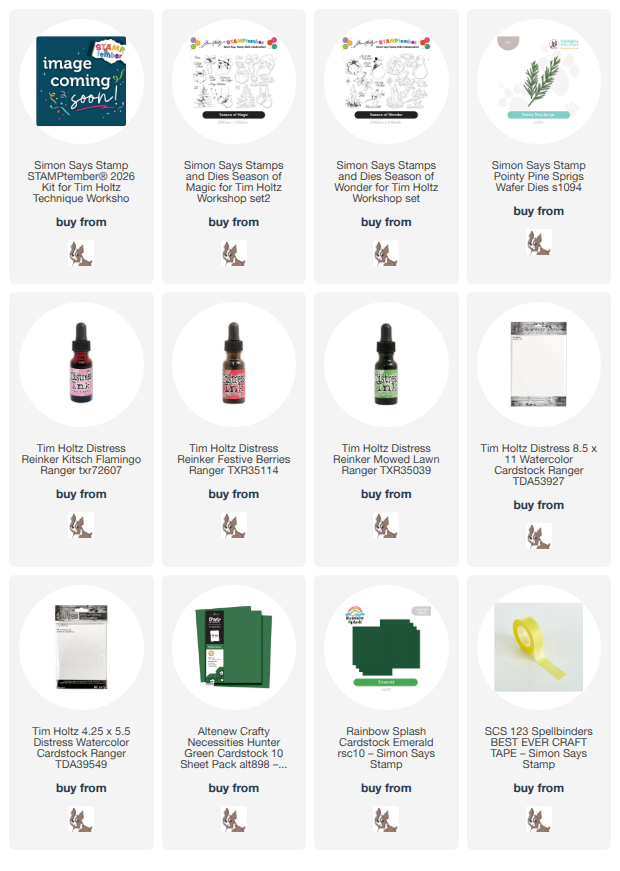
*I have gathered links to all of the products used at the bottom of the post for your convenience, using affiliate links at no extra cost to you. Thank you for shopping with my links! I truly appreciate your support for my work!*

Hello friends! It’s time to start sharing the ever-popular and highly-anticipated STAMPtember Collaboration Releases! For our first collaboration, we are starting off with a bang with a fan-favorite: Tim Holtz! (FYI: You can keep an eye on all of the collaboration sets by clicking HERE. Each new set will go live on a certain day of the month, so be sure to keep refreshing that page to see what new goodies come out at noon Eastern time!) The new illustrations from today’s kit release have a super unique, sketchy quality to them that is immediately recognizable as Tim’s signature style. (Click HERE to see this exquisitely curated kit!) I chose to create a vibrant holiday card with some mixed media flair and watercolored baubles for my project today. Let’s get started with the details!

To begin, I taped an A2 panel of Distress Watercolor Cardstock to my watercolor board using masking tape, leaving a 1/4″ frame around the edge of my panel. I then used Distress Ink Reinkers in shades of Kitsch Flamingo, Festive Berries, Mowed Lawn to create a watercolored panel, taking care to keep the green and red slightly separated so as to avoid creating a muddy mess! Once I had completed the watercoloring, adding multiple layers to make it look painterly and intentional, I allowed the panel to dry while still taped to the watercolor board to minimize warping. When completely dry, I added some gold splatters and stamped a few sparkles from the STAMPtember Exclusive Season of Magic stamp set using gold pigment ink. Once completely dry, I removed the masking tape from the edges, leaving a crisp white frame around my colorful watercolored background!

For the main focal point on the card, I used Gold Embossing Powder to heat emboss the baubles from the STAMPtember Exclusive Season of Magic stamp set twice on some more Distress Watercolor Cardstock. I used the same color palette of Kitsch Flamingo, Festive Berries, and Mowed Lawn Distress Reinkers to add color to the baubles, loosely reflecting the colors in the background, almost like they are reflecting the colorful lights from the Christmas tree! I also added some sparkling gold glitter watercolor on the bottom edge of each bauble for extra shimmer. Once the ornaments had dried completely, I used the coordinating dies to cut them out. I die cut several Pointy Pine Sprigs dies from two different shades of green cardstock and then layered the pine sprigs and the baubles atop the watercolored background to create a “branch” filled with gorgeous greenery and Christmas cheer!

After I had finished adhering the baubles and greenery to the card front, I heat embossed a greeting from the Season of Magic onto some more Distress watercolor paper using the same gold embossing powder. I die cut the finished sentiment with it’s coordinating die, then popped it up on the card front with a double layer of thin foam adhesive squares. The final finishing touch was a trio of Gold Pawsitively Dazzling Gems to add extra festive sparkle to the card!

Well, that’s all for my project today! As a reminder: these limited edition STAMPtember collaboration sets are not going to be restocked, so if you have your eyes on one, don’t let it slip away! You’ll be sad to have missed out! Thanks so much for stopping by today, and have a marvelous day!
Filed Under: simon says stamp, Uncategorized Tagged With: christmas card, distress ink, holiday card, pointy pine sprigs, stamptember, tim holtz, watercolor

Simon Says Stamp STAMPtember Tim Holtz Collaboration: Festive Holidays!

September 5, 2025

Hi friends! Exciting STAMPtember news hot off the presses: the perennially amazing Tim Holtz has partnered with Simon Says Stamp to not only release exceptional STAMPtember collaboration goodies, but they are part of the kit that will be used in an exclusive Tim Holtz STAMPtember workshop! Click HERE to see all of the details!

If you are new to STAMPtember from Simon Says Stamp, throughout the month of September, Simon Says Stamp will have exclusive collaborations with some of our favorite stamping companies, releasing a limited edition stamp set designed in collaboration with a different company nearly every day! (Click HERE to see the Collaboration Sets page, and be sure to bookmark it!) 

I have created several projects using these gorgeous new Festive Holidays products, so let’s get started with a quick rundown on each!

For my first projects, I decided to create a watercolored card and coordinating tag set using the new Festive Watercolor images, Festive Tags, Festive Words, and Festive Sentiments from the kit with some of my favorite Distress Ink pinks: Tattered Rose, Saltwater Taffy, and Worn Lipstick.

I stamped the floral images from Festive Watercolor onto some Tim Holtz Distress Watercolor Paper using Distress Tattered Rose. I then tapped Tattered Rose, Saltwater Taffy, and Worn Lipstick out onto my glass craft mat and picked up the color with my damp paintbrush, taking advantage of the water-based inks to create several beautiful watercolored blooms. I also stamped the greenery with Shabby Shutters, enhancing the images with some shadows painted on with Rustic Wildnerness Distress Ink. After I had finished painting, I die cut each image with it’s coordinating die.

I created a background with one of my new favorite techniques: ink swiping! I simply swiped the same pink Distress Inks on a panel of white cardstock, using a circular motion to blend the colors seamlessly. I splattered the background with gold shimmer watercolors as a nod to the mixed media king himself, then arranged all of the die cuts in a bouquet with foam adhesive, adding a gold and vellum die cut “Joy” greeting from the new Festive Words dies. I added some shimmering gems and topped everything off with a coordinating blush twine bow!

Using Tattered Rose Distress Ink as my main color, I created a coordinating gift tag, this time using gold embossing powder to add some truly luxurious gold shimmer to the project. I die cut a Festive Tags die from some Simon Says Stamp 120 lb Ultra Thick Card Stock, then swiped my Tattered Rose ink pad directly on the die cut tag, enhancing the gorgeous debossed lines around the edges of the die cut with a gold paint pen to create an elegant gilded frame around the edges. I splattered some more gold glitter watercolors on the delicate pink tag.

To adorn the pretty pink tag, I stamped some flowers and foliage using embossing ink, then added some gold embossing powder. Once I had melted the embossing powder, I die cut the finished images, and to add a little color, I swiped the Tattered Rose ink directly on the die cuts. Due to the resistant nature of the embossing, the color adhered to the white edges of the die cuts, creating solid, colorful images. I repeated the process with a couple of the sentiment stamps from the Festive Words, swiping Saltwater Taffy over the finished die cut. A glittery die cut hole reinforcer and some beautiful pink twine finished the tag off!

I couldn’t resist some gorgeous decor with the large scale images and Festive Words, so I die cut the gorgeous Peace word die from some Tim Holtz Metallic Kraft Stock, backing it with the die cut shadow cut from some pearlescent vellum. To create some fabulous, icy inspiration, I used Speckled Egg, Weathered Wood, and Broken China Distress Oxide Inks (so vibrant, but also so soft and velvety stamped on white cardstock!) to create a gorgeous floral background.

I also stamped some individual images from Festive Watercolor using the same ink colors, die cutting the images with their coordinating dies. I splattered the background with some sparkling watercolors (more hat tip to Tim the Mixed Media Master!), then arranged the die cuts on the 4×6 panel. I adhered the 4×6 panel to an inexpensive little easel frame that I purchased at the dollar store. Such a great way to create some pretty home decor using lots of the supplies that you already have! Finally, I added a few coordinating pearls, as well as twine and velvet bows.

One last project using the Festive Watercolor set! I customized this tiny wooden birdhouse that I found at my local dollar store, first by painting the entire birdhouse with some crisp white chalk paint. To make it pretty, I used some metallic pigment ink to stamp the images all over the birdhouse; the pigment ink stamps beautifully on the chalk paint. Stamping isn’t just for paper!!

I used some acrylic paints to enhance the stamped Festive Watercolor images, painting directly over the floral stamped images with metallic rose gold acrylic paint and some muted sage green for the foliage. I am obsessed with how beautifully this turned out!

Once my painted birdhouse had completely dried, I used a palette knife to add some chunky texture paste “snow drifts”, sprinkling the new Tim Holtz Chunky Rock Candy Glitter on the wet texture paste. I also applied some Collage Medium around the edges of the texture paste, adding some of the Fine Rock Candy Glitter, creating icy snow drifts and encrusting this pretty bird house with sparkling, icy glitter.

If you haven’t seen the LIVE, (click HERE to see!) Tim Holtz has shared a ton of different pieces of inspiration using the images that I used above. There is an unbelievable kit available filled with every single stamp and die set, as well as tons of other goodies, that is going to be used during the upcoming Technique Class on 9/28/25, shared on YouTube. The stamps and dies are going to also be available individually if you would prefer one or the other, and I’ll have them linked below, but the value of the kit (priced at $99.99) is more than two times than the purchase price. Incredible, incredible value!!!

However, just like all STAMPtember collaboration sets…. it’s limited edition. Don’t wait. Seriously… don’t wait. This is going to sell out ASAP.

Thanks so much for stopping by today, and happy STAMPtember!!

Filed Under: simon says stamp, tim holtz, Uncategorized Tagged With: birdhouse, distress, distress ink, distress oxide, festive sentiments, festive tags, festive watercolor, festive words, mixed media, painting, stamptember, tim holtz, watercolor

Chinoiserie Inspiration with New Simon Says Stamp!

June 18, 2025

This post was sponsored by Simon Says Stamp. Thanks, Simon!

Hi friends! I recently watched a video on Instagram showcasing an ancient enameling technique in which the artisan bent copper strips to create an incredibly ornate design on a porcelain vase, then crushed colorful enamel into powder and carefully placed it inside each element of the pattern, firing the finished product to melt the enamel and create an exquisite enameled vase! I found the finished product enchanting, and so I decided to try to recreate it with my cardmaking products, adding some watercoloring and die cutting into the mix. Let’s get started with the details!

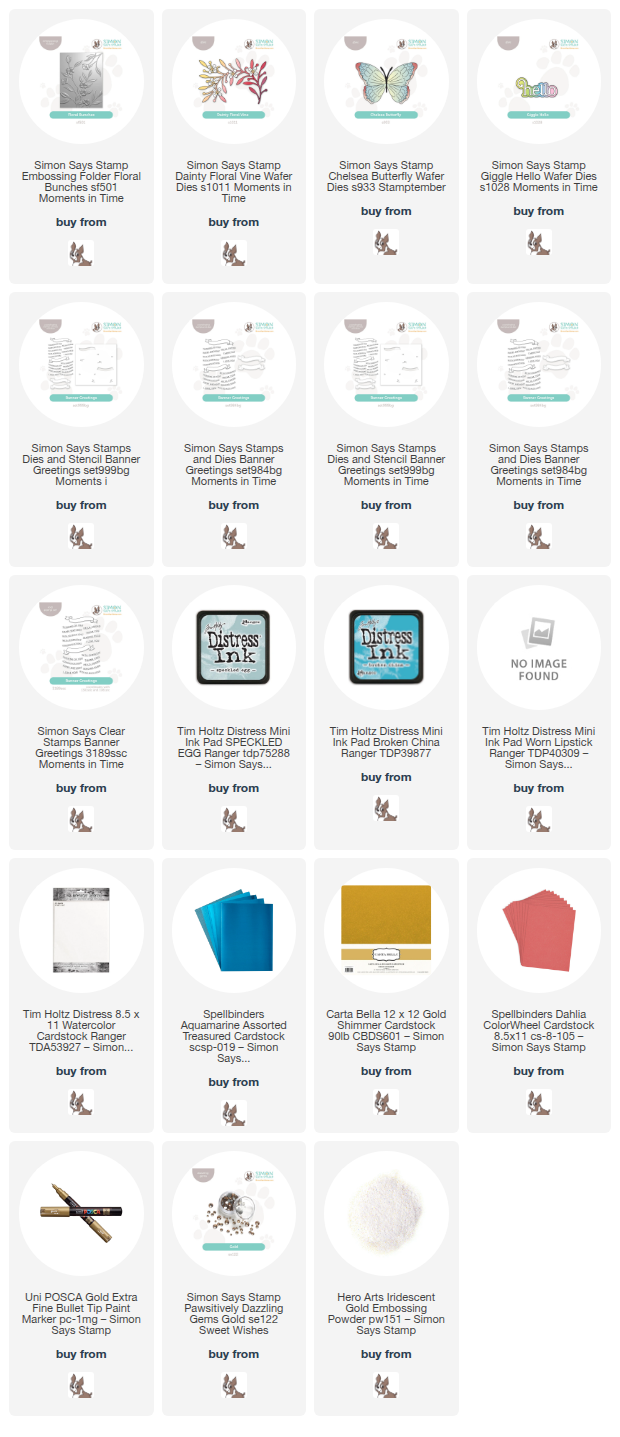
*I have gathered links to all of the products used at the bottom of the post for your convenience, using affiliate links. Thank you for shopping with my links! I truly appreciate your support for my work!*

I began by running an A2 panel of Tim Holtz Distress Watercolor Cardstock through my die cutting machine using the new Floral Bunches Embossing Folder. I then used Speckled Egg, Broken China, Worn Lipstick Distress Ink Cubes to do some watercoloring on this pretty floral background, tapping the color out on my glass mat and picking up the diluted color with my damp paintbrush. I always forget how fun it is to watercolor with my Distress Inks… I need to do it more often! I used Broken China to create a hazy blue background, then used Speckled Egg for the foliage and Worn Lipstick for the blooms, creating a colorful floral background. To take it to the next level, I used a gold acrylic paint pen around the edges of the embossed images. It’s so hard to photograph the shine, but it’s amazing in real life!

To add to the detailed background, I die cut the Chelsea Butterfly from pearlescent white cardstock and the details from teal mirror cardstock, coordinating with the lovely teal watercolored background. I also die cut the new Giggle Hello die from pearlescent gold and vellum cardstocks, layering the two together with liquid adhesive. To complement the simple hello greeting, I used the fabulous new Banner Greetings product suite, which includes stamps, stencils, and coordinating dies! I heat embossed the sentiment using Iridescent Gold embossing powder, then blended Speckled Egg ink with the stencils to add some extra dimension and color to the image, finally cutting it out with the coordinating die.

Before adhering my die cuts and sentiment pieces, I decided to add one final die cut element, cutting the foliage from the Dainty Floral Vine from pearlescent gold cardstock and the blooms from Spellbinders Dahlia cardstock. I adhered the die cuts in a cluster on the patterned card front using a combination of liquid and foam adhesive, creating lots of dimension and layers on this card. Finally, I added a few Gold Pawsitively Dazzling Gems for one last sparkling touch!

Well, that’s all for my projects today! It’s amazing how inspiration can strike from the most random videos that pop up in your social media feed, right? I’m so glad that I saw that video about the enameled vase, not only because it inspired this card, but it showed me that art can be timeless and a worthwhile skill to hone! Thanks so much for stopping by today, and have a marvelous day!

Filed Under: simon says stamp Tagged With: banner greetings, chelsea butterfly, chinoiserie, dainty floral vine, die cutting, distress ink, distress watercolor, embossing folder, floral bunches, giggle hello, watercolor

Distress Watercolored Balloons + Last Days of the Distress Ink Sale!

June 27, 2024

This post was sponsored by Simon Says Stamp. Thanks, Simon!

Hi friends! I am back today with another project featuring some pretty new stamps from the Simon Says Stamp Sunny Vibes release, this time with a softer watercolored look for a festive birthday card! I really enjoy using Distress Inks for watercoloring, and as an extra fun bonus, all Distress Inks, Reinkers, and Oxide Inks are on sale for the entire month of June to celebrate 20 Years of Distress! I did some soft watercoloring in some of my favorite colors to create this festive birthday card. Let’s get started with the details!

I started my project by heat embossing the new Festive Balloons stamp set onto some Distress Watercolor Cardstock three separate times using Iridescent Lavender embossing powder. After embossing, I taped down the watercolor panel to my watercolor board to minimize warping, then did some wet-on-wet watercoloring with Distress Inks in shades of Picked Raspberry, Kitsch Flamingo, Wilted Violet, and Blueprint Sketch. To do this, I thoroughly wet my watercolor cardstock with clean water and a large paintbrush, then tap the mini ink pads onto my ceramic watercolor palette (you can just use a plate or glass mat if that’s what you have!) and dilute the colors with water. This dilution creates softer versions of the concentrated colors. I dropped the different diluted colors directly on the wet embossed panel somewhat randomly, allowing the colors to bloom into one another and meld to create lovely color transitions.

I heated my panel with my heat gun for a few seconds to make sure that the entire panel was dry, then used concentrated versions of the same watercolors to add some extra details to the embossed balloon images. I die cut the finished images with the coordinating dies. I also taped down another panel of the Distress Watercolor Cardstock to my watercolor board and used those same colors and wet-on-wet technique to create an ethereal background that matched my bunches of balloons. Once it was dry, I splattered the background with some sparkly watercolors, then trimmed it slightly and added strips of satin purple foil cardstock and white glitter cardstock on the right side to add a little bit of interest to the background.

After creating my card front, I die cut the detail layer of the new Birthday Wishes from some more white glitter cardstock, then added the shadow layer with vellum. I popped up the balloon clusters on the watercolored, splattered background with some foam adhesive, then added the greeting with a double layer of foam adhesive to help it pop from the background. Finally, I added a smattering of coordinating Summer Blooms sequins for extra sparkle! Such a fun and festive birthday card, easily customized for a more masculine color palette.

Well, that’s all for my project today!

Click HERE to see everything included in the sale, then add code DSTR20 at checkout to save 20% on everything in this category until 11:59 ET on 6/30/24!

Thanks so much for stopping by today, and have a marvelous day!

Filed Under: simon says stamp Tagged With: birthday wishes die, distress ink, watercoloring

Distress Ink Watercoloring with Simon Says Stamp + SALE!

June 12, 2024

This post was sponsored by Simon Says Stamp. Thanks, Simon!

Hi friends! I am back today with another purple card, this time watercolored using Tim Holtz Distress Inks. Did you know that Tim Holtz’s Distress product line has been around for twenty years?? Isn’t that amazing? To celebrate Tim’s incredible creativity and the sheer volume of creative energy he and his products bring to the crafting community, Simon Says Stamp is celebrating the Distress product line throughout the entire year of 2024 with sales and giveaways! This month’s focus is the OG: Distress Inks. These inks can be used for so many different purposes, but my favorite way to use them is watercoloring. I love my fancy watercolors, for sure, but the color palette on the Distress Ink line is absolutely divine and makes color selection so easy without having to worry about mixing to create custom colors and running out. I paired Distress Inks with an older-but-still-gorgeous embossing folder for today’s purple project, so let’s get started with the details!

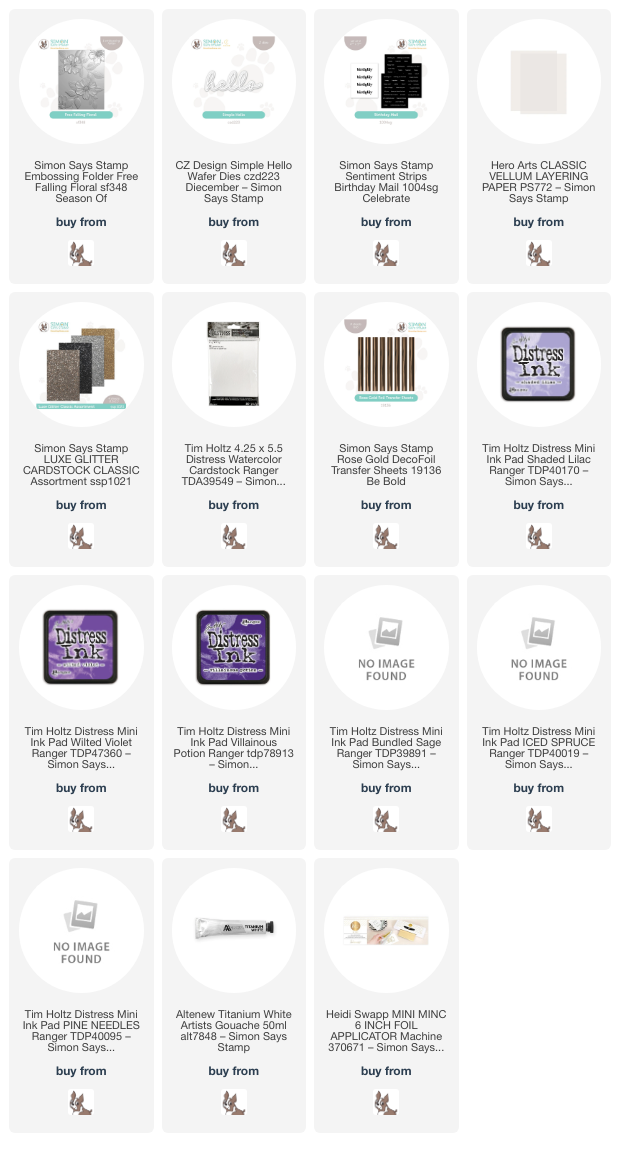
To start my project, I ran a panel of Distress A2 Watercolor Paper through my die cutting machine using the beautiful Free Falling Floral Embossing Folder. The super sturdy and bright white Distress Watercolor Paper holds up beautifully with embossing folders, and you can use either the textured or smooth side! After I had embossed the panel with the pretty floral pattern, I used Shaded Lilac, Wilted Violet, Villainous Potion, Bundled Sage, Iced Spruce, and Pine Needles Distress Inks to watercolor the flowers. When watercoloring with Distress Inks, I like to tap the mini ink pads onto a palette (I have a beautiful ceramic palette for this purpose) and then pick up the color with my damp paintbrush. Picking up the color from the palette with the paintbrush allows me to control the level of intensity for the color, which helps me to achieve those deep shadows as well as the crisp, light highlights.

When watercoloring embossing folder images, I treat it like I would any no-line watercoloring: keep the wet sections separate. Working in sections allows the wet spots to dry and retain their crisp edges and high contrast when working with the area immediately adjacent. After I had finished watercoloring the images, I did go back in with some white gouache to tidy up some of the edges of the petals and add some brighter highlights on the leaves. I also added some sparkling glitter watercolors to the flower centers for added luxury and textural interest!

For the greeting, I die cut the detail layer of the Simple Hello die from some champagne-colored Luxe Glitter Classic Assortment Cardstock and the shadow layer from vellum, adhering the two with liquid adhesive and added some thin strips of clear dimensional adhesive on the back. I also used a sentiment from the Birthday Mail sentiment card set, which I had foiled using Simon Says Stamp Rose Gold Deco Foil and my Minc machine. I popped up the sentiment strip with some foam squares, then added a few lavender-blue gems for added sparkle!

Well, that’s all for my project today! Now, for the SALE information!!!

Simon Says Stamp is offering 20% off on Distress Inks throughout the month of June 2024!! This includes Oxides and reinkers, so if you’ve been wanting to stock up on reinkers or if there are colors you’ve missed, this is an excellent opportunity. Simply add the items included in the sale to your cart, then use code DSTR20 to take 20% off! You can click HERE to see everything included in the sale!

I have one more project with a purple theme to share with you, so stay tuned later this week. 🙂 Thanks so much for stopping by today, and have a marvelous day!

Filed Under: simon says stamp Tagged With: birthday mail sentiment strips, distress ink, distress watercoloring, falling floral, free falling floral embossing folder, simple hello die

  • Page 1
  • Page 2
  • Go to Next Page »

Primary Sidebar

  • Facebook
  • Instagram
  • Pinterest
  • YouTube

Favorite Shops

Secondary Sidebar

Subscribe

Enter your email address to subscribe to this blog and receive notifications of new posts by email.

Instagram
Something is wrong.
Instagram token error.
Follow
Load More

Archives

Tags

3D embossing folder alcohol markers better press birthday birthday card blog hop card kit christmas christmas card christmas tag colored pencil copic copic coloring Daniel Smith die cutting embossing folder embroidery felt giveaway holiday holiday card hot foil ink blending karin brushmarker pro layered stencil masculine my monthly hero new release no line coloring no line watercolor OLO marker olo markers original illustration pawsitively saturated rainbow shaker card slimline stamping stamptember stencil thank you thinking of you valentine's day video watercolor

Popular Posts

Simon Says Stamp Sending Cheer Blog Hop- Day 2 + Freebie + Giveaway!
Altenew October 2026 Release Blog Hop + Giveaway!
Rustic Monochromatic Stars for Christmas with Rainbow Splash!
Waffleflower July Release Blog Hop!
Hero Arts Partners Blog Hop: Lawn Fawn!
March 2020 Essentials By Ellen Blog Hop+Giveaway!
December 2018 My Monthly Hero Blog Hop + Giveaway!
The Ton Stamps Summer Release: Day 1
The Ton Anniversary Release: Day 1!
Altenew Paint A Flower: Carnation Blog Hop+Giveaway!

Disclosure

Some affiliate links are used in my posts. This means that, should you click on one of my links and purchase something from that company, I will receive a small portion of the sale at no extra cost to you. I use the money earned from these sales to help maintain my blog. I so appreciate you visiting and, if you do choose to use one of my affiliate links, thank you so much for your support!
Copyright © 2026 ·Brunch Pro Theme · Genesis Framework by StudioPress · WordPress · Log in
Loading Comments...