• Skip to main content
  • Skip to primary sidebar
  • Skip to secondary sidebar

Sixth Street Sundries

Emily Midgett

  • Home
  • About Me
  • Contact
  • OLO Marker Color Swatch Chart
  • Shop

simple hello die

NEW Simon Says Stamp Cheering For You Release!

July 24, 2024

This post was sponsored by Simon Says Stamp. Thanks, Simon!

Hi friends! I am so excited to share some inspiration using new goodies from the brand spanking new Simon Says Stamp Cheering For You release! This release is so, so good, and features lots of beautiful summery stamps and dies, as well as some great options to start your autumn crafting! I am a sucker for a beautiful floral cover plate die, and the new Morning Garden Floral die is just gorgeous! I couldn’t resist coloring it up with my OLO markers to create a vibrant, detailed floral background. Let’s get started with the details!

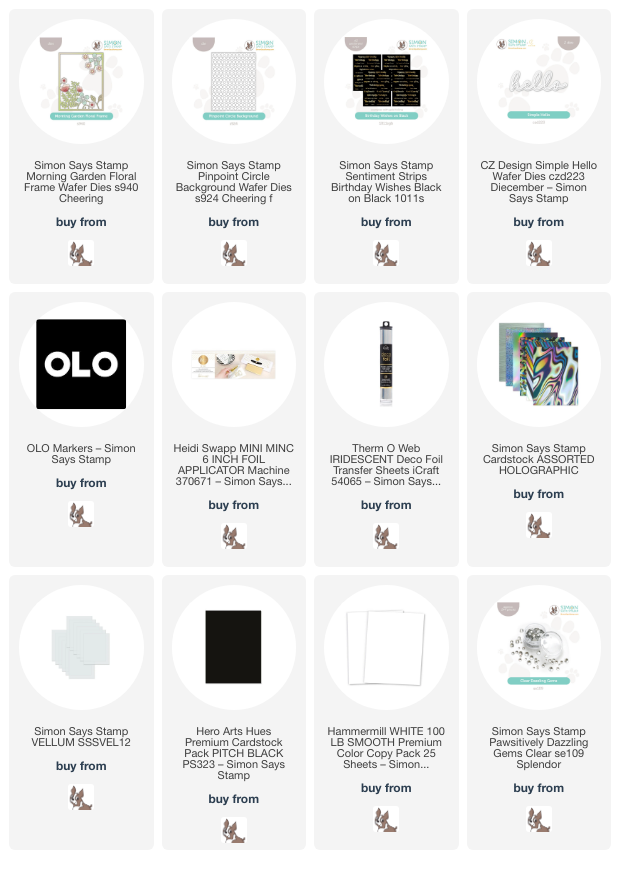
I began my card by die cutting each of the elements of the new Morning Garden Floral die from some plain white cardstock. This die set cuts both the cover plate background with the foliage as well as individual flowers so that you can cut the different elements from unique colored or textured cardstocks, and when assembled, creates a lovely background with floral arrangements in each corner. I then used OLO markers in some lovely cool shades of lilac, orchid, and deep teal to add color to each individual image and assembled the finished pieces with liquid adhesive!

I wanted to create a dramatic and bold background, and so ran a panel of Pitch Black cardstock through my die cut machine using the new Pinpoint Circle BG. This cover plate die creates a lovely, subtly textured pattern, which was a great backdrop for the vibrant floral die cuts! Before adhering my colored florals, I splattered the background with some glittery holographic watercolors to add extra shimmer and texture behind the focal points. I used liquid adhesive to add the floral die cut frame on the black textured background and added some Clear Pawsitively Dazzling Gems to the center of each flower.

For the greeting, I die cut the detail layer of the older Simple Hello die from silver holographic foil cardstock and cut the shadow layer with vellum, adhering the two together with liquid adhesive. I used Minc machine with the new Birthday Wishes Strips and some iridescent toner foil. The shiny iridescent foil shows up beautifully on the black cardstock. I used a trimmer to trim out the pieces of the sentiment that coordinated with my “hello” die cut, then adhered the sentiment components using foam adhesive for extra dimension.

Well, that’s all for my projects today! I have lots more inspiration to share with you using these new products, so be sure to come back again, especially for the blog hop later this week. You can check out the full Cheering For You release HERE. Thanks so much for stopping by today, and have a marvelous day!
Filed Under: simon says stamp Tagged With: birthday, minc, morning garden floral, OLO marker, pinpoint circle background, sentiment strips, simple hello die

Distress Ink Watercoloring with Simon Says Stamp + SALE!

June 12, 2024

This post was sponsored by Simon Says Stamp. Thanks, Simon!

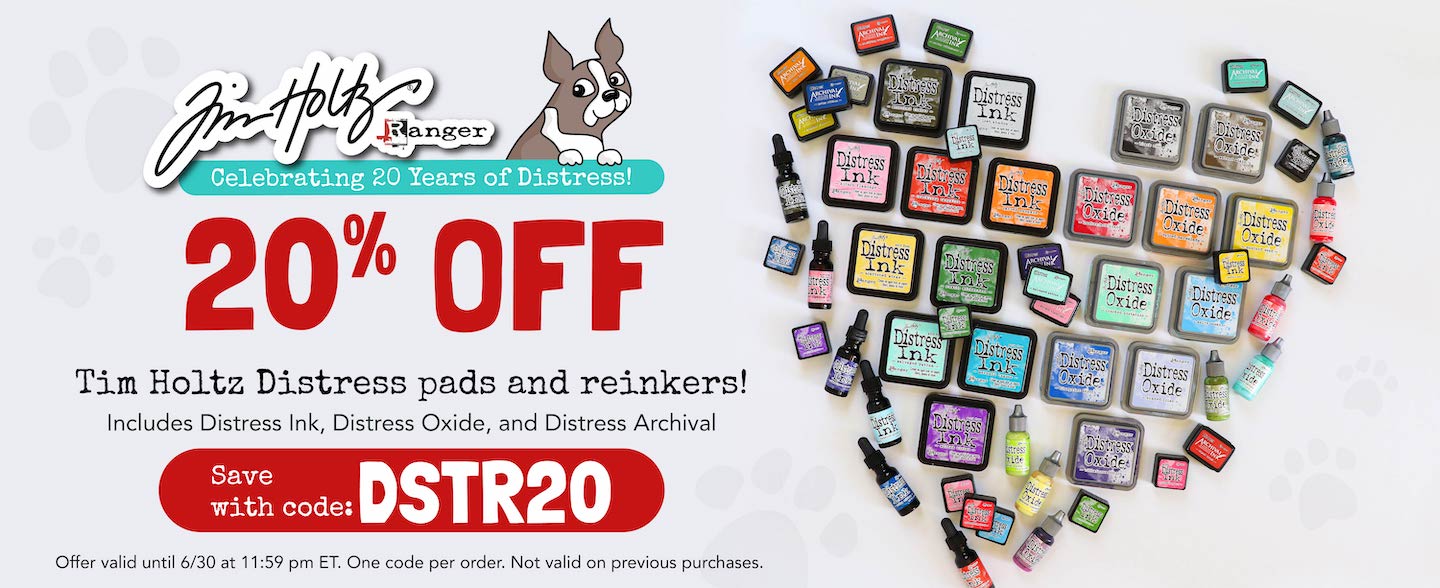
Hi friends! I am back today with another purple card, this time watercolored using Tim Holtz Distress Inks. Did you know that Tim Holtz’s Distress product line has been around for twenty years?? Isn’t that amazing? To celebrate Tim’s incredible creativity and the sheer volume of creative energy he and his products bring to the crafting community, Simon Says Stamp is celebrating the Distress product line throughout the entire year of 2024 with sales and giveaways! This month’s focus is the OG: Distress Inks. These inks can be used for so many different purposes, but my favorite way to use them is watercoloring. I love my fancy watercolors, for sure, but the color palette on the Distress Ink line is absolutely divine and makes color selection so easy without having to worry about mixing to create custom colors and running out. I paired Distress Inks with an older-but-still-gorgeous embossing folder for today’s purple project, so let’s get started with the details!

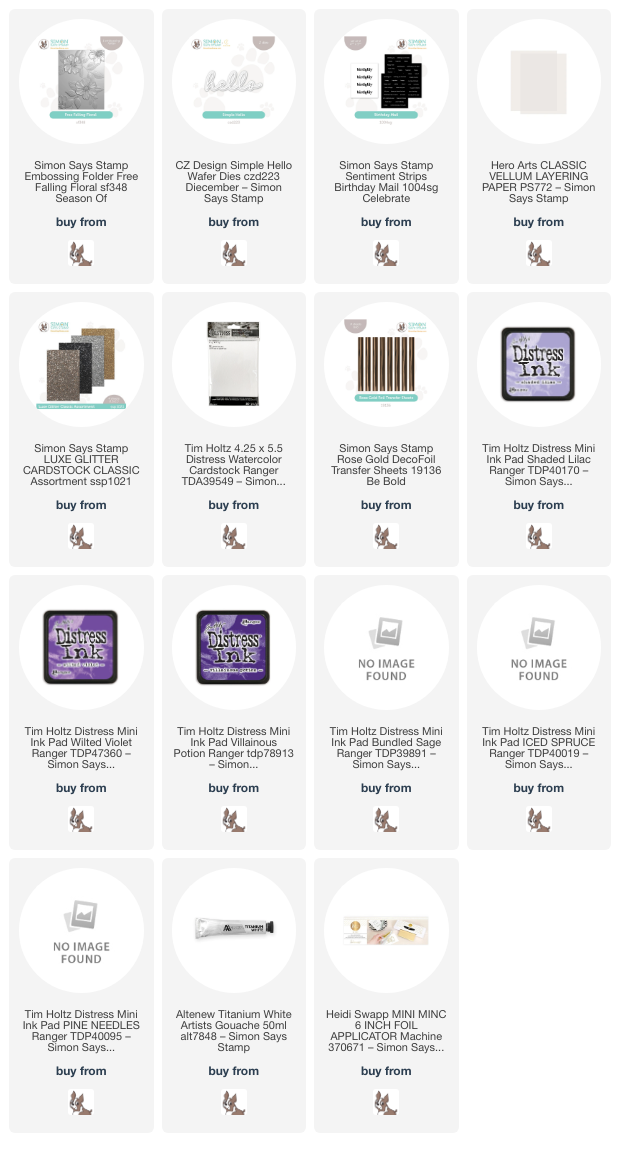
To start my project, I ran a panel of Distress A2 Watercolor Paper through my die cutting machine using the beautiful Free Falling Floral Embossing Folder. The super sturdy and bright white Distress Watercolor Paper holds up beautifully with embossing folders, and you can use either the textured or smooth side! After I had embossed the panel with the pretty floral pattern, I used Shaded Lilac, Wilted Violet, Villainous Potion, Bundled Sage, Iced Spruce, and Pine Needles Distress Inks to watercolor the flowers. When watercoloring with Distress Inks, I like to tap the mini ink pads onto a palette (I have a beautiful ceramic palette for this purpose) and then pick up the color with my damp paintbrush. Picking up the color from the palette with the paintbrush allows me to control the level of intensity for the color, which helps me to achieve those deep shadows as well as the crisp, light highlights.

When watercoloring embossing folder images, I treat it like I would any no-line watercoloring: keep the wet sections separate. Working in sections allows the wet spots to dry and retain their crisp edges and high contrast when working with the area immediately adjacent. After I had finished watercoloring the images, I did go back in with some white gouache to tidy up some of the edges of the petals and add some brighter highlights on the leaves. I also added some sparkling glitter watercolors to the flower centers for added luxury and textural interest!

For the greeting, I die cut the detail layer of the Simple Hello die from some champagne-colored Luxe Glitter Classic Assortment Cardstock and the shadow layer from vellum, adhering the two with liquid adhesive and added some thin strips of clear dimensional adhesive on the back. I also used a sentiment from the Birthday Mail sentiment card set, which I had foiled using Simon Says Stamp Rose Gold Deco Foil and my Minc machine. I popped up the sentiment strip with some foam squares, then added a few lavender-blue gems for added sparkle!

Well, that’s all for my project today! Now, for the SALE information!!!

Simon Says Stamp is offering 20% off on Distress Inks throughout the month of June 2024!! This includes Oxides and reinkers, so if you’ve been wanting to stock up on reinkers or if there are colors you’ve missed, this is an excellent opportunity. Simply add the items included in the sale to your cart, then use code DSTR20 to take 20% off! You can click HERE to see everything included in the sale!

I have one more project with a purple theme to share with you, so stay tuned later this week. 🙂 Thanks so much for stopping by today, and have a marvelous day!

Filed Under: simon says stamp Tagged With: birthday mail sentiment strips, distress ink, distress watercoloring, falling floral, free falling floral embossing folder, simple hello die

How to Salvage Your Mistakes with Mother’s Day Tulips for Simon Says Stamp !

March 8, 2024

This post was sponsored by Simon Says Stamp. Thanks, Simon!

Hi friends! I have a pair of springtime projects today that feature lots of my favorite things: vivid coloring, crisp white space, texture, and vellum. Our tulips are starting to peek through the soil in our landscaping, and I can’t wait to feast my eyes on their lush red blooms! I was inspired to pull out one of my older illustrations for Simon Says Stamp: Mother’s Day Tulips. I did some no-line Copic coloring on this large-scale tulip arrangement, intending to create one card with a very full bouquet of tulips, but I made some mistakes while coloring and ended up making two different cards. Let’s get started with the details on my projects!

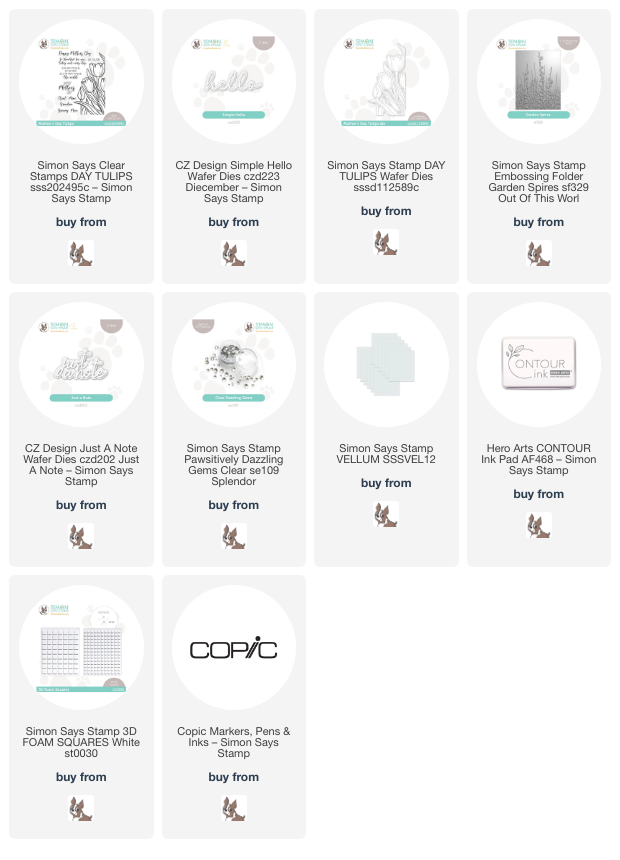
When I illustrated the Mother’s Day Tulips stamp set, I wanted to make it large enough that it could work as a focal point for a slimline card, but it also works beautifully for a more standard A2 card size! When I was mentally designing the layout of my card, I wanted to have a colorful die cut popped up on a flat stamped image, creating a veritable field of tulips. I stamped the Mother’s Day Tulips image twice using Contour Ink, offsetting it once to create some variation between the two layers of tulips.

I like to experiment with my Copic markers, mixing and matching from different color families to create really unique color gradients. I particularly like using dark neutral colors, like grays and browns, to add extra intensity to the shadows of my images. Sometimes my experiments work out wonderfully, and sometimes, like on this first project, the dark gray that I selected to add to my shadows was just a touch too dark for my taste. The alcohol ink blends splendidly most of the time, but sometimes if the colors are a bit too far apart, the lighter color will almost bleach the darker color, creating harsh lines and discoloration. On this first image, which I intended to be a background for my dimensional layer, the Toner Gray marker that I selected was just a bit too dark for the smaller areas in the tulip, and so I had issues getting a super smooth blend from one color to the next.

As I worked on the second set of tulips with a lighter gray marker for the shadows, I kept catching glances of my first panel out of the corner of my eye and loved the vibrance and contrast of the coloring. To see if I could salvage the panel rather than throw it away, I pulled out a panel of vellum, laid it over the top of the colored background, and was pleasantly surprised at the effect. The vellum softened the harsh edges of the too-dark gray while still allowing the vibrancy of the pinky red to shine through! I trimmed the vellum panel down so that it allowed 1/2″ to peek out on all sides, then added a crisp white Simple Hello die cut. I added a few sparkling Clear Pawsitively Dazzling Gems. (Also-if you haven’t checked out these new Pawsitively Dazzling Gems from Simon Says Stamp, you’re missing out. They’re glass, not plastic, which makes them feel like luxurious jewels in your hand, and they are so, SO sparkly!)

Since I was able to salvage the first background with the vellum, I decided to use the Mother’s Day Tulips coordinating dies to cut the second finished colored panel. I did not make the same mistake with the dark gray on this image; rather, I used the Toner Gray marker that was one step lighter to add my shadows, and it made a world of difference! I used the Mother’s Day Tulips coordinating dies to die cut the image, and I just adore how detailed these dies are, cutting out the little empty spaces in the center of the floral arrangement to make things as intricate and delicate as possible.

To add interest behind these vivid flowers, I added some texture to my plain white A2 card front with the Garden Spires Embossing Folder. I love that the shadows created by the texture create a such dreamy effect, like a photo that is focused on the foreground and blurry in the background! I popped up the tulip die cut with some foam squares, then die cut the Just A Note die twice from more plain white cardstock. I adhered the dimensional die cut greeting to the tulip die cut with some liquid adhesive, then added a few Clear Pawsitively Dazzling Gems to the card front for some extra sparkle!

Well, that’s all for my projects today! I hope that you find the vellum trick handy to have in your arsenal of crafty tricks in case you make a mistake like I did. Thanks so much for stopping by today, and have a marvelous day!

Filed Under: simon says stamp Tagged With: copic coloring, just a note die, mother's day tulips, no line coloring, original illustration, simple hello die

Primary Sidebar

  • Facebook
  • Instagram
  • Pinterest
  • YouTube

Favorite Shops

Secondary Sidebar

Subscribe

Enter your email address to subscribe to this blog and receive notifications of new posts by email.

Instagram
Something is wrong.
Instagram token error.
Follow
Load More

Archives

Tags

3D embossing folder alcohol markers better press birthday birthday card blog hop card kit christmas christmas card christmas tag colored pencil copic copic coloring Daniel Smith die cutting embossing folder embroidery felt giveaway holiday holiday card hot foil ink blending karin brushmarker pro layered stencil masculine my monthly hero new release no line coloring no line watercolor OLO marker olo markers original illustration pawsitively saturated rainbow shaker card slimline stamping stamptember stencil thank you thinking of you valentine's day video watercolor

Popular Posts

Simon Says Stamp Joy For You Blog Hop- Day 1!
Simon Says Stamp Joy For You Release-Now Available!
Frozen Fractals All Around with New Simon Says Stamp Joy For You Release!
Shaped Holiday Shaker Card with New Simon Says Stamp Jolly Season Card Kit of the Month!
Holiday Postage with New Simon Says Stamp!
Simon Says Stamp Glory to the Newborn King Holiday Kit-Part II!
Pinkfresh Studio 5th Birthday!
Altenew Build A Flower: Fuchsia Blog Hop+Giveway!
Holiday Joy in Pink and Green with New Simon Says Stamp DieCember!
Honey Bee Stamps September Release Blog Hop!

Disclosure

Some affiliate links are used in my posts. This means that, should you click on one of my links and purchase something from that company, I will receive a small portion of the sale at no extra cost to you. I use the money earned from these sales to help maintain my blog. I so appreciate you visiting and, if you do choose to use one of my affiliate links, thank you so much for your support!
Copyright © 2026 ·Brunch Pro Theme · Genesis Framework by StudioPress · WordPress · Log in
Loading Comments...