• Skip to main content
  • Skip to primary sidebar
  • Skip to secondary sidebar

Sixth Street Sundries

Emily Midgett

  • Home
  • About Me
  • Contact
  • OLO Marker Color Swatch Chart
  • Shop

mother's day tulips

Floral Flashback Week: Mother’s Day Tulips, Take Two with Simon Says Stamp!

February 22, 2025

This post was sponsored by Simon Says Stamp. Thanks, Simon!

Hi friends! I am back with a final installment of this week’s Floral Flashback Week, this time with another project featuring my older Mother’s Day Tulips stamp set that I illustrated for Simon Says Stamp. When I was working on my first project for this week featuring the Mother’s Day Tulips set, I initially had intended to layer the two colored die cuts together to create a very full tulip bouquet, or perhaps even a field. However, when I went to put the two colored die cuts together, I didn’t want to cover up quite so much of my hard-earned no-line coloring tulips, so I decided to just use each die cut to create their own individual cards! While THIS tulip project was clean and bright white, I decided to do something a bit more dramatic and unique with this project, pairing the vivid coral tulips with some luxurious chocolate brown cardstock. Let’s get started with the details!

*I have gathered links to all of the products used at the bottom of the post for your convenience, using affiliate links. Thank you for shopping with my links! I truly appreciate your support for my work!*

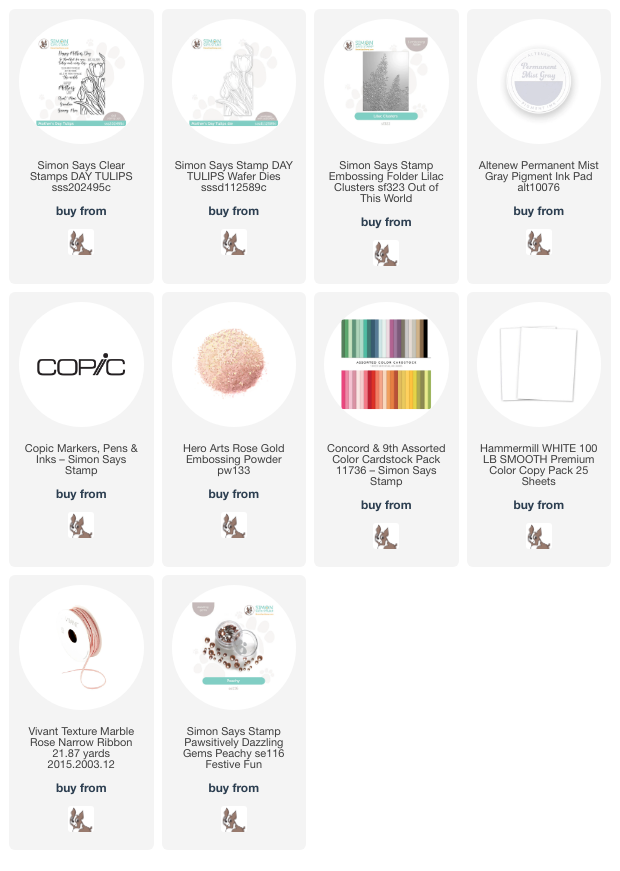
I began my project by stamping the main image from my Mother’s Day Tulips stamp set using Permanent Gray Ink from Altenew so that I could do some no-line coloring, then selected gorgeous shades of coral and lime green from my Copic collection to add some fabulous depth and dimension to these pretty tulips. I feel like some flowers are just the embodiment of spring, and tulips definitely rank high among them! Their vibrant blooms are always a harbinger of lovely mild spring weather and are the first pops of color against the sleepy winter landscape.

To intensify that illusion of vibrant colors against a bland landscape, I decided to create a background for my tulips with the Lilac Clusters Embossing Folder and some luscious brown cardstock from Concord & 9th. I embossed the lovely lilac blooms (also an embodiment of springtime around here!) onto the A2 card front, then used a coordinating brown Copic marker around the edges of the die cut tulip image, making the tulips truly pop off of the somewhat drab background. The gorgeously detailed embossing folder adds an element of spectacular texture behind the vibrant blooms! I popped up the colorful die cut tulips with some foam adhesive, trimming off any excess that was hanging over the edge.

After I had finished creating the background and the focal point, I used some rose gold embossing powder to heat emboss a sentiment from the Mother’s Day Tulips stamp set, to which I made sure to add a variety of sentiments that could be used outside of Mother’s Day, as well. I fussy cut the sentiment, then popped it up with a double layer of foam adhesive. Finally, I added a coordinating bow and some Peachy Pawsitively Dazzling Gems for some added texture!

Well, that’s all for my project today. I hope you enjoyed meandering down my stamp illustrations from the past with me this week! I am so excited about things to come, as well, and I hope you love them as much as I do. Thanks so much for stopping by today, and have a marvelous day!
Filed Under: simon says stamp Tagged With: 3D embossing folder, copic coloring, die cutting, embossing folder, lilac clusters, mother's day tulips, no line coloring

Floral Flashback Week: Favorite Flowers with Simon Says Stamp!

February 17, 2025

This post was sponsored by Simon Says Stamp. Thanks, Simon!

Hi friends! This week on my blog, I thought I would take a moment to share some new inspiration using some of my favorite floral stamps which I designed for Simon Says Stamp. I feel extraordinarily lucky to have had the opportunity to turn some of my illustrations into stamp sets, and I never cease to be thrilled and amazed when a new illustration-turned-stamp set is released. All good things must come to an end at some point, sadly, and some of my favorites have been discontinued. I wanted to share some new inspiration using some of my older stamp sets that are still on the Simon website, so this week will be a throwback week, dedicated to inspiration using these older sets! First up is one of my favorites: Mother’s Day Tulips. When I originally illustrated this set, I intended for it to be used as a corner for a slimline card, but as all trends do, slimline cards have become less prevalent. That doesn’t mean that this stamp set can’t be adapted to fit a different sized card, though! I decided to do some no-line coloring to create a vibrant pop of peachy color on this 5×7 card front. Let’s get started with the details!

*I have gathered links to all of the products used at the bottom of the post for your convenience, using affiliate links. Thank you for shopping with my links! I truly appreciate your support for my work!*

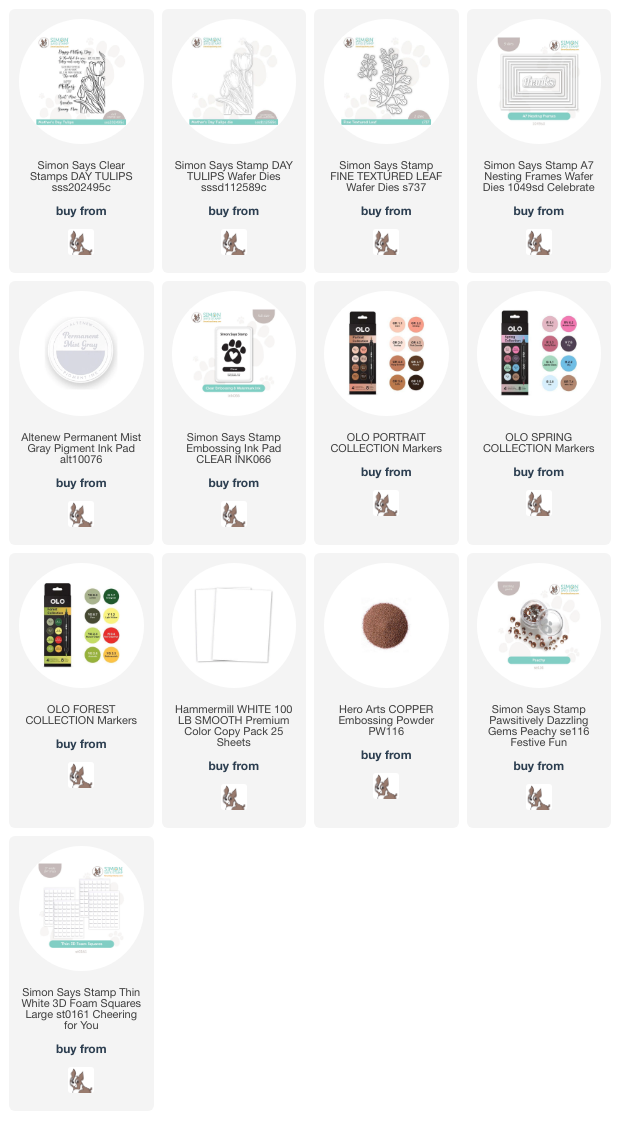
To begin my project, I stamped most of the Mother’s Day Tulips floral arrangement on a panel of white cardstock using Altenew’s Permanent Gray ink, which is an excellent ink for use with no-line alcohol ink coloring. I used some gorgeous peach and spring green tones from OLO Markers to do some vibrant no-line coloring. Tulips come in such an enormous variety of color palettes, and this pretty peachy-coral is a color that I love but haven’t used for this particular stamp set. (At least I don’t think I have, ha.) Once I had finished the detailed coloring, I used the coordinating die to cut out the image; I just love how very detailed this die is, cutting super close to the edges and also getting in between the leaves to create this intricate cutout.

Those intricately-colored tulips needed to be the star of this card, so I decided to add some monochromatic texture behind them. Because most embossing folders come oriented to fit A2 cards, I used another of my favorite techniques to add some texture behind my bouquet of tulips: tone-on-tone foliage die cuts. I die cut several of the Fine Textured Leaf dies from white cardstock to arrange them behind the vibrant tulips. I also die cut the A7 Nesting Frames from white cardstock, nestling two of them together and popping them up on my white A7 card front using foam adhesive. I snuggled the tulips into the corner of the frames and popped them up with some more foam adhesive, then arranged the leaf die cuts behind the tulips, creating some lacy, botanical texture to enhance the vibrant tulips.

After I had arranged all of the die cuts on the large A7 card front, I heat embossed a greeting from Mother’s Day Tulips onto some more white cardstock using shimmery metallic embossing powder. When creating this stamp set, I wanted to add lots of options for names, because my own children call my mom Mimi, and it can be difficult to find things with that particular name on it. One of the perks of designing stamp sets!! I used my scissors to fussy cut the sentiments and popped them up on the card front with some more foam adhesive. Finally, I added a few Peachy Pawsitively Dazzling Gems to add some more sparkle to the card.

Well, that’s all for my project today. It was such fun to delve into my stash of sets that I’ve illustrated and breathe some new life into them, and it is a great way to add some color into this arctic blast that we will be having this week. Thanks so much for stopping by today, and have a marvelous day!

Filed Under: simon says stamp Tagged With: A7, die cutting, fine textured leaf, mother's day, mother's day tulips, no line coloring, olo markers, original illustration

How to Salvage Your Mistakes with Mother’s Day Tulips for Simon Says Stamp !

March 8, 2024

This post was sponsored by Simon Says Stamp. Thanks, Simon!

Hi friends! I have a pair of springtime projects today that feature lots of my favorite things: vivid coloring, crisp white space, texture, and vellum. Our tulips are starting to peek through the soil in our landscaping, and I can’t wait to feast my eyes on their lush red blooms! I was inspired to pull out one of my older illustrations for Simon Says Stamp: Mother’s Day Tulips. I did some no-line Copic coloring on this large-scale tulip arrangement, intending to create one card with a very full bouquet of tulips, but I made some mistakes while coloring and ended up making two different cards. Let’s get started with the details on my projects!

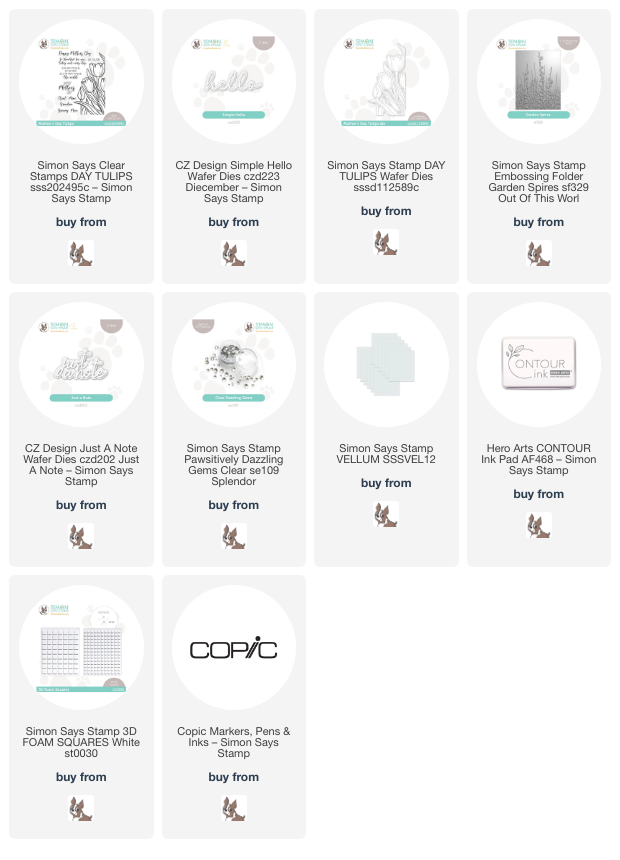
When I illustrated the Mother’s Day Tulips stamp set, I wanted to make it large enough that it could work as a focal point for a slimline card, but it also works beautifully for a more standard A2 card size! When I was mentally designing the layout of my card, I wanted to have a colorful die cut popped up on a flat stamped image, creating a veritable field of tulips. I stamped the Mother’s Day Tulips image twice using Contour Ink, offsetting it once to create some variation between the two layers of tulips.

I like to experiment with my Copic markers, mixing and matching from different color families to create really unique color gradients. I particularly like using dark neutral colors, like grays and browns, to add extra intensity to the shadows of my images. Sometimes my experiments work out wonderfully, and sometimes, like on this first project, the dark gray that I selected to add to my shadows was just a touch too dark for my taste. The alcohol ink blends splendidly most of the time, but sometimes if the colors are a bit too far apart, the lighter color will almost bleach the darker color, creating harsh lines and discoloration. On this first image, which I intended to be a background for my dimensional layer, the Toner Gray marker that I selected was just a bit too dark for the smaller areas in the tulip, and so I had issues getting a super smooth blend from one color to the next.

As I worked on the second set of tulips with a lighter gray marker for the shadows, I kept catching glances of my first panel out of the corner of my eye and loved the vibrance and contrast of the coloring. To see if I could salvage the panel rather than throw it away, I pulled out a panel of vellum, laid it over the top of the colored background, and was pleasantly surprised at the effect. The vellum softened the harsh edges of the too-dark gray while still allowing the vibrancy of the pinky red to shine through! I trimmed the vellum panel down so that it allowed 1/2″ to peek out on all sides, then added a crisp white Simple Hello die cut. I added a few sparkling Clear Pawsitively Dazzling Gems. (Also-if you haven’t checked out these new Pawsitively Dazzling Gems from Simon Says Stamp, you’re missing out. They’re glass, not plastic, which makes them feel like luxurious jewels in your hand, and they are so, SO sparkly!)

Since I was able to salvage the first background with the vellum, I decided to use the Mother’s Day Tulips coordinating dies to cut the second finished colored panel. I did not make the same mistake with the dark gray on this image; rather, I used the Toner Gray marker that was one step lighter to add my shadows, and it made a world of difference! I used the Mother’s Day Tulips coordinating dies to die cut the image, and I just adore how detailed these dies are, cutting out the little empty spaces in the center of the floral arrangement to make things as intricate and delicate as possible.

To add interest behind these vivid flowers, I added some texture to my plain white A2 card front with the Garden Spires Embossing Folder. I love that the shadows created by the texture create a such dreamy effect, like a photo that is focused on the foreground and blurry in the background! I popped up the tulip die cut with some foam squares, then die cut the Just A Note die twice from more plain white cardstock. I adhered the dimensional die cut greeting to the tulip die cut with some liquid adhesive, then added a few Clear Pawsitively Dazzling Gems to the card front for some extra sparkle!

Well, that’s all for my projects today! I hope that you find the vellum trick handy to have in your arsenal of crafty tricks in case you make a mistake like I did. Thanks so much for stopping by today, and have a marvelous day!

Filed Under: simon says stamp Tagged With: copic coloring, just a note die, mother's day tulips, no line coloring, original illustration, simple hello die

Simon Says Stamp Hello Gorgeous Release-Introducing Mother’s Day Tulips!

March 21, 2022

Hi there! I’m super excited to help Simon Says Stamp introduce their fantastic new Hello Gorgeous release for March 2022. This release features a huge variety of products, many Mother’s Day themed, as well as beautiful sentiments and lovely spring florals. I am also pleased as punch to introduce a new set that I’ve designed for Simon Says Stamp, called Mother’s Day Tulips! This large 6×8 stamp set features a large and beautiful tulip corner, sized to fit a slimline card front, but also could be adapted to fit other sizes as well! I have a few cards to share with you today, so let’s get started with the details!

My first project features my new Mother’s Day Tulips. I stamped the large image on a mini slimline card base using Hero Arts Intens-ified Black ink. I love the wide variety of colors that you can find with tulips, and I find the the deep purple tulips to be enchanting. I colored the image using Copic markers V09, V17, V15, V12, and V01 to add lots of intensity and shadows to the large images. I love coloring large images like this; the extra space allows you to really get down into the tiny areas and add lots of contrast and depth.

Once I had finished coloring the image, I blended some Blue Violet and Deep Purple inks around the edge opposite the floral arrangement using the new Flat Blending Brush. The blending brush does a beautiful job of blending these intense colors softly on the card base, leaving a halo around the flowers themselves and helping them to shine!

For the greeting, I used the new Reverse Foundations preprinted sentiment strips. I trimmed the sentiment down to three separate pieces using my trimmer, then popped them up on the colored panel using foam adhesive. The final touch was to add some shimmering purple gems for a touch of sparkle!

My next cards features the beautiful new Delicate Floral Frames stamps and dies. I contemplated going light and bright with these, but the pretty frames were just begging to be made into some chalkboard style projects! I stamped both of the frame images onto some Pitch Black cardstock using white pigment ink, then used Karin Decobrush Pigment markers to add some bright color to the black cardstock! Because these images are not terribly detailed, these opaque pigment markers made it super simple to add some quick pops of color to the images. This is the first time that I’ve tried this technique, and I absolutely love how they turned out.

To back this arched frame image from the Delicate Floral Frames stamps and dies, I die cut one of the beautiful new Detail Mandala Cover Plate dies from some more Pitch Black cardstock. The subtle pierced detail on this cover plate die is stunning; it’s surely going to become a staple in my craft room!

To accent the greenery on the arched frame, I die cut a few leaves from some Glossy Black cardstock using the new Olive Leaves dies. I popped up the frame with some foam tape, then added the shiny black leaves with some liquid adhesive. I added a greeting from the marvelous new All About Mom sentiment stamp and die set. I love the bold, chunky font on this set! These sentiments are large enough to make a really big impact on your card front. I added a few iridescent gems for a touch of sparkle.

My second card features the same technique, but places the die cuts on a plain black card front. I adhered the oval Delicate Floral Frames stamped and colored die cut to an A2 black card front using foam adhesive, then added more glossy black leaves behind the floral swag to add another element of texture to the card front.

I popped up the white embossed greeting from All About Mom. When I’m working with limited color palettes and tone-on-tone textures, I like to use tons of foam tape to add as much dimension and interest as possible, so these black and white projects have lots of height and variations in texture! I added a few more sparkling gems for an additional textural element as well as adding some sparkle.

Well, that’s all for my projects today! I hope you’ll check out the rest of the products from the Hello Gorgeous release. So many beautiful new pieces. I’m so excited that my Mother’s Day Tulips illustration is a part of it! Thanks so much for stopping by, and have a marvelous day!

Filed Under: karin, original illustrations, simon says stamp Tagged With: all about mom, chalkboard, delicate floral frames, karin pigment markers, mother's day card, mother's day tulips

Primary Sidebar

  • Facebook
  • Instagram
  • Pinterest
  • YouTube

Favorite Shops

Secondary Sidebar

Subscribe

Enter your email address to subscribe to this blog and receive notifications of new posts by email.

Instagram
Something is wrong.
Instagram token error.
Follow
Load More

Archives

Tags

3D embossing folder alcohol markers better press birthday birthday card blog hop card kit christmas christmas card christmas tag colored pencil copic copic coloring Daniel Smith die cutting embossing folder embroidery felt giveaway holiday holiday card hot foil ink blending karin brushmarker pro layered stencil masculine my monthly hero new release no line coloring no line watercolor OLO marker olo markers original illustration pawsitively saturated rainbow shaker card slimline stamping stamptember stencil thank you thinking of you valentine's day video watercolor

Popular Posts

Simon Says Stamp Joy For You Blog Hop- Day 1!
Simon Says Stamp Joy For You Release-Now Available!
Frozen Fractals All Around with New Simon Says Stamp Joy For You Release!
Shaped Holiday Shaker Card with New Simon Says Stamp Jolly Season Card Kit of the Month!
Holiday Postage with New Simon Says Stamp!
Simon Says Stamp Glory to the Newborn King Holiday Kit-Part II!
Pinkfresh Studio 5th Birthday!
Altenew Build A Flower: Fuchsia Blog Hop+Giveway!
Holiday Joy in Pink and Green with New Simon Says Stamp DieCember!
Honey Bee Stamps September Release Blog Hop!

Disclosure

Some affiliate links are used in my posts. This means that, should you click on one of my links and purchase something from that company, I will receive a small portion of the sale at no extra cost to you. I use the money earned from these sales to help maintain my blog. I so appreciate you visiting and, if you do choose to use one of my affiliate links, thank you so much for your support!
Copyright © 2026 ·Brunch Pro Theme · Genesis Framework by StudioPress · WordPress · Log in
Loading Comments...