• Skip to main content
  • Skip to primary sidebar
  • Skip to secondary sidebar

Sixth Street Sundries

Emily Midgett

  • Home
  • About Me
  • Contact
  • OLO Marker Color Swatch Chart
  • Shop

floral bunches

Lovebirds, Embossing, and Glittering Watercolors with Simon Says Stamp!

April 23, 2026

This post was sponsored by Simon Says Stamp. Thanks, Simon! *I have gathered links to all of the products used at the bottom of the post for your convenience, using affiliate links at no extra cost to you. Thank you for shopping with my links! I truly appreciate your support for my work!*

Hi friends! I an homage to blush and glitter for you today featuring some absolutely gorgeous cardstock, two different embossing folders, and sparkling glitter watercolors. Whenever I want to create something really unique and out of my typical hyper-realist color palettes, I switch up the foliage with an outside-the-box color. I love adding colored details to embossing folder images, even moreso when it’s coordinating embossed die cuts, and so I paired the beautiful birdies from Chickadee Gathering with the delicate blooming branches from the Floral BunchesĀ embossing folder to create this pretty wedding or bridal shower card. Let’s get started with the details!

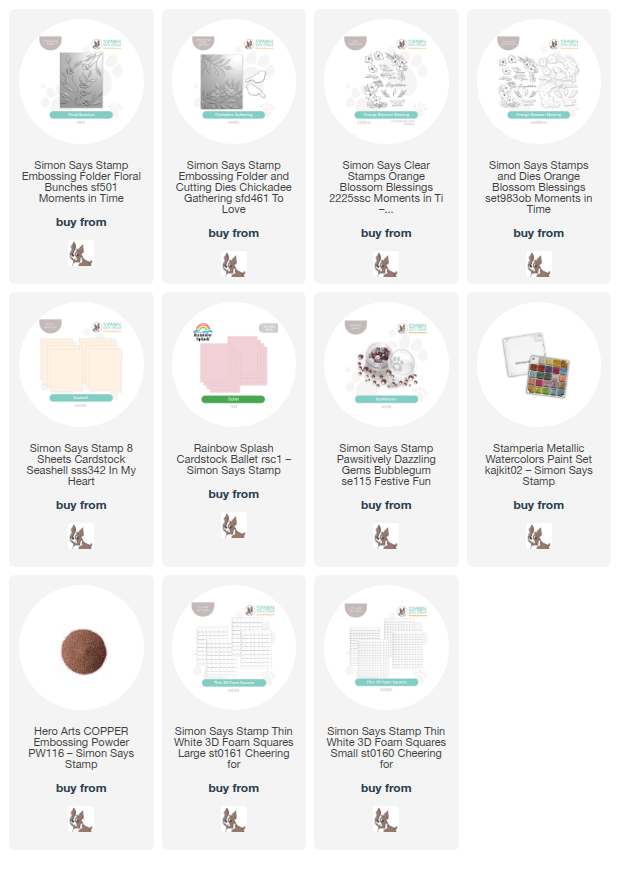
To begin, I ran an A2 panel of Apricot Simon Says Stamp cardstock through my die cutting machine with the Floral BunchesĀ embossing folder. This embossed beautifully on the cardstock, creating a delicately detailed textured background, but I took it one step further by adding some details to the embossed images. I used a cherry blossom pink alcohol marker for the blooms themselves, then used bronze metallic watercolors to add color to the leaves and stems, creating this pretty (and relatively simple!) background. The raised texture does so much of the shading work for you that simple coloring/watercoloring is all that is needed!

After I had created the background, I used some more Apricot cardstock to die cut the birds from Chickadee Gathering, then placed them in their appopriate spot within the embossing folder and ran it through my die cutting machine to create the shape and texture of these birds. Die cutting first and then adding the embossing makes sure that the deeply-embossed textured details remain as crisp as possible! I added some alcohol marker details to the birds, adding warm cocoa brown and some of the same blush from the blooms to keep the color palette cohesive. I also added lots of sparkling bronze metallic watercolor details to the individual feathers and the birds’ eyes!

For the card front itself, I trimmed 1/4″ from each of the long sides of the embossed background panel using my trimmer. I placed the trimmed, embossed panel in the center of a full sized A2 panel of Ballet Rainbow Splash cardstock, the pale pink of which coordinates beautifully with the blush blooms on the embossed section. I also used the same Ballet cardstock to create my greeting, heat embossing two of the sentiment stamps from my older Orange Blossom Blessing stamp set using Copper embossing powder. When I am creating a new stamp set, I strive to add sentiments that are unique and timeless, and as we are coming up on wedding season, I see myself reaching for this set more and more with it’s elegant greetings! I die cut the finished embossed sentiments with their coordinating dies, then arranged the sentiments and the birds on the card front, adhering the die cuts with thin foam adhesive squares. I love how the lovebirds flank the sentiments, drawing your eye to the greeting immediately! For a final special touch, I added some Bubblegum Pawsitively Dazzling Gems for one last sparkling accent.

Well, that’s all for my project today! Have you ever mixed embossing folders? Sometimes the scale of the images work so perfectly together that it’s impossible to resist!! Thanks so much for stopping by today, and have a marvelous day!
Filed Under: simon says stamp, Uncategorized Tagged With: 3D embossing folder, bridal shower, chickadee gathering, embossing folder, floral bunches, wedding card

Chinoiserie Inspiration with New Simon Says Stamp!

June 18, 2025

This post was sponsored by Simon Says Stamp. Thanks, Simon!

Hi friends! I recently watched a video on Instagram showcasing an ancient enameling technique in which the artisan bent copper strips to create an incredibly ornate design on a porcelain vase, then crushed colorful enamel into powder and carefully placed it inside each element of the pattern, firing the finished product to melt the enamel and create an exquisite enameled vase! I found the finished product enchanting, and so I decided to try to recreate it with my cardmaking products, adding some watercoloring and die cutting into the mix. Let’s get started with the details!

*I have gathered links to all of the products used at the bottom of the post for your convenience, using affiliate links. Thank you for shopping with my links! I truly appreciate your support for my work!*

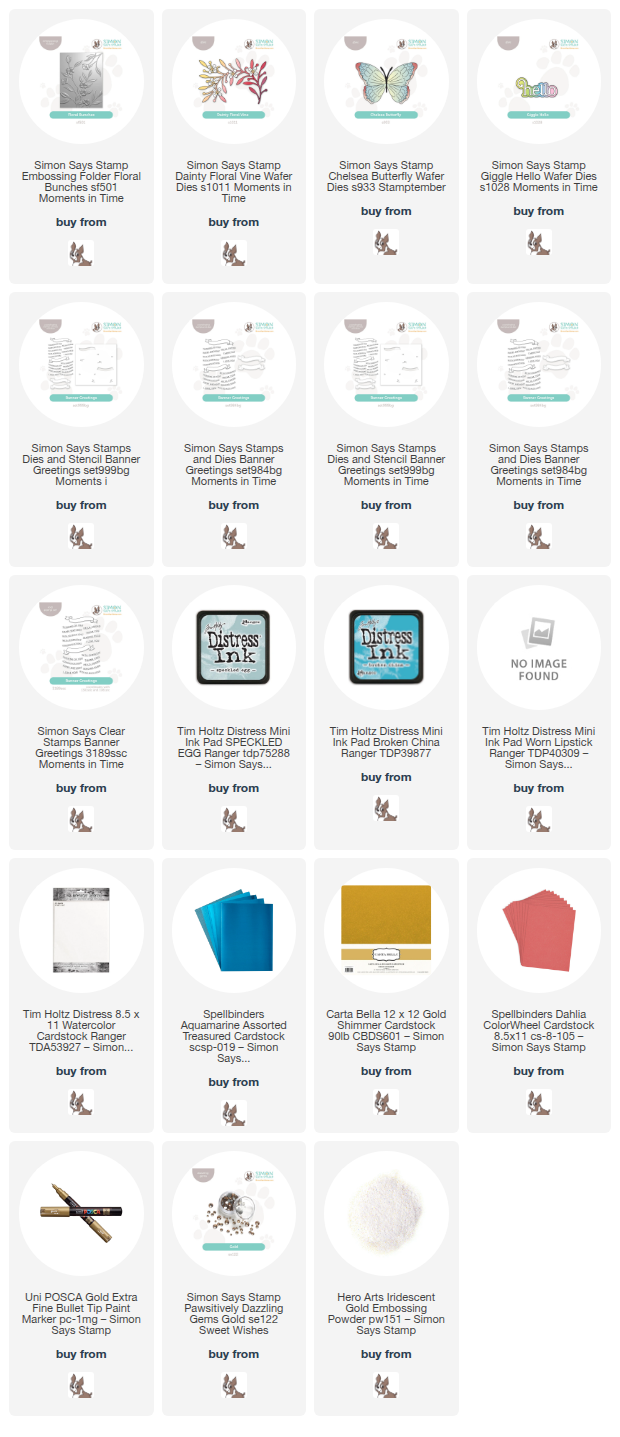
I began by running an A2 panel of Tim Holtz Distress Watercolor Cardstock through my die cutting machine using the new Floral Bunches Embossing Folder. I then used Speckled Egg, Broken China, Worn Lipstick Distress Ink Cubes to do some watercoloring on this pretty floral background, tapping the color out on my glass mat and picking up the diluted color with my damp paintbrush. I always forget how fun it is to watercolor with my Distress Inks… I need to do it more often! I used Broken China to create a hazy blue background, then used Speckled Egg for the foliage and Worn Lipstick for the blooms, creating a colorful floral background. To take it to the next level, I used a gold acrylic paint pen around the edges of the embossed images. It’s so hard to photograph the shine, but it’s amazing in real life!

To add to the detailed background, I die cut the Chelsea Butterfly from pearlescent white cardstock and the details from teal mirror cardstock, coordinating with the lovely teal watercolored background. I also die cut the new Giggle Hello die from pearlescent gold and vellum cardstocks, layering the two together with liquid adhesive. To complement the simple hello greeting, I used the fabulous new Banner Greetings product suite, which includes stamps, stencils, and coordinating dies! I heat embossed the sentiment using Iridescent Gold embossing powder, then blended Speckled Egg ink with the stencils to add some extra dimension and color to the image, finally cutting it out with the coordinating die.

Before adhering my die cuts and sentiment pieces, I decided to add one final die cut element, cutting the foliage from the Dainty Floral Vine from pearlescent gold cardstock and the blooms from Spellbinders Dahlia cardstock. I adhered the die cuts in a cluster on the patterned card front using a combination of liquid and foam adhesive, creating lots of dimension and layers on this card. Finally, I added a few Gold Pawsitively Dazzling Gems for one last sparkling touch!

Well, that’s all for my projects today! It’s amazing how inspiration can strike from the most random videos that pop up in your social media feed, right? I’m so glad that I saw that video about the enameled vase, not only because it inspired this card, but it showed me that art can be timeless and a worthwhile skill to hone! Thanks so much for stopping by today, and have a marvelous day!

Filed Under: simon says stamp Tagged With: banner greetings, chelsea butterfly, chinoiserie, dainty floral vine, die cutting, distress ink, distress watercolor, embossing folder, floral bunches, giggle hello, watercolor

NEW- Orange Blossom Blessing with Simon Says Stamp!

May 29, 2025

This post was sponsored by Simon Says Stamp. Thanks, Simon!

Hi friends! The new Simon Says Stamp Moments in Time Release went live last night, and I am thrilled to say that I illustrated a new stamp set for the release: Orange Blossom Blessing. I have always loved the idea of orange blossoms being part of a wedding bouquet; there’s something so classic and traditional about the combination of orange blossoms and weddings. The flowers are so delicate and the fragrance is divine (if only I could convey the scent within a drawing!), so it was a very enjoyable experience for me to create this set, filled with florals and meaningful sentiments, perfect for the upcoming wedding season. Let’s get started with the details on my project!

*I have gathered links to all of the products used at the bottom of the post for your convenience, using affiliate links. Thank you for shopping with my links! I truly appreciate your support for my work!*

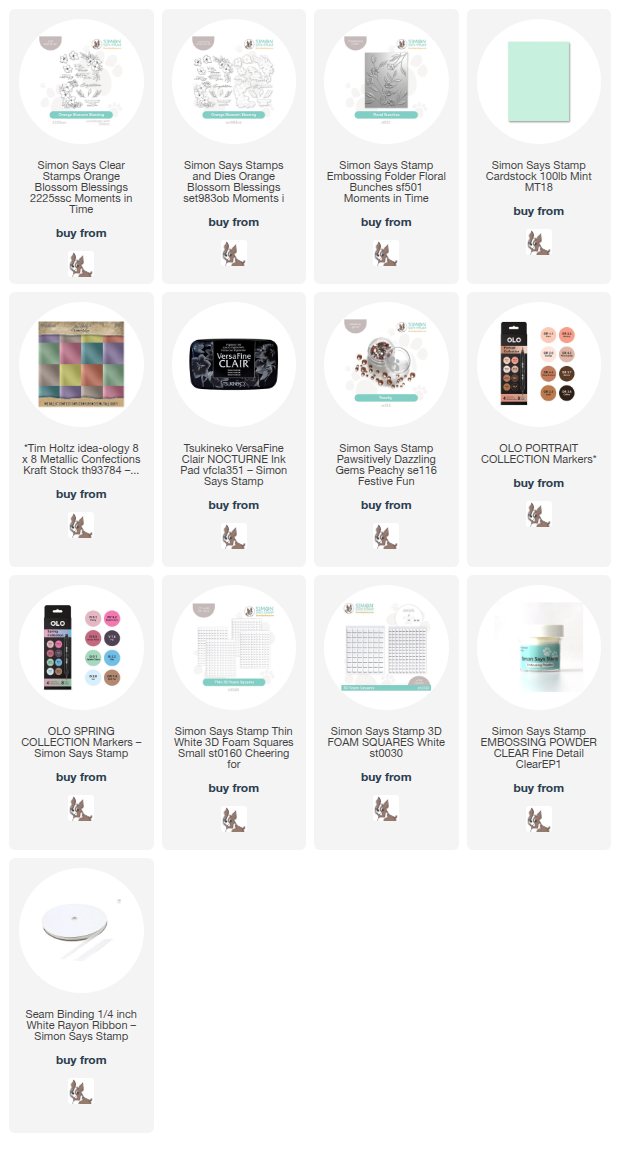
To begin, I stamped a few of the images from my new Orange Blossom Blessing stamp set onto some Hammermill cardstock using Simon Says Stamp’s Nocturne black pigment ink, enhancing the crisp black lines with clear embossing powder to make them extra sharp. I then used OLO Markers to color the images in a springy peach and mint color palette, keeping the colors pale so that those black lines would really pop. I used the coordinating dies to die cut the finished images.

Behind the colored flowers, I added some subtle, relatively neutral texture with the Floral Branches Embossing Folder. I embossed a panel of minty Tim Holtz Metallic Kraft cardstock with the new Floral Branches folder, then trimmed it down 1/2″ on two sides and nestled it in the corner of an A2 panel of Simon Says Stamp Mint cardstock. The shining foil contrasts nicely with the matte colored cardstock, while the coating on the foil helps make that gorgeous floral imagery even more crisp. If you haven’t tried embossing folders with foil or other coated papers, this is your sign to try it out!

After I had finished the background, I arranged the colored flowers in a swag on the textured background, adhering them with both thin and thick foam adhesive squares. I also stamped and embossed a pair of greetings from my Orange Blossom Blessing stamp set and used the coordinating dies to cut them out. Because I was trying to avoid straying from my mint and peach color palette, I used a pale mint OLO Marker to color the white areas around the embossed sentiment to create continuity amongst each piece of the card., then tucked the sentiments amongst the floral swag. Finally, I added a thin white silk bow and some Peachy Pawsitively Dazzling Gems to the card front for more texture and sparkle!

Well, that’s all for my project today. Be sure to stop by later this week for more inspiration during the Moments in Time blog hop. Tons of inspiration and tons of prizes await! Thanks so much for stopping by today, and have a marvelous day!

Filed Under: simon says stamp Tagged With: 3D embossing folder, alcohol marker, die cutting, embossing folder, floral bunches, olo markers, orange blossom blessings

Primary Sidebar

  • Facebook
  • Instagram
  • Pinterest
  • YouTube

Favorite Shops

Secondary Sidebar

Subscribe

Enter your email address to subscribe to this blog and receive notifications of new posts by email.

Instagram
Something is wrong.
Instagram token error.
Follow
Load More

Archives

Tags

3D embossing folder alcohol markers better press birthday birthday card blog hop card kit christmas christmas card christmas tag colored pencil copic copic coloring Daniel Smith die cutting embossing folder embroidery felt giveaway holiday holiday card hot foil ink blending karin brushmarker pro layered stencil masculine my monthly hero new release no line coloring no line watercolor OLO marker olo markers original illustration pawsitively saturated rainbow shaker card slimline stamping stamptember stencil thank you thinking of you valentine's day video watercolor

Popular Posts

Simon Says Stamp October 2026 Card Kit of the Month: Homespun Gratitude!
Honey Bee Stamps Cheerful Love Blog Hop!
Altenew Craft A Flower: Poppy Blog Hop+Giveaway!
Autumn Legs with Colorado Craft Company and Catherine Pooler!
Simon Says Stamp Cozy & Bright Inspiration, Part Two!
February 2018 My Monthly Hero Blog Hop!
The Ton Anniversary Release- Day 2
Sunflower Home Decor with Simon Says Stamp!
Hero Arts Spring 2020 Catalog Release Blog Hop+Giveaway!
Altenew Standalone Die Blog Hop+Giveaway!

Disclosure

Some affiliate links are used in my posts. This means that, should you click on one of my links and purchase something from that company, I will receive a small portion of the sale at no extra cost to you. I use the money earned from these sales to help maintain my blog. I so appreciate you visiting and, if you do choose to use one of my affiliate links, thank you so much for your support!
Copyright © 2026 ·Brunch Pro Theme · Genesis Framework by StudioPress · WordPress · Log in
Loading Comments...