• Skip to main content
  • Skip to primary sidebar
  • Skip to secondary sidebar

Sixth Street Sundries

Emily Midgett

  • Home
  • About Me
  • Contact
  • OLO Marker Color Swatch Chart
  • Shop

happy autumn

Autumn Cascade with New Simon Says Stamp!

September 17, 2025

This post was sponsored by Simon Says Stamp. Thanks, Simon!

Hi friends! I know that we are deep into the STAMPtember celebrations, but I want to keep sharing inspiration using new products that are not limited edition, but will be restocked once they initially sell out! I love autumn; my birthday is at the end of September, so I have always enjoyed that transition from summer into fall, with the switch from the vibrant summer colors to the muted orange, burgundy, and deep greens that mark our switch from hot to cool (depending on where you are, of course.) I live in the Midwest, and while the foliage frequently is beautiful, I would love to go “leaf peeping” in the more northern climes. Autumn is about the only time of year that I truly enjoy being outside, haha! (Definitely an “indoor girl.”) Today’s project was inspired by my dreams of being a leaf peeper, combined with my favorite autumnal colors: burnt orange, deep mauve, and chocolatey brown. Let’s get started with the details on my project!

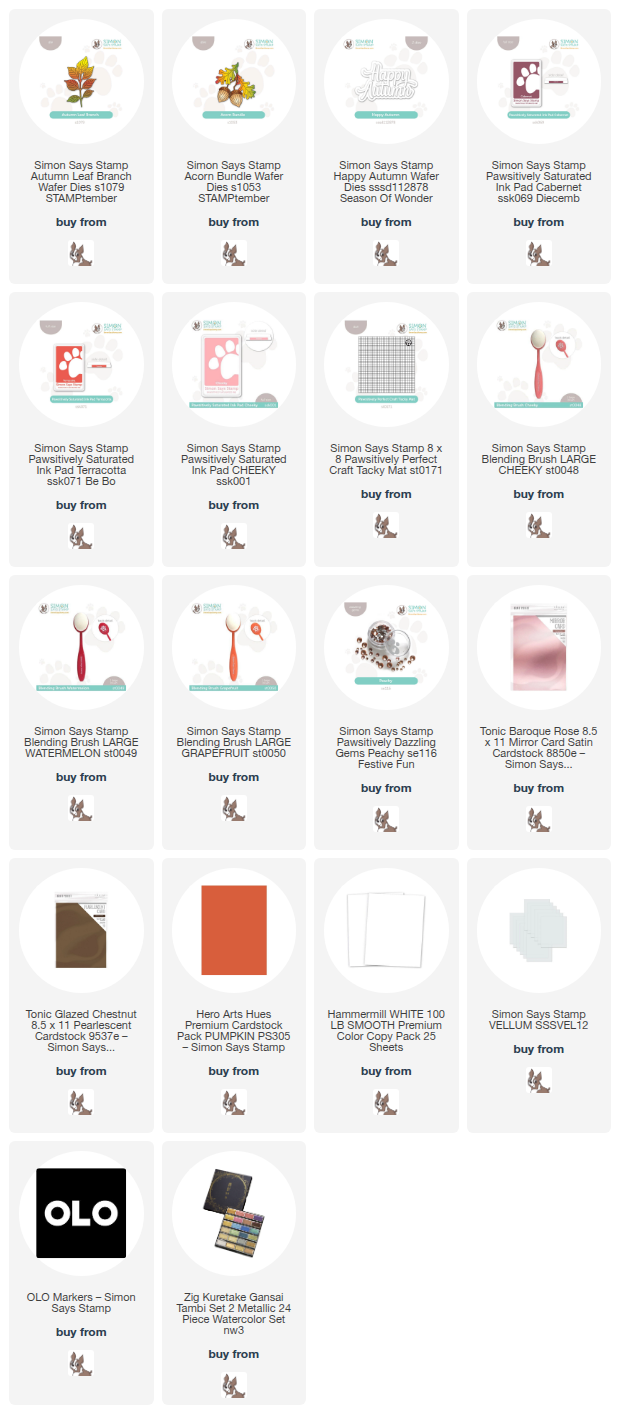
*I have gathered links to all of the products used at the bottom of the post for your convenience, using affiliate links. Thank you for shopping with my links! I truly appreciate your support for my work!*

I began my project by die cutting several sets of foliage from white cardstock using the new Autumn Leaf Branch and Acorn Bundle dies. I kept the die cuts in their negative die cut space and placed them on a Simon Says Stamp Craft Tacky Mat so that I could do some ink blending using Pawsitively Saturated Inks in shades of Cabernet, Terracotta, and Cheeky. These three inks together are such a bold and lovely combination and create such a beautiful autumn color palette! Keeping them in their negative die cut spaces on the sticky mat helps stabilize the delicate die cuts so that I can ink blend easily. Once I had finished blending, I removed the colorful cuts and die cut a few more Autumn Leaf Branches from some rosy mauve mirror cardstock, as well, for a bit of shine and textural variety.

I also used my OLO Markers to customize the acorn die cuts from the Acorn Bundle die set. You could also use your brown inks to blend these colors! I love customizing die cuts with my alcohol markers, so I chose to go that route and create deeply saturated browns to go with my abundance of foliage. Behind my autumnal cascade, I used a blending brush to blend some Terracotta Ink on a panel of deep burnt orange cardstock, keeping my blending to one corner and tapering off as I got closer to the opposite corner. I used metallic copper watercolors to splatter some additional texture and shimmer to the background before arranging my leafy cascade in the blended corner, adhering the foliage with double and single layers of foam adhesive squares.

For the greeting, I die cut the previously-released Happy Autumn die set, cutting the detail layer from some pearlescent brown cardstock and backing the detail layer with a vellum shadow. I nestled the sentiment pieces amongst the foliage, adhering them with thin strips of foam adhesive, then added my acorns and a few stray leaves to complete my foliage cascade. Finally, I added some sparkling Peachy Pawsitively Dazzling Gems, adding one final touch of sparkle and shine!

Well, that’s all for my project today! Autumn is my favorite season, and I can’t wait for things to cool down, the colors to change, and all of the festivities the changing seasons bring. (Also-begone, bugs!) Thanks so much for stopping by today, and have a marvelous day!
Filed Under: simon says stamp Tagged With: acorn bundle, autumn, autumn leaf branch, die cutting, fall, happy autumn, ink blending, olo markers, pawsitively saturated

Happy Autumn in Vivid Color!

October 9, 2023

This post was sponsored by Simon Says Stamp. Thanks, Simon!

Hi friends! I’ve professed my general disinterest in red, orange, and yellow in previous posts, but it seems that I cannot get away from them completely when creating with autumn-themed projects. I have found that adding a pop of vivid fuchsia or soft peach to the traditional autumn color schemes enlivens the entire color palette and makes it much easier for my brain to use!! I love that simply tweaking a style or theme to better fit your own personal preferences can make the creative process so much easier. For today’s project, I chose to work with the Autumn Cascade layered stencil set from the Simon Says Stamp Season of Wonder release, pairing it with a variety of gorgeous (semi-non-traditional) inks from the Pawsitively Saturated line. Let’s get started with the details!

When working with layered stencils like this, one of my favorite ways to create a unique background is to do a tone-on-tone stencil technique. That is, I blend the entirety of the background panel first with my desired ink colors, then lay my stencils over the top and blend with the exact same colors in the exact same order. The result is a lovely and colorful background, with a slightly more subtle pattern because of the tone-on-tone effect. For this project, I chose to first ink blend Amethyst, Pucker, Peachy, Lemonade, and Citrine inks down the front of my panel of A2 white Hammermill cardstock.

After I had finished creating my colorful background panel, I laid the first stencil from the Autumn Cascade layered stencil set over the top and used the same shades of ink, in the same order, to blend the first layer of the stencil. I made sure to use a little more pressure and a little more ink to blend these stenciled images so that they were visible amongst the blended background. Adding layers of blended ink is similar to adding layers of watercolor; with each subsequent layer added, the color is intensified, but if you start too intense, you’re kind of stuck. It helps to start light and add more layers as you go!

After I had blended the first layer, I laid the second stencil from the Autumn Cascade layered stencil set and mentally shifted my colors a bit. Instead of starting with the same shades as the base layer and the first stencil layer, I added Mocha ink at the top of my ink line and worked my way down. This way, the details on the second stencil were still visible, because I used ink that was a smidge darker than my first layer!

After I had finished all of my ink blending, I splattered some super sparkly, iridescent metallic watercolors. I love adding splatters of metallic watercolor to ink blended backgrounds… I think it adds just the right touch of sparkle and artistic flair!

Once I had finished the background, I die cut a vivid purple foil frame using the A2 Thin Frames dies (a favorite die set of mine and almost always out on my desk!) using some Electric Purple glossy foil from Tonic. I also used residual ink leftover on my blending brushes to blend some autumnal colors on a spare bit of white cardstock, from which I then die cut and embossed the individual leaves and acorns from the Oak Leaves and Branches Embossing Folder + Die set. For the greeting, I die cut the detail layer of the new Happy Autumn die from brown glitter cardstock, then the background from vellum and layered them together. I layered all of the die cut pieces using dots of liquid adhesive, finally adding a few shimmering gems for one last touch of sparkle!

Well, that’s all for me today! Remember if something is out of stock, you can always sign up for an email notification when it comes back in stock. Thanks so much for stopping by today, and have a marvelous day!

Filed Under: simon says stamp Tagged With: A2 thin frames, autumn cascade, happy autumn, layering stencils, pawsitively saturated, season of wonder

Primary Sidebar

  • Facebook
  • Instagram
  • Pinterest
  • YouTube

Favorite Shops

Secondary Sidebar

Subscribe

Enter your email address to subscribe to this blog and receive notifications of new posts by email.

Instagram
Something is wrong.
Instagram token error.
Follow
Load More

Archives

Tags

3D embossing folder alcohol markers better press birthday birthday card blog hop card kit christmas christmas card christmas tag colored pencil copic copic coloring Daniel Smith die cutting embossing folder embroidery felt giveaway holiday holiday card hot foil ink blending karin brushmarker pro layered stencil masculine my monthly hero new release no line coloring no line watercolor OLO marker olo markers original illustration pawsitively saturated rainbow shaker card slimline stamping stamptember stencil thank you thinking of you valentine's day video watercolor

Popular Posts

Simon Says Stamp Joy For You Blog Hop- Day 1!
Simon Says Stamp Joy For You Release-Now Available!
Frozen Fractals All Around with New Simon Says Stamp Joy For You Release!
Shaped Holiday Shaker Card with New Simon Says Stamp Jolly Season Card Kit of the Month!
Holiday Postage with New Simon Says Stamp!
Simon Says Stamp Glory to the Newborn King Holiday Kit-Part II!
Pinkfresh Studio 5th Birthday!
Altenew Build A Flower: Fuchsia Blog Hop+Giveway!
Holiday Joy in Pink and Green with New Simon Says Stamp DieCember!
Honey Bee Stamps September Release Blog Hop!

Disclosure

Some affiliate links are used in my posts. This means that, should you click on one of my links and purchase something from that company, I will receive a small portion of the sale at no extra cost to you. I use the money earned from these sales to help maintain my blog. I so appreciate you visiting and, if you do choose to use one of my affiliate links, thank you so much for your support!
Copyright © 2026 ·Brunch Pro Theme · Genesis Framework by StudioPress · WordPress · Log in
Loading Comments...