• Skip to main content
  • Skip to primary sidebar
  • Skip to secondary sidebar

Sixth Street Sundries

Emily Midgett

  • Home
  • About Me
  • Contact
  • OLO Marker Color Swatch Chart
  • Shop

holiday messages

Icy Arthur Snowman Card with New Simon Says Stamp!

November 20, 2024

This post was sponsored by Simon Says Stamp. Thanks, Simon!

Hi friends! I have a sweet and icy card to share with you today based on a card that I made a loooong time ago using my Cricut (how’s that for a throwback?), with a shabby chic snowman and a peaceful aqua background. I found that card recently, because I liked it so much that I didn’t end up sending it out, ha, and as soon as I saw Arthur the Snowman from the Festive Fun release, I knew that I wanted to recreate it with a few little twists to update it and make it more my current style. Let’s get started with the details on my project!

*I have gathered links to all of the products used at the bottom of the post for your convenience, using affiliate links. Thank you for shopping with my links! I truly appreciate your support for my work!*

I began my card by die cutting Arthur the Snowman from some pearlescent white cardstock. I love using specialty cardstock with things like snowmen and snowflakes, because I think it increases the magical icy feel and just as a general rule makes the card more luxurious and upscale. I die cut his hat and scarf from some plain white cardstock and used my OLO markers to color the images in a pale shade of icy blue. I also used OLO markers to color the details on his eyes and nose and added some Black Pawsitively Dazzling Gems for his coal buttons.

For the background, I used the beautiful snowflake images from the older Don’t Flurry, Be Happy stamp set, stamping them on the top right side of my Sea Glass card front using Simon Says Stamp White Pigment ink. I also used a blending brush dedicated solely for use with white pigment ink, to blend around the edges near the stamped snowflakes. I think the combination of stamped snowflakes and frosted edges make it look almost like a blizzard! In order to ground my snowman, I trimmed some strips of white pearl and white glitter cardstock and adhered them to my stamped and blended card front, then added Arthur over the top with some foam adhesive squares. For some added sparkle and shine, I used some sparkling white glitter paper to die cut a few tiny snowflakes using the Snow Flurries dies. I adhered them to the card front with liquid adhesive, then added some Clear Pawsitively Dazzling Gems in the centers and a smattering around the background.

To create the greeting, I die cut the Scripty Peace die from some more white glitter cardstock, enhancing it with some sentiment strips from Holiday Messages, which I heat embossed in white on the same Sea Glass cardstock. I nestled the Peace sentiment die cut next to Arthur, then added the sentiment strips beneath, tucking them in the corner of the sentiment and Arther’s tummy. The different textures of the pearlescent white snowman and the sparkling white glitter sentiment keep the limited color palette from becoming boring and keeps the two white pieces from blending into each other.

Well, that’s all for my project today! I love having the opportunity to reimagine an older project that I loved using some new techniques and products. Inspiration is everywhere! Thanks so much for stopping by today, and have a marvelous day!

Filed Under: simon says stamp Tagged With: arthur the snowman, copic coloring, die cutting, don't flurry be happy, holiday card, holiday messages, ink blending, scripty peace, snow flurries, white pigment ink

Simon Says Stamp Sweet Wishes Blog Hop-Day 2!

October 12, 2024

This post was sponsored by Simon Says Stamp. Thanks, Simon!

Hi friends! I am hopping along with Simon Says Stamp to celebrate their brand new Sweet Wishes release! You should have arrived here from Suzy Plantamura, and your next stop is Amy Rysavy. You can also start back at the beginning at the Simon Says Stamp Blog! This release is full of beautiful items with both seasonal and non-seasonal products, and I have been having fun playing around with color palettes for Christmas cards using the new embossing folders. My project for today features one of the gorgeous new embossing folder/die combo sets, as well as a beautiful new holiday sentiment set with the prettiest font. Let’s get started with the details!

*I have linked all of the products used at the bottom of the post for your convenience using affiliate links. Thank you for shopping with my links! I truly appreciate your support for my work!*

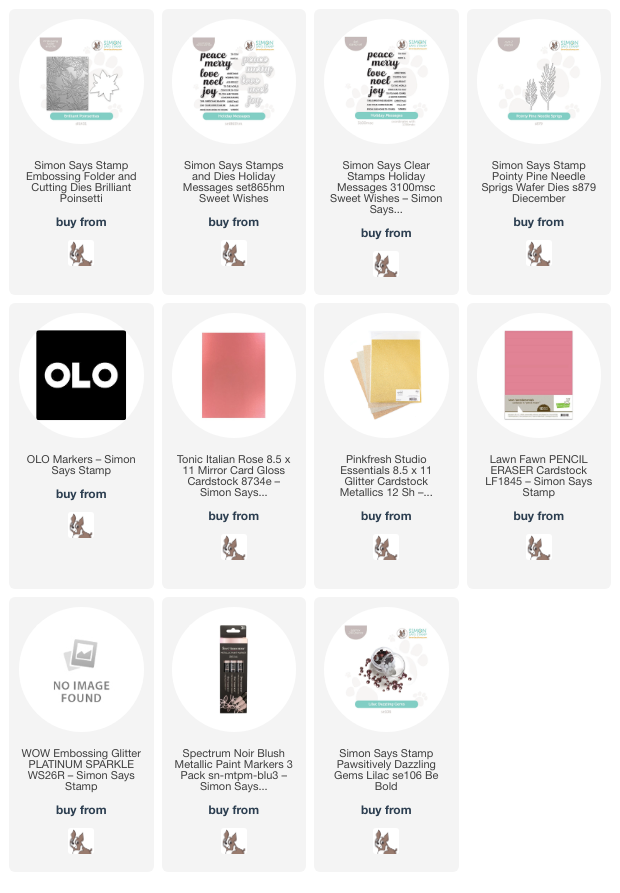
To start, I trimmed down a panel of Tonic Italian Rose cardstock to A2 size, then ran it through my die cutting machine with the new Brilliant Poinsettias Embossing Folder. If you haven’t tried pairing embossing folders with mirror foil cardstock, you’re really missing out…. the detail is absolutely incredible! Using my trimmer, I cut the embossed panel at a diagonal to create a unique diagonal strip across my card front. I tucked a strip of Champagne glitter cardstock on either side of the embossed panel, then popped it up on a panel of super pale peach cardstock using some foam adhesive squares.

After creating the unique diagonal background, I took advantage of the coordinating die for the Brilliant Poinsettias Embossing Folder combo, cutting a poinsettia from white cardstock, running it through my die cutting machine in the coordinating spot on the embossing folder, then using my OLO markers to color the die cut in shades of warm mauve that coordinated nicely with the embossed mirror cardstock. I also used a metallic rose gold paint marker to add some metallic detail to the center of the flower. I wanted to create a little holiday bouquet, so I die cut the Pointy Needle Pine Sprigs die set from some Lawn Fawn Pencil Eraser cardstock and arranged the die cuts on the card front using foam and liquid adhesive.

Finally, it was time to add the greeting. I stamped the “joy, love, peace this Christmas season” sentiments from the new Holiday Messages on some more Pencil Eraser cardstock, then heat embossed them with Platinum glitter embossing powder for added sparkle. I die cut the larger words with their coordinating die and popped them up on the card front using foam squares. Finally, I added some Lilac Pawsitively Dazzling Gems, which are a lovely chamelon pinky purple that picks up colors around it very nicely.

Well, that’s all for my project today! Now for some fun giveaway information:

Simon Says Stamp is giving away a $25 coupon to every stop on the hop, to be selected from each blog’s comment section. Winners will be chosen and posted on the Simon Says Stamp blog on Wednesday the 16th of October and can email the Simon team to claim their prize!

Simon Says Stamp is also offering a fun gift-with-purchase promotion to make the blog hop extra special. Simply follow the instructions in the graphic included at the top of the post to receive your free gift with purchase!

Your next stop is Amy Rysavy. Don’t forget to check out the Simon Says Stamp Blog for even more inspiration from Day 1 of the hop! Thanks so much for stopping by today, and happy hopping!

Filed Under: simon says stamp Tagged With: brilliant poinsettia, christmas card, die cutting, embossing folder, holiday card, holiday messages, mauve, no line coloring, olo markers, pine needle sprigs

Primary Sidebar

  • Facebook
  • Instagram
  • Pinterest
  • YouTube

Favorite Shops

Secondary Sidebar

Subscribe

Enter your email address to subscribe to this blog and receive notifications of new posts by email.

Instagram
Something is wrong.
Instagram token error.
Follow
Load More

Archives

Tags

3D embossing folder alcohol markers better press birthday birthday card blog hop card kit christmas christmas card christmas tag colored pencil copic copic coloring Daniel Smith die cutting embossing folder embroidery felt giveaway holiday holiday card hot foil ink blending karin brushmarker pro layered stencil masculine my monthly hero new release no line coloring no line watercolor OLO marker olo markers original illustration pawsitively saturated rainbow shaker card slimline stamping stamptember stencil thank you thinking of you valentine's day video watercolor

Popular Posts

Simon Says Stamp Joy For You Blog Hop- Day 1!
Simon Says Stamp Joy For You Release-Now Available!
Frozen Fractals All Around with New Simon Says Stamp Joy For You Release!
Shaped Holiday Shaker Card with New Simon Says Stamp Jolly Season Card Kit of the Month!
Holiday Postage with New Simon Says Stamp!
Simon Says Stamp Glory to the Newborn King Holiday Kit-Part II!
Altenew Build A Flower: Fuchsia Blog Hop+Giveway!
Holiday Joy in Pink and Green with New Simon Says Stamp DieCember!
Pinkfresh Studio 5th Birthday!
Honey Bee Stamps September Release Blog Hop!

Disclosure

Some affiliate links are used in my posts. This means that, should you click on one of my links and purchase something from that company, I will receive a small portion of the sale at no extra cost to you. I use the money earned from these sales to help maintain my blog. I so appreciate you visiting and, if you do choose to use one of my affiliate links, thank you so much for your support!
Copyright © 2026 ·Brunch Pro Theme · Genesis Framework by StudioPress · WordPress · Log in
Loading Comments...