• Skip to main content
  • Skip to primary sidebar
  • Skip to secondary sidebar

Sixth Street Sundries

Emily Midgett

  • Home
  • About Me
  • Contact
  • OLO Marker Color Swatch Chart
  • Shop

just a note

Simon Says Stamp Just A Note Blog Hop-Day 2 + Giveaway!

July 29, 2023

This post was sponsored by Simon Says Stamp. Thanks, Simon!

Good morning and welcome to the Simon Says Stamp Just A Note Blog Hop-Day 2! You should have arrived here from Amy Rysavy, and your next stop is Lisa Addesa. We are hopping along to celebrate the brand new Just A Note release, which is chock full of fabulous stamps and dies, including back to school sets, super cool layering stencils, and marvelous embossing folders! I shared some inspiration using the Citrus Slice Background Die HERE and the Golden Fern Embossing Folder HERE, but today I’m switching gears and sharing a fun shaker back-to-school shaker card using the new The Write Stuff and School Supplies stamps! Let’s get started with the details.

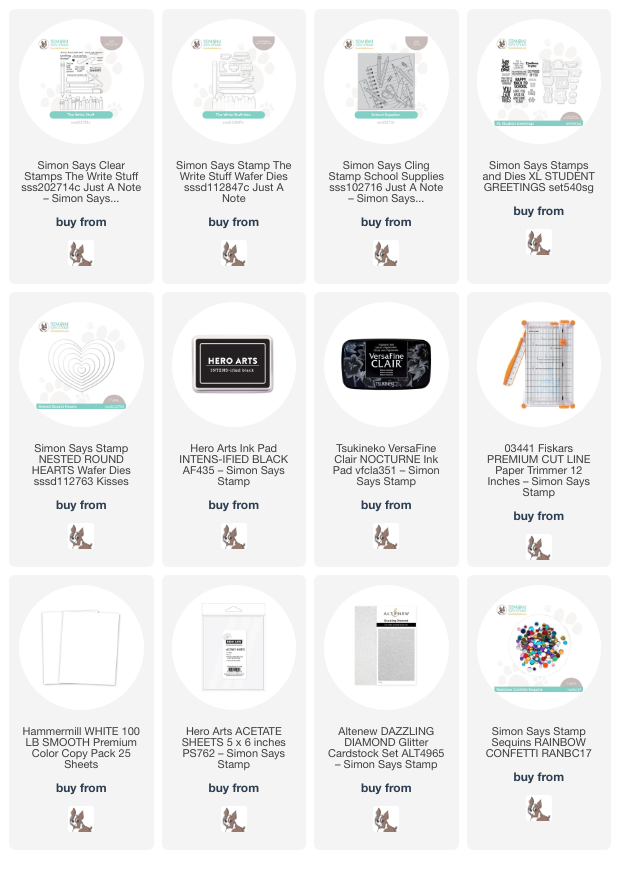
I began this encouragement shaker card by stamping the new School Supplies background stamp onto some Hammermill cardstock using alcohol marker-friendly black ink. I then colored the images in a variety of primary colors using both Copic and OLO markers to achieve the simple, childlike color scheme. We’ve been slowly purchasing new school supplies for my kiddos all summer and I definitely used them as inspiration for the color palette!

To accent my colorful background, I stamped a marker and pencil from The Write Stuff using black ink and colored them using the same shades of alcohol markers to keep everything cohesive. I love that the imagery in the background stamp exactly matches the individual images in The Write Stuff! I used the coordinating dies to cut out the colored images. I also stamped some greetings from XL Student Greetings using black pigment ink and added clear embossing powder to make the sentiments nice and crisp, then die cut them with the coordinating dies.

To create the shaker portion of my shaker card, I trimmed down a panel of white A2 cardstock using my trimmer to create an interior window and leave a 1/2″ frame around the outside. (No dies needed sometimes!) I backed the frame with some clear acetate, then added some foam tape and filled it with some coordinating colors of sequins. I nestled the pencil, marker, and sentiment die cuts in the corner of the shaker, orienting them to the left to allow the school supplies in the background on the right to be visible. I adhered the writing supplies with double sided tape and the greetings with foam tape for extra height. As an afterthought, I die cut a few hearts using the smallest of the Nested Round Hearts dies from some white glitter paper, then used a red alcohol ink marker to color them red! Still so sparkly and coordinates perfectly with the colors of the card!

Well, that’s all for my project today. Now for some fun giveaway and freebie information!

Simon Says Stamp is giving away a $25 coupon to every stop on the hop, to be selected from each blog’s comment section. The winners will be selected and posted on the Simon Says Stamp blog on Wednesday, the 2nd of August. Winners must email Simon Says Stamp to claim his/her prize 🙂

Simon Says Stamp is also offering a fabulous gift with purchase to celebrate the new Just A Note release! Simply enter code: ART to receive the Handcrafted with Love stamp set free with purchase! This gift with purchase will expire 7/30 at 11:59 pm EDT.

Here’s the full hop list in case you get lost:

Simon Says Stamp Blog 
Nina-Marie Trapani
Caly Person
Debby Hughes
Amy Rysavy
Emily Midgett
Lisa Addesa
Heather Hoffman
Lea Lawson
Bobbi Lemanski
Jennifer Kotas
Sandi MacIver
Barb Engler
Allison Frazier
Maura Hibbitts

Thanks so much for stopping by today, and happy hopping!
Filed Under: simon says stamp Tagged With: just a note, layered stencils

Simple Two-fer Notecard Set with Simon Says Stamp!

July 28, 2023

This post was sponsored by Simon Says Stamp. Thanks, Simon!

I don’t know if you’ve noticed, but I have a thing for card sets. I’ve always been someone who loves to keep everything coordinated, from my clothes to my jewelry (must always be the same type of metal!) to my accessories to the decor in my house to my artistic endeavors. There’s something so polished about all of the elements perfectly coordinating. I think that must be why I love monochromatic cards so much. Anyway, I saw the delicate new Just A Note die from the new Simon Says Stamp Just A Note Release and new I wanted to create a set of ladylike stationery that my Grammy would have been proud to send out!

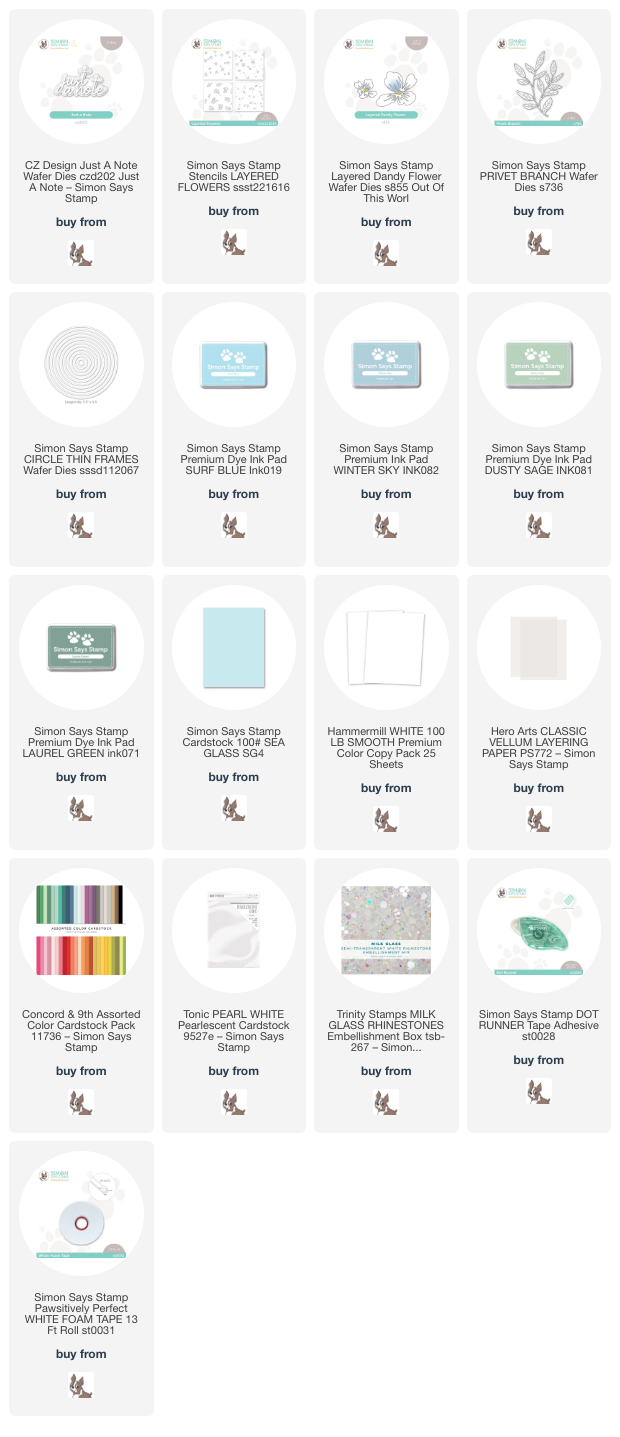
This serene duo started with the Layered Flowers stencils from Simon Says Stamp. I blended one full A2 sized panel using Surf Blue, Winter Sky, Dusty Sage, and Laurel Green inks, creating a cool and muted floral background panel. I used some circle dies to die cut a window from the center of the full A2 stenciled background, leaving me with the components for two different cards!

For my first card, I trimmed down the larger window panel slightly so that I could mount it on an A2 Sea Glass cardstock front and leave a pale blue frame around the edge, then adhered it with Simon’s Dot Runner to make it nice and flat. I die cut the components of the Dandy Flower dies using white cardstock, then layered them together with liquid adhesive. The tone-on-tone adds just a hint of texture and dimension without making the color scheme any more complicated than necessary. I also die cut some Privet Branch foliage using Juniper cardstock and snipped the leaves apart so that I could arrange them how I wanted.

Before arranging the florals, I die cut the Circle Thin Frames die from some plain white cardstock and selected a circle just slightly smaller than the window opening on the stenciled card front. I adhered the frame using liquid adhesive, then die cut the Just A Note die twice from pearlescent white cardstock. I adhered the two sentiment die cuts together to create a dimensional die cut, then arranged the sentiment and floral die cuts on my card, creating a floral swag to accent the dainty sentiment!

My second card uses some of the leftovers from my first card. I selected another circular frame die cut, slightly smaller than the circle floral die cut and adhered it in the center. I trimmed down another panel of Sea Glass cardstock (isn’t that color just dreamy??) and added the circle to the front with some more Dot Runner adhesive. I arranged some leftover florals and foliage, adhering them with foam adhesive.

To help make the sentiment stand out a bit from the patterned circle background, I die cut the outline layer from the Just A Note die set from some heavyweight vellum and adhered my pearlescent detail die cut. The vellum helps to soften the pattern behind it and helps to draw the eye to the white sentiment. I arranged the flowers, adhering them with some foam adhesive, then added a few iridescent white gems for some sparkle!

Well, that’s all for me today! Do you like to send little notes in the mail? If not, this is the perfect time to start! Who doesn’t love receiving a card in the mail? Something to look forward to besides bills! Thanks so much for stopping by today, and have a marvelous day!

Filed Under: simon says stamp Tagged With: card set, circle thin frames, just a note, layered flowers, privet branch, stationery, stencil

Simon Says Stamp Just A Note-Release Night!

July 26, 2023

This post is sponsored by Simon Says Stamp. Thanks, Simon!

Hi friends! The brand new Just A Note release is now live over at Simon Says Stamp, and there are so many wonderful new goodies upon which to feast your eyes! I have a super sweet and sunny project to share with you today using the brand new Citrus Slice Background Die with a few older products to create this zingy, cheerful card! Let’s get started with the details.

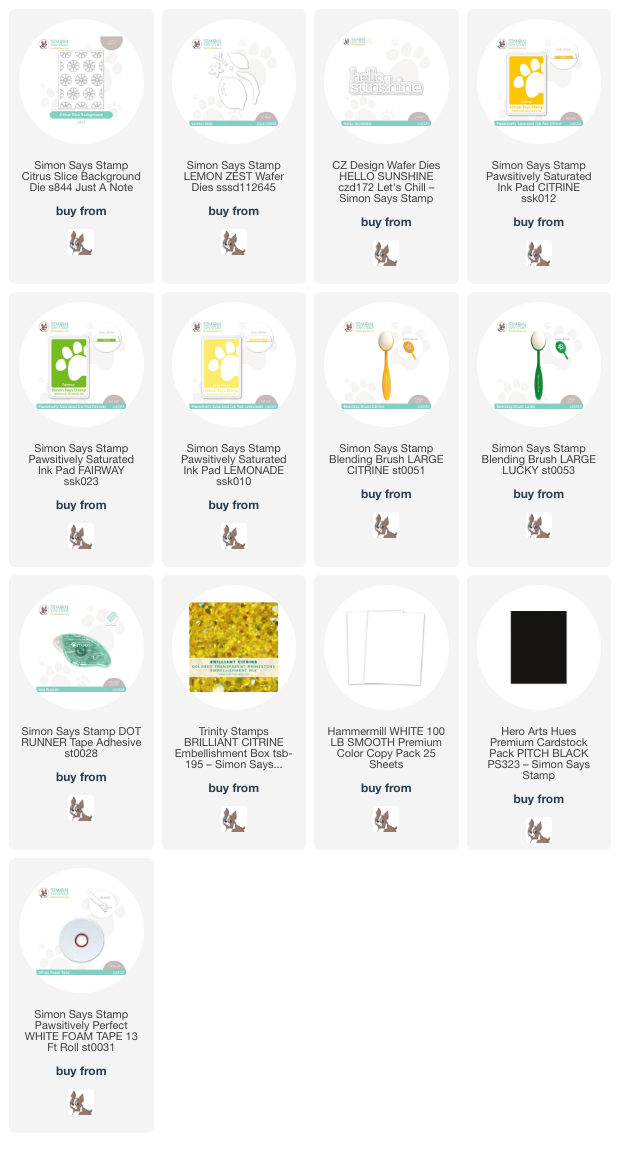
I began by die cutting the Citrus Slice background die from some plain white cardstock. I also trimmed down a panel of bright yellow cardstock to A2 size, then blended Citrine ink around the edges using a blending brush to create a super bright and saturated background to fit behind my crisp white die cut panel. I layered the two panels together using Simon Says Stamp’s Dot Runner Adhesive.

To accent my citrusy background and drive home the lemony goodness of the cover plate die, I pulled out the Lemon Zest dies and cut all of the pieces from white cardstock. I have previously created a project using these dies HERE, adding color with Copic markers, but this time, I blended Lemonade and Citrine Pawsitively Saturated inks on the lemon and Fairway on the foliage to add color to the plain white die cuts. The blending brushes glide so smoothly over the white cardstock, allowing me to create white highlights and shape on these flat die cuts so easily!

For the greeting, I die cut the detailed layer of the Hello, Sunshine die three times from black cardstock and adhered them all together using liquid adhesive to create a dimensional die cut. I arranged the die cuts on my card front to create a lemon tree “branch,” with the lemon, foliage, and blooms dripping down the card front, and popped them up using foam adhesive. To add a touch of sparkle, I added some sparkling yellow gems to the center of the flowers and dotted on the background.

Well, that’s all for my project today! Such a bright, sunshiny card, perfect for just dropping a note in the mail or sending some words of encouragement to a friend. Be sure to check out the new Just A Note Release from Simon Says Stamp, and don’t forget to come back later this week for the Just A Note Blog Hop!! Thanks so much for stopping by today, and have a marvelous day!

Filed Under: simon says stamp Tagged With: die cutting, encouragement, hello sunshine, ink blending, just a note, lemon, lemon zest

Primary Sidebar

  • Facebook
  • Instagram
  • Pinterest
  • YouTube

Favorite Shops

Secondary Sidebar

Subscribe

Enter your email address to subscribe to this blog and receive notifications of new posts by email.

Instagram
Something is wrong.
Instagram token error.
Follow
Load More

Archives

Tags

3D embossing folder alcohol markers better press birthday birthday card blog hop card kit christmas christmas card christmas tag colored pencil copic copic coloring Daniel Smith die cutting embossing folder embroidery felt giveaway holiday holiday card hot foil ink blending karin brushmarker pro layered stencil masculine my monthly hero new release no line coloring no line watercolor OLO marker olo markers original illustration pawsitively saturated rainbow shaker card slimline stamping stamptember stencil thank you thinking of you valentine's day video watercolor

Popular Posts

Simon Says Stamp Sending Cheer Blog Hop- Day 2 + Freebie + Giveaway!
Altenew October 2026 Release Blog Hop + Giveaway!
Simon Says Stamp Sending Cheer Release: Now Available!
Simon Says Stamp October 2026 Card Kit of the Month: Homespun Gratitude!
A Double Leftovers Card Set with New Simon Says Stamp Stencils and Dies!
Joyful Snowman with New Simon Says Stamp Sending Cheer Release!
Simon Says Stamp November 2025 Card Kit: Give Thanks!
Hero Arts Partners Blog Hop: Lawn Fawn!
Altenew Standalone Die Blog Hop+Giveaway!
March 2020 My Monthly Hero Blog Hop+Giveaway!

Disclosure

Some affiliate links are used in my posts. This means that, should you click on one of my links and purchase something from that company, I will receive a small portion of the sale at no extra cost to you. I use the money earned from these sales to help maintain my blog. I so appreciate you visiting and, if you do choose to use one of my affiliate links, thank you so much for your support!
Copyright © 2026 ·Brunch Pro Theme · Genesis Framework by StudioPress · WordPress · Log in
Loading Comments...