• Skip to main content
  • Skip to primary sidebar
  • Skip to secondary sidebar

Sixth Street Sundries

Emily Midgett

  • Home
  • About Me
  • Contact
  • OLO Marker Color Swatch Chart
  • Shop

ornaments

Simon Says Stamp DieCember Blog Party + Fabulous Freebie!

December 1, 2024

This post was sponsored by Simon Says Stamp. Thanks, Simon!

Hi friends! So remember the crazy amount of fun we had in STAMPtember? Well, we’re about to turn our attention to that other, incredibly versatile and wonderful product that we all love to use in our craft rooms: dies! Yes, it’s time for the marvelous DieCember release with Simon Says Stamp, in which we celebrate all things dies and die cutting! I love stamping, of course, which inevitably led to die cutting with coordinating dies for stamped images, but I have grown to love standalone dies almost as much as I adore stamping. You can use standalone dies in so many ways and with so many techniques; they’re wonderful for creating vibrant, color-saturated projects when paired with brightly colored cardstock, but I have also been loving pairing them with felt lately to create a completely different and gorgeously textured finished product. I have a pair of projects to share with you today using some of the marvelous new products from the Simon Says Stamp DieCember release, so let’s get started with the details!

I have always had a special place within my heart for cardinals being from St. Louis, and I have really loved seeing them out in my yard especially since I lost both of my grandparents. I am sure you’ve heard that “cardinals are visitors from heaven,” so I always like to think of them as my Grammy and Papa stopping by to say hi. When I saw the beautiful new Winter Cardinal dies, I knew that I wanted to use it straightaway. I recently have become obsessed with using felt to create projects that will last a little longer than just a card made of paper, so I pulled out some beautiful shades of red felt and a few stitching supplies, as well as some coordinating cardstock to create a beautiful ornament and matching card.

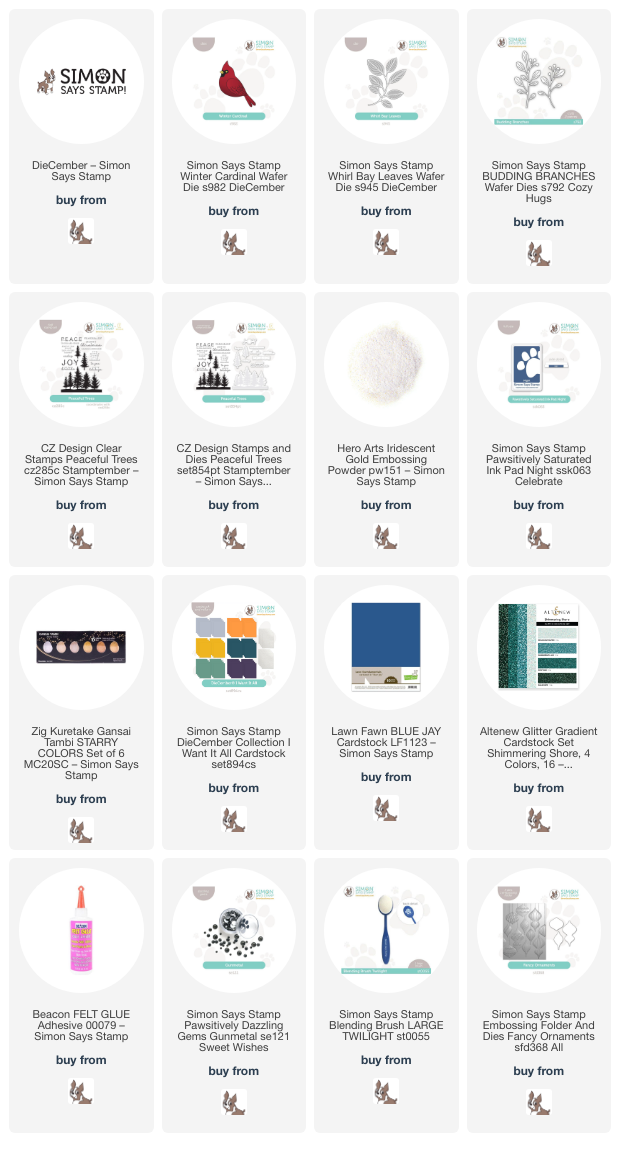
To start, I die cut the different layers of the Winter Cardinal from some cherry red and deep maroon felt, adding accents of black and pale yellow for the face on the cardinal. My stitching skills are still something upon which I am working, so I used felt glue to adhere the layers together to create a lovely layered cardinal. I also used glue to attach a shimmering Gunmetal Pawsitively Dazzling Gem for the cardinal’s eye.

To create the ornament, I filled a small embroidery hoop with navy blue fabric. I used some sage green felt from my stash to die cut the new Whirl Bay Leaves die, then adhered it to the navy blue fabric in my embroidery hoop using more felt glue. I nestled the cardinal amongst the leafy branch with the fabric glue, then used a needle and thread to add some sequins and beads to the little scene, tying in some more red to the color palette and adding a bit of shine and sparkle. Finally, I added a coordinating sage green velvet bow with my glue gun and a sage green velvet loop to be able to hang the ornament on the Christmas tree! This is going to be a perfect gift for my mom as she recovers from a shattered ankle injury; she needs some encouragement right now, and my grandparents (her parents) always helped to give her the support that she needed.

To create the matching card, I die cut the Winter Cardinal again, this time from some incredibly vivid red cardstock. I think that this shade of red perfectly matches the vibrant crimson of the real cardinals that I just saw in abundance today; they really stand out so beautifully amongst the dreary winter landscape! I also die cut the new Whirl Bay Leaves die twice from some of the new Simon Says Stamp Sage cardstock. (The new cardstock colors are absolutely luscious and coordinate so beautifully with the Pawsitively Saturated Inks! So thick and luxurious and super smooth!) To add a bit of variety to my foliage bouquet, I die cut the older Budding Branches die from some deep green glitter cardstock from the Altenew Shimmering Shores Glitter cardstock pack. The combination of large and small leaves really helps make a full and lush “bouquet” of foliage amongst which I can nestle my regal cardinal!

After I had die cut all of the different components for my card, I used a blending brush to blend Night Pawsitively Saturated Ink on an A2 panel of Lawn Fawn Blue Jay cardstock, helping to add some interest behind my foliage bouquet. Before adhering my die cuts, I also splattered the blended background with some gold watercolor to add some shimmer to the card, as well as to mimic the tiny golden beads that I sewed amongst the leaves of my ornament. For the greeting, I heat embossed a sentiment from Peaceful Trees onto some more Blue Jay cardstock using Hero Arts Iridescent Gold Embossing Powder. I love how shimmery this gold embossing powder is; it’s so unique and full of shine, especially compared to other gold embossing powders. I adhered the die cut sentiments to the little scene, tucking a golden thread bow beneath it and adding a few iridescent red “berries” to the berry stems for added sparkle!

Well, that’s all for my projects today. To celebrate the start of DieCember, Simon Says Stamp is giving you a fabulous freebie! Simply follow the instructions on the graphic at the top of this post to receive the truly elegant Fancy Ornaments embossing folder, which is a $24.99 value. The addition of the coordinating die really makes this free gift an excellent and versatile addition to your craft room…. and who doesn’t love a freebie?

We aren’t doing a traditional blog hop today, but instead having a blog party. You can check out the wealth of inspiration using the excellent new DieCember release HERE on the Simon Says Stamp blog. Thanks so much for stopping by today, and have a marvelous day!
Filed Under: simon says stamp Tagged With: budding branches, christmas card, die cutting, diecember, embroidery, felt, holiday card, ink blending, ornaments, peaceful trees, stitching, whirl bay leaves, winter cardinal

VIDEO: Watercoloring with Stencils using New Pinkfresh Studio Holiday Products!

September 28, 2022

Hi there! I am up on the Pinkfresh Studio YouTube channel today, and I’m sharing a fun faux no-line watercolor using the new Festive Leaves stencils, two shades of ink, and a bit of watercoloring. Here’s the video:

Or you can watch the video HERE.

This technique is a super fun way to get more mileage out of your standalone stencils! The Festive Leaves stencils are a standalone stencil set, meaning that they do not have a coordinating stamp set. (There are dies though!) These layering stencils create beautiful, modern, graphic holiday foliage images, but I am a traditionalist, and I love figuring out new ways to tailor products to suit my own style. This standalone stencil set was perfect for this technique, because the simple layering stencils created full images without needing a stamp set to complete them, as some stencil sets do.

I began by blending Fresh Pear on the foliage stencils and Coral Reef Pinkfresh Studio inks on the berry stencils from the Festive Leaves stencil set onto some Fabriano Artistico watercolor paper. I blended very lightly on all of the layers, as the main purpose of this blending is to give us a basic outline for our watercoloring. You could also use no-line coloring ink, like Contour Ink from Hero Arts, but that might create a bit muddier watercoloring. The Pinkfresh Studio inks are water-based, so they work seamlessly with the Holbein watercolors that I used for this technique. I simply laid the watercolor over the top of the ink blended images. I used a bit looser watercoloring technique for these images; I wanted a bit more whimsical feel, rather than super controlled and detailed, to fit with the modern aesthetic of the images themselves. While the wet watercolor was still quite damp, I dropped in some darker green, allowing the color to “bloom” on the wet areas. Once the images were finished, I used the coordinating die to cut all of the images out in one fell swoop. That one-stop die cutting never ceases to amaze me with its cleverness!

For the background, I used the embossing mat from my Platinum 6 machine’s Universal Plate System with the Lush Vines Hot Foil Plate. This creates a lovely and subtle embossed background without having to go through all of the hot foiling process. I splattered some sparkly gold handmade watercolors on the background just to add a little extra interest. I also die cut a Nested Diamond frame from some white cardstock as a ground for my foliage and sentiment pieces.

Because I can’t keep my hot foil system out on my desk all the time, I like to foil bunches of stuff at once to have ready when I need it. I had foiled a Noel Hot Foil sentiment using Matte Gold foil, then die cut it with the coordinating die. I heat embossed a greeting from the Ornaments stamp set (this set has so many great sentiments, in addition to the beautiful ornament stamp!) using gold sparkle embossing powder. I also added a slightly wider strip of gold glitter cardstock behind to help the sentiment stand out a bit more. I adhered all of the components on the embossed background panel using double and single layers of foam tape. This card has lots of white space, so that extra foam tape helps to add lots of texture and interest to the card front. Finally, I added a few Matte Gold pearls for one last element of golden shine!

Well, that’s all for my project today. I encourage you to take a look at your standalone stencils to see which ones would work with this faux no-line watercoloring technique. Such a fun way to make your cards look even more unique and truly handmade! Thanks so much for stopping by today, and have a marvelous day!

Filed Under: pinkfresh studio Tagged With: christmas card, festive leaves stencils, holbein watercolor, holiday card, hot foil, layering stencil, noel, ornaments, stencil, watercolor

Primary Sidebar

  • Facebook
  • Instagram
  • Pinterest
  • YouTube

Favorite Shops

Secondary Sidebar

Subscribe

Enter your email address to subscribe to this blog and receive notifications of new posts by email.

Instagram
Something is wrong.
Instagram token error.
Follow
Load More

Archives

Tags

3D embossing folder alcohol markers better press birthday birthday card blog hop card kit christmas christmas card christmas tag colored pencil copic copic coloring Daniel Smith die cutting embossing folder embroidery felt giveaway holiday holiday card hot foil ink blending karin brushmarker pro layered stencil masculine my monthly hero new release no line coloring no line watercolor OLO marker olo markers original illustration pawsitively saturated rainbow shaker card slimline stamping stamptember stencil thank you thinking of you valentine's day video watercolor

Popular Posts

Simon Says Stamp Joy For You Blog Hop- Day 1!
Simon Says Stamp Joy For You Release-Now Available!
Frozen Fractals All Around with New Simon Says Stamp Joy For You Release!
Shaped Holiday Shaker Card with New Simon Says Stamp Jolly Season Card Kit of the Month!
Holiday Postage with New Simon Says Stamp!
Simon Says Stamp Glory to the Newborn King Holiday Kit-Part II!
Pinkfresh Studio 5th Birthday!
Altenew Build A Flower: Fuchsia Blog Hop+Giveway!
Holiday Joy in Pink and Green with New Simon Says Stamp DieCember!
Honey Bee Stamps September Release Blog Hop!

Disclosure

Some affiliate links are used in my posts. This means that, should you click on one of my links and purchase something from that company, I will receive a small portion of the sale at no extra cost to you. I use the money earned from these sales to help maintain my blog. I so appreciate you visiting and, if you do choose to use one of my affiliate links, thank you so much for your support!
Copyright © 2026 ·Brunch Pro Theme · Genesis Framework by StudioPress · WordPress · Log in
Loading Comments...