• Skip to main content
  • Skip to primary sidebar
  • Skip to secondary sidebar

Sixth Street Sundries

Emily Midgett

  • Home
  • About Me
  • Contact
  • OLO Marker Color Swatch Chart
  • Shop

school supplies

Back to School Teacher Gift with New Simon Says Stamp!

August 18, 2025

This post was sponsored by Simon Says Stamp. Thanks, Simon!

Hi friends! I am back today with a project that is perfect for back to school using some new and some old goodies from Simon Says Stamp! Flashback to August of 2019, when I was preparing to send my older set of twins to full-day kindergarten after two years of half-day preschool. I was mentally preparing all of the work that I would get done, the shopping that I would enjoy without having to drag kiddos in and out of stores, the naps I could take and the shows I could enjoy in peace… and then I found out three days in that I was pregnant. Two weeks later, we found out we were pregnant with twins, again. All of those plans went right out the window as I dealt with morning sickness and general pregnancy discomfort, and then… Covid happened, and life turned completely, utterly upside down while I had newborn twins and 6 year old twins for which I had to assist with online school. Fast forward to this morning, when I dropped my Big Kids off at their first real day of junior high (say WHAT?!) and the Little Boys off at their first full day of kindergarten… it was an odd feeling. I rejoiced in the idea of the freedom that I’ve waited so long for (I was very unhappy when I realized “I’m going to be almost FORTY when they are all in school full time!”) but I confess… I feel like I’m drifting aimlessly with no kiddo chaos surrounding me while I attempt to work.

While I’m sure I will find my sea-legs in the next few days, I wanted to share this back-to-school teacher gift that I created the new Big Bus die from the Simon Says Stamp Happy Camper release in honor of those teachers who are also heading back to school for a new year full of learning, giggles, crying, germs, and hopefully, lots of fun! Let’s get started on the details for my project!

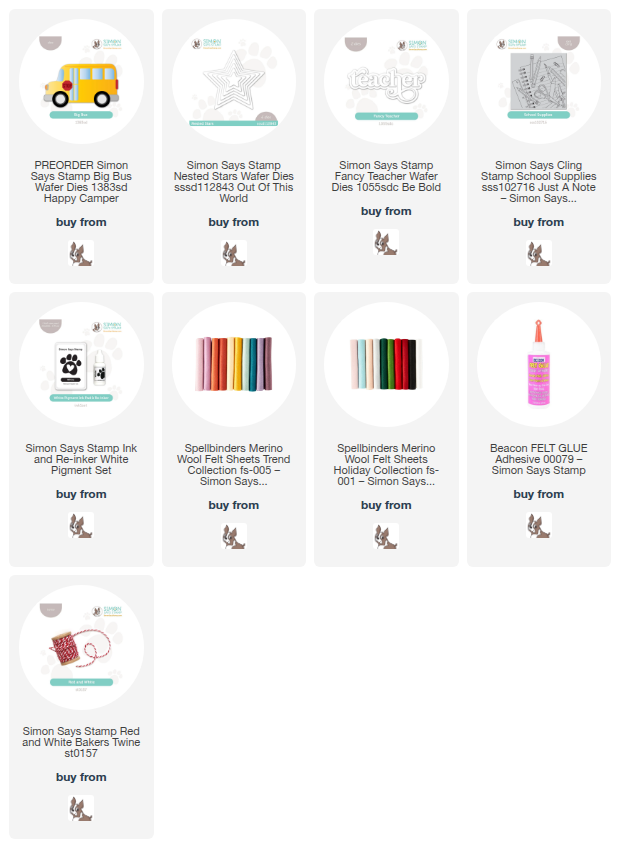
*I have gathered links to all of the products used at the bottom of the post for your convenience, using affiliate links. Thank you for shopping with my links! I truly appreciate your support for my work!*

I bought a large selection of colorful canvas zippered pouches a few months ago with the intention of embellishing them with felt die cut shapes, and I am absolutely in love with how this sweet zippered pouch turned out! I chose a vibrant cherry red pouch, a perfect contrast with the bright yellow felt for the bus, I think. I began by stamping the older School Supplies cling stamp on the corner of the pouch with Simon Says Stamp White Pigment Ink, which works beautifully on so many different surfaces, including fabric! I did touch it up a bit with my white paint pen; if I created this project again, I would have put a foam pad inside the pouch to give a little cushion, hopefully helping create a crisp stamped impression.

Next, I worked on assembling the Big Bus die cuts. I used the typical felt colors to create this school bus, embellishing with some shining foil felt from my stash for the stop sign and the chrome parts on the wheels. I also die cut some white holographic glitter felt stars using the smallest Nested Star Die as well as a black foil felt Fancy Teachers die cut. I used felt glue to adhere all of the components together for the bus, then used the glue to adhere the felt bus, stars, and teacher die cuts to the stamped red pouch. To keep everything nice and flat while drying, I like to place a glass paperweight over the top, especially on larger die cuts like the bus.

After I had created all of the components for the pouch, I used some Red and White Baker’s Twine from Simon Says Stamp to create a tassel for the zipper. I think adding this one last detail really made a big difference in how “finished” the pouch feels! Wouldn’t think be so cute for a teacher to hold her pencils and highlighters??

Well, that’s all for my project today. Whether you’re a teacher, student, parent, or grandparent, cheers to a wonderful school year! Thanks so much for stopping by today, and have a marvelous day!
Filed Under: simon says stamp Tagged With: back to school, big bus, die cutting, fancy teacher, felt, gift, school supplies, teacher gift, wool felt, zippered pouch

Rainbow Splash Inks for Back-To-School!

September 14, 2023

This post was sponsored by Simon Says Stamp. Thanks, Simon!

Hi friends! I know that it’s a little late in the year for back-to-school cards, but the new Rainbow Splash inks had me in “rainbow mode” and I couldn’t stop myself from creating bunches of projects with rainbow themes. I have been having fun experimenting with ombré stamping and embossing over the top to create a suitable canvas for emboss/resist technique, and I wanted to try it out with this new rainbow of ink colors in the Rainbow Splash line. I have four young kids, and primary color rainbows are just a part of life. I thought the fabulous School Supplies background stamp would be a perfect candidate to try out the ombré emboss/resist technique with which I’ve been playing, and I created this super fun and colorful shaker card to celebrate the start of another school year! Let’s get started with the details.

This ombré emboss/resist technique is one with which I’ve been playing a lot lately. I started experimenting with this technique earlier this year, and each time I use it, I find it more and more magical! Using my MISTI, I stamped the School Supplies background stamp with Scarlet, Pumpkin, Canary, Lime, and Sea Rainbow Splash inks. To create a smooth transition between each ink color, I tap my stamp with the first ink color, then use a microfiber cloth or blending brush on the edge of the line of ink. This extra step helps to make the ink color fade away without creating a harsh line. I close the door to my MISTI, then wipe the ink away with the microfiber cloth and stamp the next ink color, this time tapping the top and bottom lines to create a smooth fade into the previous and following colors. I repeat this process with each color of ink until I have an ombré stamped image!

While the stamp and paper are still in place in my MISTI, I stamp the image again using sticky embossing ink and cover it with clear embossing powder. This clear embossing layer “seals” the stamped image, and I think it helps to smooth some of the ink lines that I didn’t get quite perfect, as well. The added embossing also helps to maintain the vibrance of the ink color, so that I can ink blend over the top in any color that I want! I also used this technique on a greeting from XL Student Greetings, using the same ink colors and technique as the background.

Once I had finished my rainbow stamping for the background and the sentiment, I used Blending Brushes to lightly blend the same shades of ink around the edge of the stamped card front, creating a lovely rainbow glow on my background. I created a thin white frame using my Fiskars trimmer, backing it with a panel of clear acetate and adding foam tape all around the edge to create a shaker card. I filled the shaker with a ton of coordinating rainbow sequins and star confetti from my stash. (I found my huge box of sequins that has been neglected in favor of gems lately, and have decided that I need to keep making shakers to put the sparkly sequins to use!!) I added the rainbow sentiment to the center of the shaker window, creating a super colorful and fun card, perfect for a student or a teacher!

Well, that’s all for my project today! I promise, I will be back to the regularly scheduled flowers soon, but the beautiful inks and colored cardstock from the Rainbow Splash collection have been so inspiring that I just couldn’t move on to anything else until I got my rainbow fill! Thanks so much for stopping by today, and have a marvelous day!

Filed Under: simon says stamp Tagged With: back to school, ombré emboss/resist, ombre stamping, rainbow, rainbow splash, school supplies, shaker card, XL student greetings

Primary Sidebar

  • Facebook
  • Instagram
  • Pinterest
  • YouTube

Favorite Shops

Secondary Sidebar

Subscribe

Enter your email address to subscribe to this blog and receive notifications of new posts by email.

Instagram
Something is wrong.
Instagram token error.
Follow
Load More

Archives

Tags

3D embossing folder alcohol markers better press birthday birthday card blog hop card kit christmas christmas card christmas tag colored pencil copic copic coloring Daniel Smith die cutting embossing folder embroidery felt giveaway holiday holiday card hot foil ink blending karin brushmarker pro layered stencil masculine my monthly hero new release no line coloring no line watercolor OLO marker olo markers original illustration pawsitively saturated rainbow shaker card slimline stamping stamptember stencil thank you thinking of you valentine's day video watercolor

Popular Posts

Simon Says Stamp Sending Cheer Blog Hop- Day 2 + Freebie + Giveaway!
Joyful Snowman with New Simon Says Stamp Sending Cheer Release!
Simon Says Stamp Sending Cheer Release: Now Available!
February 2018 My Monthly Hero Blog Hop!
Altenew March 2020 Release Blog Hop+Giveaway!
Special Release: Simon Says Stamp Limited Edition STAMPtember Christmas Card Kit!
Simon Says Stamp Cozy & Bright Inspiration, Part Two!
Essentials By Ellen September Blog Hop!
Waffleflower December Release Blog Hop!
Altenew Build A Flower Japanese Mum Blog Hop!

Disclosure

Some affiliate links are used in my posts. This means that, should you click on one of my links and purchase something from that company, I will receive a small portion of the sale at no extra cost to you. I use the money earned from these sales to help maintain my blog. I so appreciate you visiting and, if you do choose to use one of my affiliate links, thank you so much for your support!
Copyright © 2026 ·Brunch Pro Theme · Genesis Framework by StudioPress · WordPress · Log in
Loading Comments...