• Skip to main content
  • Skip to primary sidebar
  • Skip to secondary sidebar

Sixth Street Sundries

Emily Midgett

  • Home
  • About Me
  • Contact
  • OLO Marker Color Swatch Chart
  • Shop

shimmer spray

Stencils and Masks for Valentine’s Day with Simon Says Stamp!

February 8, 2024

This post was sponsored by Simon Says Stamp. Thanks, Simon!

Hi friends! I am back today with a pair of cards that almost make you want to get your sunglasses out! I love that the Hearts in a Heart stencil set has both a heart stencil and mask, in addition to the layering stencils that create the heart pattern inside the heart. Having the option to blend both inside the heart and around the edges of the heart gives you so many ways to use this stencil set! I wanted to showcase two uses today, so let’s get started with the details!

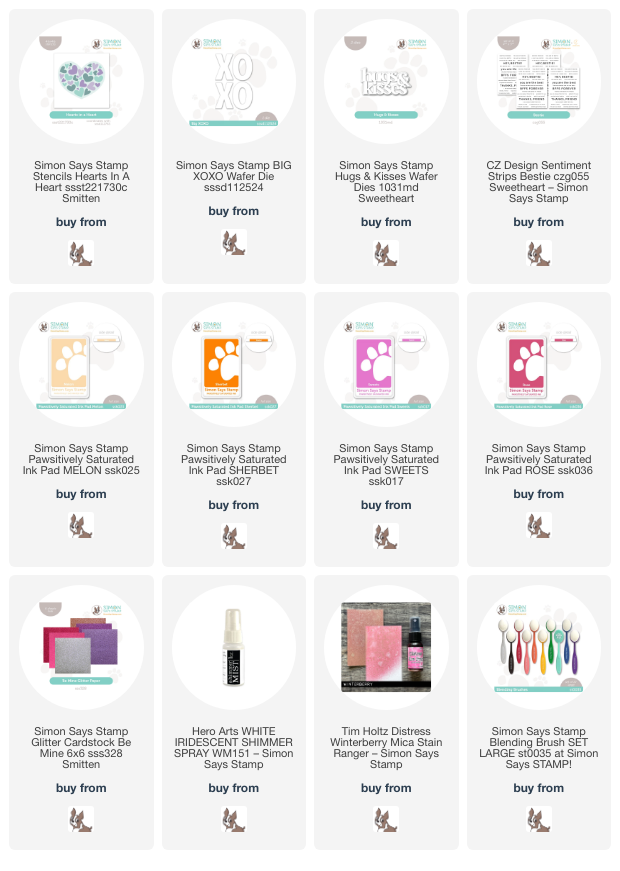
For both of my cards today, I used lots of pretty inks from the Pawsitively Saturated Ink line: Melon, Sherbet, Sweets, Taffy, and Rose. I wanted to use traditional pinks that screamed “Valentine’s Day,” but since I intended these to be more for “Galentine’s Day,” I thought that the peach and orange inks would make them super unique and just slightly different from the typical Valentine colors!

For my first card, I began by placing the solid heart mask from the Hearts in a Heart stencil on my white card front, adhering it with some light-tack tape that I’d folded over. I then used a blending brush to bledn Taffy ink around the masked heart, covering the entire background of a white A2 card front. I removed the mask (it’s like magic!) and replaced it with the different layered patterned stencils, then used Pawsitively Saturated Inks: Melon, Sherbet, Sweets, Taffy, and Rose to blend some vibrant hearts-within-the-heart, leaving a white outline around the pattern to make it stand out! I also spritzed some Hero Arts Iridescent White shimmer spray over the entirety of the card front, adding some subtle shimmer to the background before adding my sentiment.

For the greeting, I die cut the Big XOXO die from the dark pink glitter paper in the Be Mine Glitter Pack. I adhered just one of the “XO” pairs over the stenciled patterned heart using foam squares to add extra dimension. To enhance the greeting, I used one of the new Bestie Sentiment Strips to add a little “hey bestie hey!” over the top of my glittery “XO.” I popped the sentiment strip up with a double layer of foam adhesive so that it had even more height and making it extra visible amongst the busy, colorful background. Finally, I added a few coordinating peach gems from my stash.

For my second card, I put to use both the solid mask and the outline stencil from the Hearts in a Heart stencil set. I first placed the stencil in the center of my A2 card front, then used blending brushes to blend Melon, Sherbet, Sweets, and Rose ink in the center of my card front, creating a unique sunset ombré heart. I removed the stencil and replaced it with the solid heart mask, then blended Rose ink around the ombré heart, covering the entire background of my A2 card front. While the mask was still in place, I spritzed some Winterberry Mica Stain from Tim Holtz to add some shimmer to my otherwise-flat background!

While I was waiting for my background panel to dry, I die cut the new Hugs & Kisses die from some pink glitter paper found in the Be Mine Glitter Pack. This particular pink has several different shades of pink, yellow, and peach glitter, which helped it coordinate beautifully with the overall color palette for my project! I also trimmed down another tiny sentiment strip from the Bestie Sentiment Strips, popping both the die cut greeting and the sentiment strip up with some foam squares in the center of my ombré heart. A smattering of peachy gems finished the project off!

Well, that’s all for my projects today! I am hard at work creating with the new release from Simon Says Stamp, so be on the lookout for some fabulous new goodies coming your way next week! Thanks so much for stopping by today, and have a marvelous day!
Filed Under: simon says stamp Tagged With: bestie, big xoxo, galentine's day, hearts in a heart, hugs & kisses, ink blending, layered stencils, mask, mica stain, sentiment strips, shimmer spray, stencil, valentine

Let Your Dreams Soar!

April 25, 2019

Hi there! I am sharing an older project today, one that I designed for Make & Takes for the Hero Arts booth at Creativation! If you attended Creativation, you might have seen this project or done the Make & Take. The Monarch Butterfly die is so beautifully intricate and detailed that I wanted to highlight it as a mask with a little ink blending. Let’s get started with the details!

I began by die cutting the gorgeous Monarch Butterfly Fancy Cuts die from some masking paper. I adhered it to an A2 panel of Hero Hues Lavender card stock, then used my Picket Fence Studios Life Changing Blender Brushes to blend Neon Purple and Orchid inks, then added a few spritzes of White Shimmer Spray over the top. I allowed the blending and shimmer spray to dry, then peeled the masking paper back to reveal the beautifully detailed butterfly image! Peeling away masking paper is like magic for me. I just love the finished look.

After all of the ink and shimmer spray had dried completely, I dipped my paintbrush in Hero Arts’s White Liquid Watercolor, then flicked it at the card base to add a few artistic splatters. I stamped a greeting from Hot Air Blooms on a strip of white card stock, then mounted it on the card front using foam tape.

The final touch was a few purple sequins!

Well, that’s all for my project today. I hope you are having a marvelous day!

Filed Under: Hero Arts Tagged With: ink blending, monarch butterfly, shimmer spray

Primary Sidebar

  • Facebook
  • Instagram
  • Pinterest
  • YouTube

Favorite Shops

Secondary Sidebar

Subscribe

Enter your email address to subscribe to this blog and receive notifications of new posts by email.

Instagram
Something is wrong.
Instagram token error.
Follow
Load More

Archives

Tags

3D embossing folder alcohol markers better press birthday birthday card blog hop card kit christmas christmas card christmas tag colored pencil copic copic coloring Daniel Smith die cutting embossing folder embroidery felt giveaway holiday holiday card hot foil ink blending karin brushmarker pro layered stencil masculine my monthly hero new release no line coloring no line watercolor OLO marker olo markers original illustration pawsitively saturated rainbow shaker card slimline stamping stamptember stencil thank you thinking of you valentine's day video watercolor

Popular Posts

Simon Says Stamp Joy For You Blog Hop- Day 1!
Simon Says Stamp Joy For You Release-Now Available!
Frozen Fractals All Around with New Simon Says Stamp Joy For You Release!
Shaped Holiday Shaker Card with New Simon Says Stamp Jolly Season Card Kit of the Month!
Holiday Postage with New Simon Says Stamp!
Simon Says Stamp Glory to the Newborn King Holiday Kit-Part II!
Altenew Build A Flower: Fuchsia Blog Hop+Giveway!
Holiday Joy in Pink and Green with New Simon Says Stamp DieCember!
Pinkfresh Studio 5th Birthday!
Honey Bee Stamps September Release Blog Hop!

Disclosure

Some affiliate links are used in my posts. This means that, should you click on one of my links and purchase something from that company, I will receive a small portion of the sale at no extra cost to you. I use the money earned from these sales to help maintain my blog. I so appreciate you visiting and, if you do choose to use one of my affiliate links, thank you so much for your support!
Copyright © 2026 ·Brunch Pro Theme · Genesis Framework by StudioPress · WordPress · Log in
Loading Comments...