• Skip to main content
  • Skip to primary sidebar
  • Skip to secondary sidebar

Sixth Street Sundries

Emily Midgett

  • Home
  • About Me
  • Contact
  • OLO Marker Color Swatch Chart
  • Shop

mask

Simon Says Stamp STAMPtember Collaboration: Brutus Monroe!

September 18, 2024

Hi friends! I am back today with another collaboration set for the STAMPtember celebration! Today’s set features another fantastic company with a fantastic owner: Brutus Monroe! While I have never met Christopher Alan, the owner of Brutus Monroe, in person, I know that he has incredible integrity and masses of creativity, in addition to his intrinsic kindness and generosity. We are Facebook friends, and his posts about the decor put out in his physical store (definitely one of my goals to get to his storefront!!) are so inspiring. His imagination is truly magical!

The STAMPtember Brutus Monroe Collaboration set: Holiday Mugs set features beautifully illustrated images of vintage holiday-themed mugs that will take you right back to your childhood! I definitely had a reindeer mug just like the one in the set, along with a Santa and Mrs. Claus! So cute. I used both the pumpkin and reindeer mugs from the Holiday Mugs set with some fun stencils to create this pair of cards. Let’s get started with the details!

*I have linked all of the products used at the bottom of the post for your convenience using affiliate links. Thank you for shopping with my links! I truly appreciate your support for my work!*

For the autumnal card, I stamped the pumpkin mug from Holiday Mugs, along with some accessories, onto some white cardstock using Rainbow Splash Black ink, which is alcohol marker-friendly. I then used Copic markers to color the images, creating a vibrant ceramic pumpkin with verdant greenery, some cinnamon sticks, and a sweet little candy corn! I used my sharp scissors to cut the images out, but you could certainly use the dies that are included in the Holiday Mugs product suite.

After I had colored the images, I blended Sherbet Pawsitively Saturated Ink onto a white card front with the Chunky Knit stencil, continuing the autumnal vibe onto the crisp white background. I white embossed a greeting from Holiday Mugs onto a strip of black cardstock, then popped it up on my stenciled background using foam adhesive. I arranged the colored and cut images above the sentiment strip, then used a fine tipped black pen to add some “steam,” adding some Unicorn Dust fine glitter with a Quickie Glue pen for added shimmer. Finally, I finished the project off with some Mandarin Pawsitively Dazzling Gems tucked amongst the focal point to add extra sparkle!

For the second card, I stamped the darling reindeer from Holiday Mugs again on white cardstock using Rainbow Splash Black ink and colored the images with alcohol markers. I added some Unicorn Dust fine glitter with a Quickie Glue pen to the Christmas lights artfully wrapped around the handle and base of the mug for a touch of shimmer and shine! Isn’t this little mug so adorable? I need a set of them for my kitchen during the holidays!

For the background, I used some painters tape to mask off a rectangle in the center of my white card base and blended Punch ink over the entirety of the open area. While the masking tape was still in place, I placed the Christmas Star Stencil at an angle over the blended area, then blended some Cabernet Pawsitively Saturated Ink, which is a darker version of the Punch ink used for the initial blended layer, creating a pretty tone-on-tone patterned ground upon which I could build my scene once the tape was removed. I popped up the mug, candy canes, and snowman marshmallow with some foam adhesive, finally adding a white embossed greeting and some Cherry Pawsitively Dazzling Gems for added sparkle!

Well, that’s all for my projects today! These STAMPtember collaboration sets are limited edition and usually sell out very quickly, so if you’re on the fence, don’t wait too long! To sweeten the deal and make it even easier for you to shop, Heidi at Simon Says Stamp has offered free shipping for purchases over $25 for a limited time!!

This sweet set is sure to sell out quickly, so if you’re on the fence, don’t wait too long… these limited edition sets are gone forever once they sell out!

Thanks so much for stopping by today, and happy STAMPtember!!

Filed Under: brutus monroe, simon says stamp Tagged With: christmas card, christmas star stencil, chunky knit stencil, copic coloring, copic markers, holiday card, Holiday Mugs, ink blending, mask, stamptember

Stencils and Masks for Valentine’s Day with Simon Says Stamp!

February 8, 2024

This post was sponsored by Simon Says Stamp. Thanks, Simon!

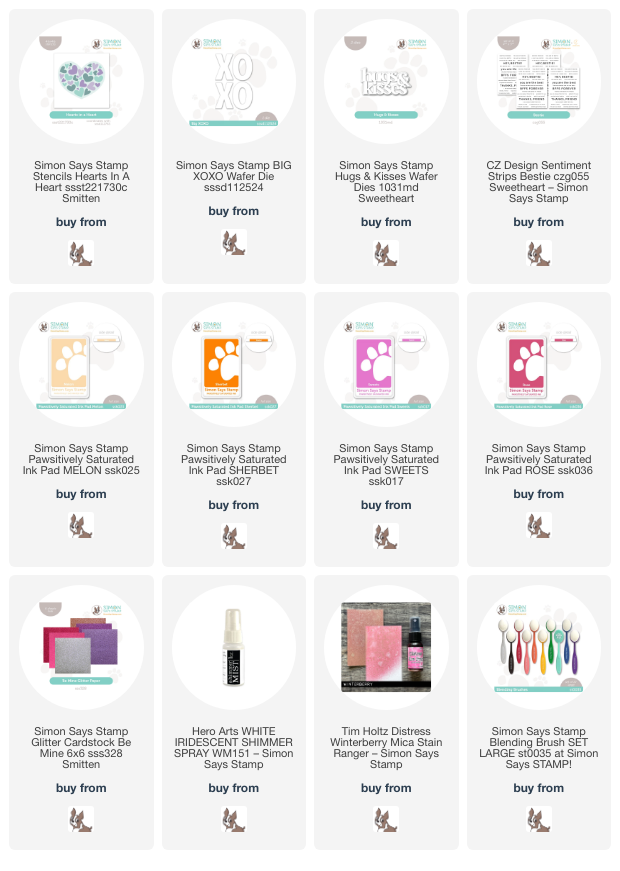
Hi friends! I am back today with a pair of cards that almost make you want to get your sunglasses out! I love that the Hearts in a Heart stencil set has both a heart stencil and mask, in addition to the layering stencils that create the heart pattern inside the heart. Having the option to blend both inside the heart and around the edges of the heart gives you so many ways to use this stencil set! I wanted to showcase two uses today, so let’s get started with the details!

For both of my cards today, I used lots of pretty inks from the Pawsitively Saturated Ink line: Melon, Sherbet, Sweets, Taffy, and Rose. I wanted to use traditional pinks that screamed “Valentine’s Day,” but since I intended these to be more for “Galentine’s Day,” I thought that the peach and orange inks would make them super unique and just slightly different from the typical Valentine colors!

For my first card, I began by placing the solid heart mask from the Hearts in a Heart stencil on my white card front, adhering it with some light-tack tape that I’d folded over. I then used a blending brush to bledn Taffy ink around the masked heart, covering the entire background of a white A2 card front. I removed the mask (it’s like magic!) and replaced it with the different layered patterned stencils, then used Pawsitively Saturated Inks: Melon, Sherbet, Sweets, Taffy, and Rose to blend some vibrant hearts-within-the-heart, leaving a white outline around the pattern to make it stand out! I also spritzed some Hero Arts Iridescent White shimmer spray over the entirety of the card front, adding some subtle shimmer to the background before adding my sentiment.

For the greeting, I die cut the Big XOXO die from the dark pink glitter paper in the Be Mine Glitter Pack. I adhered just one of the “XO” pairs over the stenciled patterned heart using foam squares to add extra dimension. To enhance the greeting, I used one of the new Bestie Sentiment Strips to add a little “hey bestie hey!” over the top of my glittery “XO.” I popped the sentiment strip up with a double layer of foam adhesive so that it had even more height and making it extra visible amongst the busy, colorful background. Finally, I added a few coordinating peach gems from my stash.

For my second card, I put to use both the solid mask and the outline stencil from the Hearts in a Heart stencil set. I first placed the stencil in the center of my A2 card front, then used blending brushes to blend Melon, Sherbet, Sweets, and Rose ink in the center of my card front, creating a unique sunset ombré heart. I removed the stencil and replaced it with the solid heart mask, then blended Rose ink around the ombré heart, covering the entire background of my A2 card front. While the mask was still in place, I spritzed some Winterberry Mica Stain from Tim Holtz to add some shimmer to my otherwise-flat background!

While I was waiting for my background panel to dry, I die cut the new Hugs & Kisses die from some pink glitter paper found in the Be Mine Glitter Pack. This particular pink has several different shades of pink, yellow, and peach glitter, which helped it coordinate beautifully with the overall color palette for my project! I also trimmed down another tiny sentiment strip from the Bestie Sentiment Strips, popping both the die cut greeting and the sentiment strip up with some foam squares in the center of my ombré heart. A smattering of peachy gems finished the project off!

Well, that’s all for my projects today! I am hard at work creating with the new release from Simon Says Stamp, so be on the lookout for some fabulous new goodies coming your way next week! Thanks so much for stopping by today, and have a marvelous day!

Filed Under: simon says stamp Tagged With: bestie, big xoxo, galentine's day, hearts in a heart, hugs & kisses, ink blending, layered stencils, mask, mica stain, sentiment strips, shimmer spray, stencil, valentine

And Back Again Release Blog Hop-Day 2!

January 21, 2022

Hello and welcome to Day 2 of the Simon Says Stamp And Back Again blog hop! I’m so excited to be a part of this month’s hop, particularly because I was lucky enough to illustrate two of the stamp sets in the release that we’re celebrating in today’s hop- To the Moon (released in December 2021) And Back Again (released January 2022)! You should have arrived here from Dilay Nacar, and your next stop is Jennifer Kotas. You can also start back at the beginning at the Simon Says Stamp blog in case you get lost! I have two lovely lavender projects to share with you today using some of the new goodies, so let’s get started with the details!

The new Pantone Color of the Year for 2022 is a lovely shade of purple called Very Peri. I used that color as my inspiration for both projects today.

My first project uses some of the fabulous stencils to create a mini slimline (3.5″x6″) card. I began by placing one of the Heart Stencil Masks offset on a white mini-slimline card base. I blended some Hydrangea ink using a blending brush, concentrating the color around the edges and leaving the center of the heart lighter. While the solid heart stencil was still taped in place on my card base, I centered the detailed Layering Heart Mandala Stencil over the blended heart, then blended some more Hydrangea ink to add a tone-on-tone pattern to the stenciled heart. Lifting the double stencil away was magical!!

For the greeting, I combined the new Birthday die and Sassy Birthday Sentiment Strips. I die cut the detailed layer of the Birthday die three times from some coordinating lavender cardstock, then adhered them together using liquid adhesive to create a dimensional die cut. I die cut the sentiment halo from some vellum, then adhered the dimensional die cut with some more liquid adhesive. I adhered both the sentiment strips and the word die cut using foam adhesive for lots of dimension.

To create a visual cascade down the front of my card, I adhered some leftover glittery heart die cuts and some lavender gems. I love the added texture and sparkle this adds to the card front!

My second project features the Beautiful Bouquet stamp set that I illustrated that was released for the To The Moon release in December, 2021. I previously created some watercolored projects (you can see them both here), so I thought it would be fun to pull out my Copic markers and do some no-line coloring. I began by stamping the bulk of the Beautiful Bouquet image on a full-size white slimline card base using Hero Arts Contour Ink.

I colored the images with my Copic markers, keeping the color palette nice and cool, and allowing that huge anemone and hydrangea to be the focus of my card front. I used Copic shades BV04, B66, BV02, and BV01 with touches of T7 for the anemone, with B28, FB2, and B12 for the hydrangea. Once I had finished coloring, I masked around the edges of the slimline card front using low-tack washi tape, lining up the edge of the card base with the edge of th washi tape to create a nice thick border. I used a blending brush to lightly blend some Blue Jay ink around the edge, tapering off as it got closer to the center of the card and around the colored image. I peeled the masking tape away to reveal a crisp white frame highlighting my Copic colored image!

I didn’t want to cover up my meticulous Copic coloring with a giant sentiment, so I heat embossed the greeting from the new Friend Greetings on some heavyweight vellum cardstock using white embossing powder. I used a vellum adhesive tape runner to add small dots of adhesive to the back of the embossed greeting and adhere it to the card front. Finally, I added a delicate silver thread bow, tucked beneath the sentiment panel and trailing down the card front, just to add a bit of extra texture and some shine to the card front.

Well, that’s all for my projects today! Now, I have some fun promo codes and giveaway information to share with you!

Add the code GNOMIE to your shopping cart receive the cute 3×4 Love Gnome stamp set FREE with purchase! This promotion will expire 1/23 at 11:59 pm EST.

Simon Says Stamp is giving away one $25 gift certificate to each stop on the hop. To enter, simply leave a comment on each hop stop. The more comments you leave, the more chances you have to win!

Your next stop on the hop is Jennifer Kotas. Thanks so much for stopping by, and happy hopping!

Filed Under: simon says stamp Tagged With: beautiful bouquet, birthday card, blog hop, copic, giveaway, ink blending, mask, no line coloring, no line copic coloring, stencil

Primary Sidebar

  • Facebook
  • Instagram
  • Pinterest
  • YouTube

Favorite Shops

Secondary Sidebar

Subscribe

Enter your email address to subscribe to this blog and receive notifications of new posts by email.

Instagram
Something is wrong.
Instagram token error.
Follow
Load More

Archives

Tags

3D embossing folder alcohol markers better press birthday birthday card blog hop card kit christmas christmas card christmas tag colored pencil copic copic coloring Daniel Smith die cutting embossing folder embroidery felt giveaway holiday holiday card hot foil ink blending karin brushmarker pro layered stencil masculine my monthly hero new release no line coloring no line watercolor OLO marker olo markers original illustration pawsitively saturated rainbow shaker card slimline stamping stamptember stencil thank you thinking of you valentine's day video watercolor

Popular Posts

Simon Says Stamp Sending Cheer Blog Hop- Day 2 + Freebie + Giveaway!
Altenew October 2026 Release Blog Hop + Giveaway!
Altenew Build A Flower Sweet Violet+Giveaway!
Floral Follies on Canvas with New Simon Says Stamp STAMPtember!
Simon Says Stamp STAMPtember Tim Holtz Collaboration: Festive Holidays!
Altenew March 2020 Release Blog Hop+Giveaway!
Honey Bee Stamps Bee Bold Release Blog Hop!
Waffleflower July Release Blog Hop!
Altenew Paint A Flower: Carnation Blog Hop+Giveaway!
Autumn Legs with Colorado Craft Company and Catherine Pooler!

Disclosure

Some affiliate links are used in my posts. This means that, should you click on one of my links and purchase something from that company, I will receive a small portion of the sale at no extra cost to you. I use the money earned from these sales to help maintain my blog. I so appreciate you visiting and, if you do choose to use one of my affiliate links, thank you so much for your support!
Copyright © 2026 ·Brunch Pro Theme · Genesis Framework by StudioPress · WordPress · Log in
Loading Comments...