• Skip to main content
  • Skip to primary sidebar
  • Skip to secondary sidebar

Sixth Street Sundries

Emily Midgett

  • Home
  • About Me
  • Contact
  • OLO Marker Color Swatch Chart
  • Shop

simple stories

Simon Says Stamp Cozy & Bright Inspiration, Part Two!

October 2, 2026

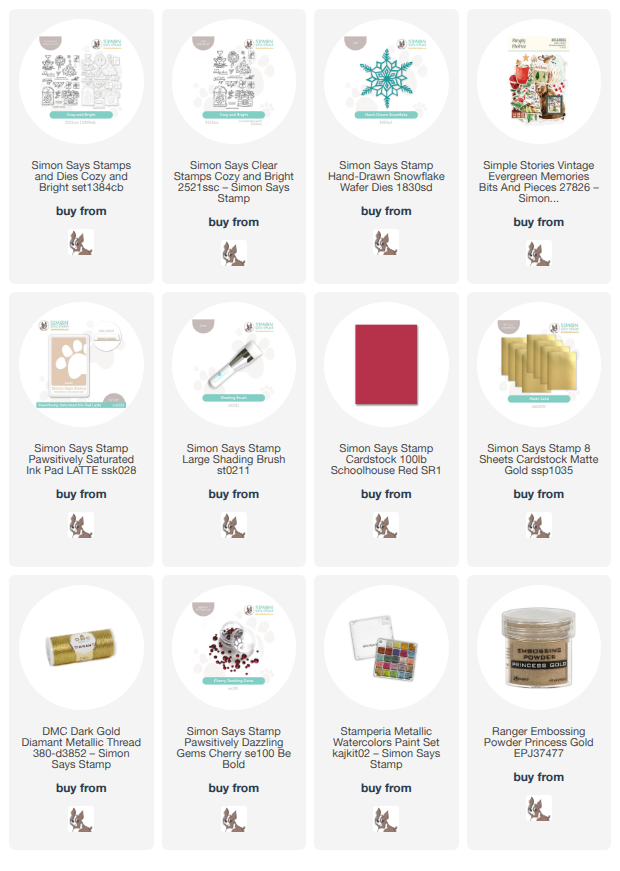
This post was sponsored by Simon Says Stamp. Thanks, Simon! *I have gathered links to all of the products used at the bottom of the post for your convenience, using affiliate links at no extra cost to you. Thank you for shopping with my links! I truly appreciate your support for my work!*

Hi friends! I am back a day later than expected…. my kiddos shared some germs with me, and I was pretty puny yesterday. But I’m back today to share more inspiration using the gorgeous new products from the Cozy & Bright kit, which is sadly sold out, but luckily the folks at Simon Says Stamp give us the option to purchase individual elements even after the kits sell out! I created another pair of cards using a completely different colorway from the previous projects; red and gold are the ultimate festive color palette, in my opinion! Let’s get started with the details on my projects.

I love the absolute ease with which you can create cards using ephemera packs. Simple Stories has some truly exquisite ephemera packs (click HERE to see them all!), chock full of traditional and whimsical imagery and with a huge amount and variety of pieces to make an insane amount of projects.

To begin my first card, I pulled out some of my favorite botanical die cuts from the Vintage Evergreen Memories ephemera pack to create a lush holiday swag, from which I could hang the coordinating baubles included with the pack, as well! Before arranging and adhering the pieces, however, I splattered some sparkling gold watercolor on the top left corner of my horizontal Lipstick Red A2 card front. I then layered the ephemera die cuts with a variety of heights of thin and thick foam adhesive.

For the greeting, I gold embossed a sentiment from the beautiful new Cozy & Bright stamp set, again using Lipstick Red cardstock, then used the detailed coordinating die to cut the sentiment out. I tucked the greeting amongst the baubles and foliage with some foam adhesive squares, then added a gold thread bow for added shimmer and texture. Finally, I wanted to add a little more interest the semi-bare area at the very bottom of the card front, so I trimmed a 1/4″ strip of Matte Gold Metallic cardstock and adhered it about 1/4″ from the bottom of the card front. The last step was a few shimmering Cherry Pawsitively Dazzling Gems!

For the next project, I kept the color palette simple and super festive with vibrant red and shiny gold. I stamped the champagne coupe tower and a sentiment from Cozy & Bright on more Lipstick Red cardstock with embossing ink and added gold embossing powder. I used the coordinating dies for the stamp set to cut both elements out, then used those same sparkling gold watercolors to add some shimmer to the cocktails within the champagne coupes!

For the background, I kept things simple, making this card one that could easily be mass-produced for the holidays. I trimmed 1/4″ of of each of the long sides of my A2 Lipstick Red card front, then blended Latte Pawsitively Saturated Ink along the long edges. While the Latte ink is a medium beige shade, it does add an “antique” element to the card, creating almost a vignette effect. I lightly splattered the blended edges with some more gold watercolors then adhered a few golden Hand-Drawn Snowflake die cuts along the edges, trimming off the excess. I popped up the two embossed die cuts with some foam adhesive in the center of the embellished card front, then placed the 3.75″ x 5.5″ card front in the center of a full size A2 Matte Gold Metallic card front, allowing strips of gold to peek out from each of the long sides. Finally, I added a few more Cherry Pawsitively Dazzling Gems for even more shimmer and shine!

Well, that’s all for my projects today! I am so excited to start delving into Christmas projects now. It’s the most wonderful time of the year! Thanks so much for stopping by today, and have a marvelous day!
Filed Under: simon says stamp Tagged With: christmas card, cozy and bright, ephemera, hand-drawn snowflake, heat embossing, holiday card, simple stories

Introducing Simon Says Stamp Limited Edition STAMPtember Holiday Kit!

September 30, 2025

Hi friends! Simon Says Stamp has released the most fabulous of holiday kits as we end STAMPtember with a bang! The exclusive new limited edition Warmth and Wonder Card Kit is available for preorder right now (click HERE to see all of the details!), and my goodness is it absolutely jam packed with holiday cardmaking goodness!! I went a little crazy creating project after project using the goodies from the kit, and still have SO much left to use for even more cards. If you need a jumpstart to your holiday cardmaking, this kit is what you’ve been waiting for!

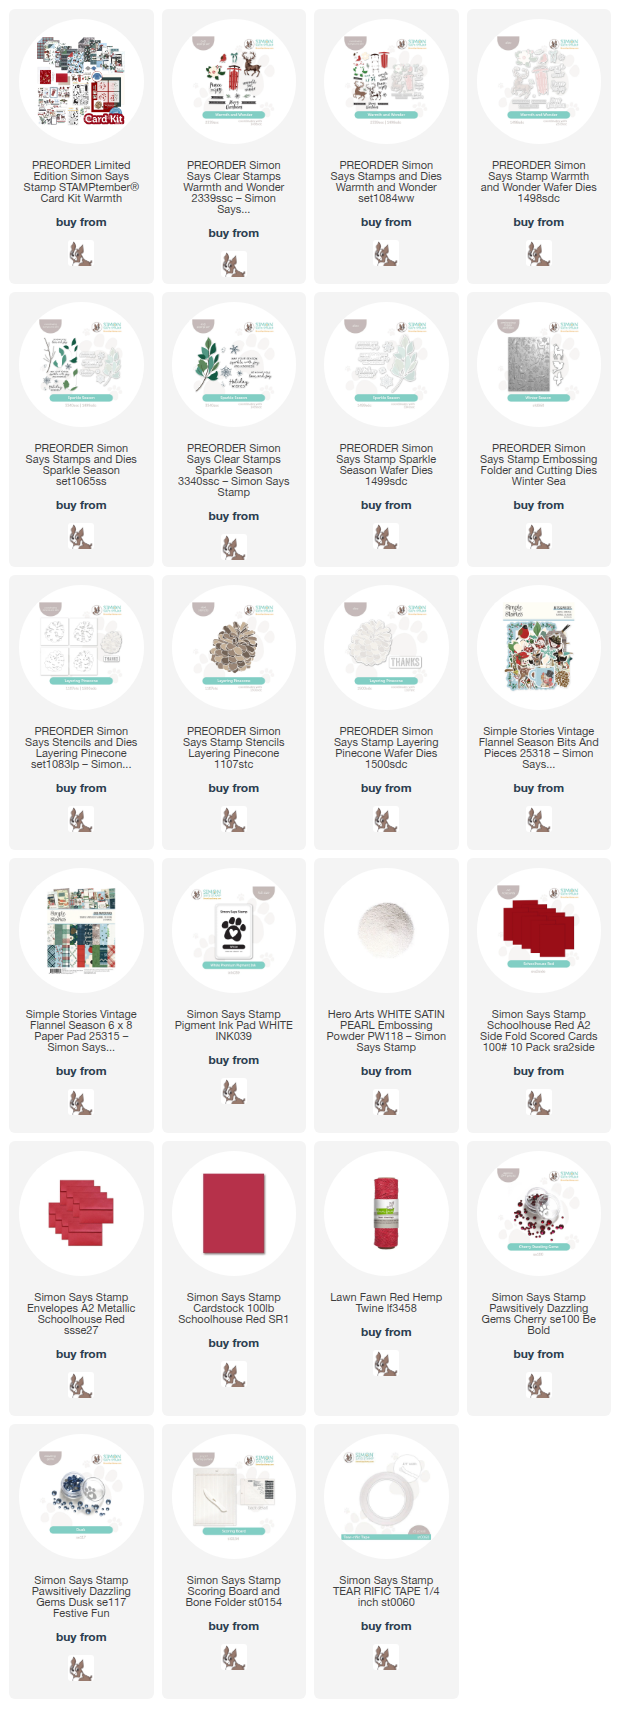
Here’s a rundown of everything included in the kit:

  • NEW & Exclusive Warmth and Wonder 6×8 Inch Clear Stamp Set
  • NEW & Exclusive Sparkle Season 4×6 Inch Clear Stamp Set
  • NEW & Exclusive Winter Sweater Die
  • NEW & Exclusive Layering Pine Cone Stencils Set
  • NEW & Exclusive Winter Season Embossing Folder with Dies Set
  • One sheet of each design from the Simple Stories Simple Vintage Flannel Season 6×8 Inch Paper Pack
  • One package of Simple Stories Simple Vintage Flannel Season Bits and Pieces Ephemera
  • Simon Says Stamp Exclusive Mocha Ink Cube (perfect for the Pine Cone Stencils)
  • Simon Says Stamp Exclusive Cappuccino Ink Cube (perfect for the Pine Cone Stencils)
  • 1 Tim Holtz Distress Mini Blending Brush
  • 1 Simon Says Stamp Exclusive A2 Envelope in Metallic Khaki
  • 1 Simon Says Stamp Exclusive A2 Envelope in Schoolhouse Red
  • 1 Sheet of Neenah Solar White 110 LB 8.5 x 11 Inch Cardstock
  • 1 Sheet of Simon Says Stamp Schoolhouse Red 100 LB 8.5 x 11 Inch Cardstock
  • 1 Sheet of Simon Says Stamp Midnight Green 100 LB 8.5 x 11 Inch Cardstock
  • 1 Sheet of Simon Says Stamp Dark Chocolate 100 LB 8.5 x 11 Inch Cardstock

The individual contents are valued at over $100, but the kit is available for preorder for only $69.99! I created no less than six different projects using the goodies in the kit, but SO many pieces of ephemera and patterned paper are left to create even more projects. And then you have multiple stamps and stencils with which to create infinite projects. Incredible, incredible value!

One of my favorite parts of the kit was the coordinating patterned papers and ephemera. I have never been huge on ephemera packs, simply because I prefer to use stamps and dies with my own unique color palettes, but I cannot say enough about the ease and absolute beauty of the ephemera included with the Limited Edition Warmth and Wonder Card Kit. The fact that the elements coordinate makes it even more useful and the finished projects even more polished!

I have a thing for deer on my holiday cards. I just find their elegant grace so appealing and peaceful. The ephemera pack included in the kit contains a multitude of beautifully illustrated deer along with colorful imagery that matches perfectly. I created this fun trifold card utilizing several of the patterned papers and the sweet beribboned deer, adding a greeting stamped on the deep Schoolhouse Red cardstock using White Pigment ink and embellished with White Satin Pearl embossing powder.

I used my Scoring Board to score a line about 1/2″ from the edge of my panel of A2 patterned paper, then added it to my Schoolhouse Red card base using Tear-rific Tape to create a tri-fold card. I selected patterned papers that would work nicely together, making sure that the patterns were contrasting enough so as not to overwhelm the eye. Plaids work beautifully with large floral patterns, and the coordinating color palette running through all of the papers included in the Warmth and Wonder Card Kit make it super easy to mix and match!

I think these tri-fold cards are such fun and such a fun way to send a unique holiday card.

My second card is in the same color family, this time with the sweet bird and anemone ephemera juxtaposed with the delicately patterned foliage patterned paper. I added a shining red foil mat around the framed “warm and cozy” patterned panel, adding a touch of shine and added texture amongst the matte printed ephemera. I selected several pre-printed sentiment strip pieces, arranging them around my bird and flower focal point in a cluster. Finally, I tucked a red twine bow and some Cherry Pawsitively Dazzling Gems amongst the cluster of focal points for additional sparkle and texture! These kinds of cards come together so very quickly, making your holiday cardmaking a breeze!

My next project for today shifts color palettes a bit, putting the beautiful blue pieces together with this vintage snowman image for a pretty and icy thank you card. I trimmed down a strip of the snowflake trellis, then added it to the side of my navy blue card base. I layered the snowflake printed piece on a piece of coordinating blue glitter cardstock, creating a sparkling blue frame and providing a visual barrier between the printed snowflake trellis strip and the patterned snowman panel. I popped this piece up on my card front with some foam adhesive.

This card didn’t need much additional embellishment (can you say fast thank you card?), so I simply popped up a few of the printed snowflake ephemera pieces and added a few sparkling Dusk Pawsitively Dazzling Gems. A simple, but super sweet and elegant, holiday thank you card finished lickety split!

Well, that’s all for my projects today! As with all Simon Says Stamp kits, each individual element is available for purchase separately from the kit, so you can mix and match as you see fit (or even pick up an extra ephemera and patterned paper set!). The kit’s value is incredible, but it’s only available for a limited time! These kits are anticipated to begin shipping in early October, so be sure to get your order in quickly so that you don’t miss out on this incredible value. Click HERE to preorder your own kit!

Thanks so much for stopping by today, and have a marvelous day!

Filed Under: simon says stamp Tagged With: card kit, christmas card, ephemera, holiday card, limited edition card kit, patterned paper, simple stories, sparkle season, vintage flannel, warmth and wonder, winter sea

Primary Sidebar

  • Facebook
  • Instagram
  • Pinterest
  • YouTube

Favorite Shops

Secondary Sidebar

Subscribe

Enter your email address to subscribe to this blog and receive notifications of new posts by email.

Instagram
Something is wrong.
Instagram token error.
Follow
Load More

Archives

Tags

3D embossing folder alcohol markers better press birthday birthday card blog hop card kit christmas christmas card christmas tag colored pencil copic copic coloring Daniel Smith die cutting embossing folder embroidery felt giveaway holiday holiday card hot foil ink blending karin brushmarker pro layered stencil masculine my monthly hero new release no line coloring no line watercolor OLO marker olo markers original illustration pawsitively saturated rainbow shaker card slimline stamping stamptember stencil thank you thinking of you valentine's day video watercolor

Popular Posts

Simon Says Stamp Sending Cheer Blog Hop- Day 2 + Freebie + Giveaway!
Altenew October 2026 Release Blog Hop + Giveaway!
Rustic Monochromatic Stars for Christmas with Rainbow Splash!
Hero Arts Partners Blog Hop: Lawn Fawn!
Waffleflower July Release Blog Hop!
December 2018 My Monthly Hero Blog Hop + Giveaway!
March 2020 Essentials By Ellen Blog Hop+Giveaway!
The Ton Anniversary Release: Day 1!
The Ton Stamps Summer Release: Day 1
Autumn Legs with Colorado Craft Company and Catherine Pooler!

Disclosure

Some affiliate links are used in my posts. This means that, should you click on one of my links and purchase something from that company, I will receive a small portion of the sale at no extra cost to you. I use the money earned from these sales to help maintain my blog. I so appreciate you visiting and, if you do choose to use one of my affiliate links, thank you so much for your support!
Copyright © 2026 ·Brunch Pro Theme · Genesis Framework by StudioPress · WordPress · Log in
Loading Comments...