• Skip to main content
  • Skip to primary sidebar
  • Skip to secondary sidebar

Sixth Street Sundries

Emily Midgett

  • Home
  • About Me
  • Contact
  • OLO Marker Color Swatch Chart
  • Shop

sparkling facets

Navy and Rose Gold with Simon Says Stamp and More Lisa Horton Crafts!

August 26, 2024

This post was sponsored by Simon Says Stamp. Thanks, Simon!

Hi friends! I have one more project to share with you using some of the super sparkly Interference Inks from Lisa Horton Crafts that I just purchased. I am in love with how unique these inks are; they can look completely different depending on what color of cardstock used! I have been experimenting with different ink color combinations, and I loved the metallic rose gold effects of the Galaxy Dream on navy blue cardstock. Let’s get started on the details!

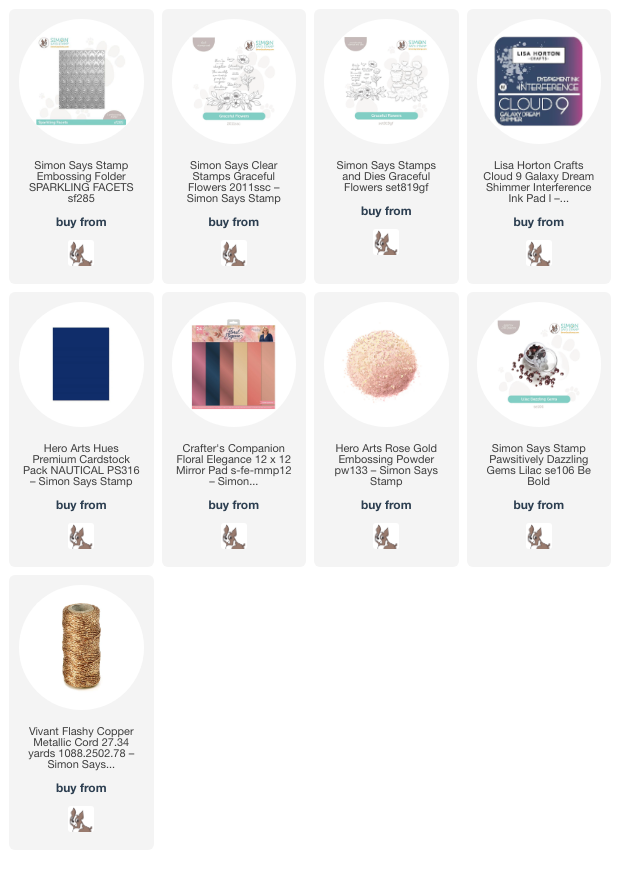
To start, I embossed a panel of Nautical cardstock using the Sparkling Facets Embossing Folder. I swiped the raised areas on the resulting patterned, textured panel with the Lisa Horton Crafts Galaxy Dream Interference Ink. These fabulous dye/pigment ink hybrids look incredible on colored cardstock; they change depending on the background cardstock color or the angle at which you are viewing it! So unique and so many was to use them. To add to the “mixed media” feel of the card, I splattered the background with some super sparkly handmade glitter watercolors in a coordinating shade of rose gold.

Once I had created the background, I decided to create some bold, heat embossed flowers for the focal point, embossing the large bouquet from Graceful Flowers onto more Nautical cardstock using rose gold embossing powder. I die cut the image and trimmed it so that it was hanging off of the edge of the card. I also heat embossed a greeting from the Graceful Flowers set and used the coordinating die (love that there are dies for the sentiments, as well!) to cut it out. To ground my focal point and sentiment, I cut a thicker strip of Nautical cardstock as well as a thinner strip of rose gold foil cardstock and popped them up on the embossed, inky card front with some thin foam adhesive squares.

I adhered the sentiment and floral die cuts to the card front with a double layer of foam adhesive to help add multiple layers of height to the card. To add a bit more sparkle and texture to the card, I tucked a few Lilac Pawsitively Dazzling Gems on the card front. The Lilac gems are almost a “neutral” gemstone color, working nicely with muted shades of mauve, purple, and rose gold, depending on the colors with which they are paired! Finally, I tucked a bow made from some sparkly copper twine beneath the flowers for one last touch of sparkly texture.

Well, that’s all for my project today! I can’t wait to play with these shimmery  Lisa Horton Crafts inks for holiday cards… I definitely think they’re going to add an element of luxury with their metallic shine. Thanks so much for stopping by today, and have a marvelous day!
Filed Under: simon says stamp Tagged With: 3D embossing folder, graceful flowers, lisa horton crafts, sparkling facets

Copper Dragonflies and Glittering Foliage with Simon Says Stamp!

August 16, 2024

This post was sponsored by Simon Says Stamp. Thanks, Simon!

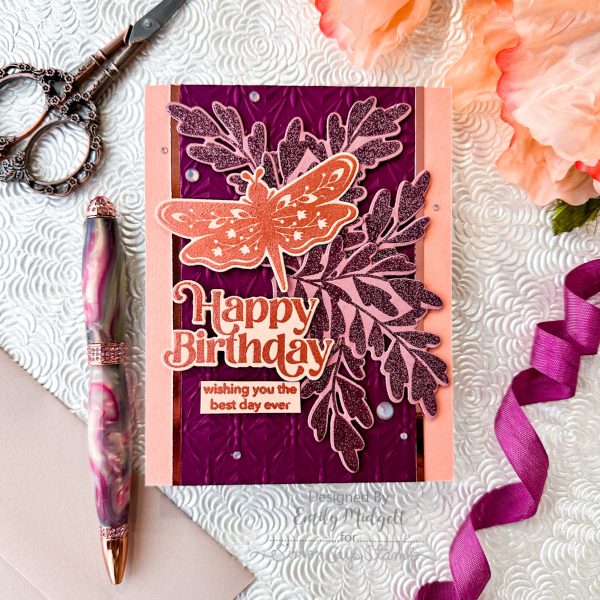
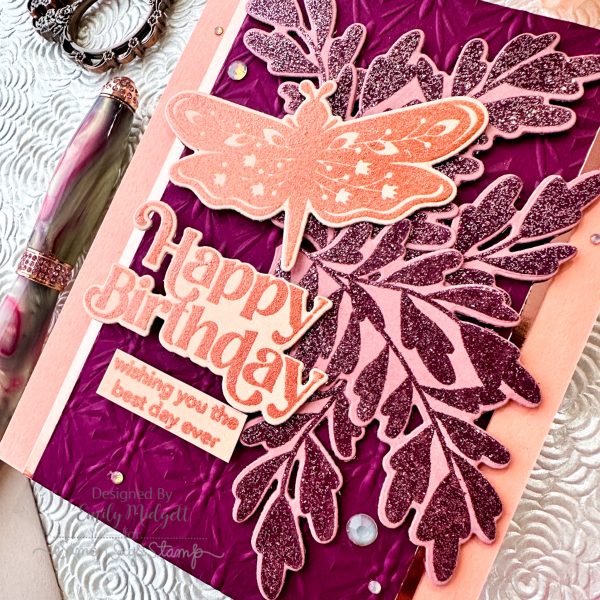
Hi friends! I have been having some fun playing around with different color combinations than I normally utilize, which is usually how I begin my projects. I find a stamp, die, or stencil on which I want to focus, then turn to my color combination Pinterest board to figure out what color palette I would like to use. For today’s project, I found a lovely peach-plum-mauve color palette image, which I thought was a great transitional color palette from summer into autumn! You still have the warm and vivid tones of the coppery peaches, but the richness of that plum just screams “autumn” to my eyes. Once I had my color palette selected, I pulled out some coordinating cardstocks, embossing powders, and gems to pull everything together for a cohesive project. Let’s get started with the details!

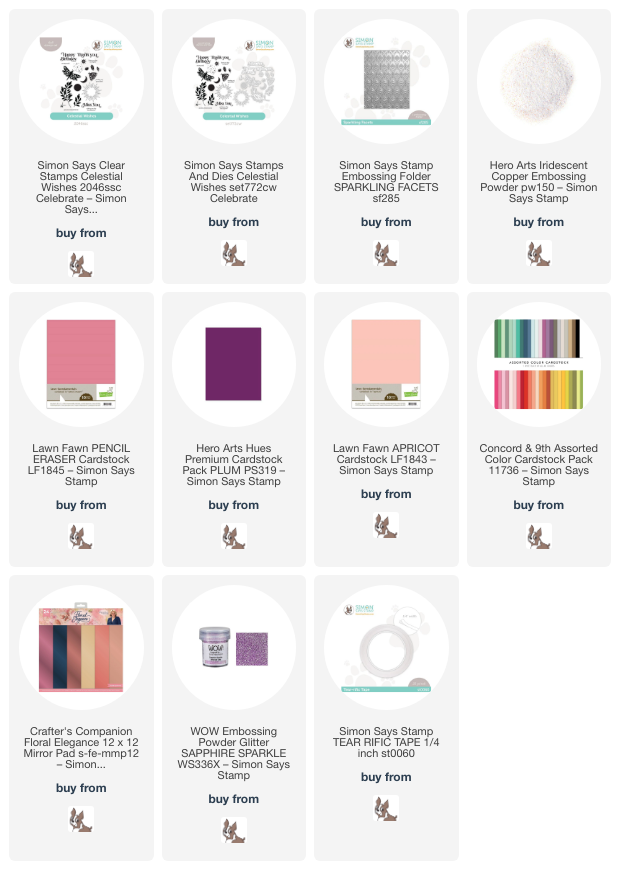
To begin, I heat embossed the leaf clusters from the Celestial Wishes stamp set onto some Lawn Fawn Pencil Eraser cardstock. I used some super sparkly glitter embossing powder from WOW!, which unfortunately seems to be discontinued, but THIS is a good substitute! After heat embossing the leaves, I used the coordinating dies to cut them out. I also heat embossed the lovely stylized dragonfly image and sentiment components from Celestial Wishes onto some Lawn Fawn Apricot cardstock using Iridescent Copper embossing powder, which creates a shimmery, tone-on-tone effect.

After heat embossing and die cutting the different components for the focal point, I ran a panel of Hero Arts Plum cardstock through my die cutting machine using the Simon Says Stamp Sparkling Facets Embossing Folder. This continuous geometric pattern is a great foil for the flowy foliage and botanical dragonfly images. I trimmed the embossed panel down a bit and mounted it in the center of a Concord and 9th Grapefruit card front using Tear-rific Tape. I added a few thin strips of copper foil cardstock on either side of the embossed panel to add some extra metallic accents to the background before arranging my die cuts.

After I had finished my background, I arranged the leaves, dragonfly, and sentiment die cuts, adhering them with a double and single layer of foam adhesive. Using a double layer of foam squares for the dragonfly and sentiment allows them to pop a bit more from the background. Finally, I added a few shimmering gems for added sparkle and shine!

Well, that’s all for my project today! Finding ways to incorporate the color palette into each element of my cards is so much fun. I hope you’ll give it a try! Thanks so much for stopping by today, and have a marvelous day!
Filed Under: simon says stamp Tagged With: celestial wishes, embossing folder, sparkling facets

Purple Week with Simon Says Stamp!

June 10, 2024

This post was sponsored by Simon Says Stamp. Thanks, Simon!

Hi friends! As I was creating the first few projects for this week’s posts, I inadvertently found myself drawn to my purple products in my stash, creating a variety of projects starting with a purple color scheme on each. I thought I would continue the trend throughout the week with some pretty purple inspiration, starting today with some simple stamping and ink blending. I recently purchased the Brushed Flowers stamps and coordinating dies and used the pretty daisy stamp in the set as the inspiration point for my card set today. Let’s get started with the details!

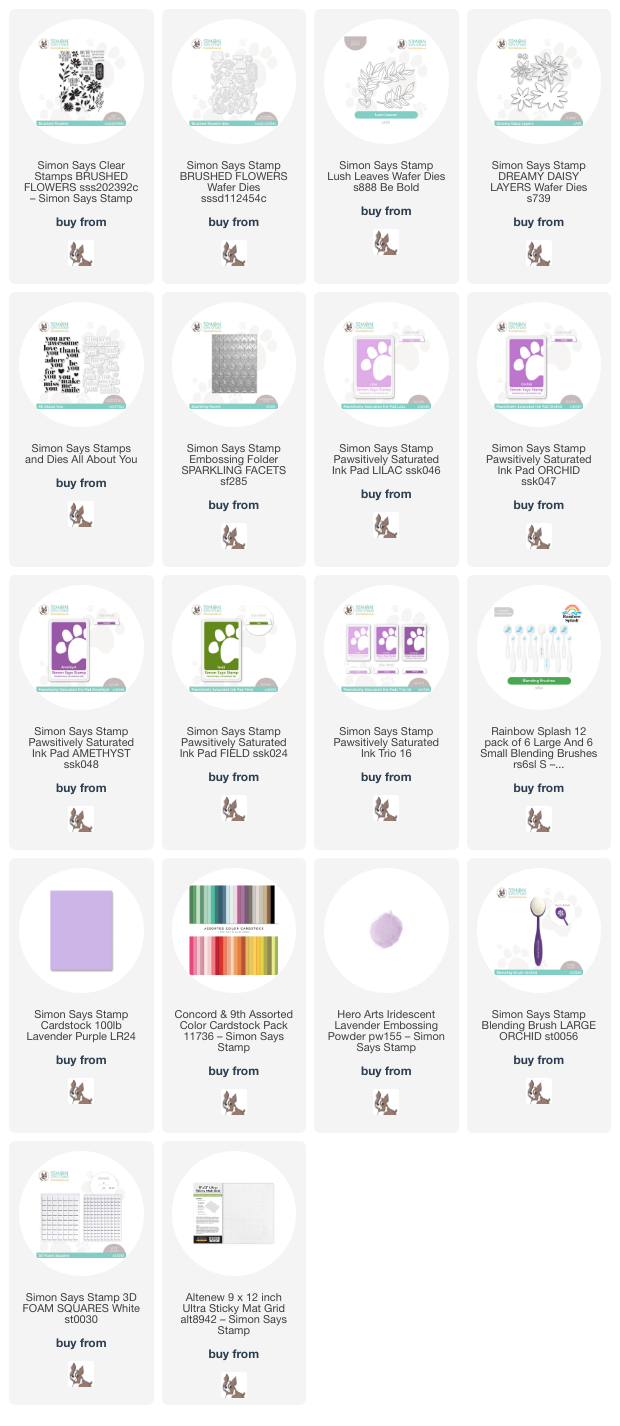
For both of my projects, I did some “color drenching,” that is, I kept the color scheme as monochromatic as possible with the exception of the foliage for the flowers. I even stamped the florals on Lavender cardstock using Pawsitively Saturated Inks: Lilac, Orchid, Amethyst, Field and an oldie-but-goodie trick with some white pigment ink.

For my first project, I stamped the flowers from Brushed Flowers stamp set onto Lavender cardstock, using only the pretty purple inks in the Ink Trio 16. To keep the foliage a crisp, bright green on the Lavender cardstock, I used a technique similar to the technique that I used for THIS stenciled card: I stamped a layer of white pigment ink first to act as a barrier on the colored cardstock, then stamped directly over the top with Field ink. Mixing purple cardstock and green dye ink together means that the green will become dulled by the red hues in the purple cardstock, but the layer of white pigment ink keeps that green nice and bright! I could, of course, have used white cardstock for the stamped images, but that white edge of the die cuts would detract from the “color drenched” effect that I was trying to achieve. I die cut the images with their coordinating dies.

For the background, I trimmed down an A2 panel of Concord and 9th Fig cardstock and blended some Amethyst ink on the center right side using a purple blending brush, then splattered the background with some sparkling handmade watercolors. I also stamped a greeting from Brushed Flowers onto Lavender cardstock using the same white pigment ink and Field combination that I used on the foliage. I arranged the flora around the oval sentiment die cut and popped everything up with foam squares, finally adding some extra sparkle with shimmering gems.

For my second card, I used the same Lilac and Amethyst inks to create my flowers, blending the different ink colors on plain white die cuts, then creating some bright green foliage using Field ink with the Lush Leaves die. I started by die cutting all of the layers for the Dreamy Daisy Layers and Lush Leaves die sets from white cardstock, then placed the individual layers on my Ultra Sticky Mat to hold the delicate die cuts in place while I blended the colors. I used blending brushes both large and small to blend color on each of the individual die cuts, then adhered the daisy components together with liquid and foam adhesive.

For the background, I trimmed down a panel of Lavender cardstock to 3.75″ x 5″ and ran it through my die cutting machine with the Sparkling Facets folder to add some subtle texture behind my blended die cut flowers. I adhered the textured panel to a full sized Lavender A2 card front, creating a plain Lavender frame around the textured area to add extra interest to the background. I arranged the daisies and foliage on the horizontal card front, orienting them to the left. To create the greeting, I stamped a sentiment on Lavender cardstock from the All About You stamp set using Amethyst ink, then stamped directly over the top using embossing ink, then sprinkled Iridescent Lavender embossing powder over the top and heated it. The embossing powder adds a lush iridescent sheen to the sentiment! I die cut the sentiment with the coordinating die, then adhered it to the card front using a double layer of foam adhesive. Finally, I added some sparkling gems!

Well, that’s all for my projects today! I have been playing with some fun mediums for this “Purple Week,” and I’m so excited to share them with you. I hope you’ll love them as much as I do! Thanks so much for stopping by today, and have a marvelous day!
Filed Under: simon says stamp Tagged With: all about you, brushed flowers, color drenching, daisy, die cutting, dreamy daisy, embossing folder, ink blending, pawsitively saturated, purple week, sparkling facets

Primary Sidebar

  • Facebook
  • Instagram
  • Pinterest
  • YouTube

Favorite Shops

Secondary Sidebar

Subscribe

Enter your email address to subscribe to this blog and receive notifications of new posts by email.

Instagram
Something is wrong.
Instagram token error.
Follow
Load More

Archives

Tags

3D embossing folder alcohol markers better press birthday birthday card blog hop card kit christmas christmas card christmas tag colored pencil copic copic coloring Daniel Smith die cutting embossing folder embroidery felt giveaway holiday holiday card hot foil ink blending karin brushmarker pro layered stencil masculine my monthly hero new release no line coloring no line watercolor OLO marker olo markers original illustration pawsitively saturated rainbow shaker card slimline stamping stamptember stencil thank you thinking of you valentine's day video watercolor

Popular Posts

Simon Says Stamp Joy For You Blog Hop- Day 1!
Simon Says Stamp Joy For You Release-Now Available!
Frozen Fractals All Around with New Simon Says Stamp Joy For You Release!
Shaped Holiday Shaker Card with New Simon Says Stamp Jolly Season Card Kit of the Month!
Holiday Postage with New Simon Says Stamp!
Simon Says Stamp Glory to the Newborn King Holiday Kit-Part II!
Pinkfresh Studio 5th Birthday!
Altenew Build A Flower: Fuchsia Blog Hop+Giveway!
Holiday Joy in Pink and Green with New Simon Says Stamp DieCember!
Honey Bee Stamps September Release Blog Hop!

Disclosure

Some affiliate links are used in my posts. This means that, should you click on one of my links and purchase something from that company, I will receive a small portion of the sale at no extra cost to you. I use the money earned from these sales to help maintain my blog. I so appreciate you visiting and, if you do choose to use one of my affiliate links, thank you so much for your support!
Copyright © 2026 ·Brunch Pro Theme · Genesis Framework by StudioPress · WordPress · Log in
Loading Comments...