• Skip to main content
  • Skip to primary sidebar
  • Skip to secondary sidebar

Sixth Street Sundries

Emily Midgett

  • Home
  • About Me
  • Contact
  • OLO Marker Color Swatch Chart
  • Shop

stamp of the month

Spellbinders Stamp of the Month Club- August 2021!

August 10, 2021

Hi there! I have a couple of cards to share with you today using the Spellbinders August Stamp of the Month club kit! This month’s stamp set features a pretty little bundle of flowers, both outline and individual solid versions, that you can use to stamp multi layered versions or color if your heart desires! I have a pair of projects for you featuring some stamping and creative trimming, so let’s get started with the details!

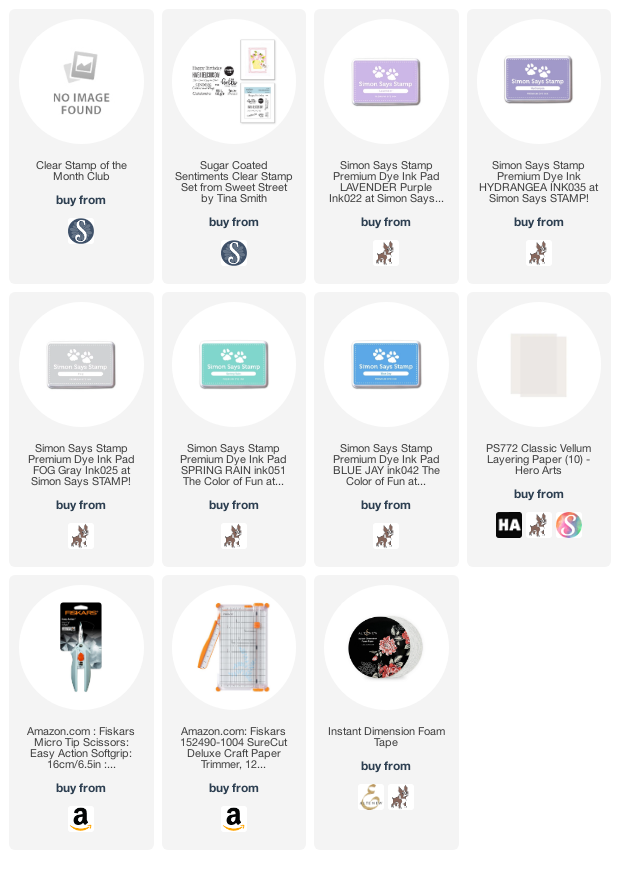
For both of my projects today, I used a variety of cool blue and purple inks from Simon Says Stamp: Lavender, Hydrangea, Fog, Spring Rain, and Blue Jay.

My first card features a stamped background and some individual flowers using just the individual solid flowers included in the Stamp of the Month set. I stamped a floral curtain on the upper left hand corner of my white A2 card base, then stamped several individual flowers on a separate piece of cardstock and trimmed them out using my sharp scissors.

In order to help soften the colorful, busy background pattern, I trimmed a panel of vellum smaller than the A2 panel, then arranged the individual solid blooms on the corner. I love the effect that layering the individual blooms with the stamped pattern has! So dimensional. I arranged them (along with a sentiment strip from the Sugar Coated Sentiments stamp set) on the corner of the vellum panel, then added some dimensional foam adhesive behind the flowers adhered to the vellum. (Gotta be sneaky with that adhesive when working with vellum!) The solid flowers look so pretty and graphic when used by themselves, but they look just as lovely when used with the outline stamp, as well!

For my next project, I began by stamping the outline stamp twice on a panel of white cardstock. I did this by arranging my stamp in my MISTI, stamping with black ink, then rotating the cardstock 180* to ensure that the image was in the same spot on the opposite corner of the paper. I then used the same shades of purple, blue, and mint ink to stamp the details on the flowers, again using my MISTI to ensure perfect placement and even ink coverage.

Once I had finished stamping, I used my trimmer to do some selective trimming and create a rectangular panel that allowed the flowers to hang over the edge. I trimmed just up to the edge of the stamped floral spray, then used my scissors to fussy cut the outline of the flowers to create a unique piece for my card front! I simply added it to a white A2 card base using some foam adhesive for a little extra dimension. I finished the card off with another sentiment from the Sugar Coated Sentiments stamp set, which I stamped on a strip of white cardstock and added with some more foam tape for double the dimension. Can’t go wrong with white-on-white with pops of color!

Well, that’s all for my projects today! I encourage you to check out all of the fun kits that Spellbinders has to offer- you can always subscribe to be guaranteed a set at your doorstep every month! Thanks so much for stopping by today, and have a marvelous day!
Filed Under: spellbinders Tagged With: club kit, layered stamping, stamp of the month

Spellbinders June Stamp of the Month!

June 9, 2021

Hi there! Today, I’m sharing some inspiration using the June Stamp of the Month stamp set from Spellbinders! This month has so many beautiful, heartfelt sentiments included, as well as some great outdoor imagery that I’ve used to create a mini-slimline card with a blended sunset. Let’s get started with the details!

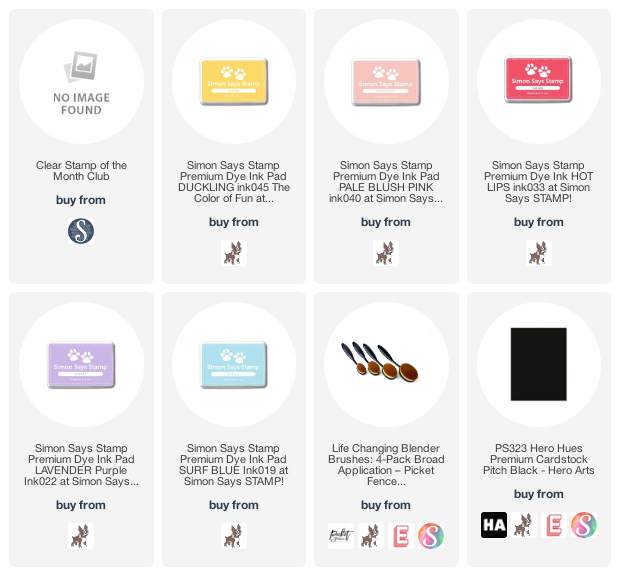
I began by trimming down a piece of white cardstock, then used a T-square to mark a line for my mask. I added some Post-It notes across the bottom, then stamped the sun from the June Stamp of the Month using Duckling ink from Simon Says Stamp in the center of the top of the card.

Next, I used Pale Blush Pink, Hot Lips, Lavender, and Surf Blue inks (all from Simon Says Stamp) with blending brushes to blend a pretty sunset sky. I removed the mask from the bottom portion of the card front. (I love the crisp edges when you remove the mask. It’s so magical!)

I stamped a greeting from the June Stamp of the Month on a square of white cardstock, then backed it with a slightly larger panel of black cardstock. I stamped a couple of the bird silhouettes to complete the “rule of three” for the black accents, then popped up the greeting using some foam adhesive. I popped up the blended panel on a full size mini-slimline card base using some more foam tape. Lots of dimension, but only a few stamps used for this one. It’s so fun to see the whole card come together after using only minimal supplies!

Well, that’s all for these projects! I encourage you to check out all of the different club kits available from Spellbinders. There are some wonderful kits that can be delivered to your door each month. Thanks so much for stopping by today, and have a marvelous day!

Filed Under: spellbinders Tagged With: ink blending, spellbinders, stamp of the month

Spellbinders Stamp of the Month Club!

April 9, 2021

Hi there! I have a couple of projects today using the Spellbinders April Stamp of the Month club: Around the Bend. Spellbinders offers several great monthly club kits, including die kits, which also coordinate with these stamps. I thought I would show you how you can use these stamps by themselves, too.

Both projects use Twirling Tutu, Rose Apple, and Hot Lips ink for the blooms, and Dusty Sage for the foliage, all from Simon Says Stamp ink line.

For this first card, I stamped the waving branch of flowers on a white card base, adding the blooms in a pretty pink ombrè using the inks listed. I also stamped the waving Hello greeting from the April Stamp of the Month using black ink.

I trimmed the white stamped panel down and added a very thin strip of black cardstock to coordinate with the black sentiment. I also used a fine liner pen to add some black centers to the flowers to finish off the “rule of three.” I mounted the whole thing on an A2 panel of pale pink cardstock. Simple, but ultra feminine with all of the pink and the pretty blooms!

For my second card, I did some old-fashioned stamping and fussy cutting. I began by creating a banner for the greeting by stamping the “Thank You” onto some white cardstock, then cutting around it to form a curved strip. I also cut two small flagged strips for the banner’s ends, adhering the pieces together using foam adhesive for lots of dimension.

I stamped some individual blooms from the April Stamp of the Month and fussy cut them, then arranged them with the sentiment banner on a mini slimline card base, adhering them with liquid adhesive. I added a few iridescent pearls for some shine and extra texture!

Well, that’s all for these projects! I encourage you to check out all of the different club kits available from Spellbinders. There are some wonderful kits that can be delivered to your door each month. Thanks so much for stopping by today, and have a marvelous day!

Filed Under: spellbinders Tagged With: stamp of the month

Spellbinders Stamp of the Month-March!

March 10, 2021

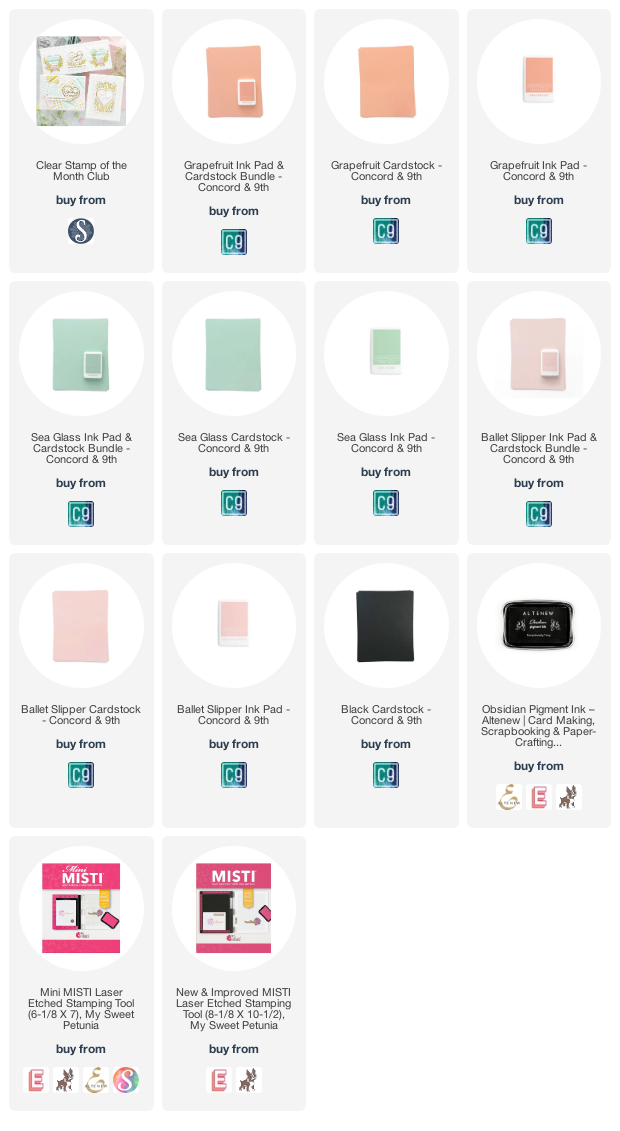
Hi there! Spellbinders has a large variety of monthly club kits to which you can subscribe featuring fun stamps and dies. Their monthly stamp club is a real bargain: $10 for a full size stamp set when you subscribe! The sweet little bunnies in this March Stamp of the Month remind me of springtime toile, so I created a trio of cards using these beautiful stamps.

Sometimes, using one ink color can be just as impactful as a variety of ink colors, and it can allow the detail in the stamps to really shine! Using my trusty Misti stamping tool, I was able to create three stamped panels using three different shades of ink- Ballet Slipper, Grapefruit, and Sea Glass- super springy colors, in my opinion!

After I’d stamped each panel with the bunny and wreath of flowers using colored ink, I used a black pigment ink to add a crisp black sentiment from the March Stamp of the Month on each panel. I then trimmed them down from A2 size and added a black mat that was very slightly larger to create a thin black frame around the edge.

For the bases, I chose coordinating shades of colored cardstock and trimmed them down to A2 size. I then used the same ink shades to stamp a custom tone-on-tone pattern just around the edge of each colored cardstock panel using some of the individual floral stamps from the March Stamp of the Month stamp set.

Once I had stamped all of the pieces of colored cardstock, I mounted the black framed panels on each of them using foam adhesive. Such clean and springy projects! I love when you can create lovely projects easily and quickly because of beautifully designed stamps.

Well, that’s all for my projects today! I hope you’ll check out all of the Spellbinders Monthly Club Kits… there are so many fun options to choose from, and the variety of styles and products represented is a wonderful value!

Filed Under: spellbinders Tagged With: bunny, easter, mass produce, springtime, stamp of the month, toile

Spellbinders Stamp of the Month January 2020!

January 6, 2021

Hi there! I’m excited to be helping introduce the Spellbinders Stamp of the Month Club for January 2021. Each month, Spellbinders releases fantastic new kits full of fun stamps, dies, and/or foiling that you can buy individually or, if you know that you’d love to play with them all, you can subscribe and be automatically sent each month’s release. There is even the option to combine multiple kits (the “value” option) at a discounted rate! You can read all about the kits available here.

This month’s Stamp of the Month (a $20 value for only $10!) is perfect for some sweet valentines! It features several different heart designs that you can use in a myriad of ways to create simple or elaborate valentines. My project features lots of white space and some fun glittery embossing powder. Let’s get started with the details!

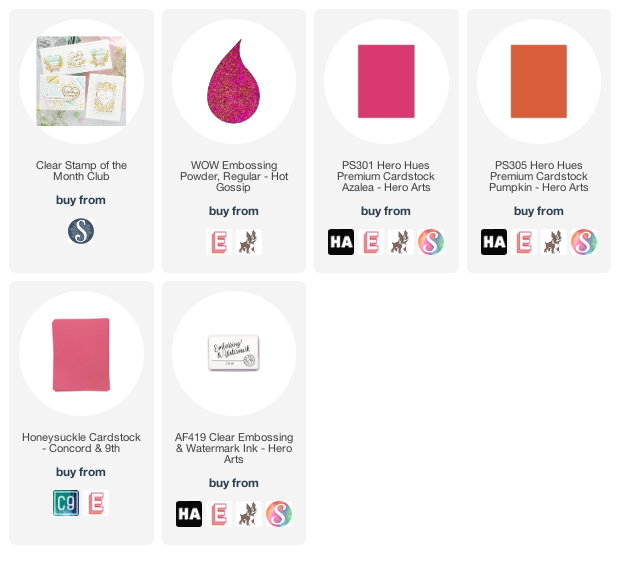
To start, I heat embossed three of the designs from the Stamp of the Month on white cardstock using Hot Gossip glitter embossing powder from WOW! Embossing Powders (linked below). This powder is a fun combination of hot pink powder and orange glitter, which I thought would be something traditional-but-slightly-different for a Valentine’s Day card!

After heat embossing each heart and the greeting, I fussy cut the hearts and trimmed the sentiment using my trimmer. I also trimmed three different, very thin strips of colored cardstock: one hot pink, one coral, and one deep orange to coordinate with the different colors in the glittery embossing powder! I mounted these strips on a white A2 card base on the left side of the card front using liquid adhesive.

I also adhered the thin sentiment strip on a slightly larger strip of hot pink cardstock. Before adding the hearts and sentiment, I trimmed the card front down slightly to make it 4″x5.5,” because I knew that I wanted to have the hearts hang off of the edge slightly, and keeping the card front the same width would make it too big to fit in an A2 envelope. I finally adhered all of the different pieces using foam adhesive for lots of dimension!

Well, that’s all for my project today. I highly encourage you to check out all of the fun monthly kits available from Spellbinders. So many amazing different ways to be creatively inspired every month! Thanks so much for stopping by today, and have a marvelous day!
Filed Under: spellbinders Tagged With: glitter, stamp of the month, valentine, valentine's day, wow embossing powder

Primary Sidebar

  • Facebook
  • Instagram
  • Pinterest
  • YouTube

Favorite Shops

Secondary Sidebar

Subscribe

Enter your email address to subscribe to this blog and receive notifications of new posts by email.

Instagram
Something is wrong.
Instagram token error.
Follow
Load More

Archives

Tags

3D embossing folder alcohol markers better press birthday birthday card blog hop card kit christmas christmas card christmas tag colored pencil copic copic coloring Daniel Smith die cutting embossing folder embroidery felt giveaway holiday holiday card hot foil ink blending karin brushmarker pro layered stencil masculine my monthly hero new release no line coloring no line watercolor OLO marker olo markers original illustration pawsitively saturated rainbow shaker card slimline stamping stamptember stencil thank you thinking of you valentine's day video watercolor

Popular Posts

Simon Says Stamp Joy For You Blog Hop- Day 1!
Simon Says Stamp Joy For You Release-Now Available!
Frozen Fractals All Around with New Simon Says Stamp Joy For You Release!
Shaped Holiday Shaker Card with New Simon Says Stamp Jolly Season Card Kit of the Month!
Holiday Postage with New Simon Says Stamp!
Simon Says Stamp Glory to the Newborn King Holiday Kit-Part II!
Pinkfresh Studio 5th Birthday!
Altenew Build A Flower: Fuchsia Blog Hop+Giveway!
Holiday Joy in Pink and Green with New Simon Says Stamp DieCember!
Honey Bee Stamps September Release Blog Hop!

Disclosure

Some affiliate links are used in my posts. This means that, should you click on one of my links and purchase something from that company, I will receive a small portion of the sale at no extra cost to you. I use the money earned from these sales to help maintain my blog. I so appreciate you visiting and, if you do choose to use one of my affiliate links, thank you so much for your support!
Copyright © 2026 ·Brunch Pro Theme · Genesis Framework by StudioPress · WordPress · Log in
Loading Comments...