• Skip to main content
  • Skip to primary sidebar
  • Skip to secondary sidebar

Sixth Street Sundries

Emily Midgett

  • Home
  • About Me
  • Contact
  • OLO Marker Color Swatch Chart
  • Shop

layered stamping

Springtime Gift Ensemble with Simon Says Stamp!

March 6, 2024

This post was sponsored by Simon Says Stamp. Thanks, Simon!

Hi friends! I am popping in to share this sweet springy gift ensemble created using a bunch of goodies from Simon Says Stamp. I love a good floral layering stamp set, and the beautiful, painterly blooms in the Fresh Air Flowers set creates such lovely, unique flora that I just went crazy stamping a ton of blooms, leaving me with enough floral die cuts to create not just a card, but also a sweet coordinating gift bag! Let’s get started on the details for my projects.

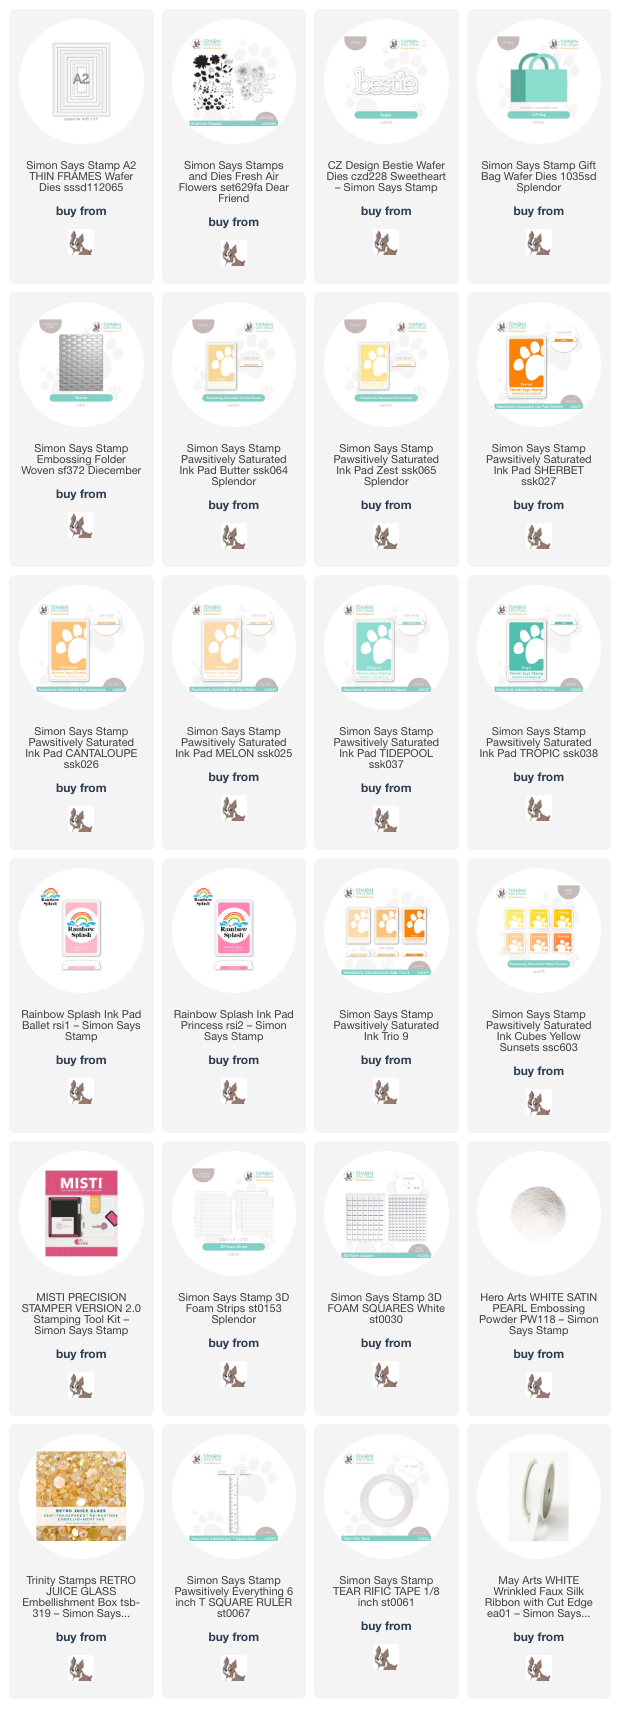
To start my project, I used my MISTI to stamp the florals from Fresh Air Flowers with bunches of inks from Simon Says Stamp, including Pawsitively Saturated Inks in shades of Butter, Zest, Sherbet, Cantaloupe, Melon, Tidepool, Tropic and Ballet, as well as Princess Rainbow Splash Inks. I wanted to create some super delicate pastel blooms, but the Pawsitively Saturated inks are super vivid and concentrated, so I used an oldie-but-goodie trick for stretching your ink colors to create a larger color gradient: stamping off. I simply inked up my stamp as normal, then stamped the image off on a piece of scrap paper, then stamped it again on my good cardstock, creating a very pale version of the same color!

The first layer of stamped-off color was very pale, so I used my MISTI to stamp the first layer of each image at 2-3 times, building up that super pale pastel so that it had a little more intensity while still staying significantly lighter than the full-strength version. I used the full-strength version on my second layer of each flower, then moved on to the next darkest color in the ink family for my darkest layer. All of the flowers, except the large peach daisy, were stamped with only two shades of ink! The peach daisy had four layers, so I used all three colors in Ink Trio 9.

After stamping and die cutting all of my stamped flowers from Fresh Air Flowers, I began assembling the floral arrangement on the card front so that I knew how many flowers I had left to use on the gift bag. I wanted to create a super springy “flower basket,” so I trimmed down a panel of white cardstock and ran it through my die cutting machine using the Woven Embossing Folder. I adhered this embossed panel in the center of my A2 card front using strong double sided tape.

I find that “framing” my focal point always adds such classy interest to the my floral arrangements, so I die cut a white A2 Thin Frame and popped it up on my woven card front using 3D Foam Strips, which made it super easy to add this delicate frame to my card front! I arranged my pastel flower garden on the card front, adhering all of the elements with foam squares. For the greeting, I die cut a white Bestie die and adhered it along the bottom of the frame using tiny pieces of foam tape. I also created a custom embossed sentiment using a greeting from Fresh Air Flowers, stamping it first with Cantaloupe ink, then again with embossing ink, and heat embossing with pearlescent embossing powder. I popped up the greeting die cut with a double layer of foam tape, then added a few iridescent peach gems for sparkle!

For the coordinating gift bag, I die cut the Gift Bag Die twice from white cardstock, (love that it only takes one sheet of cardstock to create this adorable gift bag!) then used my T-square to measure the large front panel and cut a piece of cardstock down to the same size. I nestled this piece into the coordinating spot on the Gift Bag Die, then ran the panel through my die cut machine in order to create the scalloped top edge. I finally ran this extra panel through my die cut machine with the Woven Embossing Folder to create that textured background, then assembled the bag using some super sticky double sided tape.

After assembling my gift bag, I added the leftover peach floral die cuts with some foam adhesive. I created another sentiment (perfect for a gift bag!) using Cantaloupe ink and white pearl embossing powder and tucked it amongst the flowers, finally embellishing the bag with a white faux silk bow and some more peach gems!

Well, that’s all for my projects today! One of my favorite parts about stamping is being able to create coordinating card and gift ensembles… I just love it when everything matches! Thanks so much for stopping by today, and have a marvelous day!
Filed Under: simon says stamp Tagged With: A2 thin frames, bestie, fresh air flowers, gift bag, layered stamping, rainbow splash, woven embossing folder

Altenew Build-A-Flower: Belladonna Lily+Giveaway!

April 1, 2022

Hi there! Today, Altenew is celebrating the release of their newest Build-A-Flower: Belladonna Lily! We are hopping along, and you should have arrived here from Teresa Litchfield. Your next stop is Nenette S. Madero, and you can always start back at the beginning at the Altenew Card Blog if you get lost! I love the options that you have with the Build-A-Flower stamp sets; you usually are able to stamp just the outline to color with your choice of coloring medium, or you can use the included layering stamps to create a more graphic, super vivid and colorful project. Here’s a peek at this month’s Build-A-Flower: Belladonna Lily!

Such a beautiful layering stamp set this month! You can always subscribe to the Build A Flower series to receive the sets each month at a discounted rate! For today’s project, I did some layered stamping with some pretty pink inks to create this crisp, vibrant project. Let’s get started with the details!

I began by die cutting the Build-A-Flower: Belladonna Lily three times on some plain white cardstock, then used my Misti to stamp the outline stamp to stamp the black outline, as well as some bright pink inks from the Spring Bouquet collection of inks. (That ink grouping contains the most gorgeous shades of pink!)

Once I’d stamped the multiple floral die cuts, I die cut a Circle Quilt Cover Plate die from some white cardstock and layered it on my A2 white card base for lots of beautiful texture in the background. The subtle texture provides a bit of interest behind my bright flowers!

I arranged the Build-A-Flower: Belladonna Lily die cuts so that they were dripping down from the top of the cardstock, then used lots of Instant Dimension Foam Tape to pop them up and add extra dimension to the card. I stamped a greeting from Build-A-Flower: Belladonna Lily onto a strip of white cardstock using black ink, then popped it up as well. Simple, but I just love that bright pop of pink!

Well, that’s all for my project today! Now for some fun giveaway information:

$200 in total prizes! To celebrate this release, Altenew is giving away a $50 gift certificate to 2 lucky winners and a $20 gift certificate to 5 winners! Please leave a comment on the Altenew Card Blog and/or each designer’s blog post on the blog hop list below by 04/06/2022 for a chance to win. Altenew will draw 7 random winners from the comments left on each stop of this blog hop and announce the winners on the Altenew Winners Page on 04/08/2022.

Your next stop on the hop is Nenette S. Madero. Thanks so much for stopping by today, and have a marvelous day!

Filed Under: altenew Tagged With: belladonna lily, build a flower, circle quilt cover plate, layered stamping

Altenew All Things Handmade Collection Release Blog Hop + Giveaway ($300 in total prizes)

February 4, 2022

Hi there! Altenew has released their new All Things Handmade collection today, and we’re celebrating with a blog hop! You should have arrived here from Michelle Short, and your next stop is Laurie Willison. You can also head back to the Altenew Card Blog if you get lost. We’ve been having such dreary weather lately; not horribly cold, but definitely not warm, and so… blah. Why does January always seem endless and so gray? I thought I’d perk myself up a bit with some cheery springtime colors and flowers using the new Garden Delights products. Let’s get started with the details!

I began by stamping the layers for the blooms from Garden Delights using Orange Sorbet for the base layer, then using the beautiful peachy inks in the Martian Terrain inks for the details. I used the Green Valley dye inks for the foliage. The bright, tropical green is a lovely contrast to the somewhat muted peaches of the flowers. I die cut the images with the coordinating dies.

Next, I die cut one of my favorite word dies from Altenew’s line: Mega Thanks. I cut the greeting from plain white cardstock and kept it inside of the negative space, then used an ink blending tool to lightly blend some Canyon Clay ink at the top, fading to nothing towards the bottom of the die cut. I stamped a coordinating greeting from the Garden Delights stamp set on a thin strip of white cardstock.

Once I had finished stamping all of the components, I began arranging my card front. I placed the stamped Garden Delight blooms on my white A2 card front, allowing some to hang over the edge and trimming them off to be used along another edge, then popped them all up using some foam tape. I added the ombré die cut greeting and sentiment strip over the top using foam adhesive, as well, finally adding some iridescent peachy-pink pearls for some shine.

Well, that’s all for my project today. Now for some fun giveaway information!

$300 in total prizes! To celebrate this release, Altenew is giving away a $50 gift certificate to 2 lucky winners and a $25 gift certificate to 8 winners! Please leave a comment on the Altenew Card Blog and/or each designer’s blog post on the blog hop list below by 02/10/2022 for a chance to win. Altenew will draw 10 random winners from the comments left on each stop of this blog hop and announce the winners on the Altenew Winners Page on 02/12/2022.

Your next stop on the hop is Michelle Short. Thanks so much for stopping by today, and happy hopping!

Filed Under: altenew Tagged With: garden delight, layered stamping, mega thanks

Altenew Craft Your Life Project Kit: Vintage Tapestry Release Blog Hop + Giveaway ($300 in total prizes)

December 12, 2021

Hi there! Altenew is releasing their newest Craft Your Life Project Kit today, and I’m super excited to be helping introduce the absolutely stunning new Vintage Tapestry kit! We are, of course, having a blog hop to inspire you, and you can start at the beginning at the Altenew Card Blog. You should have arrived here from LauraJane, and your next stop is Teresa Litchfield. This month’s Project Kit is an absolute stunner (aren’t they always, though?)… if you love layered stamping, this kit is totally for you! Here’s a peek at the kit:

Vintage beauty in a classic style! Create gorgeous vintage print-inspired projects using this Vintage Tapestry kit! This kit contains a beautiful 3-dimensional embossing folder, a 6×8 layering stamp set, a 4-piece layering stencil set, and a matching die set to cut all the pieces from the stamp set and the layering stencil set.

These kits frequently sell out and take a few weeks to restock, but you can avoid having to wait by subscribing to the Craft Your Life kit, and bonus-get 14% off of the regular price with your subscription!

My project today features lots of my favorite things: detailed stamping, pops of color, white on white, lots of subtle texture. I loved so many of the finished blooms in the new Vintage Tapestry kit that it only made sense to use the larger canvas of the slimline card to show them off!

I began by stamping and stenciling the various blooms on some crisp white cardstock using a wide variety of inks from Altenew’s ink line, keeping the colors rich but somewhat muted. I used the understated Fall Harvest, Tranquility, and Nature’s Wonders ink families, then added a vivid pop of color using the Rose Petal inks for the large cabbage roses and anemones. Those blue stenciled delphiniums have my heart though… I love the graceful, fluid lines that they add to the bouquet! I die cut all of the finished inked pieces with the coordinating dies, included in the kit.

Because I had such an abundance of beautiful flowers to arrange, I trimmed down a slimline card base (3.5″x8.5″) and used the 3D embossing folder (included in the kit) to emboss the beautiful tapestry images on just the opposing corners of the white card base. It puts me in mind of some beautiful lacy tapestry or wedding gown. So gorgeous.

Next, I die cut a Thinking of You die twice from some white cardstock, adhering them together to create a dimensional die cut. I arranged the floral bouquets around the die cut greeting, using an uneven number of elements on either side to keep things visually interesting. I adhered them with Instant Dimension Foam Tape (adding a touch of liquid adhesive to the foam tape to ensure that they stuck firm to the dimensional embossed card base). The final touch was to add a few yellow gems to tie into the yellow flowers in the arrangement. A lovely springy bouquet fit for all kinds of occasions!

$300 in total prizes! To celebrate this release, Altenew is giving away a $50 gift certificate to 2 lucky winners and a $ 25 gift certificate to 8 winners! Please leave a comment on the Altenew Card Blog and/or each designer’s blog post on the blog hop list below by 12/18/2021 for a chance to win. Altenew will draw 10 random winners from the comments left on each stop of this blog hop and announce the winners on the Altenew Winners Page on 12/20/2021.

Your next stop on the hop is Teresa Litchfield. Thanks so much for stopping by today, and happy hopping!

Filed Under: altenew Tagged With: craft your life project kit, layered stamping, layered stencils, project kit, slimline, stamp layering, stencil, vintage tapestry

Spellbinders Stamp of the Month Club- August 2021!

August 10, 2021

Hi there! I have a couple of cards to share with you today using the Spellbinders August Stamp of the Month club kit! This month’s stamp set features a pretty little bundle of flowers, both outline and individual solid versions, that you can use to stamp multi layered versions or color if your heart desires! I have a pair of projects for you featuring some stamping and creative trimming, so let’s get started with the details!

For both of my projects today, I used a variety of cool blue and purple inks from Simon Says Stamp: Lavender, Hydrangea, Fog, Spring Rain, and Blue Jay.

My first card features a stamped background and some individual flowers using just the individual solid flowers included in the Stamp of the Month set. I stamped a floral curtain on the upper left hand corner of my white A2 card base, then stamped several individual flowers on a separate piece of cardstock and trimmed them out using my sharp scissors.

In order to help soften the colorful, busy background pattern, I trimmed a panel of vellum smaller than the A2 panel, then arranged the individual solid blooms on the corner. I love the effect that layering the individual blooms with the stamped pattern has! So dimensional. I arranged them (along with a sentiment strip from the Sugar Coated Sentiments stamp set) on the corner of the vellum panel, then added some dimensional foam adhesive behind the flowers adhered to the vellum. (Gotta be sneaky with that adhesive when working with vellum!) The solid flowers look so pretty and graphic when used by themselves, but they look just as lovely when used with the outline stamp, as well!

For my next project, I began by stamping the outline stamp twice on a panel of white cardstock. I did this by arranging my stamp in my MISTI, stamping with black ink, then rotating the cardstock 180* to ensure that the image was in the same spot on the opposite corner of the paper. I then used the same shades of purple, blue, and mint ink to stamp the details on the flowers, again using my MISTI to ensure perfect placement and even ink coverage.

Once I had finished stamping, I used my trimmer to do some selective trimming and create a rectangular panel that allowed the flowers to hang over the edge. I trimmed just up to the edge of the stamped floral spray, then used my scissors to fussy cut the outline of the flowers to create a unique piece for my card front! I simply added it to a white A2 card base using some foam adhesive for a little extra dimension. I finished the card off with another sentiment from the Sugar Coated Sentiments stamp set, which I stamped on a strip of white cardstock and added with some more foam tape for double the dimension. Can’t go wrong with white-on-white with pops of color!

Well, that’s all for my projects today! I encourage you to check out all of the fun kits that Spellbinders has to offer- you can always subscribe to be guaranteed a set at your doorstep every month! Thanks so much for stopping by today, and have a marvelous day!

Filed Under: spellbinders Tagged With: club kit, layered stamping, stamp of the month

  • Page 1
  • Page 2
  • Go to Next Page »

Primary Sidebar

  • Facebook
  • Instagram
  • Pinterest
  • YouTube

Favorite Shops

Secondary Sidebar

Subscribe

Enter your email address to subscribe to this blog and receive notifications of new posts by email.

Instagram
Something is wrong.
Instagram token error.
Follow
Load More

Archives

Tags

3D embossing folder alcohol markers better press birthday birthday card blog hop card kit christmas christmas card christmas tag colored pencil copic copic coloring Daniel Smith die cutting embossing folder embroidery felt giveaway holiday holiday card hot foil ink blending karin brushmarker pro layered stencil masculine my monthly hero new release no line coloring no line watercolor OLO marker olo markers original illustration pawsitively saturated rainbow shaker card slimline stamping stamptember stencil thank you thinking of you valentine's day video watercolor

Popular Posts

Simon Says Stamp Sending Cheer Release: Now Available!
Joyful Snowman with New Simon Says Stamp Sending Cheer Release!
Autumn Legs with Colorado Craft Company and Catherine Pooler!
February 2018 My Monthly Hero Blog Hop!
Altenew Paint A Flower: Carnation Blog Hop+Giveaway!
Special Release: Simon Says Stamp Limited Edition STAMPtember Christmas Card Kit!
Altenew March 2020 Release Blog Hop+Giveaway!
Pinkfresh Studio 5th Birthday!
Pinkfresh Studios June Washi and Stamp Release Blog Hop!
Advent Calendar Extravaganza with Taheerah Atchia

Disclosure

Some affiliate links are used in my posts. This means that, should you click on one of my links and purchase something from that company, I will receive a small portion of the sale at no extra cost to you. I use the money earned from these sales to help maintain my blog. I so appreciate you visiting and, if you do choose to use one of my affiliate links, thank you so much for your support!
Copyright © 2026 ·Brunch Pro Theme · Genesis Framework by StudioPress · WordPress · Log in
Loading Comments...