• Skip to main content
  • Skip to primary sidebar
  • Skip to secondary sidebar

Sixth Street Sundries

Emily Midgett

  • Home
  • About Me
  • Contact
  • OLO Marker Color Swatch Chart
  • Shop

willow snowflake

Snowflakes in a Shaker!

October 16, 2023

This post was sponsored by Simon Says Stamp. Thanks, Simon!

Hi friends! I am back from a weekend with some of the smartest and most creative crafty ladies in the industry, and I am so creatively charged! I am in full-blown holiday mode, and I will be unabashedly listening to holiday music and creating holiday cards as much as I can for the next 10 weeks. To that end, I have a project to share with you today which you might have seen during the Simon Says Stamp Season of Wonder Livestream. (If you haven’t watched one of the release livestreams, they’re SO fun! They go through lots of the products, and Heidi gives snippets about their creators and shares lots of inspiration using the products. They also always do fun giveaways!! You should keep your eyes open for them if you aren’t already!) I can’t seem to resist snowflakes, because it gives me free rein to use as many sparkles and soft pastels as my heart desires, and this card definitely fits those descriptors. Let’s get started with the details!

Disclaimer before we get started: the spectacular new Willow Snowflake Die is currently sold out. I highly, highly encourage you to sign up for email notification for when it comes back in stock, because I would not be surprised if it goes out of stock again very quickly. This die is marvelous because not only does it feature the detail layer, but it also features a “bubble” layer: a solid, slightly larger background that you can combine with the detail layer to create a focal point on your card front.

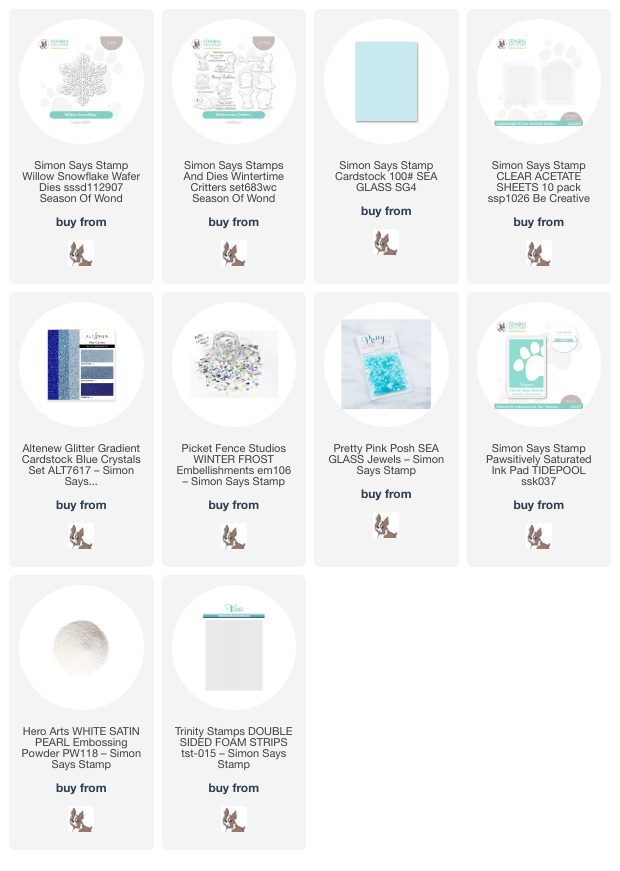
To create this simple-but-elegant shaker card, I began by die cutting the Willow Snowflake Die‘s “bubble” layer from the center of a panel of Sea Glass cardstock, then backed it with a panel of clear acetate, creating my shaker window. I added the glittering Willow Snowflake Die die cut detail layer, cut from coordinating pale aqua glitter cardstock, to the center of the acetate window using liquid adhesive. Before filling my shaker up with sequins, I trimmed the panel down slightly so that I could mat it on a full sized A2 card front.

After I had finished creating my shaker window, I used foam adhesive strips to create the seal around my window and then filled my shaker with lots of shimmering sequins. After my shaker was complete, it was time to add a sentiment. I stamped the greeting from Wintertime Critters on Sea Glass cardstock using Tidepool Pawsitively Saturated Ink. To create the custom embossing color, I stamped the sentiment again using sticky embossing ink, then sprinkled White Satin Pearl embossing powder over the top and heated it, creating a pearlescent aqua tone-on-tone sentiment. I popped the greeting up with some foam adhesive to help it stand out from the monochromatic background, then added some Sea Glass Gems on the points of the snowflake for one last touch of elegant sparkle.

Well, that’s all for my project today! Do you love to make shaker cards like I do? I feel like shaker cards are so appropriate and so much fun for holidays, and they can be whimsical or elegant. Such a versatile technique! Thanks so much for stopping by today, and have a marvelous day!
Filed Under: simon says stamp Tagged With: sea glass, shaker card, willow snowflake, wintertime critters

Warm Hands, Warm Heart!

October 12, 2023

This post was sponsored by Simon Says Stamp. Thanks, Simon!

Hi friends! I have a sweet project for you today using some of the new products from the Simon Says Stamp Season of Wonder release from last week. The new Winter Mitten die is super sweet and so generously sized that it can easily create a focal point for your project! I chose to keep things icy with aqua and iridescent white color palette to enhance the frosty feelings on my project. Let’s get started with the details!

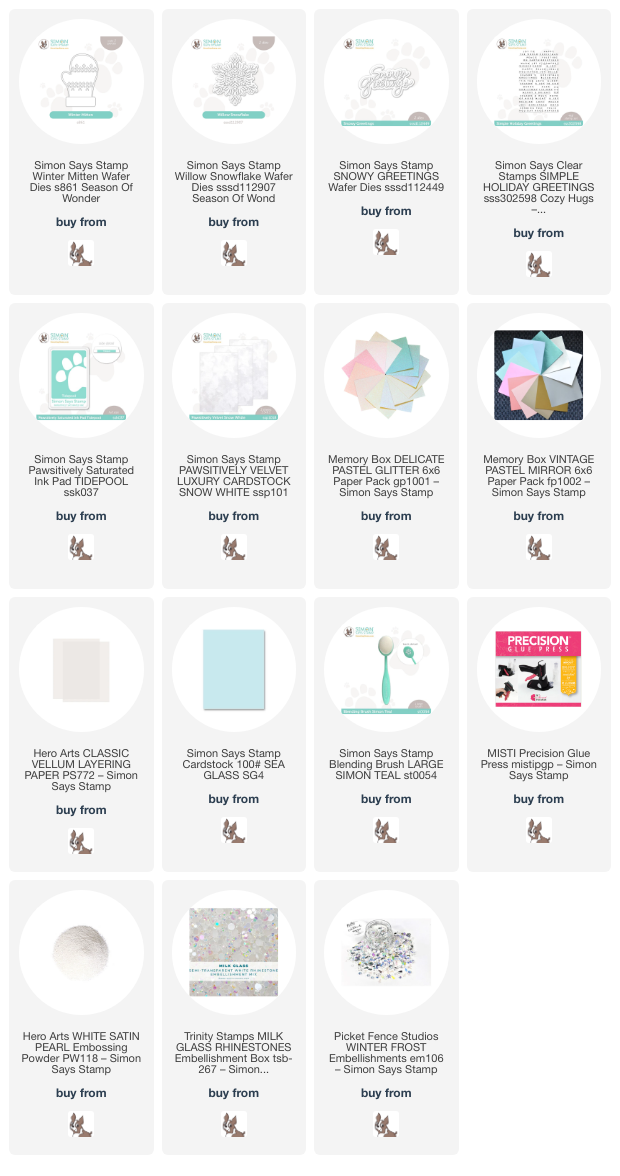
I started by die cutting the detail layer of the Winter Mitten die from Sea Glass cardstock and the background and cuff from Pawsitively Velvet Snow White cardstock. Before adhering the die cut pieces together, I blended Pawsitively Saturated Tidepool ink lightly around the edges of the mitten using a blending brush to add a little extra dimension to the image. I adhered all of the die cut components together using liquid adhesive.

For the background, I lightly blended the Pawsitively Saturated Tidepool ink around the edge of my white A2 card front, keeping the color very light and allowing the center of the card front to remain completely white, creating an icy effect. I also splattered the background with some sparkling watercolors for extra shimmer. Next, I die cut the gorgeous new Willow Snowflake from some shimmering iridescent white mirror cardstock. I trimmed one of the snowflakes in half and butted them right against the edge of my blended and splattered panel, adhering all three pieces with my Precision Glue Press. (That thing is amazing! It’s out of stock right now, but be sure to sign up for notifications for when it comes back in!)

I die cut the detail layer of the Snowy Greetings die set from some aqua glitter paper, cutting the background layer from some vellum to keep things nice and light. I also stamped a greeting from Simple Holiday Greetings once from Tidepool ink and then again (using my MISTI for perfect placement) using sticky embossing ink, covering it with White Satin Pearl embossing powder for extra shimmer and a custom-embossed greeting. I popped up the mitten die cut, adding the sentiment pieces with another layer of foam adhesive for a double layer to allow them to really pop. Finally, I added some Milk Glass rhinestones and snowflake confetti for lots of different sizes of “snowflake”!

Well, that’s all for my project today! I am so enjoying sitting in my new office with my holiday Pandora station and working with all of these gorgeous holiday products from Simon Says Stamp. If you haven’t started your holiday crafting yet, what are you waiting for? We are less than eleven weeks away from the big day!! Thanks so much for stopping by today, and have a marvelous day!

Filed Under: simon says stamp Tagged With: christmas, holiday, simple holiday greetings, snowy greetings, velvet, willow snowflake, winter, winter mitten

Primary Sidebar

  • Facebook
  • Instagram
  • Pinterest
  • YouTube

Favorite Shops

Secondary Sidebar

Subscribe

Enter your email address to subscribe to this blog and receive notifications of new posts by email.

Instagram
Something is wrong.
Instagram token error.
Follow
Load More

Archives

Tags

3D embossing folder alcohol markers better press birthday birthday card blog hop card kit christmas christmas card christmas tag colored pencil copic copic coloring Daniel Smith die cutting embossing folder embroidery felt giveaway holiday holiday card hot foil ink blending karin brushmarker pro layered stencil masculine my monthly hero new release no line coloring no line watercolor OLO marker olo markers original illustration pawsitively saturated rainbow shaker card slimline stamping stamptember stencil thank you thinking of you valentine's day video watercolor

Popular Posts

Simon Says Stamp Sending Cheer Blog Hop- Day 2 + Freebie + Giveaway!
Altenew October 2026 Release Blog Hop + Giveaway!
Rustic Monochromatic Stars for Christmas with Rainbow Splash!
December 2018 My Monthly Hero Blog Hop + Giveaway!
March 2020 Essentials By Ellen Blog Hop+Giveaway!
The Ton Stamps Summer Release: Day 1
Hero Arts Partners Blog Hop: Lawn Fawn!
Waffleflower July Release Blog Hop!
Simon Says Stamp STAMPtember Tim Holtz Collaboration: Festive Holidays!
The Ton Anniversary Release: Day 1!

Disclosure

Some affiliate links are used in my posts. This means that, should you click on one of my links and purchase something from that company, I will receive a small portion of the sale at no extra cost to you. I use the money earned from these sales to help maintain my blog. I so appreciate you visiting and, if you do choose to use one of my affiliate links, thank you so much for your support!
Copyright © 2026 ·Brunch Pro Theme · Genesis Framework by StudioPress · WordPress · Log in
Loading Comments...