• Skip to main content
  • Skip to primary sidebar
  • Skip to secondary sidebar

Sixth Street Sundries

Emily Midgett

  • Home
  • About Me
  • Contact
  • OLO Marker Color Swatch Chart
  • Shop

simple holiday greetings

More Colorblock Christmas with Simon Says Stamp!

September 30, 2024

This post was sponsored by Simon Says Stamp. Thanks, Simon!

Hi friends! I have some more holiday inspiration to share with you today using goodies from the Simon Says Stamp STAMPtember release. I am a huge fan of non-traditional color combinations for Christmas, color palettes that are just a few ticks off of a traditional color palette. For today’s card and gift bag set, I selected a unique coral, cranberry, plum, and navy color palette, counting on the cranberry red, sparkles, and the snowflake images to convey the holiday theme. Let’s get started with the details!

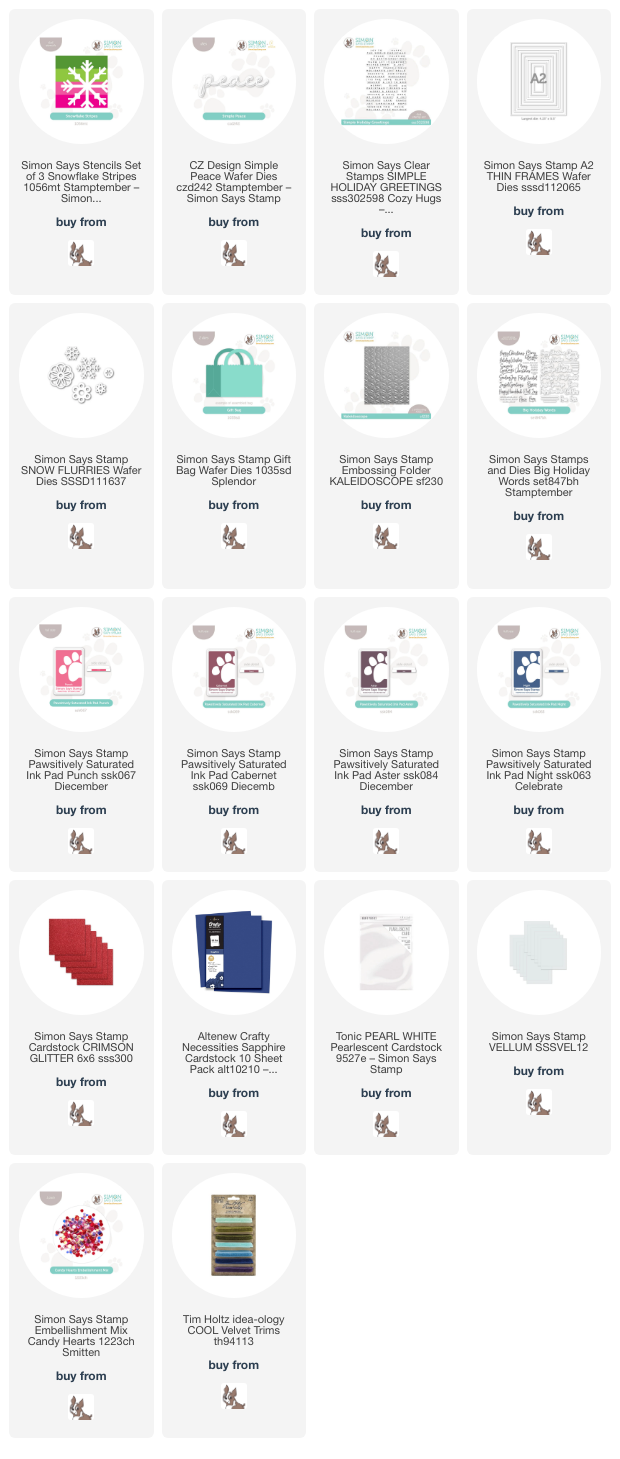
*I have linked all of the products used at the bottom of the post for your convenience using affiliate links. Thank you for shopping with my links! I truly appreciate your support for my work!*

The colorblocked imagery began with the new Snowflake Stripes Stencil from the STAMPtember product release. I have been loving the clean look of color blocking lately; you can see some more inspiration using this technique HERE. For today’s card, I selected several inks from the Pawsitively Saturated Ink line: Punch, Cabernet, Aster, and Night. I used blending brushes to blend them on the new Snowflake Stripes Stencil set on a panel of white cardstock. These ink colors work so nicely together, blending in a gradient from coral to navy beautifully!

After I had finished stenciling the color blocked snowflake, I trimmed the A2 panel down and created a shaker pocket with some leftover stamp packaging, filling it with some Candy Hearts sequins to create a flat shaker card. I nestled the shaker panel in the upper left hand corner of an A2 panel of Altenew’s Sapphire cardstock, allowing the deep blue to peek out from the bottom right hand corner.

For the greeting, I die cut the new Simple Peace die from some more deep blue cardstock, backing the detail layer with a vellum shadow layer. I also white embossed a coordinating sentiment from Simple Holiday Greetings onto some more deep blue cardstock. To embellish my shaker front, I added some pearlescent white snowflakes cut using the Snow Flurries die set as well as a glittery red frame cut using the A2 Thin Frames and Crimson glitter cardstock, all from Simon Says Stamp. I popped up the sentiment pieces with dimensional clear adhesive, then added the snowflakes in a swag down the front of the card.

I created a coordinating gift bag using the ever-versatile Gift Bag Die. This die is quickly becoming a favorite of mine; it’s the perfect size for all sorts of goodies like lip gloss, candy, gift cards, and so much more! I created the bag itself by die cutting the bag twice from more of the Sapphire cardstock and adhering it with super strong double sided tape. I continued the color blocked theme and embellished the front of the bag with strips of coordinating colored cardstock, one of which was embossed using the Kaleidescope Embossing Folder. I cut the strips down and adhered them to the front of the bag with strong double sided tape, embellishing the front of the bag with more snowflakes from the Snow Flurries die set and a greeting from the new Big Holiday Words sentiment set. A velvet bow and some tissue paper finished this gift bag off, ready to be filled with treats and gifted to a friend!

Well, that’s all for my projects today! Tomorrow is October 1, and I am thrilled to be able to share as much Christmas and holiday inspiration as my little heart desires. So many wonderful things are coming, friends! I am excited to share them with you. Thanks so much for stopping by, and have a marvelous day!
Filed Under: simon says stamp Tagged With: A2 thin frames, big holiday words, christmas, christmas card, die cutting, embossing folder, gift bag, holiday, holiday card, ink blending, kaleidescope, shaker card, simple holiday greetings, snow flurries, snowflake stripes

Warm Hands, Warm Heart!

October 12, 2023

This post was sponsored by Simon Says Stamp. Thanks, Simon!

Hi friends! I have a sweet project for you today using some of the new products from the Simon Says Stamp Season of Wonder release from last week. The new Winter Mitten die is super sweet and so generously sized that it can easily create a focal point for your project! I chose to keep things icy with aqua and iridescent white color palette to enhance the frosty feelings on my project. Let’s get started with the details!

I started by die cutting the detail layer of the Winter Mitten die from Sea Glass cardstock and the background and cuff from Pawsitively Velvet Snow White cardstock. Before adhering the die cut pieces together, I blended Pawsitively Saturated Tidepool ink lightly around the edges of the mitten using a blending brush to add a little extra dimension to the image. I adhered all of the die cut components together using liquid adhesive.

For the background, I lightly blended the Pawsitively Saturated Tidepool ink around the edge of my white A2 card front, keeping the color very light and allowing the center of the card front to remain completely white, creating an icy effect. I also splattered the background with some sparkling watercolors for extra shimmer. Next, I die cut the gorgeous new Willow Snowflake from some shimmering iridescent white mirror cardstock. I trimmed one of the snowflakes in half and butted them right against the edge of my blended and splattered panel, adhering all three pieces with my Precision Glue Press. (That thing is amazing! It’s out of stock right now, but be sure to sign up for notifications for when it comes back in!)

I die cut the detail layer of the Snowy Greetings die set from some aqua glitter paper, cutting the background layer from some vellum to keep things nice and light. I also stamped a greeting from Simple Holiday Greetings once from Tidepool ink and then again (using my MISTI for perfect placement) using sticky embossing ink, covering it with White Satin Pearl embossing powder for extra shimmer and a custom-embossed greeting. I popped up the mitten die cut, adding the sentiment pieces with another layer of foam adhesive for a double layer to allow them to really pop. Finally, I added some Milk Glass rhinestones and snowflake confetti for lots of different sizes of “snowflake”!

Well, that’s all for my project today! I am so enjoying sitting in my new office with my holiday Pandora station and working with all of these gorgeous holiday products from Simon Says Stamp. If you haven’t started your holiday crafting yet, what are you waiting for? We are less than eleven weeks away from the big day!! Thanks so much for stopping by today, and have a marvelous day!

Filed Under: simon says stamp Tagged With: christmas, holiday, simple holiday greetings, snowy greetings, velvet, willow snowflake, winter, winter mitten

Songs of the Season, August 2023: Silent Night

August 25, 2023

This post was sponsored by Simon Says Stamp. Thanks, Simon!

Hi friends! I am back with another installment of my Songs of the Season holiday series, where I use Christmas songs throughout the year as inspiration for a holiday card! This is a great way to get ahead on my holiday cardmaking by building up a little stash throughout the year so that the long list of names to whom I will send a card doesn’t seem quite so daunting come December! This month, I was inspired by that most classic of holiday songs: Silent Night. I jokingly said a few years ago, when my little boys were still babies and still up multiple times a night, that all I wanted for Christmas was a silent night. (I didn’t receive it, haha!) But the mental imagery that that song provides, of a peaceful, deep blue night sky with snowflakes gently falling to the ground, gave me some serene inspiration for today’s project. Let’s get started with the details!

One of my favorite ways to create unique projects is by stamping, or in this case die cutting, my own completely custom patterned backgrounds. I have been moving my craft room to a new space recently, and so have been “shopping” in some of my un- or under-used supplies, and I found a stash of gorgeous pearlescent colored cardstocks, including this stunning peacock teal cardstock. Tip: pearlescent or foil cardstocks die cut beautifully, especially with intricate dies like these snowflake dies for today’s project! I die cut Simon Says Stamp’s Sophie snowflake, Kate snowflake, Alicia snowflake, and Daphne snowflake dies from that pearlescent peacock teal cardstock, then turned my attention to the card base.

To create my vivid, peaceful blue background, I started by trimming down an A2 panel of Island Blue cardstock. I then blended Island Blue ink around the edges, keeping the center clean, then lightly blended some Galaxy Pawsitively Saturated Ink around the edges, keeping this dark blue area fairly subtle and right up against the edge. The combination of these two ink colors on this super saturated colored cardstock creates the most gorgeous glow! I also splattered some handmade glittery watercolors to add some shimmer to the blended background. Once my card front was dry, I began arranging my snowflake pattern, beginning with the largest snowflake die cuts, turning them so that they were falling at different angles, and trying to keep the spacing random so that the pattern would not look forced. I trimmed off the overhang, then used those leftover bits and bobs to fill in some of the edges of the card front. The combination of these steps helps to make the pattern look cohesive and continuous!

Finally, I die cut the Snowy Greetings die from some glittery turquoise cardstock. I chose this lighter shade of turquoise as a bit less saturated version of the peacock teal pearlescent cardstock, in order to ensure that it would stand out from the super vibrant background. I heat embossed a coordinating greeting from the Simple Holiday Greetings stamps using silver embossing powder on a strip of more Island Blue cardstock. I popped up the sentiment pieces with foam adhesive, then added a smattering of iridescent gems for some sparkle!

Well, that’s all for this month’s Songs of the Season post! I hope you will try using your favorite Christmas songs and carols as inspiration for your holiday cardmaking. It’s such a fun way to incorporate more music into your life, and it even gives you an excuse to listen to Christmas music all year long! Thanks so much for stopping by today, and have a marvelous day!

Filed Under: simon says stamp, Uncategorized Tagged With: christmas card, die cutting, holiday, holiday card, island blue, simple holiday greetings, snowflake, snowy greetings, songs of the season

Primary Sidebar

  • Facebook
  • Instagram
  • Pinterest
  • YouTube

Favorite Shops

Secondary Sidebar

Subscribe

Enter your email address to subscribe to this blog and receive notifications of new posts by email.

Instagram
Something is wrong.
Instagram token error.
Follow
Load More

Archives

Tags

3D embossing folder alcohol markers better press birthday birthday card blog hop card kit christmas christmas card christmas tag colored pencil copic copic coloring Daniel Smith die cutting embossing folder embroidery felt giveaway holiday holiday card hot foil ink blending karin brushmarker pro layered stencil masculine my monthly hero new release no line coloring no line watercolor OLO marker olo markers original illustration pawsitively saturated rainbow shaker card slimline stamping stamptember stencil thank you thinking of you valentine's day video watercolor

Popular Posts

Simon Says Stamp Sending Cheer Blog Hop- Day 2 + Freebie + Giveaway!
Altenew October 2026 Release Blog Hop + Giveaway!
Rustic Monochromatic Stars for Christmas with Rainbow Splash!
December 2018 My Monthly Hero Blog Hop + Giveaway!
March 2020 Essentials By Ellen Blog Hop+Giveaway!
The Ton Stamps Summer Release: Day 1
Hero Arts Partners Blog Hop: Lawn Fawn!
Waffleflower July Release Blog Hop!
Simon Says Stamp STAMPtember Tim Holtz Collaboration: Festive Holidays!
Honey Bee Stamps Autumn Blessings Blog Hop-Day 2!

Disclosure

Some affiliate links are used in my posts. This means that, should you click on one of my links and purchase something from that company, I will receive a small portion of the sale at no extra cost to you. I use the money earned from these sales to help maintain my blog. I so appreciate you visiting and, if you do choose to use one of my affiliate links, thank you so much for your support!
Copyright © 2026 ·Brunch Pro Theme · Genesis Framework by StudioPress · WordPress · Log in
Loading Comments...