• Skip to main content
  • Skip to primary sidebar
  • Skip to secondary sidebar

Sixth Street Sundries

Emily Midgett

  • Home
  • About Me
  • Contact
  • OLO Marker Color Swatch Chart
  • Shop

sea glass

Happy Retirement with Leftover Die Cuts from Simon Says Stamp!

June 11, 2025

This post was sponsored by Simon Says Stamp. Thanks, Simon!

Hi friends! I am back today with a project using the leftover “happy” cover plate die cut that I created for THIS card. Because I was using specialty iridescent mirror cardstock, I wanted to make sure that I used as much of the cardstock as possible, and so created a project with the negative die cuts as well as the positive die cuts. For today’s project, I created a serene retirement card using a variety of shades of turquoise to complement my shimmery iridescent white die cut. Let’s get started with the details!

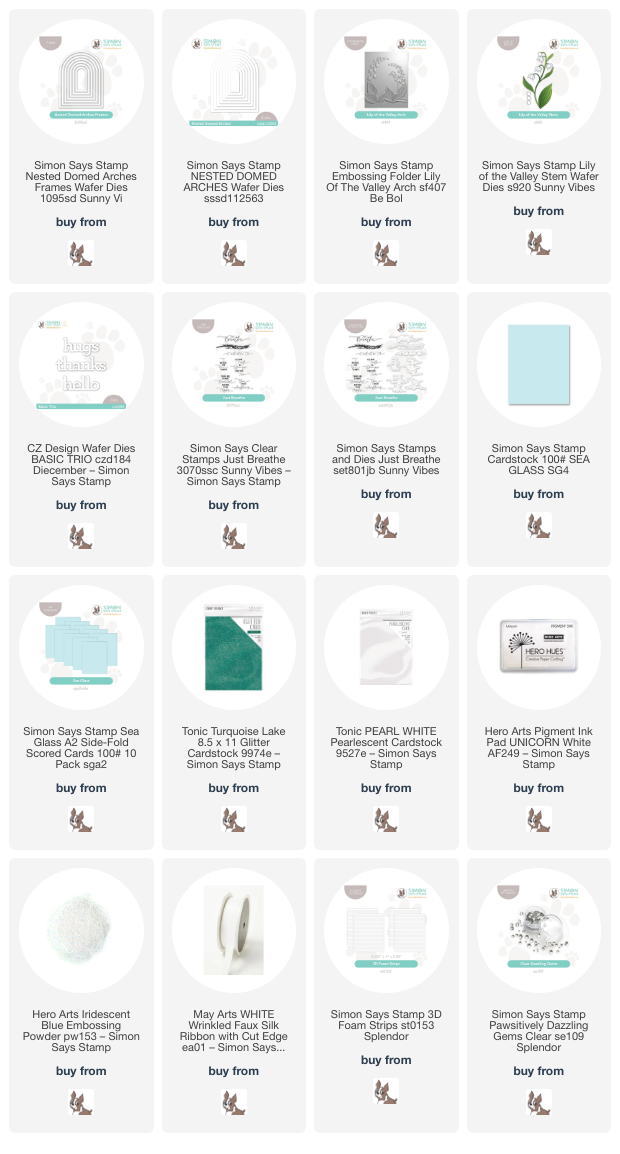
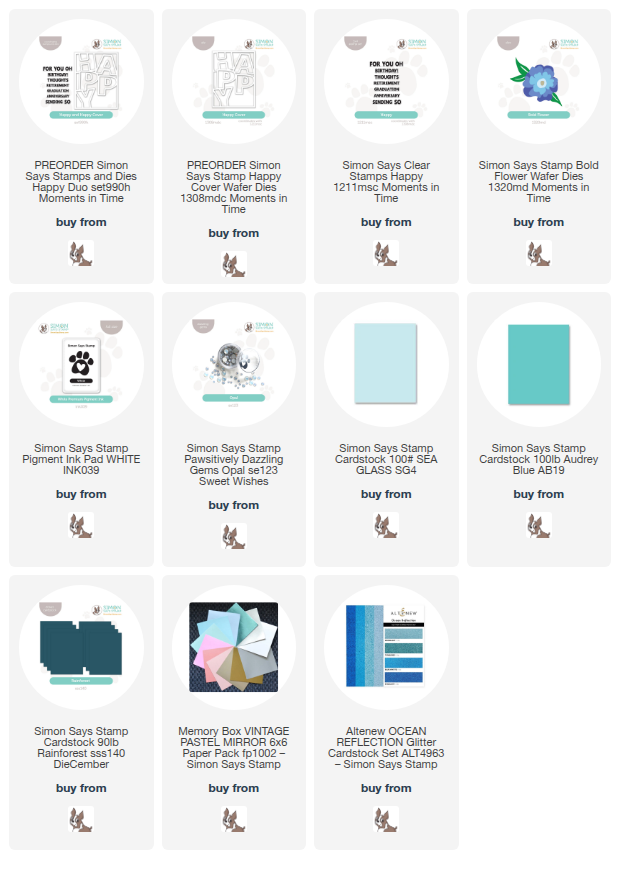
*I have gathered links to all of the products used at the bottom of the post for your convenience, using affiliate links. Thank you for shopping with my links! I truly appreciate your support for my work!*
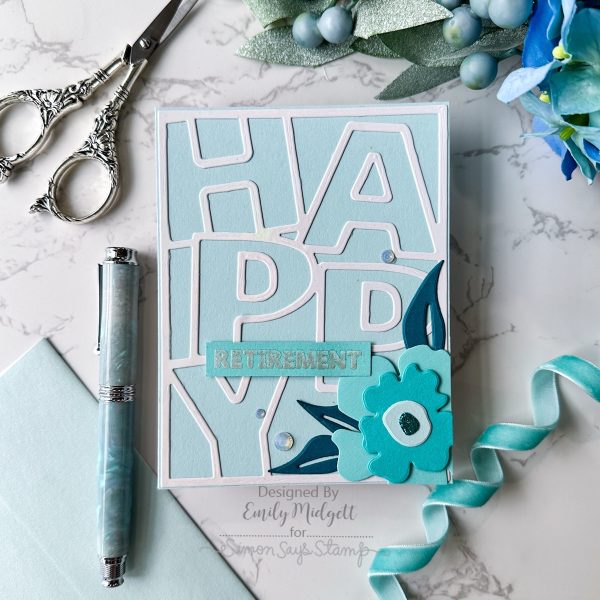
To begin, I used some pearlescent white mirror foil cardstock to die cut the new Happy Cover die. I reserved the positive pieces for the card linked above, then adhered the negative single die cut to an A2 panel of Simon Says Stamp Sea Glass cardstock using liquid adhesive. I also stamped a coordinating sentiment from the Happy stamp set onto a strip of Audrey Blue cardstock using Simon Says Stamp White Pigment Ink, then added White Satin Pearl embossing powder over the top to add a lovely pearlescent sheen.
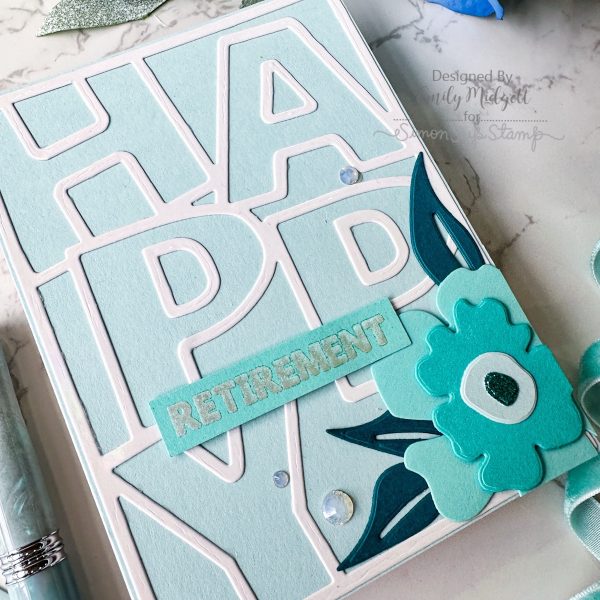
Because the sentiment takes up such a large portion of the card front, I created a coordinating turquoise Bold Flower die cut and nestled it in the corner of the card front, trimming off the excess with my sharp scissors. To keep the color palette cohesive throughout the card, I used the same Sea Glass and Audrey Blue cardstocks, along with another medium shade of turquoise as well as a glittery flower center.
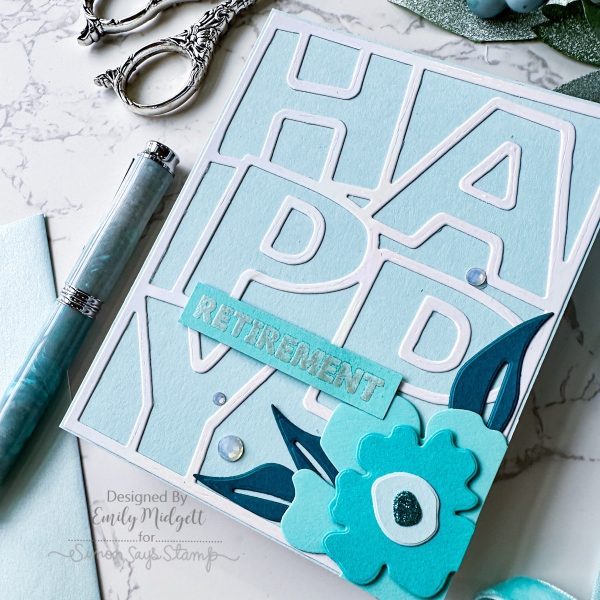
After I had created all of the elements of the card, I adhered the die cut floral and the sentiment strip to the card front using foam adhesive, finally adding some extra sparkle to this elegant card with a smattering of Opal Pawsitively Dazzling Gems.

Well, that’s all for my project today! I love when I can use all of the parts of a die cut to create multiple projects, don’t you? Thanks so much for stopping by today, and have a marvelous day!
Filed Under: simon says stamp Tagged With: audrey blue, bold flower, die cutting, happy cover, happy duo, retirement, sea glass, white satin pearl

Bridgerton Week Begins!

July 8, 2024

This post was sponsored by Simon Says Stamp. Thanks, Simon!

Hi friends! So, like lots of people, I have been eagerly awaiting the newest season of the Bridgerton series on Netflix. I have not read the books, but disappearing into the colorful and romantic Bridgerton world provides a few hours of pleasant diversion from the day to day. I happened to be sick when the first part of the season came out, which provided a welcome distraction from being sick. The fashion is one of the reasons that I love watching Bridgerton; I always find lots of inspiration from fashion in general, but the elegant color palettes and elements of sparkle and shimmer in the Bridgerton world are right up my alley. The Bridgerton ladies frequently wear shades of blue, and flowers are everywhere throughout the series, so I thought I would devote my blog posts this week to projects that are inspired by the fashions of Bridgerton! I have a pair of cards using two different Lily of the Valley products from Simon Says Stamp, so let’s get started with the details!

The Bridgerton Family’s “family color” is blue in all varieties and mixtures, whether it is rich French blue to a paler, more pastel aqua to elegant hyacinth purple. I chose to focus my attentions on one of my most favorite shades today: Simon Says Stamp’s Sea Glass. This shade of pale pool blue is the most perfect color, in my opinion, working beautifully as the main color for a lighter color palette or as an accent color. It was the perfect back drop for some beautiful lily of the valley blooms, created using both the older Lily of the Valley Embossing Folder and the new Lily of the Valley die.

For my first project, I paired the new Nested Domed Arches Frames with their companion solid Nested Domed Arches dies. I die cut a large solid die from some white pearl cardstock, then ran the panel through my die cutting machine using the Lily of the Valley Embossing Folder. This coated specialty cardstock works beautifully with these detailed embossing folders to create incredible detail with a hint of shimmer! I also die cut a coordinating arch frame from some turquoise glitter cardstock using the Nested Domed Arches Frames. I used some thin foam strips to add dimension to the delicate glittery frame, then adhered both arched pieces to the center of an A2 Sea Glass folded card using liquid adhesive.

For the greeting, I created a coordinating turquoise sentiment using a greeting from Just Breathe, stamping it first on turquoise cardstock using white pigment ink, then again with embossing ink, finally adding some beautiful Iridescent Blue embossing powder for extra shimmer iridescent sparkle. I die cut the sentiment with its coordinating die and popped it up over the embossed background with some more foam adhesive. Finally, I used a coordinating Copic marker to add some pretty pale aqua to a length of white faux silk ribbon, which I tucked beneath the die cut sentiment. Finally, I adhered a smattering of Clear Pawsitively Dazzling Gems for added sparkle!

For my second card, I decided to create a sweet sprig of flowers using the Lily of the Valley die that reminded me very much of the delicate floral designs throughout the Bridgerton homes and clothing. I die cut the Nested Domed Arches Frames from some turquoise glitter cardstock and adhered it to the center of another Sea Glass folded card. I used some beautiful deep jade and white pearl cardstock to die cut the elements of the Lily of the Valley die. I did create two different floral sprigs, then did some creative trimming to create this one lush bouquet of flowers, which I adhered in the center of the glittery arch.

For the greeting, I die cut the “hugs” from the Basic Trio dies and heat embossed another sentiment from Just Breathe onto some more deep jade cardstock in order to create a custom sympathy/ thinking of your sentiment. I adhered them with a double layer of foam adhesive, then added a thin white silk bow beneath to create a “bouquet” effect. I finally added a few Clear Pawsitively Dazzling Gems for some more sparkle and shine!

Well, that’s all for my projects today. Have you watched Bridgerton? The storyline is not the most intellectually stimulating one that I’ve ever experienced, but it is certainly entertaining and full of visual inspiration! I have more projects in mind featuring Bridgerton inspiration, so stay tuned! Thanks so much for stopping by today, and have a marvelous day!

Filed Under: simon says stamp Tagged With: bridgerton, folded cards, just breathe, lily of the valley, lily of the valley embossing folder, nested domed arches, nested domed arches frames, sea glass

Snowflakes in a Shaker!

October 16, 2023

This post was sponsored by Simon Says Stamp. Thanks, Simon!

Hi friends! I am back from a weekend with some of the smartest and most creative crafty ladies in the industry, and I am so creatively charged! I am in full-blown holiday mode, and I will be unabashedly listening to holiday music and creating holiday cards as much as I can for the next 10 weeks. To that end, I have a project to share with you today which you might have seen during the Simon Says Stamp Season of Wonder Livestream. (If you haven’t watched one of the release livestreams, they’re SO fun! They go through lots of the products, and Heidi gives snippets about their creators and shares lots of inspiration using the products. They also always do fun giveaways!! You should keep your eyes open for them if you aren’t already!) I can’t seem to resist snowflakes, because it gives me free rein to use as many sparkles and soft pastels as my heart desires, and this card definitely fits those descriptors. Let’s get started with the details!

Disclaimer before we get started: the spectacular new Willow Snowflake Die is currently sold out. I highly, highly encourage you to sign up for email notification for when it comes back in stock, because I would not be surprised if it goes out of stock again very quickly. This die is marvelous because not only does it feature the detail layer, but it also features a “bubble” layer: a solid, slightly larger background that you can combine with the detail layer to create a focal point on your card front.

To create this simple-but-elegant shaker card, I began by die cutting the Willow Snowflake Die‘s “bubble” layer from the center of a panel of Sea Glass cardstock, then backed it with a panel of clear acetate, creating my shaker window. I added the glittering Willow Snowflake Die die cut detail layer, cut from coordinating pale aqua glitter cardstock, to the center of the acetate window using liquid adhesive. Before filling my shaker up with sequins, I trimmed the panel down slightly so that I could mat it on a full sized A2 card front.

After I had finished creating my shaker window, I used foam adhesive strips to create the seal around my window and then filled my shaker with lots of shimmering sequins. After my shaker was complete, it was time to add a sentiment. I stamped the greeting from Wintertime Critters on Sea Glass cardstock using Tidepool Pawsitively Saturated Ink. To create the custom embossing color, I stamped the sentiment again using sticky embossing ink, then sprinkled White Satin Pearl embossing powder over the top and heated it, creating a pearlescent aqua tone-on-tone sentiment. I popped the greeting up with some foam adhesive to help it stand out from the monochromatic background, then added some Sea Glass Gems on the points of the snowflake for one last touch of elegant sparkle.

Well, that’s all for my project today! Do you love to make shaker cards like I do? I feel like shaker cards are so appropriate and so much fun for holidays, and they can be whimsical or elegant. Such a versatile technique! Thanks so much for stopping by today, and have a marvelous day!

Filed Under: simon says stamp Tagged With: sea glass, shaker card, willow snowflake, wintertime critters

Primary Sidebar

  • Facebook
  • Instagram
  • Pinterest
  • YouTube

Favorite Shops

Secondary Sidebar

Subscribe

Enter your email address to subscribe to this blog and receive notifications of new posts by email.

Instagram
Something is wrong.
Instagram token error.
Follow
Load More

Archives

Tags

3D embossing folder alcohol markers better press birthday birthday card blog hop card kit christmas christmas card christmas tag colored pencil copic copic coloring Daniel Smith die cutting embossing folder embroidery felt giveaway holiday holiday card hot foil ink blending karin brushmarker pro layered stencil masculine my monthly hero new release no line coloring no line watercolor OLO marker olo markers original illustration pawsitively saturated rainbow shaker card slimline stamping stamptember stencil thank you thinking of you valentine's day video watercolor

Popular Posts

Simon Says Stamp Joy For You Blog Hop- Day 1!
Simon Says Stamp Joy For You Release-Now Available!
Frozen Fractals All Around with New Simon Says Stamp Joy For You Release!
Shaped Holiday Shaker Card with New Simon Says Stamp Jolly Season Card Kit of the Month!
Holiday Postage with New Simon Says Stamp!
Simon Says Stamp Glory to the Newborn King Holiday Kit-Part II!
Altenew Build A Flower: Fuchsia Blog Hop+Giveway!
Holiday Joy in Pink and Green with New Simon Says Stamp DieCember!
Pinkfresh Studio 5th Birthday!
Honey Bee Stamps September Release Blog Hop!

Disclosure

Some affiliate links are used in my posts. This means that, should you click on one of my links and purchase something from that company, I will receive a small portion of the sale at no extra cost to you. I use the money earned from these sales to help maintain my blog. I so appreciate you visiting and, if you do choose to use one of my affiliate links, thank you so much for your support!
Copyright © 2026 ·Brunch Pro Theme · Genesis Framework by StudioPress · WordPress · Log in
Loading Comments...