• Skip to main content
  • Skip to primary sidebar
  • Skip to secondary sidebar

Sixth Street Sundries

Emily Midgett

  • Home
  • About Me
  • Contact
  • OLO Marker Color Swatch Chart
  • Shop

A2 masks

Using Simple Masks to Create Small Scenes!

May 9, 2024

This post was sponsored by Simon Says Stamp. Thanks, Simon!

Hi friends! I have a pair of princess projects using the absolutely darling Once Upon A Time stamp set designed by the incredibly talented Alberto Gava. This stamp set features so many of our favorite fairytale princesses and accessories to visually tell their stories! I have mentioned in previous posts that I have difficulty building scenes with “cute” sets like this; for some reason, my brain finds it difficult to build a design on a completely blank canvas. However, I have found a way to overcome this difficulty with the diffferent masks and stencil sets from Simon Says Stamp. I can use these masks to “shrink” the canvas, which helps me concoct the little scenes a bit more easily. Let’s get started on the details for my projects!

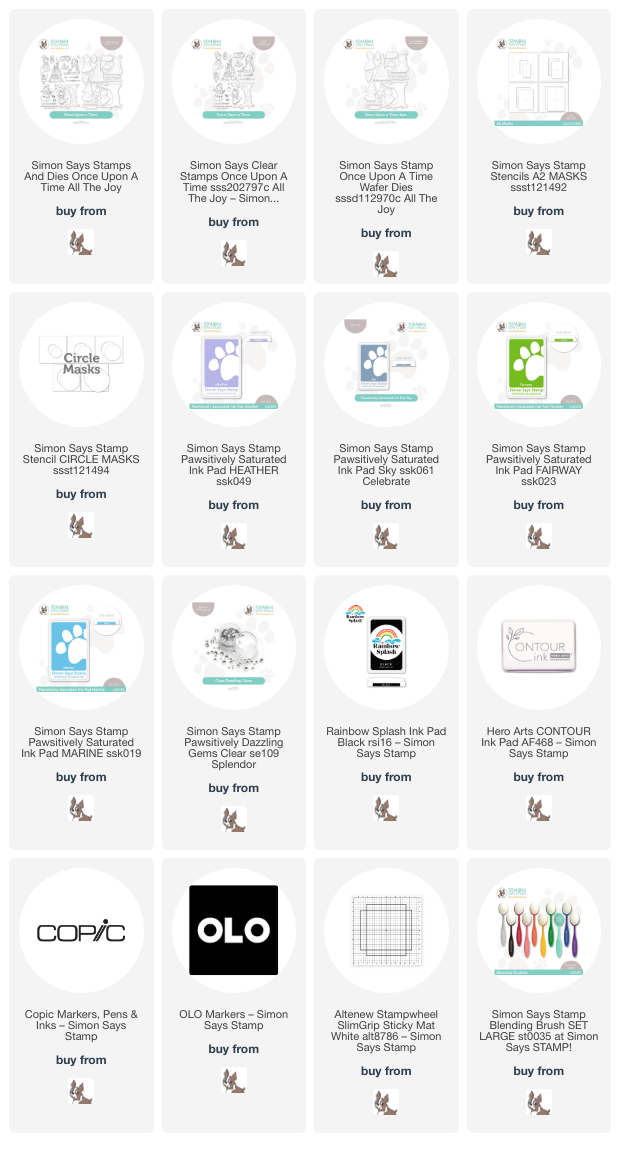
For both of my projects, I stamped several of the images from the Once Upon A Time set, creating elements for a Cinderella scene and a Rapunzel scene. As a super girly mom of three boys and one girl, I am so glad that my daughter loves princesses as much as I do! In fact, she told me that she was stealing this stamp set from me when I was finished with it, the stinker. I stamped the images from Rapunzel using Rainbow Splash Black ink from Simon Says Stamp, and Contour Ink for the Cinderella images so that I could do both outline and no-line coloring. I used both Copic and OLO markers for these images; the OLO color palette fills some of the holes in the Copic color spectrum very nicely, particularly in the purple range!

For my Cinderella card, I placed one of the Circle Masks stencils on my A2 white card front, offsetting the stencil slightly to create a balance the large castle image that I had stamped and colored. I used a sticky mat to keep my stencil in place while blending; these tools make it super simple to create stenciled images without having to worry about your stencils shifting while blending! I used blending brushes to blend Heather and Sky Pawsitively Saturated Inks on my background, also splattering the masked area with some glittery handmade watercolors.

After I had finished blending and splattering my background, I used the same glittery watercolors to add some shimmering details to Cinderella’s dress. (Do you follow @hnicholsillustration on Instagram? If not, you totally should… her illustrations are phenomenal. She adds metallic accents to her dresses all the time and they look marvelous!) I arranged my die cuts on the card front, using the blended circle to ground my little scene, and I popped them all up using foam adhesive for extra dimension and interest, adding a black embossed die cut greeting with a double layer of foam tape to help it pop. Finally, I added some Clear Pawsitively Dazzling Gems for extra sparkle!

For my second card, I used a brighter color palette, in keeping with the bright cheerfulness that exudes from the Rapunzel character in Disney’s Tangled. I centered one of the A2 Masks stencils on my A2 white card front, then used blending brushes to blend Fairway and Marine inks, giving the illusion of both grass and sky behind my die cuts. This is a super simple way to trick your recipient into “seeing” that background without having to go to the trouble of drawing individual pieces of grass!

I arranged the die cuts on my blended background, allowing them to spill over the edges of the blended areas a bit to keep things interesting. I tucked the stamped and die cut sentiment beneath the tree, finally finishing everything off with some Clear Pawsitively Dazzling Gems for extra sparkle!

Well, that’s all for my projects today. You might see some more projects using this set from me, but then again you might not…. my daughter has taken custody of it, and I will have to try to get it back from her, lol! Thanks so much for stopping by today, and have a marvelous day!
Filed Under: simon says stamp Tagged With: A2 masks, circle masks, copic coloring, ink blending, no line coloring, OLO marker, once upon a time, pawsitively dazzling, pawsitively saturated, stencil

Sweet Snowman Hugs for 2024!

January 2, 2024

This post was sponsored by Simon Says Stamp. Thanks, Simon!

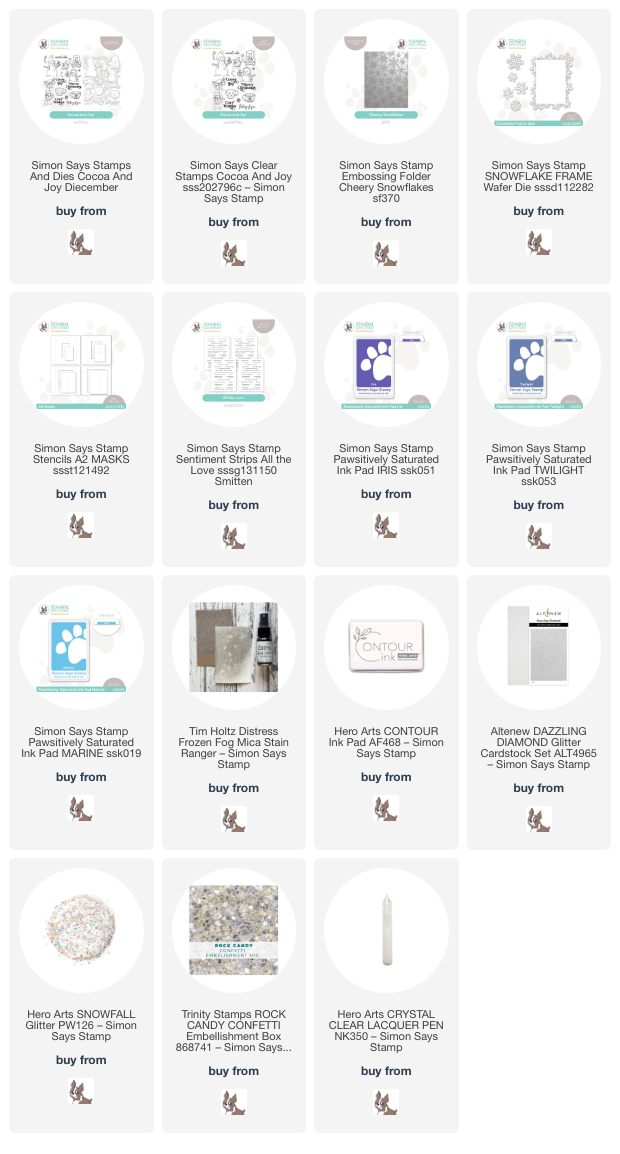
Hi friends! Happy New Year! I am flabbergasted that we are already at the dawn of a new year; I sometimes still feel like I haven’t finished processing 2020! Anyway, I have a project featuring some gorgeous newer products from Simon Says Stamp, perfect for those icy days that we’ve been experiencing after the warmth that we had on Christmas Day. We even woke up to a bit of snow on the ground last week…. as you can imagine, my kiddos were beside themselves with joy even if the snow only lasted until 10 am! For today’s project, I paired the utterly precious Cocoa and Joy stamps and dies with the new Cheery Snowflakes embossing folder. Let’s get started with the details!

To start my project, I stamped the adorable snowman from Cocoa and Joy (which is back in stock- HOORAY!!! Right?) onto some Hammermill white cardstock using Contour Ink. I used my Copic markers to add some subtle shading on the “white” snowman, giving him a vivid blue hat and scrumptious-looking hot cocoa! I used a fine tip black pen to enhance some of the finer details on the snowman, like the steam from the hot chocolate, his smile, and his little poufs on his hat. I die cut the finished image with the coordinating die, as well as one of the sentiments. For a finishing touch, I also added some black gems for his “coal” buttons and eyes.

For the background, I began by masking off the center of a panel of white cardstock using a stencil from the A2 Stencils and Masks set. I then used blending brushes to blend Iris, Twilight, and Marine Pawsitively Saturated inks in the open area on the white cardstock. While the stencil was still in place, I spritzed the finished background with Frozen Fog Mica Spray to add some extra wintry-looking shimmer behind my snowman. Once my blended and shimmering background was dry, I removed the stencil and ran the entire panel through my die cutting machine using the Cheery Snowflakes embossing folder from the Smitten release!

After I had adhered my snowman to my embossed background using foam tape, I wanted to add some sparkling snowflakes to enhance the icy feeling of the card. I die cut the standalone snowflakes from the Snowflake Frame dies from some Dazzling Diamond glitter cardstock. I tucked the snowflakes behind snowman on the blended area, allowing the white frame to draw the eye to the snowman. I added some extra sparkly glitter “snow” using Clear Lacquer and Snowfall Glitter from Hero Arts. For the greeting, I added the stamped greeting die cut from Cocoa and Joy and a coordinating sentiment strip from the All the Love sentiment cards pack. I added a few shimmering confetti for one last addition of snowy texture and sparkle!

Well, that’s all for my project today! I hope your 2024 is off to an amazing start! Thanks so much for stopping by today, and have a marvelous day!

Filed Under: simon says stamp Tagged With: A2 masks, all the love sentiment strips, cheery snowflakes, cocoa and joy, copic, copic coloring, ink blending, mica stain, no line coloring, snowflake, snowman

Primary Sidebar

  • Facebook
  • Instagram
  • Pinterest
  • YouTube

Favorite Shops

Secondary Sidebar

Subscribe

Enter your email address to subscribe to this blog and receive notifications of new posts by email.

Instagram
Something is wrong.
Instagram token error.
Follow
Load More

Archives

Tags

3D embossing folder alcohol markers better press birthday birthday card blog hop card kit christmas christmas card christmas tag colored pencil copic copic coloring Daniel Smith die cutting embossing folder embroidery felt giveaway holiday holiday card hot foil ink blending karin brushmarker pro layered stencil masculine my monthly hero new release no line coloring no line watercolor OLO marker olo markers original illustration pawsitively saturated rainbow shaker card slimline stamping stamptember stencil thank you thinking of you valentine's day video watercolor

Popular Posts

Simon Says Stamp October 2026 Card Kit of the Month: Homespun Gratitude!
Honey Bee Stamps Cheerful Love Blog Hop!
Altenew Craft A Flower: Poppy Blog Hop+Giveaway!
Autumn Legs with Colorado Craft Company and Catherine Pooler!
Simon Says Stamp Cozy & Bright Inspiration, Part Two!
February 2018 My Monthly Hero Blog Hop!
The Ton Anniversary Release- Day 2
Sunflower Home Decor with Simon Says Stamp!
Simon Says Stamp STAMPtember Surprise: Boo Bundle Halloween Card Kit!
Hero Arts Spring 2020 Catalog Release Blog Hop+Giveaway!

Disclosure

Some affiliate links are used in my posts. This means that, should you click on one of my links and purchase something from that company, I will receive a small portion of the sale at no extra cost to you. I use the money earned from these sales to help maintain my blog. I so appreciate you visiting and, if you do choose to use one of my affiliate links, thank you so much for your support!
Copyright © 2026 ·Brunch Pro Theme · Genesis Framework by StudioPress · WordPress · Log in
Loading Comments...