• Skip to main content
  • Skip to primary sidebar
  • Skip to secondary sidebar

Sixth Street Sundries

Emily Midgett

  • Home
  • About Me
  • Contact
  • OLO Marker Color Swatch Chart
  • Shop

alcohol ink

Introducing: Boughs of Holly-Holiday Coloring Panels!

October 11, 2022

Hi there! It’s been a bit quiet around here lately, because I have been busy behind the scenes working on some fun new things, including this new holiday coloring panel set, called Boughs of Holly! I love combining unusual flowers with traditional “Christmas flowers” in holiday designs, so I made sure to provide both some traditional poinsettias and holly with some hellebore, anemeones, and ranunculus, all kept cohesive with lots of berries and foliage.

I have created four unique panels using these traditional and non-traditional flowers. I kept the flowers large (gotta make things fun to color!) so all you have to do is add a simple sentiment or sentiment die cut, and you have a holiday card that is easy to mail and full of handmade details!

The panels pictured were printed on the Jack Richeson watercolor paper using the no-line version of the panels, which prints a light gray outline. I painted these with Daniel Smith watercolors, and the paper held up beautifully to many (many, many) layers of watercolors and quite a lot of water! I have been very pleased with how well this lighter weight paper holds up to my relatively intense watercoloring.

You might recognize the full poinsettia background arrangement; I used one of the corner images from last year’s panels to create a full, super detailed background panel! I love how festive these images are, even using the non-traditional holiday flowers!

I also am offering the Lo, How A Rose E’er Blooming panels, released last year, for sale again!

These panels feature more non-traditional holiday flowers, including magnolia, anemone, amaryllis, and of course, a poinsettia, with lots of foliage and berries to keep things super festive!

All of the coloring panels are available on your choice of lightly textured watercolor paper or alcohol-marker friendly paper, printed in outline or no-line style to accomodate your choice of coloring method.

Here are the details:

  • Pricing:
    Copic-friendly white cardstock-$9
    Watercolor paper-$10
    Shipping is included in the continental US for up to 3 sets of panels (twelve total A2 sheets). A surcharge of $3 will be added for four or more sets.
    International friends: add $4 to accommodate international postage (this may be increased slightly if more than two sets of panels are ordered to accommodate for the increased weight of the envelope.) Sorry, no tracking available on these, and international mail seems to be exceptionally unreliable these days, so I can’t guarantee how quickly they will arrive, unfortunately.
  • You will receive 4 panels in each set-one of each for four individual designs.
  • To purchase: please indicate which set(s) you would like, whether you would like outline or no-line printing, paper choice (i.e.-Copic-friendly white cardstock or watercolor paper), and whether you are located within the US or internationally. I will then send you an invoice via PayPal, to please be paid within 24 hours of receipt.
  • I will leave the preorders open for one week, until October 19, 2022. It’s just me printing, trimming, and shipping, so please allow 2 additional weeks for processing and shipping. I have four young kids here; please be patient with me! 
  • ***In purchasing these coloring panels, you agree that you will use the designs for personal use only. The designs belong to me, Emily Midgett, and are not to be copied or used for commercial gain. I appreciate your support in keeping my artwork safe!***

To order: email me at eamidgettsketches (at) gmail.com, and please be sure to include all of the information requested above!

Thank you so much for the support and kind words on my artistic venture! I appreciate each of you who have ordered previously, shared my panels on your social media, or offered a supportive comment so very much. You’re helping me to support my family in these stressful economic times, and for that I cannot offer enough thanks.

Have a marvelous day!

Filed Under: coloring panels Tagged With: alcohol ink, christmas, coloring panels, copic coloring, Daniel Smith, for sale, holiday, original illustration, watercolor

Man Card Monday, a day late!

April 30, 2019

Hi there! This month’s Man Card Monday comes on a Tuesday, sorry about that. I didn’t want to distract from the Pinkfresh Studios release yesterday! (You can check out that blog post and enter to win the entire new release here.) Today’s Man Card Monday is an ocean-themed Father’s Day card using some fabulous supplies from Hero Arts, so let’s get started with the details!

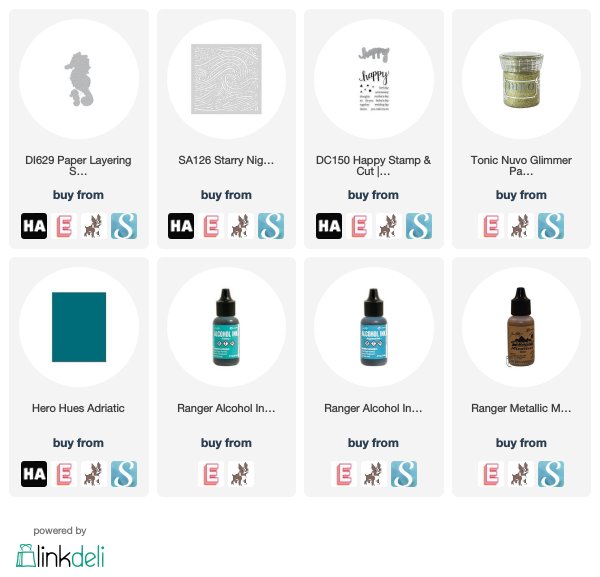
This Man Card Monday was inspired by this fabulous seahorse die set from the My Monthly Hero Add-Ons from a few months ago. Male seahorses actually carry and give birth to the baby seahorses, so I thought they would be a perfect focal point for a Father’s Day card! I began by die cutting some of the Paper Layering Seahorses from some Adriatic card stock. My husband and I have twins (though he most certainly didn’t carry and birth them haha!), so I die cut an extra little baby seahorse to give the daddy seahorse his own set of twins!

For the background, I created a swirling alcohol ink panel using teals and gold, then added some gold glitter paste using the Starry Night stencil. While that was drying, I die cut the “happy” 4x from the Happy Stamp and Cut using gold vellum, then adhered them all together to make a dimensional die cut. I also heat embossed the “father’s day” onto a strip of white card stock using gold embossing powder.

Once the glitter paste was dry, I used foam tape to adhere the die cuts and greeting to the card front in a cluster. I know, it’s a little more glitter than you would normally think of for a “man card,” but I couldn’t resist adding that extra bit of texture to the alcohol ink background! Texture paste, to me, is a bit messy, and so of course that works on a guy card. (ha!)

Well, that’s all for April’s Man Card Monday. I hope you’re enjoying the series and finding some inspiration for those forever-difficult “man cards.” Thanks so much for dropping by today, and have a marvelous day!

Filed Under: Hero Arts, Man Card Monday Tagged With: alcohol ink, father's day, stencil, texture paste

Honey Bee Stamps 4th Anniversary Celebration!

April 19, 2019

Hi there! If you follow me on Instagram, you’ll know that I’ve been sneaking peeks of Honey Bee Stamps‘s release. This release is a doozy… over 50 new products being debuted… and it’s super appropriate, because it’s their 4th Anniversary! Four years of Honey Bee goodness! I am so proud of how much Honey Bee Stamps has grown, and so honored to have been part of Melissa’s Design Team for almost two years now! I seriously am so lucky to be able to work with so many wonderful people in this industry, and Melissa is on one of my absolute favorites!

There’s a huge blog hop going on today and tomorrow (my “official” blog hop post is tomorrow), but I created so many projects using the new goodies in this release that I thought I’d spread the details about them out over two posts! This post will be long, with lots of pictures, but that’s just how much I have to show you!! 🙂 Let’s get started!

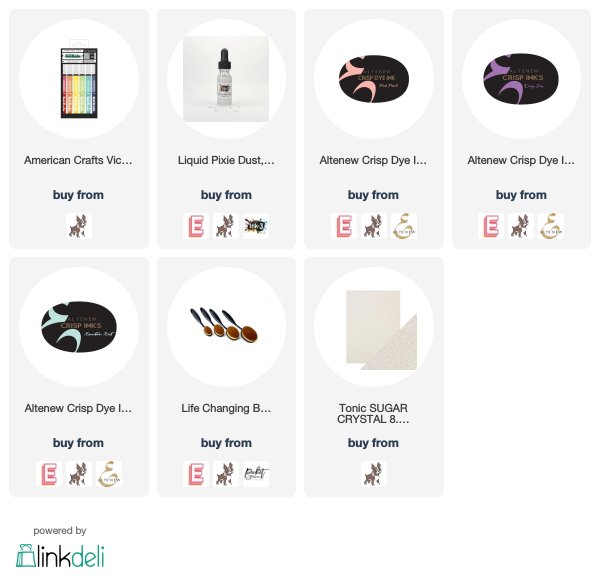
For my first project, I wanted to create a birthday card using the fantastic new Balloon Bunch dies. These are a set of nested dies, with two different shapes included in the die set, and they range from teeny tiny to gigantic! I die cut a bunch of them from some watercolor paper, then used Vicki Boutin’s Watercolor Brush Markers (such gorgeous, vibrant colors in this watercolor set!) to watercolor the solid balloons in a pretty mint, jade, pink, and fuchsia color scheme! I also added a generous layer of Ink On 3’s Pixie Dust to each ballon to make them super festive.

Next, I blended some pretty purple, pink, and mint inks on a white A2 card using blending brushes, layered my die cut balloons over the top, and adhered them with foam tape. I also die cut a glittery white “birthday” using the new Birthday Honey Cuts die. I white embossed a coordinating greeting from the new Happy Birthday stamp set onto some strips of vellum. (So many cute sentiments in that stamp set! Definitely a must have.) The final touch was some jewels and Nuvo drops.

For my second project, I used the absolutely stunningly detailed new Mandala die. I die cut the Mandala from some beautiful gold card stock, then layered it on an alcohol ink background that I had in my stash. (I like to make a bunch of them at once and then have them on hand for a quick background!) I stamped the greeting from Thanks a Bunch using Brass embossing powder onto some heavyweight vellum, then fussy cut around the edges.

The final touch was a few gems around the edge of the intricate Mandala die cut.

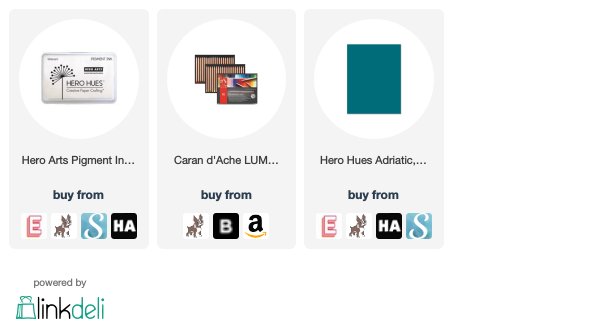
I saved my favorite for my final project today… Y’all know I’m a sucker for anything peony, and these new Spring Peony stamps from today’s release immediately claimed my attention as soon as I received my package. They’re gonna be awesome in any medium. For today, however, I decided to put my Luminance pencils to use. I absolutely love the look of colored pencils on colored card stock to create a seamless, almost screen-printed look, so I stamped several of the blooms and foliage from Spring Peony onto some beautiful teal card stock using white pigment ink, then colored them with my C’aran D’ache Luminance colored pencils.

I wanted to keep that deep teal background, allowing the peonies to be some bright pops of saturated color, which was accomplished by coloring the flowers on the same shade of teal card stock, then die cutting them and layering them on my teal background. I also die cut one of the new Double Stitched Polygon dies from that same teal card stock and popped it up on the teal card base using foam tape.

I die cut the white “bloom” from the new Bloom Honey Cuts and added the rest of the sentiment from the Bloom stamp set on strips of white card stock. I arranged the flowers on one side of the Double Stitched Polygon die cut, then adhered them and the greeting components using liquid adhesive. The final touch was a few jewels for sparkle!

Well, that’s all for my projects today. Be sure to stop by the Honey Bee Stamps blog to get linked up to Day 1 of the Blog Hop. (Psst… There are prizes to be had!!!) And don’t forget to come back here tomorrow for Day 2 for even more inspiration using the newest release from Honey Bee Stamps! Thanks so much for stopping by today, and have a marvelous day!

Filed Under: heat embossing, Honey Bee Stamps Tagged With: alcohol ink, balloons, luminance pencils, mandala, peonies, vicki boutin

Concord and 9th Feature Friday, Volume 3!

August 24, 2018

Good morning! Today is the third installment of the Where Creativity Meets C9‘s Feature Friday for Concord and 9th’s 3rd Birthday Month! Today, we are focusing on the absolutely gorgeous Leaf Turnabout stamp and die set! There have been so many gorgeous examples of projects using the Leaf Turnabout stamp set that I wanted to focus on the beautiful details maple leaf die set that coordinates with the stamp set. Let’s get started with the details!

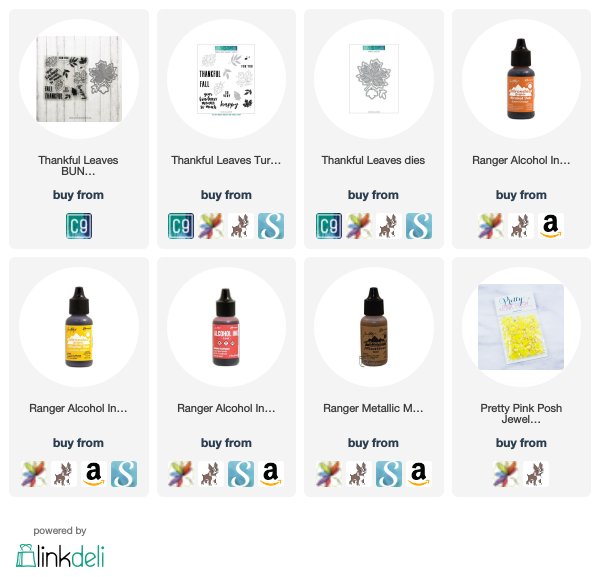
To begin, I die cut the intricate vein and frame portion of the Thankful Leaves die set from some gold glitter card stock. I had initially thought that I would use just solid colored card stock to back my leaf, but it was just a bit bland for my taste. I have several alcohol ink panels already made up (I like to spend an hour or two just playing with my alcohol inks, which results in a nice little pile of backgrounds waiting to be put to use!), so I die cut the solid leaf from an orange and gold panel. I love how the colors of the alcohol inks swirl and meld with each other, definitely reminiscent of the colors on an autumn leaf.

After die cutting the solid leaf from the alcohol ink panel, I decided that the veined frame covered up too much of the pretty mottled alcohol ink pattern and decided to place it back within the negative space of the full panel. I adhered the whole thing to a panel of plain card stock to keep everything in place, then adhered the veined frame to cover the die cut lines. I heat embossed the sentiment from the Leaf Turnabout using gold embossing powder onto some heavy weight vellum, then adhered both sentiment strips to the card front using liquid adhesive. Thankfully, the chunky font used on the sentiments allowed for me to easily hide the adhesive behind the letters.

The final step was to add some jewels from Pretty Pink Posh for some more sparkle.

Well, that’s all for me today! Remember, you still have some time left this month to get your project in to the linkup for the Where Creativity Meets C9 challenge. This month’s theme is Anything Goes, so pull out your favorite Concord and 9th stamp set, create a project, link it up here, and you could be eligible to win a $25 shopping spree to Concord and 9th! (Please be sure to read all of the rules for eligibility so if you’re chosen, you’re not disqualified!)

Thanks so much for dropping by today, and have a marvelous weekend!


Filed Under: Concord and 9th, Where Creativity Meets C9 Tagged With: alcohol ink, challenge, feature friday, turnabout

Honey Bee Stamps Cheerful Love Blog Hop!

February 23, 2018

Hi Crafty Friends!! The Honey Bee Stamps Cheerful Love Release is now available in the store. To celebrate the new release, we are having a two day blog hop called Cheerful Love. So please hop along with us both days to be inspired! Be sure to visit each blog & leave a comment to be entered to win!!! We will be giving away two $50 gift cards to the Honey Bee Stamps store, one from each day. The winners will be posted on our blog Tuesday, February 27th.

For my first project, I couldn’t resist putting my Zig markers to that sweet little Platypus from Penny the Platypus. Isn’t she just so darn precious?? The sweet, innocent expression on her face just melts my heart. I stamped her using sticky black ink onto some watercolor paper, then added clear embossing powder. I also stamped a balloon and a little bouquet of flowers, also from the Penny the Platypus set, onto the same watercolor paper. I watercolored all of the images with my Zig markers and used a damp paintbrush to blend everything out.

I cut an A2 sized panel from some more watercolor paper and added a sweet “feel better soon” sentiment from Cheerful Sentiments on the background wash using waterproof ink. Next, I used the same three shades from the bouquet to create an ethereal wash for the background panel, using very little Zig marker and lots of water to blend everything. I die cut the balloon, flowers, and Penny herself using the coordinating dies and popped her up on the watercolored panel. I added a few Unicorn Jewels to add some sparkle. Pretty straightforward, but that little platypus is just so darn cute that you don’t need much!!

For my next project today, I used the new Congrats Grad stamp set in conjunction with some of the cute accessories from the Penny the Platypus stamp and die set. I started with an alcohol inked panel from my stash (I like to make a bunch at a time and use them at leisure) and die cut it using the Double Stitched Rectangle dies. I then used a massive amount of very strong adhesive (Score Tape, in this case) to adhered it to my card front. I did this to add extra stability to help prevent warping when I embossed the greeting from Congrats Grad onto my alcohol ink panel using white embossing powder. I also cut a shimmery silver frame using the same Double Stitched Rectangle dies and created a shaker out of it, filling it with both Bokeh Lights Confetti, Clear Bubbles Sequins, and Frozen Tree tiny leaves sequins.

I stamped more balloons, the graduation cap, and the diploma scroll from Penny the Platypus onto watercolor paper and colored them with colors that coordinate with the alcohol ink background. I die cut them out with the coordinating dies, then added them to the front of the shaker in a cluster.

Well, that’s all for my projects today! We have a super fun two-day blog hop planned to help celebrate this darling release. You should have arrived here from the Honey Bee Stamps blog and your next stop is Kelley Kohout’s blog. Here’s the full hop list, in case you get lost:

Honey Bee Stamps
Emily Midgett (that’s me!)
Kelley Kohout
JoAnn Danchik
Carly Minner
Carrie Bryant
Carol Hintermeier
Ilda Dias

Be sure to visit each blog & leave a comment to be entered to win!!! We will be giving away two $50 gift cards to the Honey Bee Stamps store, one from each day. The winners will be posted on our blog Tuesday, February 27th.


Filed Under: Honey Bee Stamps, watercolor, Zig Clean Color Tagged With: alcohol ink, blog hop, new release, shaker card

Primary Sidebar

  • Facebook
  • Instagram
  • Pinterest
  • YouTube

Favorite Shops

Secondary Sidebar

Subscribe

Enter your email address to subscribe to this blog and receive notifications of new posts by email.

Instagram
Something is wrong.
Instagram token error.
Follow
Load More

Archives

Tags

3D embossing folder alcohol markers better press birthday birthday card blog hop card kit christmas christmas card christmas tag colored pencil copic copic coloring Daniel Smith die cutting embossing folder embroidery felt giveaway holiday holiday card hot foil ink blending karin brushmarker pro layered stencil masculine my monthly hero new release no line coloring no line watercolor OLO marker olo markers original illustration pawsitively saturated rainbow shaker card slimline stamping stamptember stencil thank you thinking of you valentine's day video watercolor

Popular Posts

Simon Says Stamp Sending Cheer Blog Hop- Day 2 + Freebie + Giveaway!
Altenew October 2026 Release Blog Hop + Giveaway!
Simon Says Stamp Sending Cheer Release: Now Available!
Simon Says Stamp October 2026 Card Kit of the Month: Homespun Gratitude!
A Double Leftovers Card Set with New Simon Says Stamp Stencils and Dies!
Joyful Snowman with New Simon Says Stamp Sending Cheer Release!
Simon Says Stamp November 2025 Card Kit: Give Thanks!
Hero Arts Partners Blog Hop: Lawn Fawn!
Altenew Standalone Die Blog Hop+Giveaway!
March 2020 My Monthly Hero Blog Hop+Giveaway!

Disclosure

Some affiliate links are used in my posts. This means that, should you click on one of my links and purchase something from that company, I will receive a small portion of the sale at no extra cost to you. I use the money earned from these sales to help maintain my blog. I so appreciate you visiting and, if you do choose to use one of my affiliate links, thank you so much for your support!
Copyright © 2026 ·Brunch Pro Theme · Genesis Framework by StudioPress · WordPress · Log in
Loading Comments...