• Skip to main content
  • Skip to primary sidebar
  • Skip to secondary sidebar

Sixth Street Sundries

Emily Midgett

  • Home
  • About Me
  • Contact
  • OLO Marker Color Swatch Chart
  • Shop

box and ribbon gift card

Video: Coloring Cocktails and Decanters with OLO Markers and Simon Says Stamp!

December 16, 2024

This post was sponsored by Simon Says Stamp. Thanks, Simon!

Hi friends! I have some inspiration to share with you using one of my favorite sets that I’ve ever illustrated: Old Fashioned Christmas. This set was inspired by my husband’s love of bourbon (and his extensive collection). I went to make him a birthday card and couldn’t find anything that would suit him perfectly, so I knew that this would fill an empty niche in my stamping collection! I find myself a bit intimidated when it comes to coloring things that are not flowers, so I thought it might be helpful to show you how I colored the cocktail and whiskey decanter from this new set. Watch the video below or HERE on YouTube:


*I have gathered links to all of the products used at the bottom of the post for your convenience, using affiliate links. Thank you for shopping with my links! I truly appreciate your support for my work!*

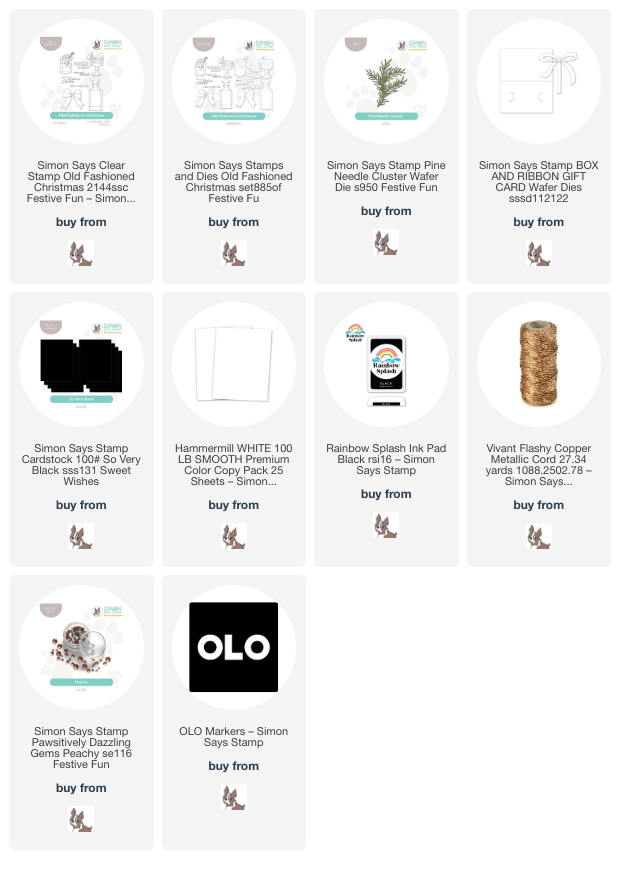
In case you can’t watch the video, I’ll give a quick rundown of my process for creating this gift card holder. I began by stamping the images from Old Fashioned Christmas onto some Hammermill cardstock using Simon Says Stamp’s Rainbow Splash Black Ink, which is alcohol marker-compatible! I then used OLO Markers to color the images, using very pale gray-blue markers with my colorless blender marker to create the glass and highlights, then adding warm burnt orange and coppery brown to create the whiskey inside the decanter. The cocktail was created using similar shades of coppery brown, this time with a pale pink “glaze” over the top to add some pink undertones, mimicking the cherry juice added to an old-fashioned cocktail! After I had finished coloring the images, I used the coordinating dies to cut the images out. I also used a black OLO Marker to color around the edges of the die cuts, making sure that there was no annoying white edge to detract from my crisp black background envisioned in my head.

For the base, I used the older-but-still-amazing Box & Ribbon Gift Card die, which is perfect for holiday gift giving! It cuts the notches out for you to quickly and easily slide a gift card inside. I die cut the Box & Ribbon Gift Card die from some Simon Says Stamp So Very Black cardstock. I also die cut a few white Pine Needle Cluster to place die cuts behind the whiskey die cuts to add some holiday festiveness to the card. I adhered the pine boughs to the black gift card with liquid adhesive and placed the whiskey die cuts over the top with foam adhesive.

After I had adhered my die cut pieces to the card, I created a sentiment from the Old Fashioned Christmas stamp set. When designing these sentiments for this set, I set aside my normal rule of “no puns” and created some adult-friendly puns that worked with the whiskey images in the set. I stamped the “making spirits bright” onto some more black cardstock using Simon Says Stamp White Pigment Ink, then added white embossing powder to create a super crisp and bright white sentiment! I used the coordinating die to cut the sentiment out and popped it up on the gift card holder using a double layer of foam tape. To close the gift card holder, I threaded some sparkling copper twine beneath the sentiment and tied it in a fluffy bow. Finally, I added a few Peachy Pawsitively Dazzling Gems for added sparkle, which I think perfectly complements the warm coppery whiskey and cocktail!

Well, that’s all for my project today. I can’t believe that Christmas is only 9 days away! Are you ready? I am ready in some ways, but I’m not ready for the creativity that holiday supplies brings out in me to be gone yet! So many different styles and color palettes and sparkles still to use. Thanks so much for stopping by today, and have a marvelous day!
Filed Under: simon says stamp Tagged With: box and ribbon gift card, christmas card, copic coloring, gift card holder, holiday card, old fashioned christmas, olo markers, original illustration, pine needle cluster

No Line Coloring with New Hey Sweetie Stamps from Simon Says Stamp!

April 3, 2024

This post was sponsored by Simon Says Stamp. Thanks, Simon!

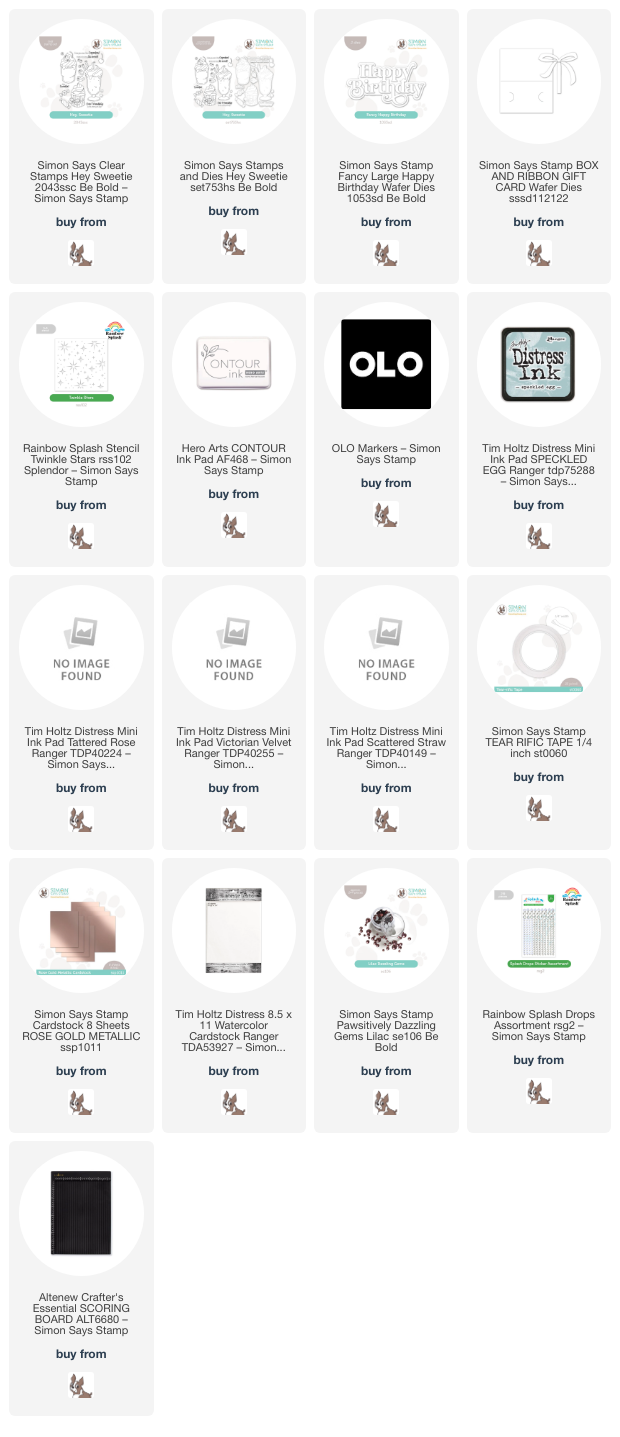
Hi friends! I have some super sweet inspiration to share with you today to start your April!! This week happens to be both my mom’s birthday and my little boys’ fourth birthday, so I wanted to create some birthday inspiration using the new Hey Sweetie from the Simon Says Stamp Be Bold release. I love pairing whimsical images with my attempt at realistic no-line coloring, challenging myself to add as much shadows and shape as I can to the images. For my cards today, I challenged myself to do some no-line OLO marker coloring and some no-line Distress Ink watercoloring to create two festive projects. Let’s get started with the details!

My first card is a unique one for me, featuring a shaped card created with the new Hey Sweetie stamps and dies. I started by stamping the large milkshake image onto some Hammermill white cardstock using Contour Ink, then used my OLO markers to add lots of vivid color to the image. I tried to pay special attention to the direction from which the light was coming, adding extra dark shadows on the right hand side, implying that the light was coming from the left side.

After I had finished coloring my milkshake and a cherry to go on top, I used the coordinating dies from Hey Sweetie to die cut the images. I wanted to create a shaped card, so I created a card base that was slightly smaller than the milkshake image and placed my die so that the folded edge of the card was contained within the die and ran it through my die cut machine. This created a shaped card base upon which I could adhere my colored die cut.

After I had created my shaped card base, I adhered my colorful die cut to the front of the card with some Tear-rific Tape. I stamped a sentiment from Hey Sweetie onto some more white cardstock using black pigment ink, then embossed it with clear embossing powder to make the greeting super crisp. I die cut the sentiment, then popped it up on the card with some foam squares. Finally, I added a few Rainbow Splash Drops to create little bubbles of condensation on the glass!

For my second project, I did some no-line watercoloring using Distress Inks with the sweet cupcake from Hey Sweetie. I began by stamping the cupcake on Distress Watercolor Cardstock using Scattered Straw ink. To watercolor the image, I used Distress Inks in shades of Speckled Egg, Tattered Rose, Victorian Velvet, and Scattered Straw. Distress Inks make great watercolors, because they’re water reactive and blend beautifully together, so you can create all kinds of custom shades outside of the gorgeous rainbow of colors in the Distress line! I mixed and matched these four shades to create lots of dimension on this cupcake image, then used some opaque glitter watercolors from my stash to make an extra special bow around the cupcake base.

For the card base, I die cut the Box and Ribbon Gift Card Holder die from some plain white cardstock. This die is amazing; you can use the base with the large bow die as I did in THIS post, but you can also use it on it’s own to embellish with whatever stamps and dies you choose! I used my scoring board to get a really crisp fold line, then added some ink blending on the front of the card. I first lightly blended some Tattered Rose ink on its own, then used the Twinkle Stars stencil to blend some Victorian Velvet stars and splattered some more glittery watercolors over the blended and stenciled area. I love the magical effect the combination of the blending, stenciling, and splatters creates, especially for a birthday card!! Who doesn’t want a bit of magic on their birthday, right?

After I had finished with my card base, I die cut the Fancy Happy Birthday die from some of Simon Says Stamp’s Rose Gold Metallic cardstock. I popped up the die cut cupcake and sentiment with some foam adhesive, then added a few Lilac Pawsitively Dazzling Gems for a bit of added sparkle!

Well, that’s all for my projects today, projects honoring my mom’s and my little twin boys’ birthdays this week. Side note: I can’t believe that my little guys are turning four. It seems like a lifetime ago that they were the teeniest little peanuts all snuggled into me, and now they’re big boys (literally… they’re both 95th-plus percentile for height!) who go to school, make friends, practice their writing, sweetly sing “Twinkle, Twinkle, Little Star,” play together and separately, give the most precious hugs, and use their imaginations so beautifully. The days are long sometimes, but the years are oh, so short. We were going to take them on their first “little boy only” trip to the zoo tomorrow, but I think the weather has other plans for us, unfortunately. Hopefully next week!

Thank you so much for stopping by today, and have a marvelous day!

Filed Under: simon says stamp Tagged With: birthday card, box and ribbon gift card, fancy large happy birthday, hey sweetie, no line coloring, no line watercolor, olo markers, shaped card, twinkle stars stencil

Shades of Blue with Simon Says Stamp!

March 14, 2024

This post was sponsored by Simon Says Stamp. Thanks, Simon!

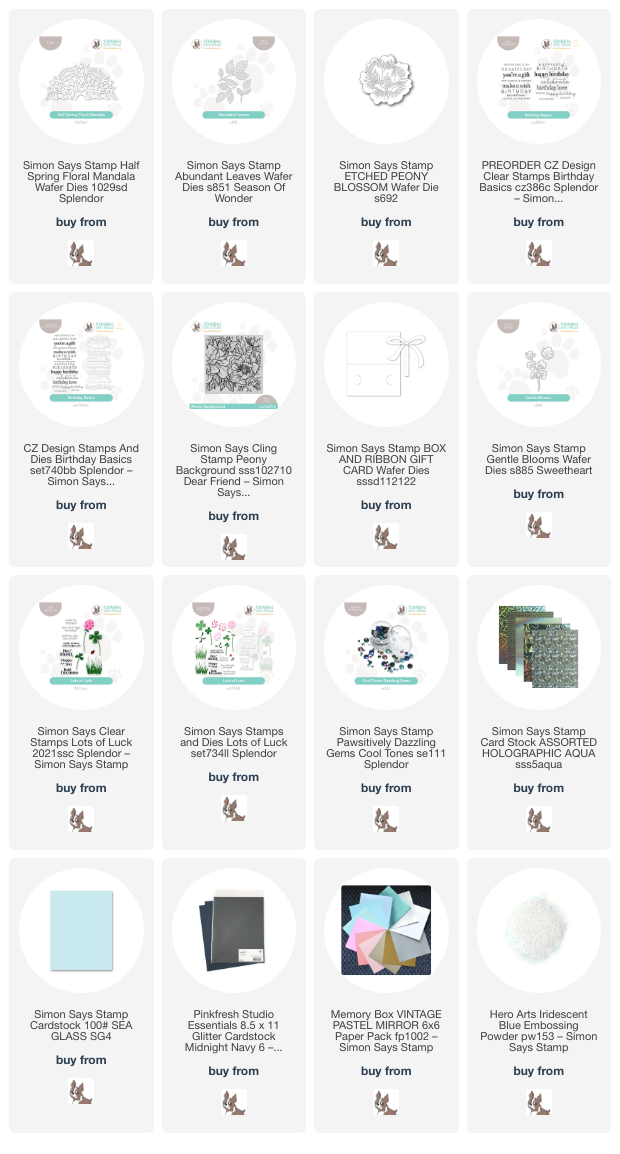
Hi friends! I am back today with a pair of cards with some unconventional blue peonies. I have been in a blue mood lately; this transition time between winter and spring always seems to bring out my love for different shades of blue, as it can be both icy and cold for winter or fresh and crisp for springtime. I never tire of monochromatic projects, so I pulled out lots of different blue cardstock, my Peony Background, the gorgeous Half Spring Floral Mandala, and some other goodies and got to work creating this coordinating card set!

Navy blue is one of those colors that works well as a neutral nearly all the time. It pairs beautifully with so many different colors, and while I normally would pair this deep blue with magenta or coral, I thought it would unique to have some pale, icy blue peonies!

For my first project, I die cut the totally gorgeous new Half Spring Floral Mandala from Simon Says Stamp’s Holographic Aqua cardstock. This super thick iridescent mirror cardstock die cut this intricate die beautifully. The die cuts a delicately-patterned half circle, so I mounted it on my navy blue A2 card base using liquid glue, then added a thin strip of Midnight Navy Glitter Cardstock, nestling it right along the edge of the intricate die cut. This tone-on-tone glitter cardstock helps to create a visual buffer between the edge of the die cut and the solid blue background so that it’s not just floating in midair.

To embellish my lacy background and frame the greeting, I die cut the Etched Peony Blossom from Sea Glass cardstock and some foliage using the Abundant Leaves dies and some iridescent white foil cardstock. I arranged the flowers and foliage over the seam of the glitter paper strip and the die cut, popping them up with foam adhesive. For the greeting, I white embossed a sentiment from the new Birthday Basics on some cornflower blue cardstock, then die cut the larger sentiment with the coordinating die and popped them up with a double layer of foam adhesive to make them extra visible. Finally, I added a few Pawsitively Dazzling Gems Cool Tones for a bit extra sparkle and shine!

For my second project, I wanted to put the Box & Ribbon Gift Card die to use. I have always loved creating extra special gift packaging, but rarely find the time to dedicate to a specific gift, so I thought it might be a good idea to have some on hand the next time I need something! I wanted to create fancy “wrapping paper,” so I heat embossed my Peony Background illustration on some navy blue cardstock using Hero Arts Iridescent Blue embossing powder, masking off the back part of the gift card holder with some Post-It Notes to keep it nice and clean. This Iridescent Blue embossing powder creates the most beautiful tone-on-tone shimmer on colorful cardstock. Depending on the angle, it can take on a more aqua hue or, when angled the opposite way, can look almost purple. So unique and beautiful! I love that the details from the Peony Background are not lost in the slightest, even with this tone-on-tone project.

To embellish my “gift” gift card holder, I die cut the layered bow included in the Box & Ribbon Gift Card die set from some Midnight Navy Glitter Cardstock. I assembled the bow off to the side of the box, popping the top part up with some foam adhesive squares. (If you assemble the bow in the center of the card, it will fit into an A2 envelope when complete. This one won’t quite fit into an A2 envelope, but fits nicely into an A7!) I die cut some Gentle Blooms dies from Sea Glass cardstock and tucked them beneath the bow and greeting from Lots of Luck. Finally, I added a few coordinating aqua Pawsitively Dazzling Gems Cool Tones for extra sparkle!

Well, that’s all for my projects today! I am so in love with this pair of navy blue projects. Monochromatic blue cards are always a winner in my book! Thanks so much for stopping by today, and have a marvelous day!

Filed Under: simon says stamp Tagged With: abundant leaves, birthday basics, box and ribbon gift card, etched peony blossom, gentle blooms, gift card holder, lots of luck, original illustration, peony background, spring floral mandala

Primary Sidebar

  • Facebook
  • Instagram
  • Pinterest
  • YouTube

Favorite Shops

Secondary Sidebar

Subscribe

Enter your email address to subscribe to this blog and receive notifications of new posts by email.

Instagram
Something is wrong.
Instagram token error.
Follow
Load More

Archives

Tags

3D embossing folder alcohol markers better press birthday birthday card blog hop card kit christmas christmas card christmas tag colored pencil copic copic coloring Daniel Smith die cutting embossing folder embroidery felt giveaway holiday holiday card hot foil ink blending karin brushmarker pro layered stencil masculine my monthly hero new release no line coloring no line watercolor OLO marker olo markers original illustration pawsitively saturated rainbow shaker card slimline stamping stamptember stencil thank you thinking of you valentine's day video watercolor

Popular Posts

Simon Says Stamp Joy For You Blog Hop- Day 1!
Simon Says Stamp Joy For You Release-Now Available!
Frozen Fractals All Around with New Simon Says Stamp Joy For You Release!
Shaped Holiday Shaker Card with New Simon Says Stamp Jolly Season Card Kit of the Month!
Holiday Postage with New Simon Says Stamp!
Simon Says Stamp Glory to the Newborn King Holiday Kit-Part II!
Altenew Build A Flower: Fuchsia Blog Hop+Giveway!
Holiday Joy in Pink and Green with New Simon Says Stamp DieCember!
Pinkfresh Studio 5th Birthday!
Honey Bee Stamps September Release Blog Hop!

Disclosure

Some affiliate links are used in my posts. This means that, should you click on one of my links and purchase something from that company, I will receive a small portion of the sale at no extra cost to you. I use the money earned from these sales to help maintain my blog. I so appreciate you visiting and, if you do choose to use one of my affiliate links, thank you so much for your support!
Copyright © 2026 ·Brunch Pro Theme · Genesis Framework by StudioPress · WordPress · Log in
Loading Comments...