• Skip to main content
  • Skip to primary sidebar
  • Skip to secondary sidebar

Sixth Street Sundries

Emily Midgett

  • Home
  • About Me
  • Contact
  • OLO Marker Color Swatch Chart
  • Shop

bunny kisses

Bunny Kisses and Easter Wishes!

March 31, 2024

This post was sponsored by Simon Says Stamp. Thanks, Simon!

Hi friends! Happy Easter to you! I just wanted to pop in with one last Easter card. I bought the adorable Layered Bunny die at the beginning of the spring and haven’t had an opportunity to use it. I have been reading Peter Rabbit with my little boys lately, and the storybook illustrations have such lovely floral decor around the main focal point for that page, so I thought I might try to recreate that feeling with some pretty floral and foliage dies. Let’s get started with the details!

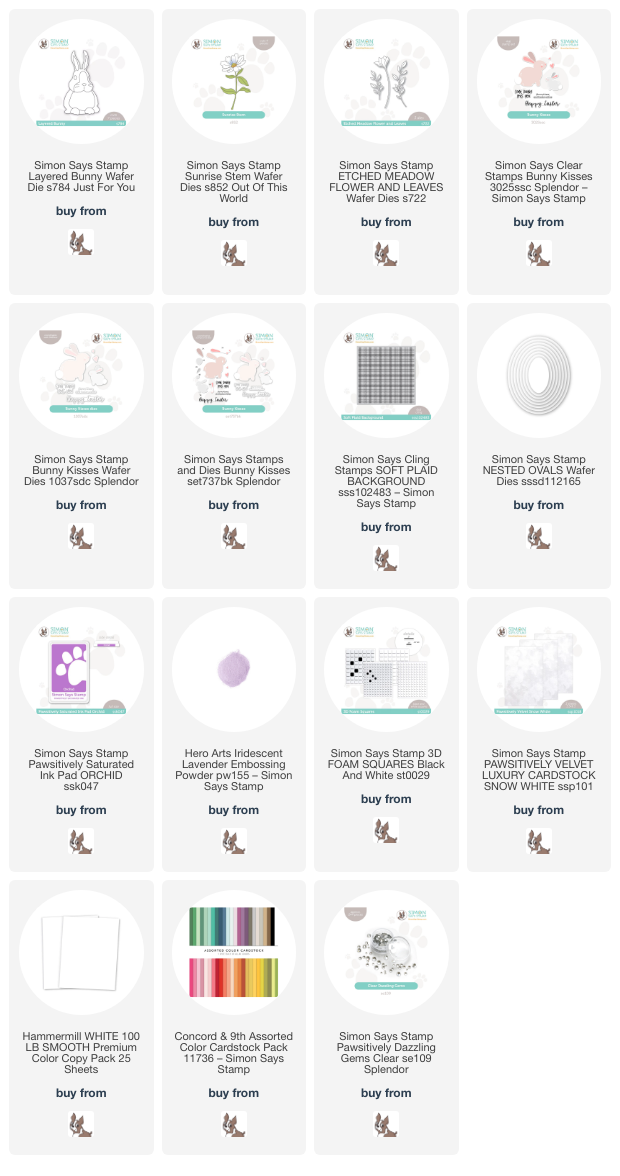
I began by die cutting the Layered Bunny die using both white cardstock and Snow White Pawsitively Velvet Luxury cardstock. I used OLO markers to add some details to the bunny’s ears, eyes, and nose on a couple of the cardstock layers, then adhered all of the layers together with liquid adhesive.

Now that I had the focal point of the card created, I began work on the background. I wanted to keep the entire card very light and springy, allowing the sweet bunny to be the star of the show, accented by some soft colors. I knew that the flowers and foliage that I wanted to use were on a bit larger scale, so I created a 5×7 card base and heat embossed the Soft Plaid Background in the center using Hero Arts’s Iridescent Lavender embossing powder, which adds the most beautifully subtle shine and texture to the background. I also cut another panel of 5×7 white cardstock and die cut a window using the Nested Oval dies. (Side note: I just got these oval dies and am absolutely in love with how large they are. So many dies are oriented to only fit A2 sized cards, and these are such a generous size that they can easily be used with A7 cards, as I’ve done here!) I reserved the actual die cut for later, instead popping up the window over the plaid embossed background using some foam squares.

To create a pretty springtime floral wreath, I die cut the Sunrise Stem die from both white and jade green cardstock, then cut the Etched Meadow Flower & Leaves die from purple and light green cardstock. I arranged the flowers and foliage in a swag atop the oval window. For the greeting, I stamped a sentiment from Bunny Kisses using Pawsitively Saturated Orchid ink, then stamped directly over the top with embossing ink and sprinkled more Iridescent Lavender embossing powder, creating a custom colored embossed greeting! I die cut the embossed sentiments using the coordinating Bunny Kisses dies and arranged them under the fuzzy bunny’s paws. Finally, I added a few sparkling Clear Pawsitively Dazzling Gems amongst the flowers and foliage to create a really special Easter card!

Well, that’s all for my project today! If you observe the holiday, I hope that you have had a lovely celebration filled with family and yummy treats. If not, I hope your spring Sunday has been filled with sunshine and maybe a little crafty time! Thanks so much for stopping by today, and have a marvelous day!
Filed Under: simon says stamp, Uncategorized Tagged With: bunny kisses, easter, etched meadow flower and leaves, layered bunny, nested ovals dies, soft plaid background, sunrise stem

Bunnies in the Clover with Simon Says Stamp!

February 29, 2024

This post was sponsored by Simon Says Stamp. Thanks, Simon!

Hi friends! Today, I have some Easter inspiration that combines two of the new stamp sets from the Simon Says Stamp Splendor release: Lots of Luck and Bunny Kisses. Whenever I am mixing stamp sets, I try to ensure that all of the sets with which I am working are illustrated in a similar style. I don’t like to mix outline images with solid stamped or standalone die cut images, simply because in my mind, they are in different imaginative dimensions. When I saw the bold graphic style of these two stamp sets, I knew that they would work beautifully together for a large-scale A7 card! I also was inspired by a cute family story: my husband used to have a small garden at our old house that was right underneath our dining room window. One night after supper, he went out to tend to the tomatoes and lettuce plants and found a family of teeny bunnies!! The purple twilight of that night has been stuck in my mind all of these years later (my big kids were only 2.5 at the time!), and I was definitely channeling that memory today! Let’s get started on the details for my project.

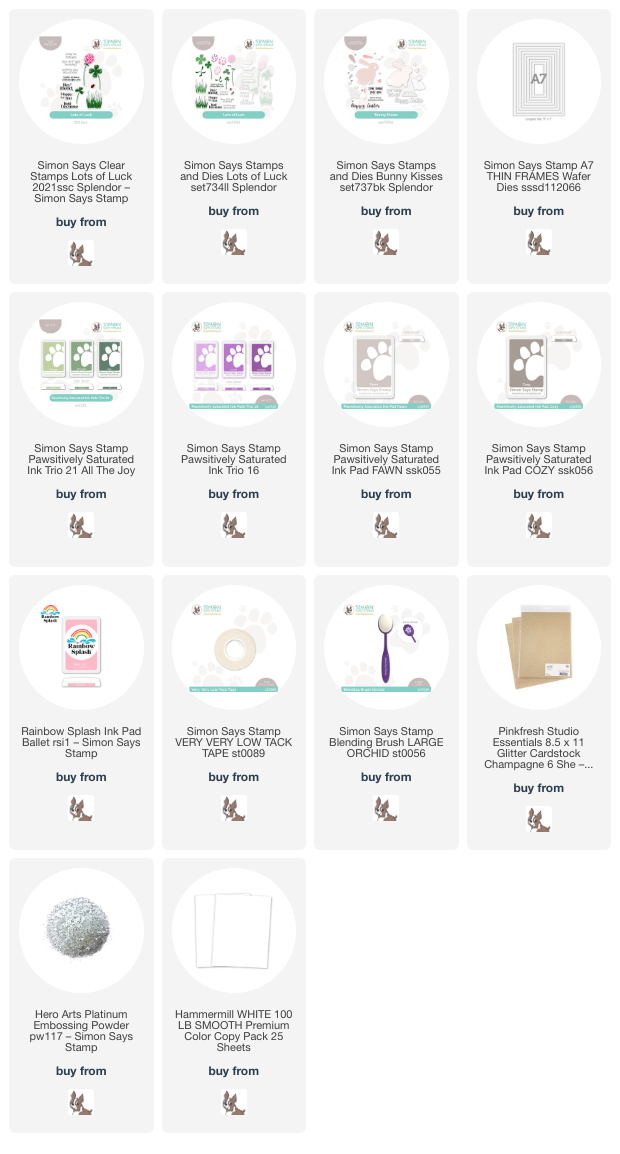
The new Lots of Luck stamp set features some pretty clover flowers, clover, and foliage in a layered stamp style. I am loving the fact that Simon Says Stamp has been printing the colored layering schematics on the back of the stamp packaging as well as labeling each layer on the stamp set itself to make layering your images super simple and quick! I like to start projects like this by stamping lots of different elements and then arranging them later. It helps me to keep the process organized in my head to keep all of the die cut stamped images together, so I stamped the sweet bunny from Bunny Kisses and lots of clover flowers, leaves, and grasses from Lots of Luck using Pawsitively Saturated Ink Trio 21,Pawsitively Saturated Ink Trio 16, Fawn and Cozy Pawsitively Saturated inks, and finishing the bunny’s ears and nose off with Ballet Rainbow Splash Ink, then die cut them with the coordinating dies from each set.

Because of the large scale and the framed scene that I had in my head, I started my card front by trimming down an A7 card front from Hammermill white cardstock, then masked around the edges using some Very Very Low Tack Tape. I used a blending brush to lightly blend Orchid ink at the top of my card front, creating a subtle twilight sky. After I had finished blending, I removed the mask, leaving a crisp white frame around the edges. I wanted to accent the focal point as well as make my canvas for my scene a bit smaller, so I die cut the A7 Thin Frames dies from some Pinkfresh Studio Champagne Glitter Cardstock. I found a frame to fit around where I had masked off and adhered it with some liquid adhesive.

Before arranging my stamped die cuts, I wanted to add some more grass behind the front rose of flowers and foliage, so I stamped a single layer of grass in the background, adding some more depth to my scene. I layered the die cuts on top of the stamped grasses, adhering them with both liquid and foam adhesive for extra dimension. I heat embossed a greeting from Bunny Kisses using platinum embossing powder and die cut both sentiments with the coordinating dies. Finally, I added a smattering of iridescent lavender gems, which I think look like dew drops or perhaps even some whimsical fireflies!

Well, that’s all for my project today. I love when different products work so seamlessly together, don’t you? Thanks so much for stopping by today, and have a marvelous day!

Filed Under: simon says stamp Tagged With: A7 thin frames, bunny kisses, easter, ink blending, lots of luck, pawsitively saturated, spring

Primary Sidebar

  • Facebook
  • Instagram
  • Pinterest
  • YouTube

Favorite Shops

Secondary Sidebar

Subscribe

Enter your email address to subscribe to this blog and receive notifications of new posts by email.

Instagram
Something is wrong.
Instagram token error.
Follow
Load More

Archives

Tags

3D embossing folder alcohol markers better press birthday birthday card blog hop card kit christmas christmas card christmas tag colored pencil copic copic coloring Daniel Smith die cutting embossing folder embroidery felt giveaway holiday holiday card hot foil ink blending karin brushmarker pro layered stencil masculine my monthly hero new release no line coloring no line watercolor OLO marker olo markers original illustration pawsitively saturated rainbow shaker card slimline stamping stamptember stencil thank you thinking of you valentine's day video watercolor

Popular Posts

Simon Says Stamp Joy For You Blog Hop- Day 1!
Simon Says Stamp Joy For You Release-Now Available!
Frozen Fractals All Around with New Simon Says Stamp Joy For You Release!
Shaped Holiday Shaker Card with New Simon Says Stamp Jolly Season Card Kit of the Month!
Holiday Postage with New Simon Says Stamp!
Simon Says Stamp Glory to the Newborn King Holiday Kit-Part II!
Altenew Build A Flower: Fuchsia Blog Hop+Giveway!
Holiday Joy in Pink and Green with New Simon Says Stamp DieCember!
Pinkfresh Studio 5th Birthday!
Honey Bee Stamps September Release Blog Hop!

Disclosure

Some affiliate links are used in my posts. This means that, should you click on one of my links and purchase something from that company, I will receive a small portion of the sale at no extra cost to you. I use the money earned from these sales to help maintain my blog. I so appreciate you visiting and, if you do choose to use one of my affiliate links, thank you so much for your support!
Copyright © 2026 ·Brunch Pro Theme · Genesis Framework by StudioPress · WordPress · Log in
Loading Comments...