• Skip to main content
  • Skip to primary sidebar
  • Skip to secondary sidebar

Sixth Street Sundries

Emily Midgett

  • Home
  • About Me
  • Contact
  • OLO Marker Color Swatch Chart
  • Shop

etched meadow flower and leaves

Bold Bunny Easter Card with New Simon Says Stamp Favorite Things Release!

March 6, 2025

This post was sponsored by Simon Says Stamp. Thanks, Simon!

Hi friends! I have a dramatic navy blue Easter card to share with you today. I have always loved navy blue with pastel colors for springtime, taking the dark navy blue from winter and brightening it up with cheery springtime colors. I paired some of the new Easter goodies from the Favorite Things release with some older botanical dies and pretty inks to create this bold project. Let’s get started with the details!

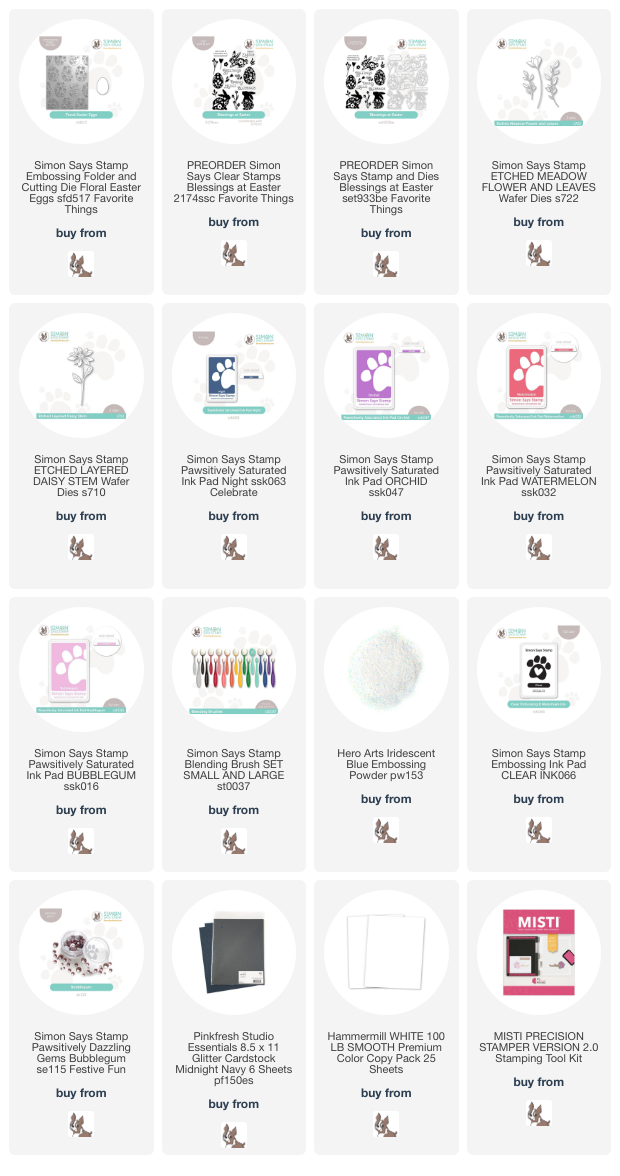
*I have gathered links to all of the products used at the bottom of the post for your convenience, using affiliate links. Thank you for shopping with my links! I truly appreciate your support for my work!*

To begin, I created an embossed panel using some white cardstock and the new Floral Easter Eggs embossing folder. This embossing folder comes complete with coordinating dies, so that you can create gorgeously textured embossed egg die cuts, but I wanted to create a delicate floral background pattern and so used the entirety of the embossed panel. I flipped the embossed panel over so that the pattern was debossed into the cardstock, rather than raised up, and did some ink blending on the debossed areas. I used blending brushes to blend Orchid, Watermelon, and Bubblegum Pawsitively Saturated Inks on the debossed floral images, then swiped the Night ink pad directly on the raised areas of the cardstock, creating a multicolored, debossed, super textured background!

After I had created my background, I worked on my focal point. I began by stamping one of the adorable bunnies in the Blessings At Easter stamp set, stamping it once with Night ink and then again directly over the top with embossing ink and adding Iridescent Blue Embossing Powder from Hero Arts. This sheer iridescent embossing powder adds the most gorgeous and lustrous iridescent sheen to the stamped images while still allowing the colorful ink beneath to still show! I also die cut the Etched Meadow Flower & Leaves and Etched Layered Daisy Stem dies from coordinating colored cardstock and some super glittery navy blue cardstock.

After trimming the debossed panel down and nestling it in the upper left hand corner of a full size A2 panel of the same navy blue glittered cardstock, I arranged all of the die cuts on the floral background, adhering them with both liquid and foam adhesive squares to create lots of dimension. I nestled a stamped, embossed, and die cut “Spring Greetings” sentiment amongst the die cuts, then added a few shimmering Bubblegum Pawsitively Dazzling Gems.

Well, that’s all for my project today! It’s a busy card, but it’s so fresh and floral and springy! I love the pretty floral bunny paired with the colorful florals! Now for a fun sale:

Simon Says Stamp is celebrating 23 fabulous years, and as a special treat, they are offering an equally fabulous gift with purchase: buy any gift card valued at $100 or more and get a FREE $23 gift card!! Isn’t that incredible? Click HERE to purchase a gift card!

Thanks so much for stopping by today, and have a marvelous day!
Filed Under: simon says stamp Tagged With: 3D embossing folder, blessings at easter, die cutting, easter card, embossing folder, etched layered daisy stem, etched meadow flower and leaves, floral easter eggs, ink blending, ink swiping, pawsitively saturated

A Final Ode to Pumpkins with Simon Says Stamp!

October 31, 2024

This post was sponsored by Simon Says Stamp. Thanks, Simon!

Hi friends! I am back with my final post for the month of October, just in the nick of time, too! I will be helping my kiddos get their Halloween costumes on as soon as I’m done: Sally from Nightmare Before Christmas, Harry Potter, and two firemen! (If you’ve never checked out the Halloween costumes from Costco, they are legit! The firemen costumes are incredible and were very reasonably priced.) For my last project for the month, I thought I’d do one final “ode to a pumpkin.” I don’t do spooky, and I’m not great a cute, so pumpkins are basically my favorite imagery for autumn and Halloween. They can be fun and playful, or they can be elegant, especially when paired with foliage and florals. I have been collecting more felt and embroidery items, and so I was itching for a project on which to use them. This autumnal wall hanging was the perfect project to start my obsession! Let’s get started with the details.

*I have linked all of the products used at the bottom of the post using affiliate links for your convenience. Thank you for shopping with my links! I truly appreciate your support for my work!*

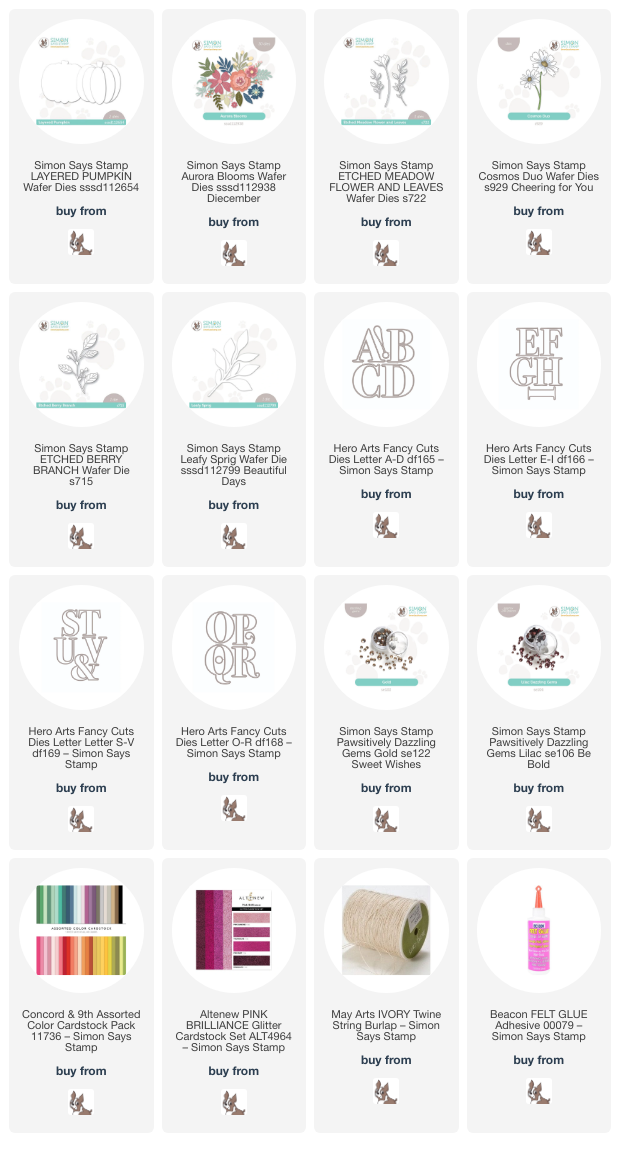
For both of my projects, I paired the Aurora Blooms, Etched Meadow Flower & Leaves, Cosmos Duo, Etched Berry Branch, Layered Pumpkin, and Leafy Sprig dies. I wanted to create some decor with felt as well as with paper, so I scoured my local dollar stores and big box craft stores for some fun “blanks” that I could decorate. I found this canvas wall hanging and little chalkboard easel, and I think they both are just perfect for embellishing with die cuts!

For the wall hanging, I began by die cutting all of the images from the die sets listed above using high-quality colored felt. I used a somewhat non-traditional color palette, pulling some deep, somewhat muted oranges together with cranberry and autumn rose, with touches of lime green and hunter green. I used some needle and thread with sequins and seed beads to adorn the center of some of the flowers, adding a touch of sparkle and additional texture to the felt images. I also die cut the word “gather” using the large-scale Hero Arts Alphabet Dies. I adore these alphabet dies; they’re perfect for creating banners and home decor (I used them to create a banner for my office Christmas tree last year!) and are such a great size.

For the pumpkin, I used some fabric glue to assemble the individual pieces from the Layered Pumpkin die set, then used a coordinating shade of orange to do a (very) simple blanket stitch around the edges of each piece of rind. This additional stitching around the edges adds some texture as well as helping to differentiate one segment from the next, so that it doesn’t look too flat.

After I had die cut and assembled the different components, I began to create my arrangement. I used a piece of ribbon to line up my letters, adhering them to the banner with some fabric glue, then began arranging my pumpkin, flowers, and foliage in a swag beneath my letters. I stitched some more sequins and seed beads to create “berries” amongst my floral arrangement, helping to fill in any gaps in the flowers. After completing the arrangement on the bottom, I felt that the area above the letters was a bit too bare, so added another, simpler arrangement above the letters as well. I think it will look so pretty hanging from my front door for Thanksgiving!

Since I haven’t been working with felt for very long, I decided to make another home decor project using my more typical cardstock, using the same color palette! I die cut the same images from the Aurora Blooms, Etched Meadow Flower & Leaves, Cosmos Duo, Etched Berry Branch, Layered Pumpkin, and Leafy Sprig die sets. I used some sparkling cranberry glitter cardstock from Altenew to create the Etched Meadow Flower & Leaves blossoms. I think this color palette is so pretty; it is definitely autumnal, but not super orange-y!

I found this little easel chalkboard at my local dollar store! They have them in both black chalkboard and white dry erase board; this black backdrop was perfect for adorning with colorful die cuts. After I had adhered all of the die cuts in a little arrangement on the front of the easel, I used a double layer of twine, wrapping it around the top of the easel multiple times, then added a fluffy bow. I used some glue to hold the bow down and prevent it from being untied.

After I had finished arranging the die cuts and adding my twine bow, I added some Gold and Lilac Pawsitively Dazzling Gems to the berry stems and flower centers, adding a touch of sparkle and texture to this piece of decor. I think this would look so sweet on a desk at work or perhaps on a piano or mantelpiece at home!!

Well, that’s all for my projects today. I am having such fun branching out from my typical cardmaking, and I hope you’re enjoying it too. It’s fun to try new things, right? Thanks so much for stopping by today, and have a marvelous day!

Filed Under: simon says stamp Tagged With: alphabet dies, aurora blooms, banner, canvas, cosmos duo, die cutting, etched berry branch, etched meadow flower and leaves, felt, home decor, home deocr, layered pumpkin, leafy sprig, wall hanging

Simon Says Stamp STAMPtember Collaboration: Pinkfresh Studio!

September 11, 2024

Hi friends! The new limited edition Pinkfresh Studio STAMPtember-Edged Floral stamp set is now available, and it’s a stunner! This 6×6 set features a large botanical corner stamp perfect for creating a lovely textural adornment on your background or as a corner focal piece! I used both techniques with some of Pinkfresh Studio’s vibrant, unique inks to create a pair of pretty-in-pink cards. Let’s get started with the details on my projects!

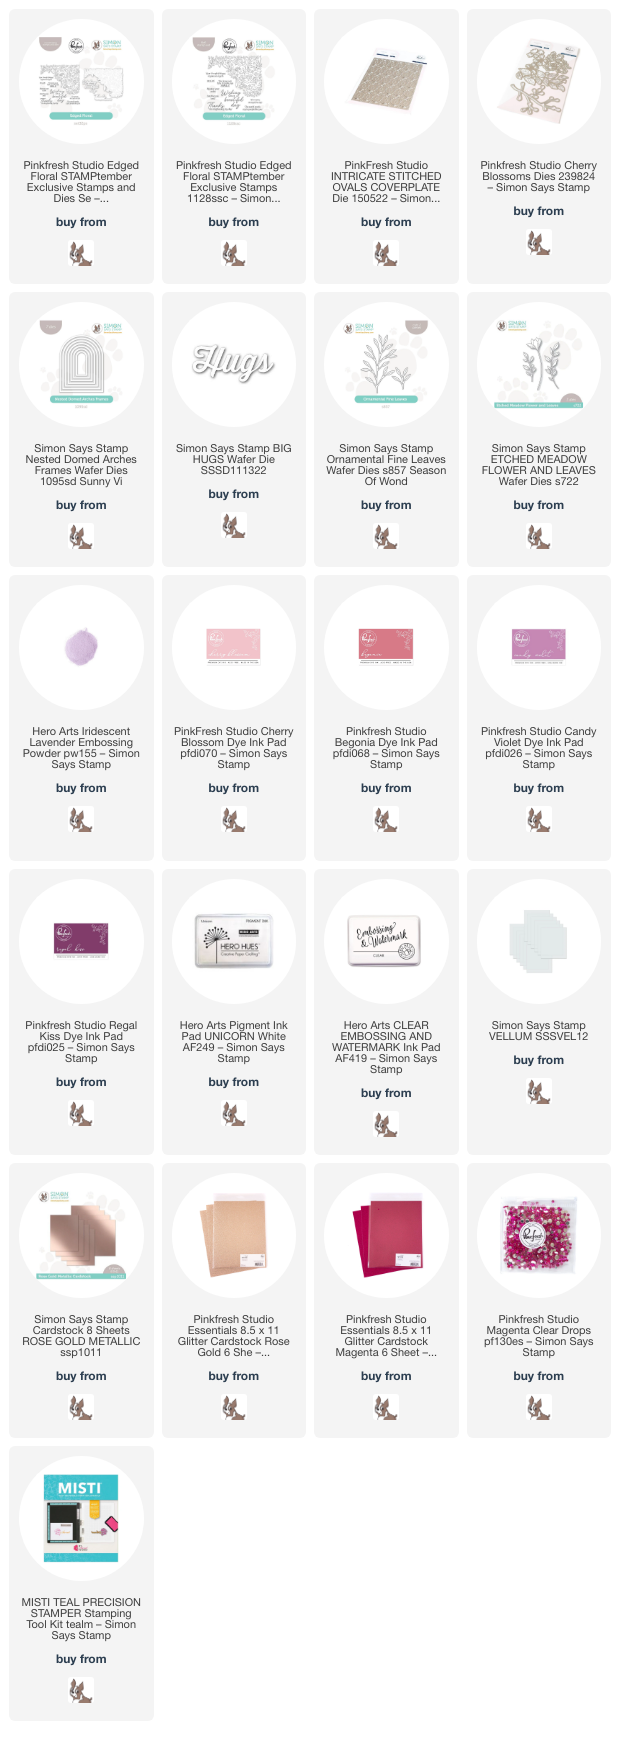
Both of my projects features the gorgeous Pinkfresh Studio STAMPtember-Edged Floral heat embossed with Iridescent Lavender embossing powder from Hero Arts; these iridescent embossing powders are so unique and versatile, and I love using them with intricate stamps like these! I pulled from the lovely shades in the iridescent embossing powder to select Cherry Blossom, Begonia, Candy Violet, and Regal Kiss Pinkfresh Studio inks to create a gorgeous sunset-inspired ombré.

For my first project, I heat embossed the main image from the Edged Floral set onto some vellumusing the Iridescent Lavender embossing powder, then used sharp scissors to fussy cut the image (but you have the option of using the coordinating dies to save your wrists and quite a bit of time!). From straight on, the embossing on the vellum looks like delicate texture, but from certain angles, the iridescent embossing powder shows off so beautifully, as you can see in the photo below. I wanted to create some contrast behind the embossed vellum piece, so I blended Cherry Blossom, Begonia, Candy Violet, and Regal Kiss Pinkfresh Studio inks on the diagonal on a panel of white cardstock, then ran the panel through my die cutting machine with Pinkfresh Studio’s Intricate Stitched Ovals die, adding pretty texture to the blended panel.

To add some interest around my sentiment, I die cut the Cherry Blossoms dies from Pinkfresh using some coordinating bubble gum cardstock, as well as Pinkfresh Studio Rose Gold glitter cardstock. I heat embossed the greeting onto some deep magenta cardstock, stamping it first with white pigment ink, then again with sticky embossing ink, finally sprinkling the Iridescent Lavender embossing powder over the top to create a unique iridescent sentiment. The initial layer of white pigment ink helps to make the iridescent embossing powder stand out a bit better on the vibrant cardstock. I fussy cut the sentiment, (again, you could use the coordinating die-they cut out the sentiments, too!) then arranged the sentiment and flowers on my fussy cut floral vellum corner, popping some of the pieces up with foam adhesive squares and adding some with liquid adhesive. I added some more foam adhesive on the back of the vellum piece behind the solid die cuts to hide them, then adhered it to the blended background. I tucked a Nested Domed Arches Frames cut from some Simon Says Stamp Rose Gold Metallic cardstock, finally adding a few Pinkfresh Studio Clear Drops: Magenta to the flower centers for a bit more shine and color!

For my second card, I set up the Edged Floral stamp in my MISTI, stamping it once using Cherry Blossom ink, then again with sticky embossing ink, finally adding some more of the Iridescent Lavender embossing powder, then rotating it 180* and repeating the process, so that I had the floral design in each corner. Stamping the pale pink ink first and adding the iridescent embossing powder creates the prettiest effect, especially when paired with some soft, tone-on-tone ink blending using Cherry Blossom, Begonia, and Candy Violet Pinkfresh Studio inks around the edges.

The somewhat simplistic nature of the individual images themselves from Edged Floral gave me some freedom when selecting botanical dies to add to my card; I selected Ornamental Fine Leaves and Etched Meadow Flower & Leaves dies, both from Simon Says Stamp, which I die cut from pearlescent blush cardstock and Magenta glitter cardstock. I also die cut the Big Hugs die from some brushed pink foil cardstock and enhanced the large sentiment die cut with another sentiment from the Edged Floral set, stamped with white pigment and embossing inks, then heat embossed with the Iridescent Lavender embossing powder. I arranged the die cuts on a small rectangle of vellum, allowing the flowers and foliage to peek out from behind the large sentiment die cut, finally adding a few shimmering gems for added sparkle!

Well, that’s all for my projects today! These STAMPtember collaboration sets are limited edition and usually sell out very quickly, so if you’re on the fence, don’t wait too long! To sweeten the deal and make it even easier for you to shop, Heidi at Simon Says Stamp has offered free shipping for purchases over $25 for a limited time!!

This limited edition stamp set is so gorgeous, and the added option to have the coordinating dies for both the image and the sentiments makes it a must-have. Thanks so much for stopping by today, and Happy STAMPtember!

Filed Under: pinkfresh studio, simon says stamp Tagged With: big hugs, cherry blossoms, Edged Floral, embossing, etched meadow flower and leaves, exclusive, heat embossing, ink blending, intricate stitched ovals, limited edition, nested domed arches, ornamental fine leaves, stamptember

April Showers Bring May Flowers: Celebrate Rose Corner Edition!

May 13, 2024

This post was sponsored by Simon Says Stamp. Thanks, Simon!

Hi friends! After a whirlwind of fun teaching at a Simon Says Stamp booth at CREATE, I am back home and trying to get back into the swing of things at a little bit less frantic pace. (I spent several days prior energetically prepping to be gone from my family for four days) I meant to blog this project while I was gone, but I had too much fun teaching and was exhausted by the end of the days, so there’s been a bit of a lull here on my blog as a result. But I’m back with some fun inspiration for my April Showers Bring May Flowers series, this time using my Celebrate Rose Corner illustration for Simon Says Stamp. This was one of my first illustrations for Simon Says Stamp, and it’s still one of my favorites! It’s such fun to play with older supplies using different mediums and color palettes. I chose to use a soft peach melba color combination for today’s project. Let’s get started with the details!

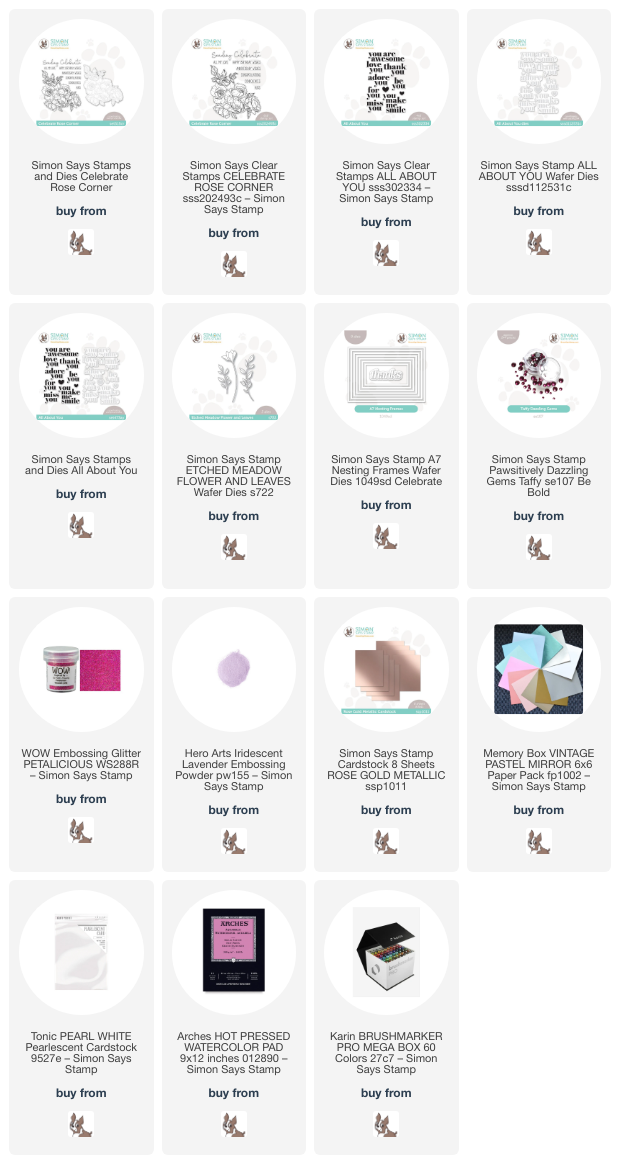
To begin my project, I stamped the large Celebrate Rose Corner stamp on an A7 panel of Arches Hot Press watercolor paper, then heat embossed the image with Hero Arts’s Iridescent Lavender embossing powder. This embossing powder is gorgeous and creates a subtle iridescent sheen on your embossed image. It looks marvelous on both colored cardstock and white cardstock alike. I like to use white or clear embossing powder when I want to create a semi-no-line-coloring look. The white lines are a bit softer than the stark black lines created with typical stamping. However, because of these white lines on the white paper, I do like to start watercoloring the background first so that I have a better visual on where the flowers are located.

To begin my watercoloring, I taped my panel down to my watercolor board to reduce warping, then used Karin Brushmarker Pro markers to add soft peach and pink around the edges of my embossed image. To create that dreamy watercolor look, I scribble the color on my glass craft mat, then dilute the color with lots of water. I add lots of layers of color, allowing each layer to dry between applications, which helps create the subtle layers of color. I used the same colors for the roses to create these pretty peachy roses, paying extra attention to the shadowed areas. Once I had finished adding color to the image, I allowed it to dry completely before beginning to assemble my card front.

After allowing my watercolor panel to dry completely, I die cut a frame using the A7 Nesting Frame Dies and Rose Gold Metallic foil cardstock from Simon Says Stamp. The soft rosy foil cardstock complements the peach and pink tones in the watercolored image. I trimmed the watercolored panel down to 4″ x 6″, then selected a coordinating frame and adhered it to the watercolor panel using liquid adhesive. I added the framed watercolored panel to a full size A7 panel of pearlescent white cardstock, creating a shimmery white mat around the edge. I heat embossed a sentiment from All About You onto some heavyweight vellum using pink glitter embossing powder, then die cut the sentiment with the coordinating die. To add a little extra interest to the sentiment, I die cut some foliage from the Etched Meadow Flower and Leaves using pale pink brushed foil cardstock. I nestled the foliage behind the sentiment, then added some Taffy Pawsitively Dazzling Gems for extra sparkle!

Well, that’s all for my project today. Thank you so much for stopping by, and have a marvelous day!

Filed Under: simon says stamp Tagged With: A7 card, A7 nesting frames, all about you, celebrate rose corner, etched meadow flower and leaves, karin brushmarker pro, watercolor

Bunny Kisses and Easter Wishes!

March 31, 2024

This post was sponsored by Simon Says Stamp. Thanks, Simon!

Hi friends! Happy Easter to you! I just wanted to pop in with one last Easter card. I bought the adorable Layered Bunny die at the beginning of the spring and haven’t had an opportunity to use it. I have been reading Peter Rabbit with my little boys lately, and the storybook illustrations have such lovely floral decor around the main focal point for that page, so I thought I might try to recreate that feeling with some pretty floral and foliage dies. Let’s get started with the details!

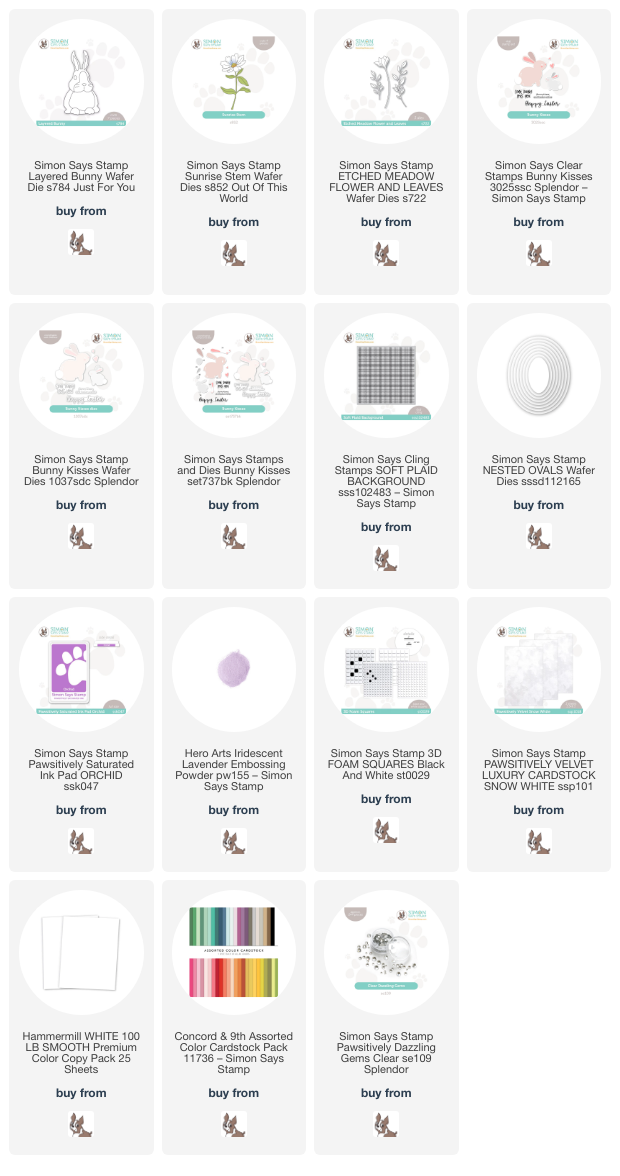
I began by die cutting the Layered Bunny die using both white cardstock and Snow White Pawsitively Velvet Luxury cardstock. I used OLO markers to add some details to the bunny’s ears, eyes, and nose on a couple of the cardstock layers, then adhered all of the layers together with liquid adhesive.

Now that I had the focal point of the card created, I began work on the background. I wanted to keep the entire card very light and springy, allowing the sweet bunny to be the star of the show, accented by some soft colors. I knew that the flowers and foliage that I wanted to use were on a bit larger scale, so I created a 5×7 card base and heat embossed the Soft Plaid Background in the center using Hero Arts’s Iridescent Lavender embossing powder, which adds the most beautifully subtle shine and texture to the background. I also cut another panel of 5×7 white cardstock and die cut a window using the Nested Oval dies. (Side note: I just got these oval dies and am absolutely in love with how large they are. So many dies are oriented to only fit A2 sized cards, and these are such a generous size that they can easily be used with A7 cards, as I’ve done here!) I reserved the actual die cut for later, instead popping up the window over the plaid embossed background using some foam squares.

To create a pretty springtime floral wreath, I die cut the Sunrise Stem die from both white and jade green cardstock, then cut the Etched Meadow Flower & Leaves die from purple and light green cardstock. I arranged the flowers and foliage in a swag atop the oval window. For the greeting, I stamped a sentiment from Bunny Kisses using Pawsitively Saturated Orchid ink, then stamped directly over the top with embossing ink and sprinkled more Iridescent Lavender embossing powder, creating a custom colored embossed greeting! I die cut the embossed sentiments using the coordinating Bunny Kisses dies and arranged them under the fuzzy bunny’s paws. Finally, I added a few sparkling Clear Pawsitively Dazzling Gems amongst the flowers and foliage to create a really special Easter card!

Well, that’s all for my project today! If you observe the holiday, I hope that you have had a lovely celebration filled with family and yummy treats. If not, I hope your spring Sunday has been filled with sunshine and maybe a little crafty time! Thanks so much for stopping by today, and have a marvelous day!

Filed Under: simon says stamp, Uncategorized Tagged With: bunny kisses, easter, etched meadow flower and leaves, layered bunny, nested ovals dies, soft plaid background, sunrise stem

  • Page 1
  • Page 2
  • Go to Next Page »

Primary Sidebar

  • Facebook
  • Instagram
  • Pinterest
  • YouTube

Favorite Shops

Secondary Sidebar

Subscribe

Enter your email address to subscribe to this blog and receive notifications of new posts by email.

Instagram
Something is wrong.
Instagram token error.
Follow
Load More

Archives

Tags

3D embossing folder alcohol markers better press birthday birthday card blog hop card kit christmas christmas card christmas tag colored pencil copic copic coloring Daniel Smith die cutting embossing folder embroidery felt giveaway holiday holiday card hot foil ink blending karin brushmarker pro layered stencil masculine my monthly hero new release no line coloring no line watercolor OLO marker olo markers original illustration pawsitively saturated rainbow shaker card slimline stamping stamptember stencil thank you thinking of you valentine's day video watercolor

Popular Posts

Simon Says Stamp Joy For You Blog Hop- Day 1!
Simon Says Stamp Joy For You Release-Now Available!
Frozen Fractals All Around with New Simon Says Stamp Joy For You Release!
Shaped Holiday Shaker Card with New Simon Says Stamp Jolly Season Card Kit of the Month!
Holiday Postage with New Simon Says Stamp!
Simon Says Stamp Glory to the Newborn King Holiday Kit-Part II!
Pinkfresh Studio 5th Birthday!
Altenew Build A Flower: Fuchsia Blog Hop+Giveway!
Holiday Joy in Pink and Green with New Simon Says Stamp DieCember!
Honey Bee Stamps September Release Blog Hop!

Disclosure

Some affiliate links are used in my posts. This means that, should you click on one of my links and purchase something from that company, I will receive a small portion of the sale at no extra cost to you. I use the money earned from these sales to help maintain my blog. I so appreciate you visiting and, if you do choose to use one of my affiliate links, thank you so much for your support!
Copyright © 2026 ·Brunch Pro Theme · Genesis Framework by StudioPress · WordPress · Log in
Loading Comments...