• Skip to main content
  • Skip to primary sidebar
  • Skip to secondary sidebar

Sixth Street Sundries

Emily Midgett

  • Home
  • About Me
  • Contact
  • OLO Marker Color Swatch Chart
  • Shop

home deocr

Snowflake Inspiration Using Simon Says Stamp Exclusive Tim Holtz Coordinating Dies + Halloween SALE!

October 30, 2026

Hi friends! I have another project to share with you today using some of the new dies that coordinate with Tim Holtz holiday stamps, released exclusively at Simon Says Stamp! (Click HERE to see the entire new release!) Whenever I think of Tim Holtz, I automatically think of mixed media and altered items embellished with lots of fun extras and bling. Last Christmas, I purchased lots of circular ornaments made of MDF board so that I could embellish and customize them to my heart’s content! I absolutely LOVE the gorgeous Swirly Snowflakes and Mini Swirly Snowflakes from Tim Holtz, and now that we have coordinating dies, it makes creating fun projects like this so quick and simple. Let’s get started on the details of my project!
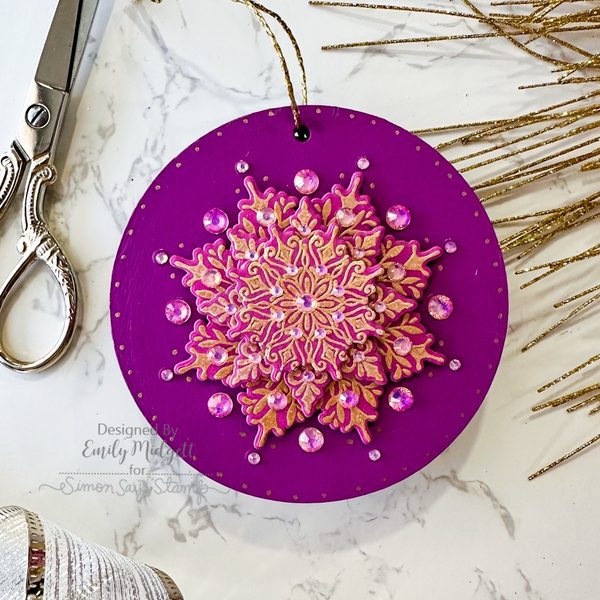
After I had painted my blank ornament with a few layers of a lovely shade of fuchsia with Seedless Preserves Distress Paint, I set it aside to dry completely. I love using my acrylic paints to create home decor projects like this one; the opaque paint seems so much more permanent than using just watercolor or cardstock, and it can be mixed to create infinite custom colors to perfectly match the vision in my head!
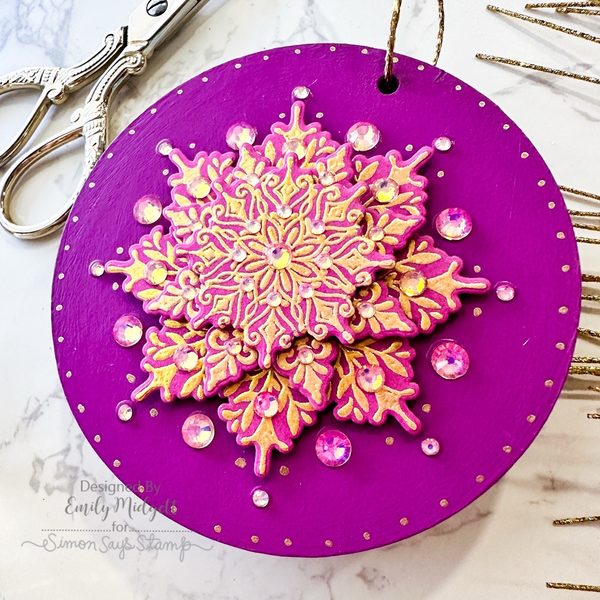
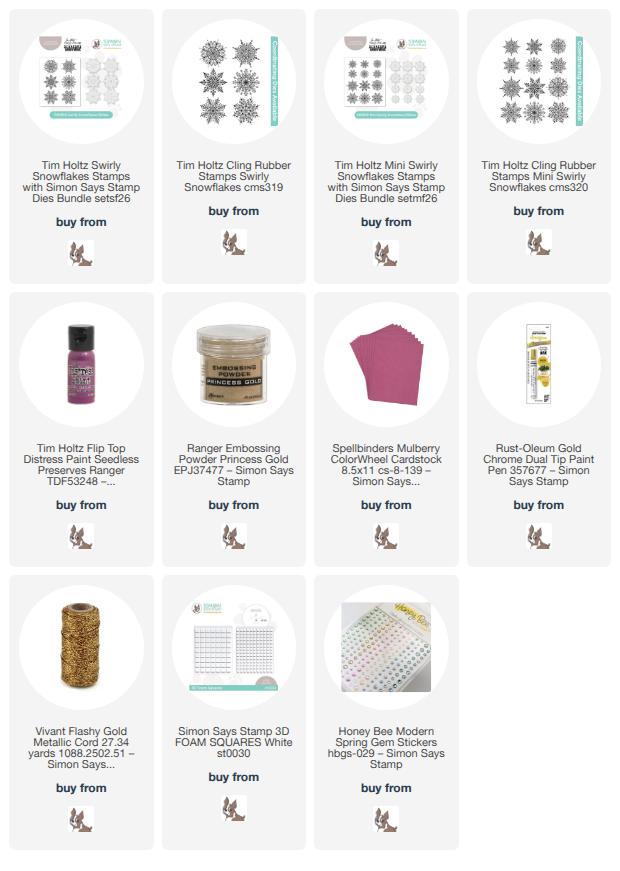
To create the layered snowflakes, I pulled out some Spellbinders Mulberry cardstock, which matched the vibrant pinky purple paint on the ornament beautifully. I then heat embossed a large snowflake from Swirly Snowflakes and a medium and small snowflake from Mini Swirly Snowflakes using shimmering Princess Gold Embossing Powder. These snowflakes layer together so beautifully, and having both the large and mini sets means tons of layering options and more versatility!
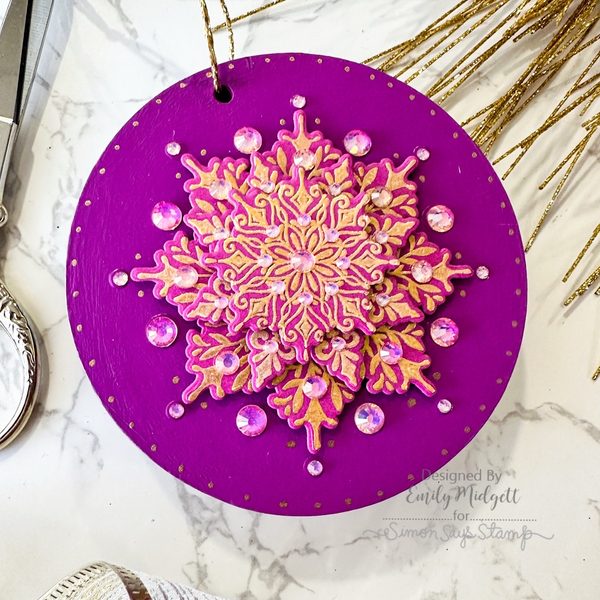
After I had embossed the snowflake trio, I used the new coordinating dies to cut them out quickly and easily. I layered them together, starting at the bottom with the largest snowflake from Swirly Snowflakes, then the medium and small from Mini Swirly Snowflakes, adhering each layer together with thick foam adhesive squares to create tons of dimension. After I had adhered the snowflake in the center of the fuchsia ornament with another layer of foam adhesive, I used a Gold Paint Marker to add some dot accents and to gild the edge of the ornament. I think this creates such a polished effect. I also added some gorgeous, shimmering gems from my stash that are pink with an iridescent gold shimmer over the top. To finish everything off, I threaded a sparkling gold twine loop through the hole at the top of the ornament, making it easy to adorn a package or add to a Christmas tree!

Well, that’s all for my project today! It’s almost Halloween, so Simon Says Stamp is offering treats without tricks:
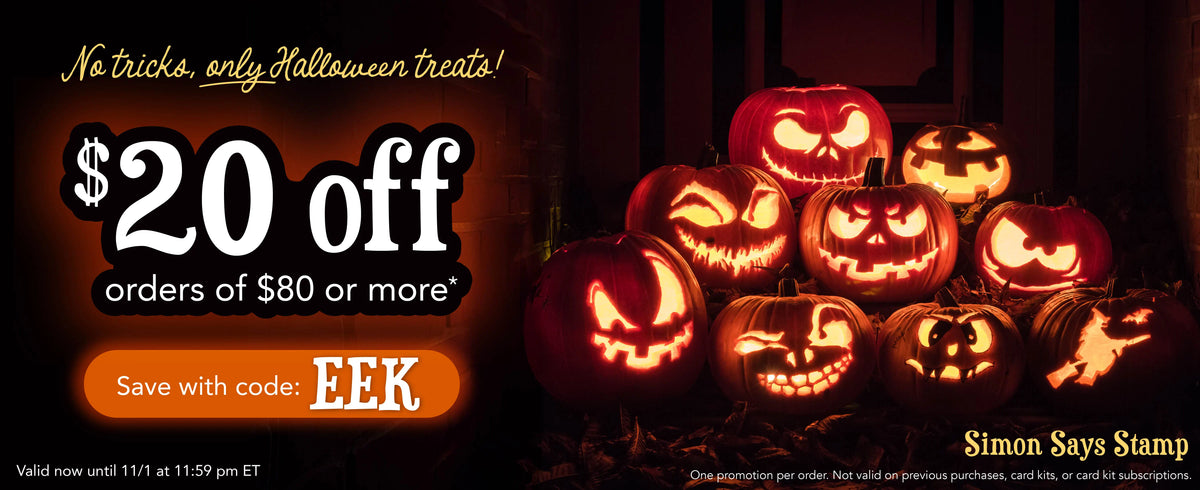
Use code EEK at checkout to receive $20 off your order of $80 or more until 11:59 on Sunday, November 1!! Click HERE to see all of the fabulous new goodies!

I’m signing off for the weekend now… we have so many Halloween happenings this weekend, so I am going to be one busy momma! Happy Halloween to those who celebrate. I am definitely ready to be done with pumpkins and move on to all. things. CHRISTMAS! Thanks so much for stopping by today, and have a marvelous day!
Filed Under: simon says stamp, tim holtz Tagged With: acrylic paint, christmas, holiday, home decor, home deocr, mini swirly snowflakes, ornament, swirly snowflakes

A Final Ode to Pumpkins with Simon Says Stamp!

October 31, 2024

This post was sponsored by Simon Says Stamp. Thanks, Simon!

Hi friends! I am back with my final post for the month of October, just in the nick of time, too! I will be helping my kiddos get their Halloween costumes on as soon as I’m done: Sally from Nightmare Before Christmas, Harry Potter, and two firemen! (If you’ve never checked out the Halloween costumes from Costco, they are legit! The firemen costumes are incredible and were very reasonably priced.) For my last project for the month, I thought I’d do one final “ode to a pumpkin.” I don’t do spooky, and I’m not great a cute, so pumpkins are basically my favorite imagery for autumn and Halloween. They can be fun and playful, or they can be elegant, especially when paired with foliage and florals. I have been collecting more felt and embroidery items, and so I was itching for a project on which to use them. This autumnal wall hanging was the perfect project to start my obsession! Let’s get started with the details.

*I have linked all of the products used at the bottom of the post using affiliate links for your convenience. Thank you for shopping with my links! I truly appreciate your support for my work!*

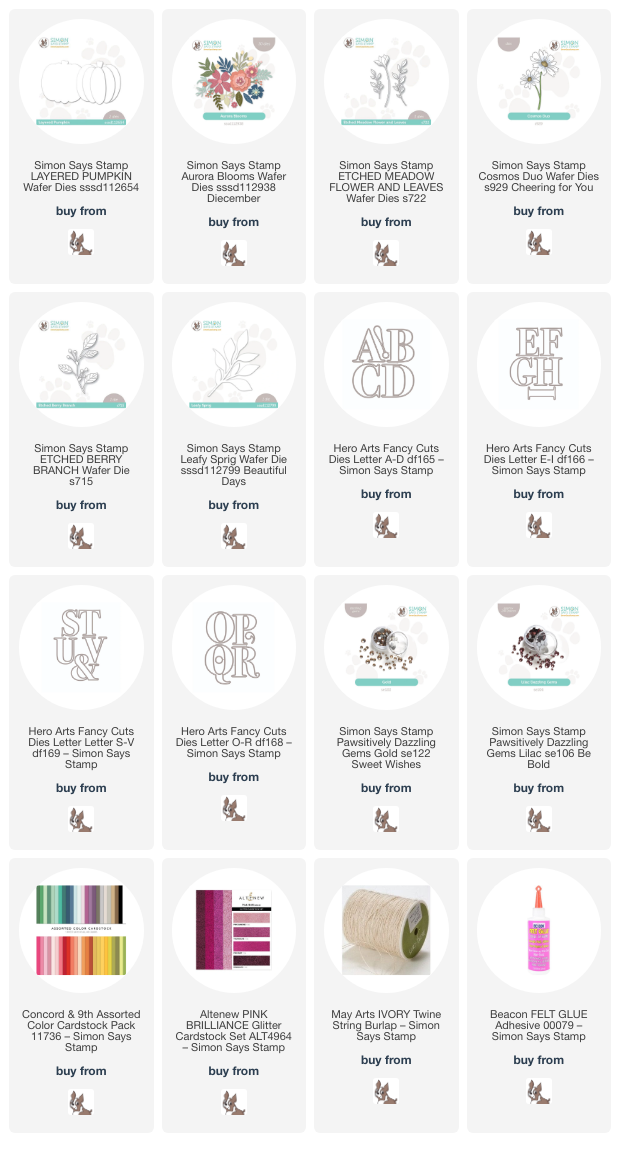
For both of my projects, I paired the Aurora Blooms, Etched Meadow Flower & Leaves, Cosmos Duo, Etched Berry Branch, Layered Pumpkin, and Leafy Sprig dies. I wanted to create some decor with felt as well as with paper, so I scoured my local dollar stores and big box craft stores for some fun “blanks” that I could decorate. I found this canvas wall hanging and little chalkboard easel, and I think they both are just perfect for embellishing with die cuts!

For the wall hanging, I began by die cutting all of the images from the die sets listed above using high-quality colored felt. I used a somewhat non-traditional color palette, pulling some deep, somewhat muted oranges together with cranberry and autumn rose, with touches of lime green and hunter green. I used some needle and thread with sequins and seed beads to adorn the center of some of the flowers, adding a touch of sparkle and additional texture to the felt images. I also die cut the word “gather” using the large-scale Hero Arts Alphabet Dies. I adore these alphabet dies; they’re perfect for creating banners and home decor (I used them to create a banner for my office Christmas tree last year!) and are such a great size.

For the pumpkin, I used some fabric glue to assemble the individual pieces from the Layered Pumpkin die set, then used a coordinating shade of orange to do a (very) simple blanket stitch around the edges of each piece of rind. This additional stitching around the edges adds some texture as well as helping to differentiate one segment from the next, so that it doesn’t look too flat.

After I had die cut and assembled the different components, I began to create my arrangement. I used a piece of ribbon to line up my letters, adhering them to the banner with some fabric glue, then began arranging my pumpkin, flowers, and foliage in a swag beneath my letters. I stitched some more sequins and seed beads to create “berries” amongst my floral arrangement, helping to fill in any gaps in the flowers. After completing the arrangement on the bottom, I felt that the area above the letters was a bit too bare, so added another, simpler arrangement above the letters as well. I think it will look so pretty hanging from my front door for Thanksgiving!

Since I haven’t been working with felt for very long, I decided to make another home decor project using my more typical cardstock, using the same color palette! I die cut the same images from the Aurora Blooms, Etched Meadow Flower & Leaves, Cosmos Duo, Etched Berry Branch, Layered Pumpkin, and Leafy Sprig die sets. I used some sparkling cranberry glitter cardstock from Altenew to create the Etched Meadow Flower & Leaves blossoms. I think this color palette is so pretty; it is definitely autumnal, but not super orange-y!

I found this little easel chalkboard at my local dollar store! They have them in both black chalkboard and white dry erase board; this black backdrop was perfect for adorning with colorful die cuts. After I had adhered all of the die cuts in a little arrangement on the front of the easel, I used a double layer of twine, wrapping it around the top of the easel multiple times, then added a fluffy bow. I used some glue to hold the bow down and prevent it from being untied.

After I had finished arranging the die cuts and adding my twine bow, I added some Gold and Lilac Pawsitively Dazzling Gems to the berry stems and flower centers, adding a touch of sparkle and texture to this piece of decor. I think this would look so sweet on a desk at work or perhaps on a piano or mantelpiece at home!!

Well, that’s all for my projects today. I am having such fun branching out from my typical cardmaking, and I hope you’re enjoying it too. It’s fun to try new things, right? Thanks so much for stopping by today, and have a marvelous day!

Filed Under: simon says stamp Tagged With: alphabet dies, aurora blooms, banner, canvas, cosmos duo, die cutting, etched berry branch, etched meadow flower and leaves, felt, home decor, home deocr, layered pumpkin, leafy sprig, wall hanging

Primary Sidebar

  • Facebook
  • Instagram
  • Pinterest
  • YouTube

Favorite Shops

Secondary Sidebar

Subscribe

Enter your email address to subscribe to this blog and receive notifications of new posts by email.

Instagram
Something is wrong.
Instagram token error.
Follow
Load More

Archives

Tags

3D embossing folder alcohol markers better press birthday birthday card blog hop card kit christmas christmas card christmas tag colored pencil copic copic coloring Daniel Smith die cutting embossing folder embroidery felt giveaway holiday holiday card hot foil ink blending karin brushmarker pro layered stencil masculine my monthly hero new release no line coloring no line watercolor OLO marker olo markers original illustration pawsitively saturated rainbow shaker card slimline stamping stamptember stencil thank you thinking of you valentine's day video watercolor

Popular Posts

Simon Says Stamp Joy For You Blog Hop- Day 1!
Simon Says Stamp Joy For You Release-Now Available!
Frozen Fractals All Around with New Simon Says Stamp Joy For You Release!
Shaped Holiday Shaker Card with New Simon Says Stamp Jolly Season Card Kit of the Month!
Holiday Postage with New Simon Says Stamp!
Simon Says Stamp Glory to the Newborn King Holiday Kit-Part II!
Pinkfresh Studio 5th Birthday!
Altenew Build A Flower: Fuchsia Blog Hop+Giveway!
Holiday Joy in Pink and Green with New Simon Says Stamp DieCember!
Honey Bee Stamps September Release Blog Hop!

Disclosure

Some affiliate links are used in my posts. This means that, should you click on one of my links and purchase something from that company, I will receive a small portion of the sale at no extra cost to you. I use the money earned from these sales to help maintain my blog. I so appreciate you visiting and, if you do choose to use one of my affiliate links, thank you so much for your support!
Copyright © 2026 ·Brunch Pro Theme · Genesis Framework by StudioPress · WordPress · Log in
Loading Comments...