• Skip to main content
  • Skip to primary sidebar
  • Skip to secondary sidebar

Sixth Street Sundries

Emily Midgett

  • Home
  • About Me
  • Contact
  • OLO Marker Color Swatch Chart
  • Shop

intricate stitched ovals

Simon Says Stamp STAMPtember Collaboration: Pinkfresh Studio!

September 11, 2024

Hi friends! The new limited edition Pinkfresh Studio STAMPtember-Edged Floral stamp set is now available, and it’s a stunner! This 6×6 set features a large botanical corner stamp perfect for creating a lovely textural adornment on your background or as a corner focal piece! I used both techniques with some of Pinkfresh Studio’s vibrant, unique inks to create a pair of pretty-in-pink cards. Let’s get started with the details on my projects!

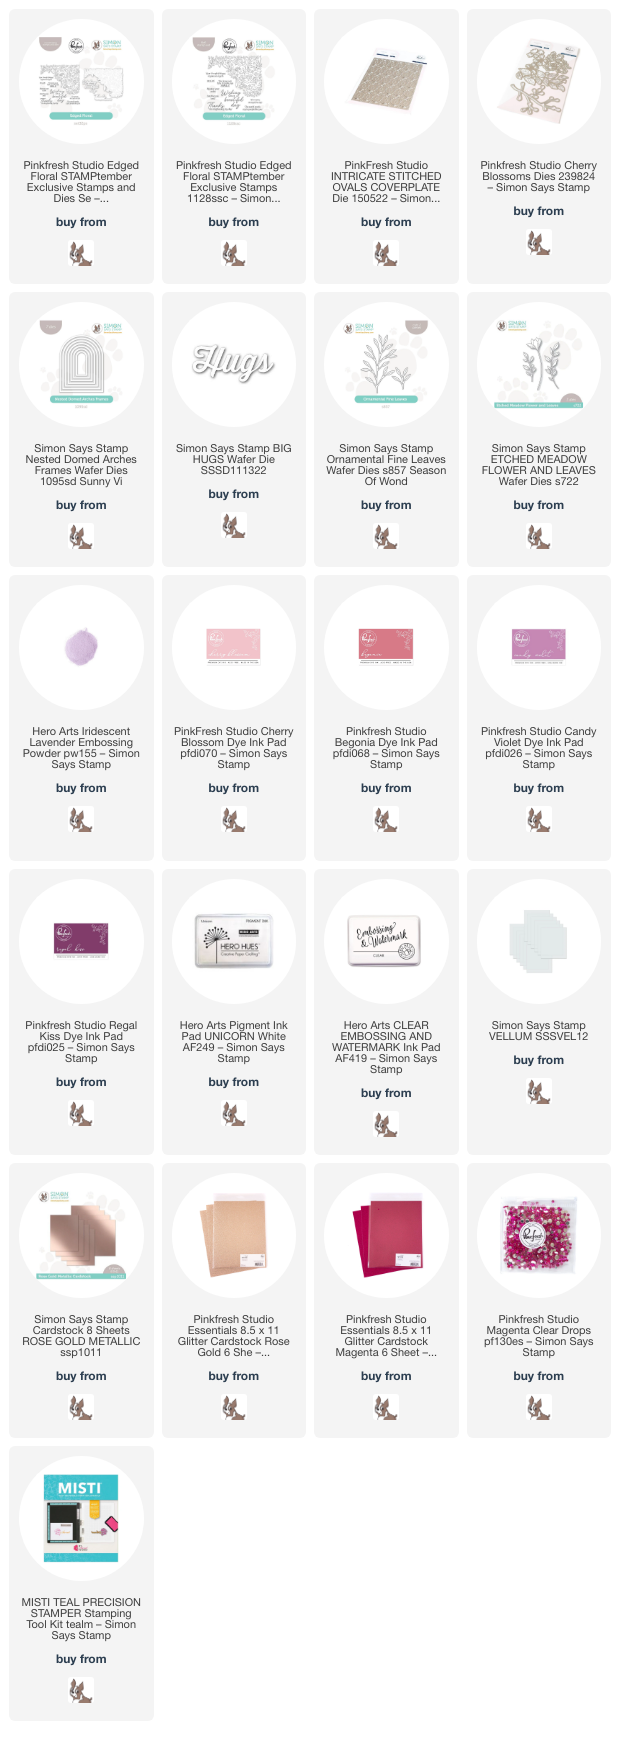
Both of my projects features the gorgeous Pinkfresh Studio STAMPtember-Edged Floral heat embossed with Iridescent Lavender embossing powder from Hero Arts; these iridescent embossing powders are so unique and versatile, and I love using them with intricate stamps like these! I pulled from the lovely shades in the iridescent embossing powder to select Cherry Blossom, Begonia, Candy Violet, and Regal Kiss Pinkfresh Studio inks to create a gorgeous sunset-inspired ombré.

For my first project, I heat embossed the main image from the Edged Floral set onto some vellumusing the Iridescent Lavender embossing powder, then used sharp scissors to fussy cut the image (but you have the option of using the coordinating dies to save your wrists and quite a bit of time!). From straight on, the embossing on the vellum looks like delicate texture, but from certain angles, the iridescent embossing powder shows off so beautifully, as you can see in the photo below. I wanted to create some contrast behind the embossed vellum piece, so I blended Cherry Blossom, Begonia, Candy Violet, and Regal Kiss Pinkfresh Studio inks on the diagonal on a panel of white cardstock, then ran the panel through my die cutting machine with Pinkfresh Studio’s Intricate Stitched Ovals die, adding pretty texture to the blended panel.

To add some interest around my sentiment, I die cut the Cherry Blossoms dies from Pinkfresh using some coordinating bubble gum cardstock, as well as Pinkfresh Studio Rose Gold glitter cardstock. I heat embossed the greeting onto some deep magenta cardstock, stamping it first with white pigment ink, then again with sticky embossing ink, finally sprinkling the Iridescent Lavender embossing powder over the top to create a unique iridescent sentiment. The initial layer of white pigment ink helps to make the iridescent embossing powder stand out a bit better on the vibrant cardstock. I fussy cut the sentiment, (again, you could use the coordinating die-they cut out the sentiments, too!) then arranged the sentiment and flowers on my fussy cut floral vellum corner, popping some of the pieces up with foam adhesive squares and adding some with liquid adhesive. I added some more foam adhesive on the back of the vellum piece behind the solid die cuts to hide them, then adhered it to the blended background. I tucked a Nested Domed Arches Frames cut from some Simon Says Stamp Rose Gold Metallic cardstock, finally adding a few Pinkfresh Studio Clear Drops: Magenta to the flower centers for a bit more shine and color!

For my second card, I set up the Edged Floral stamp in my MISTI, stamping it once using Cherry Blossom ink, then again with sticky embossing ink, finally adding some more of the Iridescent Lavender embossing powder, then rotating it 180* and repeating the process, so that I had the floral design in each corner. Stamping the pale pink ink first and adding the iridescent embossing powder creates the prettiest effect, especially when paired with some soft, tone-on-tone ink blending using Cherry Blossom, Begonia, and Candy Violet Pinkfresh Studio inks around the edges.

The somewhat simplistic nature of the individual images themselves from Edged Floral gave me some freedom when selecting botanical dies to add to my card; I selected Ornamental Fine Leaves and Etched Meadow Flower & Leaves dies, both from Simon Says Stamp, which I die cut from pearlescent blush cardstock and Magenta glitter cardstock. I also die cut the Big Hugs die from some brushed pink foil cardstock and enhanced the large sentiment die cut with another sentiment from the Edged Floral set, stamped with white pigment and embossing inks, then heat embossed with the Iridescent Lavender embossing powder. I arranged the die cuts on a small rectangle of vellum, allowing the flowers and foliage to peek out from behind the large sentiment die cut, finally adding a few shimmering gems for added sparkle!

Well, that’s all for my projects today! These STAMPtember collaboration sets are limited edition and usually sell out very quickly, so if you’re on the fence, don’t wait too long! To sweeten the deal and make it even easier for you to shop, Heidi at Simon Says Stamp has offered free shipping for purchases over $25 for a limited time!!

This limited edition stamp set is so gorgeous, and the added option to have the coordinating dies for both the image and the sentiments makes it a must-have. Thanks so much for stopping by today, and Happy STAMPtember!
Filed Under: pinkfresh studio, simon says stamp Tagged With: big hugs, cherry blossoms, Edged Floral, embossing, etched meadow flower and leaves, exclusive, heat embossing, ink blending, intricate stitched ovals, limited edition, nested domed arches, ornamental fine leaves, stamptember

VIDEO: Keeping Monochromatic Cards Interesting Using Clear Embossing + Pinkfresh Studio!

July 12, 2023

Hi there! I am up on the Pinkfresh Studio YouTube Channel today with a project featuring tons of monochromatic layers. In the video, I share tips on how to achieve a really interesting and unique monochromatic card using lots of textures and clear embossing powder with your stenciled images! Here’s the video:

Watch above or click HERE to watch on YouTube.

In the video, I start by stamping the Blooming Vines Stamp onto some white cardstock using Candy Violet ink in order to do some “no line stenciling.” I then blended the Blooming Vines Stencils using Candy Violet, Regal Kiss, Lavender, Olive, and Grassy Knoll inks. Once I had completed the solid and detail layer for the flowers, I replaced the solid (that is, the most open and basic stencil covering the entirety of the image, NOT the detail layer that adds shading) stencil over the top of the blended area. I have dedicated a blending brush specifically to embossing ink, and I used that with some embossing ink refill to “blend” the sticky watermark ink over the solid areas of the image. I covered those sticky areas with clear embossing powder and heated it up creating a shiny embossed solid image done entirely with stencils!

I used the same technique for the foliage until I had covered the entirety of the stamped/stenciled images with clear embossing powder. I then blended more Candy Violet ink over the entire panel. The clear embossing powder allowed the stamped/stenciled images to resist the blending, which creates super vibrant stenciled images with a lovely violet blended background. This technique allows you to keep that super saturated and vibrant look throughout your card without having to worry about pesky white die cut edges! I used the Blooming Vines Coordinating Dies to die cut all of the finished images.

Once I had initially decided on the direction for my video, I selected my favorite ink shade from Pinkfresh (Candy Violet) and then searched my cardstock stash for coordinating cardstock in a few different types. I found a beautiful shade of intense lilac-y fuchsia cardstock, as well as some mirrored matte cardstock and glitter cardstock in almost exactly the same shades. I used the Intricate Stitched Ovals, Spiral Circle Die, and Leafy Branch dies to die cut these elements from each of these cardstock styles. When working with monochromatic cards, I liked to use lots of different textures and finishes for the different elements to add visual interest. Multiple textures keep the eye interested, and for me it’s like figuring out a puzzle of which products to use that will give the most monochromatic finished product!

I stamped a greeting from the Circle Florals Stamp Set onto some more of the fuchsia cardstock using Regal Kiss ink, then stamped the same spot again using more watermark ink and covered it with clear embossing powder. I die cut the finished sentiment with the Coordinating Dies. After all of the different elements were completed, I assembled the card using a mixture of liquid and foam adhesive for lots of dimension and different heights. The final touch was to add some Twilight Ombré Glitter Drops for one last bit of sparkle!

Well, that’s all for my project today! Thanks so much for stopping by today, and have a marvelous day!

Filed Under: pinkfresh studio Tagged With: blooming vines, circle florals, ink blending, intricate stitched ovals, leafy branch, monochromatic, spiral circle, stencil

Primary Sidebar

  • Facebook
  • Instagram
  • Pinterest
  • YouTube

Favorite Shops

Secondary Sidebar

Subscribe

Enter your email address to subscribe to this blog and receive notifications of new posts by email.

Instagram
Something is wrong.
Instagram token error.
Follow
Load More

Archives

Tags

3D embossing folder alcohol markers better press birthday birthday card blog hop card kit christmas christmas card christmas tag colored pencil copic copic coloring Daniel Smith die cutting embossing folder embroidery felt giveaway holiday holiday card hot foil ink blending karin brushmarker pro layered stencil masculine my monthly hero new release no line coloring no line watercolor OLO marker olo markers original illustration pawsitively saturated rainbow shaker card slimline stamping stamptember stencil thank you thinking of you valentine's day video watercolor

Popular Posts

Simon Says Stamp Joy For You Blog Hop- Day 1!
Simon Says Stamp Joy For You Release-Now Available!
Frozen Fractals All Around with New Simon Says Stamp Joy For You Release!
Shaped Holiday Shaker Card with New Simon Says Stamp Jolly Season Card Kit of the Month!
Holiday Postage with New Simon Says Stamp!
Simon Says Stamp Glory to the Newborn King Holiday Kit-Part II!
Altenew Build A Flower: Fuchsia Blog Hop+Giveway!
Holiday Joy in Pink and Green with New Simon Says Stamp DieCember!
Pinkfresh Studio 5th Birthday!
Honey Bee Stamps September Release Blog Hop!

Disclosure

Some affiliate links are used in my posts. This means that, should you click on one of my links and purchase something from that company, I will receive a small portion of the sale at no extra cost to you. I use the money earned from these sales to help maintain my blog. I so appreciate you visiting and, if you do choose to use one of my affiliate links, thank you so much for your support!
Copyright © 2026 ·Brunch Pro Theme · Genesis Framework by StudioPress · WordPress · Log in
Loading Comments...